Microcom Phone Buddy Comfort User manual


User’s manual
English

44
44
44
44
Main Diagram
LCD displey
Battery
compartment
Buzzer
NEW call and
NEW message
indicator
Jack for
line cord

55
55
55
55
Function Description Functions of control key
Function Description
Description of icon
Icons Description
When in the state of off-hook, this icon will
turn on to indicate that the unit is in use
mode.
When you receive a new SMS message
or voice mail, this icon will be displayed on
the LC .
If there are new calls in memory, this icon
will turn on. After all the new calls have
been reviewed, the icon will be turned off.
If the call comes repeatedly, this icon will
turn on.
When the battery power is low, this icon will
turn on.
When this icon turns on, it means that the
letter will be entered in upper case.
Functions
Buttons Description
To enter the digits 0~9
To quickly read message
To quickly write messages in Box 0
Phone book function has up to 50 memory locations in
the Phone book memory. For details, please see Phone
book section in this manual.
This unit has up to 90 memory locations in the CI me-
mory. For details, please see Caller identification list
section in this manual.
To delete an entry or a record or all records in the
memory
To switch from lower case to upper case or vice versa
To enter the character up the numeric key
To enter the character up the letter key
To enter down row
To enter the menu list
To cancel
To confirm
To scroll up/down when browsing selections. And
to move the cursor to left/right when editing a record.
To up page
To down
page
Message display area
English

66
66
Content
Main Diagram . . . . . . . . . . . . . . . . . . . . . . . . . . . . 4
Function Description . . . . . . . . . . . . . . . . . . . . . . . 5
Information on the display . . . . . . . . . . . . . . . . . . . . . 5
escriptions of icons . . . . . . . . . . . . . . . . . . . . . . . . . 5
Functions of control key . . . . . . . . . . . . . . . . . . . . . . 5
Safety precaution . . . . . . . . . . . . . . . . . . . . . . . . . 7
Installing the base unit . . . . . . . . . . . . . . . . . . . . 7
Presetting . . . . . . . . . . . . . . . . . . . . . . . . . . . . . . . 9
Country profile . . . . . . . . . . . . . . . . . . . . . . . . . . . . . . 9
Accept all calls (always SMS) . . . . . . . . . . . . . . . . . . 9
Select labguage . . . . . . . . . . . . . . . . . . . . . . . . . . . . . 9
Setting the date and time . . . . . . . . . . . . . . . . . . . . . 9
Setting the LC contrast . . . . . . . . . . . . . . . . . . . . . 10
Resetting the unit . . . . . . . . . . . . . . . . . . . . . . . . . . 10
Setting the area & L S code . . . . . . . . . . . . . . . . . . 10
Character map . . . . . . . . . . . . . . . . . . . . . . . . . . . 11
Phonebook . . . . . . . . . . . . . . . . . . . . . . . . . . . . . . 12
Storing the names and numbers . . . . . . . . . . . . . . . 12
Reviewing the names and numbers . . . . . . . . . . . . . 12
eleting the names and numbers . . . . . . . . . . . . . . 13
ialling a number from phonebook . . . . . . . . . . . . . 13
Editing the names . . . . . . . . . . . . . . . . . . . . . . . . . . 13
Caller identification list . . . . . . . . . . . . . . . . . . . 14
Reviewing the caller list . . . . . . . . . . . . . . . . . . . . . . 14
eleting single CI number . . . . . . . . . . . . . . . . . . . 14
eleting all CI numbers . . . . . . . . . . . . . . . . . . . . . 14
Copying a CI number to phonebook . . . . . . . . . . . 14
Calling back a CI number . . . . . . . . . . . . . . . . . . . 15
Outgoing calls . . . . . . . . . . . . . . . . . . . . . . . . . . . 15
Reviewing and dialling outgoing numbers . . . . . . . . 15
Text message SMS) . . . . . . . . . . . . . . . . . . . . . . 16
Writing, storing and sending an SMS message . . . . 16
Setting a new code . . . . . . . . . . . . . . . . . . . . . . . . . 17
Clearing a set code number . . . . . . . . . . . . . . . . . . . 17
Inbox list . . . . . . . . . . . . . . . . . . . . . . . . . . . . . . . . . 18
Outbox list . . . . . . . . . . . . . . . . . . . . . . . . . . . . . . . . 19
SMS centre . . . . . . . . . . . . . . . . . . . . . . . . . . . . . . . 19
Main menu . . . . . . . . . . . . . . . . . . . . . . . . . . . . . . 20
Feature list . . . . . . . . . . . . . . . . . . . . . . . . . . . . . . 21
Troubleshooting . . . . . . . . . . . . . . . . . . . . . . . . . . 22

77
77
Safety precautions Installing t e base unit
Safety precautions
To reduce the risk of fire, electrical shock and injury,
please follow these basic safety precautions before
you use this equipment.
1. Carefully read the instructions in this manual.
2. Read the warnings marked on the unit.
3. When cleaning, unplug the phone. Use a damp cloth.
DO NOT use liquid or aerosol cleaners.
4. DO NOT use this equipment in moist surroundings
5. DO NOT place objects on the line cord that may
cause damage.
6. Avoid spilling any liquids on the unit.
7. Unplug this telephone from the wall outlet and refer
servicing to qualified service.
Preparing t e telep one
The package contains the following:
• One base unit
• One line cord
• 4 AA size 1.5V batteries
• One User manual
Installing t e base unit
Notes on the installation
The unit is designed for operation in rooms with a tem-
perature range from +5 to +45.
Inserting the batteries
The Phone buddy requires four 1.5V AA size batteries
to activate display.
1. Remove the battery cover from the back of your SMS
phone.
2. Insert four new 1.5V AA size batteries, note +/- pola-
rity marks into the compartment.
3. Replace the cover securely.
BATTERY
NOTE:
1. The battery type is: size AA SUM-4 1.5V
2. o not dispose the batteries into the fire.
3. o not dispose the battery in the normal waiste
but use the specified containers or recycling services
to dispose of worn out batteries, to avoid pollution.
Congratulations
or purchasing our high quality product,
please read the manual carefully, in order to benefit from all features and operate the SMS device
properly.
Certifications:
English

88
88
Installing t e base unit
Connecting t e base unit
Insert one end of the telephone cable into line jack, insert another telephone jack into telephone socket.
• If you buy another cable, ensure that the telephone leads have pin 3-4 assign as AB.
Attention: new telephone cable. Only use the cablesupplied.
Telep one jack wit telep one cable
(type varies depending on country)

99
99
Presetting
Getting Started
Setting t e date and time
In standby mode, the unit can show the date and time,
if your operator supplies time and date information
together with the CLIP information, your unit will
automatically update time and date.
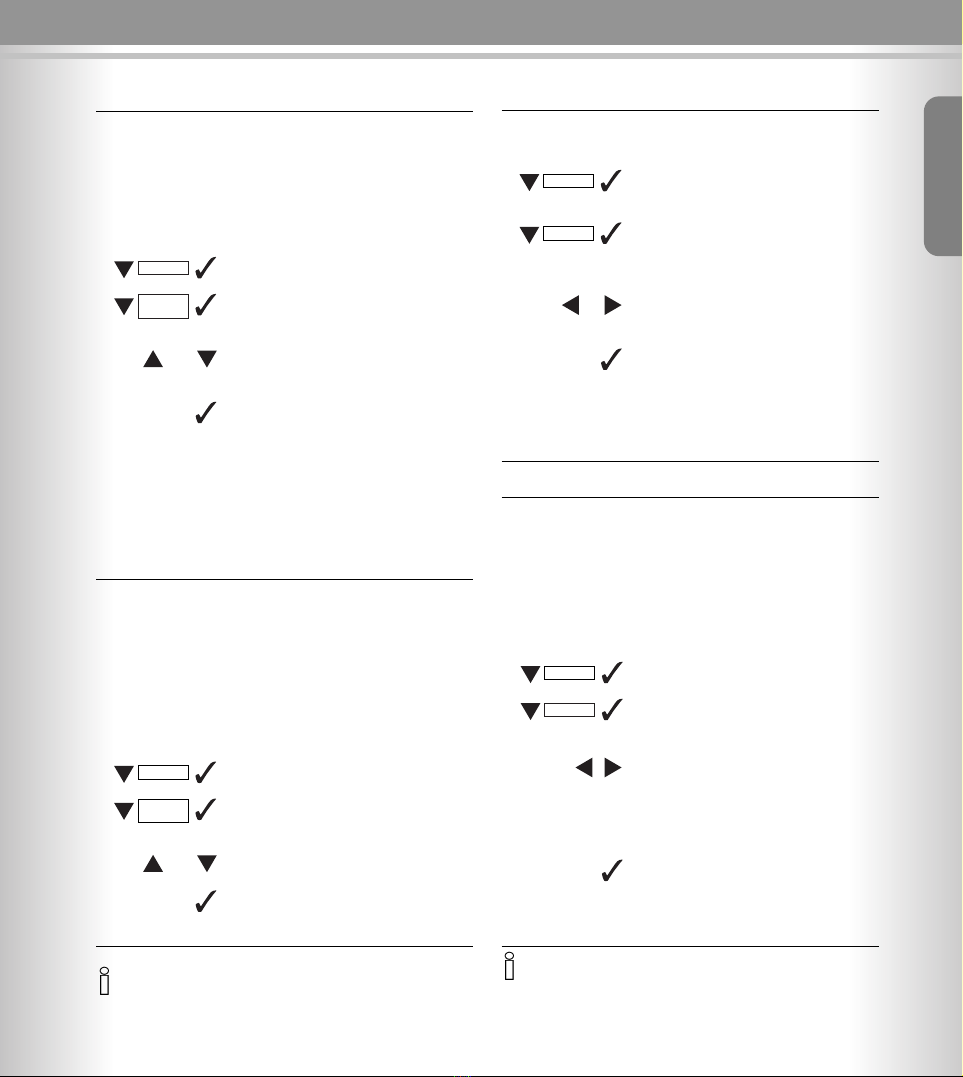
Open the menu
Select the menu item and confirm
The current setting is displayed and
the month digits will flash
Select the Month/ ay/Hour/Minute
field
Enter the correct month/day/hour/
minutes (e.g. 12:36 23/08, as shown)
Press to confirm and exit
Country profile
Before you can use the phoneBuddy you need to confi-
gure the country settings, by choosing the country whe-
re you are using the device, all local services will be con-
figured automatically
Open the menu
Select menu item and confirm
Select countr profile item and confirm
List of countries will be displayed
Select the country (for example
Belgium)
Confirm your selection by pressing
button
After confirmation your phoneBuddy is
ready to use.
Accept all calls (always SMS)
This function can be used to make a dedicated SMS li-
ne (similar like dedicated FAX line), when activated the
phoneBuddy will pickup all incoming calls without verify-
ing the SMS-C number. This feature is ideal to enable
SMS receiving on lines where CLIP is not present
(i.e PABX).
Open the menu
Select menu item and confirm
Select Accept all calls item and con-
firm
Select item On/Off
Confirm your selection by pressing
button
• When setting the date and time, you need to enter two digits at
a time e.g. the month August, in the month field you need to en-
ter 8. If not, the entry number is invalid.
• The time is in 24h mode.
If you select this feature, the line where device is connected can
NOT be used for any other purpose then SMS, (all incoming voice
calls will be discarded)
Setup
MENU
MENU
0 - 9
Set Clock
Setup
MENU
Country
profile
English
Select lanugage
Open the menu
Select menu item and confirm
List of languages of which can be set
will be displayed
Select language (for example Eng-
lish)
Confirm your selection by pressing
button
or
Setup
MENU
Accept all
calls
or
Setup
Language
or

11
1100
00
Presetting Making calls
Setting t e area & LDS code
Open the menu
Select the menu item and confirm
LC shows Enter Area Code1
Enter the area code1 number 0~9 (up
to 4 digits)
Press to confirm and enter the area
code2 setting.
LC shows Enter Area Code2
Enter the area code2 number 0~9 (up
to 4 digits)
Press to confirm and enter the L S
code setting.
LC shows Enter Prefix
Enter the L S code number 0~9 (up
to 2 digits)
Press to confirm and exit.
• If you set the area code number, when dialling the number that
with the set area code number in phonebook or CI list, the num-
ber will be dialled out without the area code number.
• If you set the Prefix number, when dialling the long distance
number(more than 7 digits) in phonebook or CI list, the number
will be dialled out with the Prefix number.
• In reviewing state, the Prefix number can not be displayed.
Setup
MENU
Area Code
Setting t e LCD contrast
There are 64 levels for you to choose.
Open the menu
Select the menu item and confirm
The current setting is displayed(e.g.
Contrast: 30)
Select the level your desired
Press to confirm and exit
Resetting t e unit
After reset the unit, all the settings will be deleted.
Open the menu
Select the menu item and confirm,
LC shows Reset now?
Press to confirm, and the LC shows
Formatting. When formatting is
ended the display, will return
to standby mode.
Setup
MENU
Master Reset
Setup
MENU
Contrast

11
1111
11
C aracter map
C aracter map
• To change a letter from upper case to lower case or vice versa press CAPS.
• Control the cursor with
• The letter to the left of the cursor is deleted with
• Letters are always inserted to the left of the cursor.
➞
English

11
1122
22
Names
Names
The unit can store 50 names and numbers in phonebook.
Storing t e names and numbers
Press to confirm
Open the menu
Select the menu item and confirm
display will show the Review and
Add Entr
Select the menu item and confirm
LC will show the sequence and
Enter Number
Enter the number(e.g.:1236008,as
shown)
Press to confirm and the LC shows
Enter Name
Enter the name (e.g.:John Smith, as
shown)
Press to confirm and LC shows
Saved!
• You can store another name and number following above steps
• You can press button to cancel the previous entries
• The entered number is up to 16 digits
• The entered name is up to 16 characters
• If there is no entry in phonebook, display will show Empt
• At the end of the entry, display will show End of List
Reviewing t e names and numbers
Press to confirm
Open the menu
Select the menu item and confirm
LC will show the Review and Add
Entr
Select the menu item and confirm
LC will show the name list
Scroll to the next or previous call na-
me
Press to review the number and the
entered date and time
Press to scroll the next or previous
number
Names
MENU
0 - 9
Add Entry
or Names
MENU
Review
or
or
or

11
1133
33
Names
Deleting t e names and numbers
When the display shows your desired number
Press to select
Select to delete and the LC shows
Deleted !, then exit
Dialling a number in p onebook
When the display shows your desired phonebook number
Press to select
Select to delete and the display
shows Pickup handset . .
then in the state of off-hook to dial
out
Editing t e names
Press to select
Select the item menu
Enter number will be showed on the
display, confirm and Enter Name
appears.
Enter the new name from keypad
(e.g. John smith, as shown)
Press to confirm and the LC shows
Saved!, then exit.
Delete
Edit
Dial
English

11
1144
44
Names
Caller Identification list
This unit can store up to 90 incoming calls, with name
and number date an time stamp
• If the memory storage is full, when the next call comes in,
the oldest record will be overwritten - for the New Call Record.
• When you have received New Calls, the NEW messages LE will
flash.
• At the end of the call record list, display will show End of List.
• If there are no calls, display will show No Calls.
Reviewing t e caller list
Press to show the CI list
Open the menu
Select the menu item and show the
CI list
Press to review the CI name and
(or) number
Press to review the number, the date
and time
Press to review others number
Deleting single CID number
When get your desired number that shown on the LC
Press to enter
Press to delete and the LC shows
Delete !
Deleting all CID numbers
Press to show the CI list
Open the menu
Select the menu item and show the
CI list
Press once and the LC will show
Del All CID?
Press to delete and the LC shows
No Calls
Press to cancel
Copying a CID number to p onebook
When get your desired number that shown on the LC
Press to enter
Press to confirm, LC shows Enter
Name
Enter the name
Press to confirm, LC shows Saved!
Caller ID
MENU
CID
or
Caller ID
MENU
➔
CID
or
or
or
Delete
Add name

11
1155
55
Names
Calling back a CID number
Press to show the last CI call list
Open the menu
Select to show the CI list
Press to get your desired
Press twice to enter
Select and the LC shows Pickup
handset . .
then in the state of off-hook to dial
out
For details, please consult your phone
operator for the availability of this
function.
If the phone can not recognize the in-
formation within the caller display
messages properly, it will show
ERROR. This does not mean that your
phone is defective.
Outgoing calls
You can store up to 30 last dialled outgoing calls number
Reviewing and Dialling outgoing numbers
Open the menu
Select the menu and confirm, the
LC shows the last dialled number
list
Press to get your desired number
that shown on the LC
Press to enter
Select to dial out the number
Select to add the number to phone-
book
Select to delete the number
• The call back function will not dial the phone number properly if
the selected call record is blocked or it is not available.
If the caller has used the option to
prevent his name and number from
being sent (suppressed caller I , also
CLIR), “Private” will be shown on the
display.
Out of area will display when someo-
ne calls from an area where the telep-
hone company is not offering the cal-
ler identification services or an area
that is not yet providing name and
number delivery to your area via the
long distance net work.
If you have voice mail service from
your telephone company and a recor-
ded message is left, the display will
show Message Waiting. Icon will
then appear on the right of the display.
The icon will remain until you have
retrieved your voice mail.
PRIVATE
OUT OF AREA
MESAGE
WAITING
ERROR
Call Back
Add name
Caller ID
MENU
MENU
CID
nebo
Calls Dialed
Call Back
Delete
English

11
1166
66
Text message
Text message (SMS)
With this SMS phone you can send and receive text messa-
ges (SMS messages). SMS messages can only be received
by device which support this feature (mobile phones, PCs,
other telephones) SMS Short Message Service
Prerequisite:
CID
Caller identification (CI ) and station number transmission
must be enabled at your fixed network telephone connecti-
on.
Contact your network provider to enable this features for
your telephone connection. Without CLIP enable you will not
be able to receive any SMS message.
SMS center
To send and receive SMSs you need the enter the SMSC
number of the service provider, please contact your operator
to obtain these numbers.
IMPORTANT: without this number the unit will NOT be
able to send or receive an SMS.
Some Fixed SMS center require only one number , other ne-
ed both sending and receiving number.
Select the menu item and confirm LC shows Enter Num-
ber, then enter the number
Press and confirm
Select to cancel
Writing, storing and sending an SMS message
Your device has for different SMS boxes they are indepen-
dent from each other and can be used to enable each mem-
berin the family to receive and send his private SMS,
Each SMS may contain no more than 160 characters.
Each box can store at least 30X160 characters messages or up
to 99 messages, they are not lost in the event of a power off.
The unit will receive messages as long the memory is not full.
Incase of full memory, the unit shows Inbox Full and dis-
plays how many messages are stored. You need to free up
space for new messages.
Sending SMS are not automatically stored. If you want to
store an SMS you must do this before sending it.
Open the menu
Select the menu item and confirm
Open the input field
Press to quickly write a new
message in Box 0
Press to quickly read a new message
For information on entering letters
and characters, see page 11.
Move the cursor in the
text field
The next characters ente-
red will appear to the left
of the cursor.
elete characters to the
left of the cursor.
Press to make a space
Press to switch from up-
per case to lower case or
vice versa
Press and hold it then
press to enter the top
symbol on the button
Press and hold it then
press A~Z and to enter
the top symbol and cha-
racter on the button
Press to confirm
Store the SMS message in the Out-
box to send it later if you like.
Send the SMS immediately and the
unit will ask you to enter the recipi-
ents telephone number, Enter
Number
Enter the recipients telephone number
from the directory or dial it manually.
SMS ShortMessageService
We're happ
ou got
promot ion.
➞
➞
SMS
MENU
CAPS
SHIFT
ALT
WRITE
READ
Box 0-3
Store
Send
Write Message
or
or
✍

11
1177
77
Text message
Setting t e box code
You can use the different SMS boxes in private mode by
defining a pin code number for Box1, Box2 and Box3.
Box0 is for public use.
Setting a new code
Open the menu
Select the menu item and confirm
The LC shows Enter Code, enter
the code number(0~9)
(up to 4 digits)
• uring the sending, the LC shows SMS Sending...
• If the net is busy, then LC will show Tr Again
• If you press Xbutton while you are sending SMS message, LC
will show Cancelled.
• If the message was not sent, the unit will return back to standby
mode, and the LC shows Send Fail.
* Must be supported by your local operator and the device of the
destination owner.
• If the second code number is different to the first one, the LC
will show Code Error!
• Set the code of Box2 and Box3 same as the steps of Box1.
• If you already set the code, when you want to enter the Box, you
need to enter your code number firstly.
• If you removed the code number, you can enter the box without
it.
• Also you can set a new code number again with the same steps
of Setting a new code number.
Clearing a set code number
Open the menu
Select the menu item and confirm
Select the menu item and confirm,
the LC shows Enter Code, then
enter the code number you have set.
Press to confirm, LC shows Code
Removed !, then exit.
SMS
Box 2
MENU
SMS Setup
Box Code
New Code
SMS
Box 2
MENU
SMS Setup
Box Code
Clear Code
• Press button, use or but-
ton to get the desired number from
phonebook, then press button.
• Press button, use or but-
ton to get the desired number from
CI list, then press button
isplay shows Enter sub address*;
enter sub address of destination, if
you do not know the number, type 0
or press button.
Note: Sub addresses allow you to send your message to
a private SMS box, using 0 or no number automatically
send your message to the public box of the destination
number.
Press to send. When the message
was sent succesfully the unit, shows
Message Sent
CID
Press to confirm, LC shows
Repeat Entr , enter the same code
number to reconfirm.
Press to confirm, LC shows
Success !, then exit.
English

11
1188
88
Text message
Inbox list
Reading and deleting received
SMS message
When you get a new message, you will hear a beep to-
ne and the LC will show icon and the NEW LE will
flash twice at a time to signal until you review it.
Press to quickly read a new message
Select the menu item and confirm
Select the menu item and open the
inbox list
Scroll to review the numbers from list
Press to read the messages
Press to enter
Press to select
Press to delete
Options w ile reading
After reading an SMS you can immediately reply to it and
you can access other functions.
Open the menu, then select the opti-
on you want.
Repl Can write a new message or edit
this message
Forward Send a text message to someone
else
Call back Make a call to the message sender
Add name Cop the telephone number of the
SMS to the phonebook, also will
indicate to enter name.
Delete Can delete message
• If a new message is receiving, LC will show SMS receiving.
• If there is no message, LC will show No Message.
• In the received message, you will see the date and time.
• At the end of the messages you will see -- End --.
• LC will show the new and total received SMS messages num-
ber: Inbox XX(new)/XX(total), if there is no message will show
Inbox 00/00.
• If the number have been added to phonebook, in the inbox list
will only show the calls name.
SMS
MENU
READ
Box 0
Inbox
Delete
or
or

11
1199
99
Text message
• If there is no message, LC will show No Message.
• The unit will display the stored SMS message number Outbox
XX, if there is not message the unit will show Outbox 00.
Outbox list
Reading, editing, sending and deleting
stored SMS messages
Press to quickly read a new message
Select the menu item and confirm
Select the menu item and open the
outbox list
Scroll to the next or previous SMS
Press to read
Select message
Press for deleting message in Outbox
SMS centre
Select the menu item and confirm
Select menu item and enter the
center number of your local operator
and press confirm
Select the menu item and LC show
Enter number and confirm, LC
shows Box1 Sub-addr.=0, please
confirm.
Select the menu item and LC show
Enter number and confirm, LC
shows Box1 Sub-addr.=0, please
confirm.
SMS
Box 1
MENU
READ
Outbox
or
or
or
SMS
For Sending
MENU
SMS Setup
Center
Number
For Receiving 1
For Receiving 2
English
➞

SMS Box0 Write Message
Inbox
Outbox
Box1 Write Message
Inbox
Outbox
Box2 Write Message
Inbox
Outbox
Box3 Write Message
Inbox
Outbox
SMS setup Service Center For Sending
For Receiving
For Receiving
Box Code Box2
Box3
Box4
Setup Contrast
Set Clock
Master Reset
Area Code
Language
Countr Profile
Accept all Calls (Alwa s SMS)
Names Review
Add Entr
Caller ID
Calls Dialed
22
2200
00
Main menu
Table of contents
Languages: