manuals.online logo
Brands
  1. Home
  2. •
  3. Brands
  4. •
  5. MicroTouch
  6. •
  7. Camera Accessories
  8. •
  9. MicroTouch Autofocuser User manual

MicroTouch Autofocuser User manual

Popular Camera Accessories manuals by other brands

CamRanger CamRanger user manual

CamRanger

CamRanger CamRanger user manual

Custom Brackets HDV CAGE KIT Instructions for use

Custom Brackets

Custom Brackets HDV CAGE KIT Instructions for use

Aegis ABL052010P user manual

Aegis

Aegis ABL052010P user manual

Saft SRA Series Installation and operating instructions

Saft

Saft SRA Series Installation and operating instructions

Kodak TIB5200 technical information

Kodak

Kodak TIB5200 technical information

Videotec HEG instruction manual

Videotec

Videotec HEG instruction manual

Ikelite 6171.11 manual

Ikelite

Ikelite 6171.11 manual

Pentax Auto Bellows Slide Copier K user manual

Pentax

Pentax Auto Bellows Slide Copier K user manual

Nikon UT-1 user manual

Nikon

Nikon UT-1 user manual

dji RONIN 4D quick start guide

dji

dji RONIN 4D quick start guide

SLIK ABLE 300DX user manual

SLIK

SLIK ABLE 300DX user manual

Rebelcell 36V70 user manual

Rebelcell

Rebelcell 36V70 user manual

Trojan GC2 48V quick start guide

Trojan

Trojan GC2 48V quick start guide

Calumet 7100 Series CK7114 operating instructions

Calumet

Calumet 7100 Series CK7114 operating instructions

Ropox 4Single Series User manual and installation instructions

Ropox

Ropox 4Single Series User manual and installation instructions

Cambo Wide DS Digital Series Main operating instructions

Cambo

Cambo Wide DS Digital Series Main operating instructions

Samsung SHG-120 Specification sheet

Samsung

Samsung SHG-120 Specification sheet

Ryobi BPL-1820 Owner's operating manual

Ryobi

Ryobi BPL-1820 Owner's operating manual

manuals.online logo
manuals.online logoBrands
  • About & Mission
  • Contact us
  • Privacy Policy
  • Terms and Conditions

Copyright 2025 Manuals.Online. All Rights Reserved.

The MicroTouch Autofocuser is designed to work with Feathertouch Focusers from
Starlight Instruments. It allows automatic focusing with CCD and DSLR cameras.
Included is FocusMax software to automaticall focus the telescope for imaging. Manual
focus is also possible using the hand controller. The hand control features an LCD screen
for displa ing a digital readout of focus position as well as information used for
programming the temperature compensation feature.
The MicroTouch Autofocuser is compatible with Feathertouch Cra ford focusers,
Feathertouch SCT MicroFocusers, and Feathertouch MicroFocusers for Takahashi and
TeleVue refractors. Optional larger focus motors allow use with the Starlight
Instruments 2.5”, 3.0” and 3.5” focusers. Motors are also available for non-Feathertouch
focusers on Sk -Watcher, Stellarvue and Takahashi refractors.
Included Parts
Hand Control
Focus Motor
Focuser Gear
Motor Connector Cables
USB Cable
12-Volt Power Cord (AC or DC user selected)
Hex-Head Wrenches
MicroTouch & FocusMax Software
Hand control, motor, cables
Installing the Focus Motor
The following directions are illustrated using a Feathertouch SCT MicroFocuser, but the
instructions are identical for an Feathertouch focuser.
1) Begin b removing both the brass fine focus and black standard focus knobs from
the focuser. Use the included medium size hex-head wrench to remove the knobs.
2) Install the small brass gear onto the focus shaft. The gear goes toward the
telescope, with the smaller gear hub awa from the scope, as shown below. The
gear should NOT quite touch the brass bearing hub on the focuser. Insert the gear
all the wa onto the shaft then back it off slightl . Use the small hex-head wrench
to lock the gear in place.
Note: The gear has a small insert to allow installation on different size focus shafts. The
insert can only be removed from one side. Using one of the hex-head wrenches to push
the insert out can be helpful.
3) Slide the focus motor onto the focuser. You ma need to rotate the motor slightl
to allow the motor gear and focuser gear to mesh. The motor can be rotated to the
desired position after the gears have meshed. When installed properl , the motor
will completel cover the silver portion of the focuser. Use the large hex-head
wrench to lock the motor in place.
Connect Hand Control
4) Use the included RJ11 cable to connect the motor to the hand control.
Using the MicroTouch Autofocuser Manually
You can use the MicroTouch focuser to focus the telescope visuall b using the IN and
OUT buttons. This is also how ou will approximatel focus the telescope when using a
camera, before using the autofocus routine.
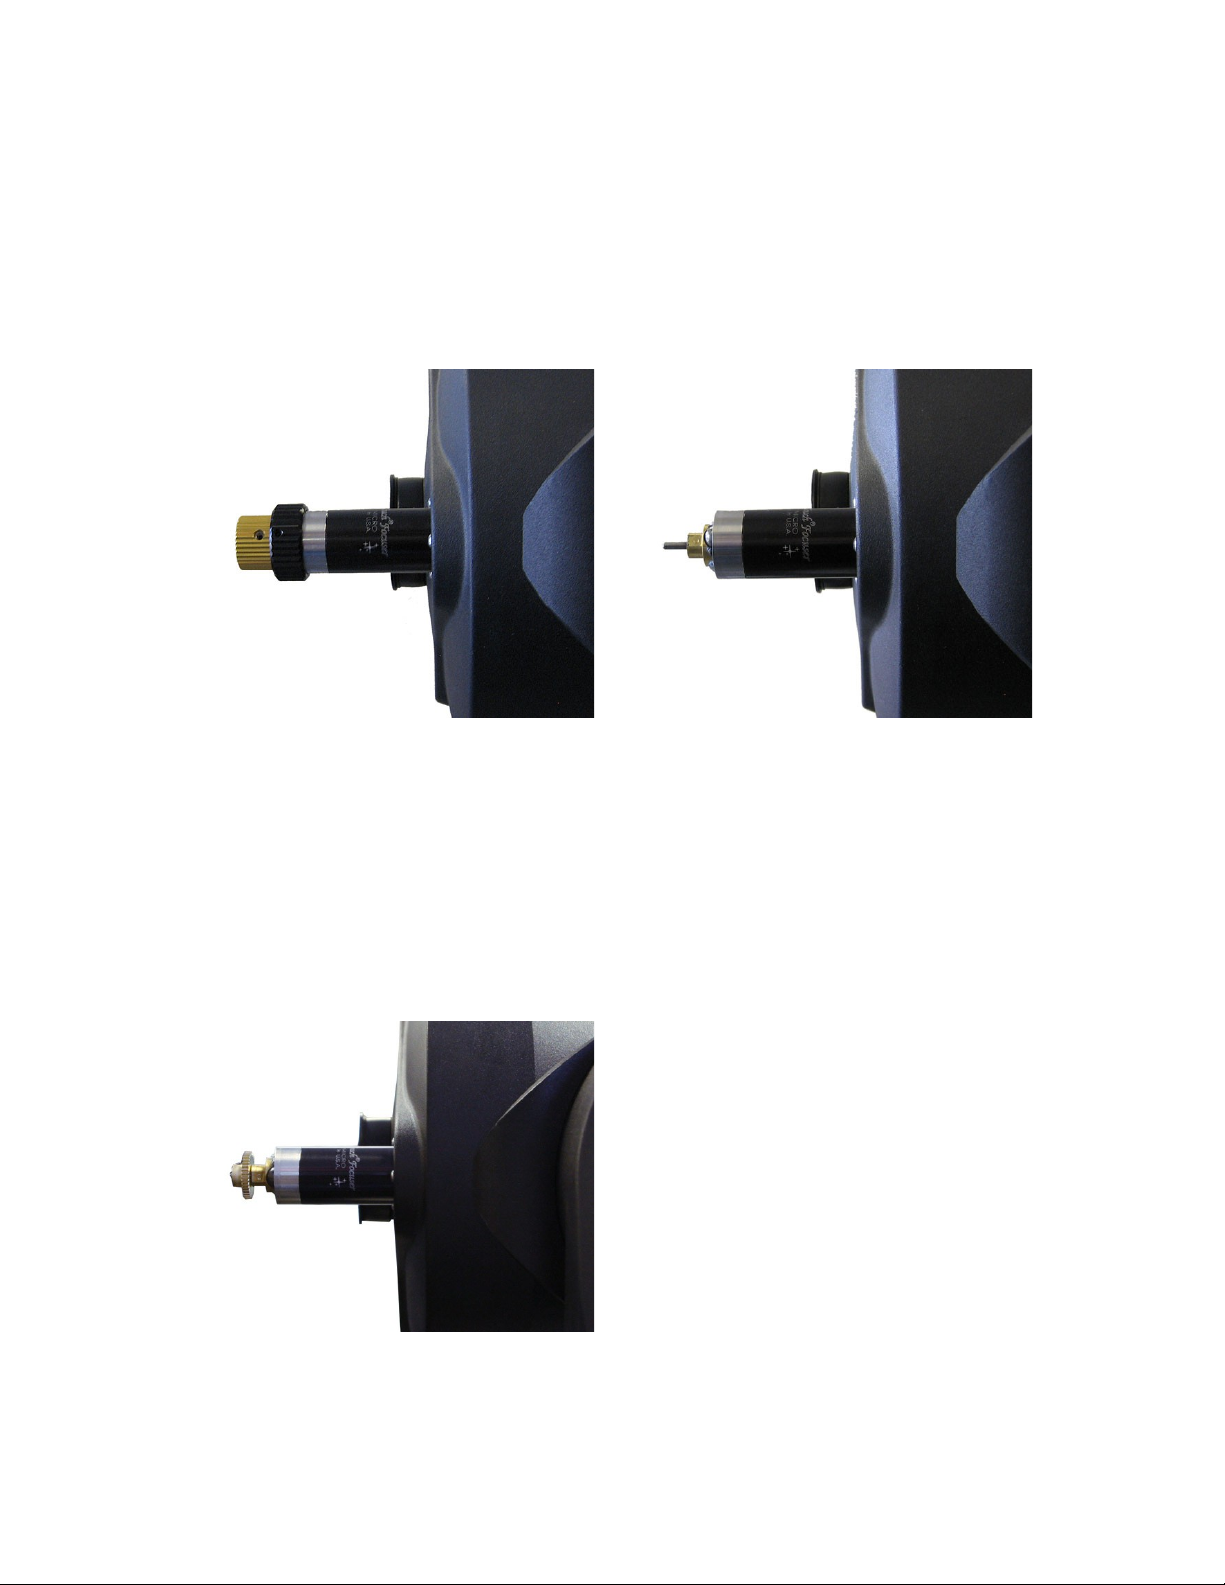
MicroTouch Hand Control Menus
The LCD screen light turns on when the hand control is powered up. If desired, press the
LIGHT button to turn the light off.
Pressing MODE once displa s the current ambient temperature. The default displa is
°F. To change to °C, press the SET button while the temperature is displa ed.
The following menus are accessed sequentiall b pressing the MODE button: Temp
Comp, Learning, Wireless, Motor Rev, and Reset Position. Each is described in detail
below.
Temp Comp
This activates the Temperature Compensation feature of the MicroTouch Autofocuser.
Press SET to turn this feature on. In order for the Temperature Compensation feature to
work, it must learn how to compensate for changes based on the optical s stem being
used. This is done using the Learning menu (below).
Learning
The Temperature Compensation feature works b learning how much focus change is
necessar to compensate for a given temperature change. For example, on a certain
s stem, a temperature drop of 1°F might require a focus position shift of 25 counts.
Therefore, if the temperature drops b 2 degrees, the focuser would move 50 counts to
keep the telescope in focus. The focuser must learn the exact focus shift required for a
given telescope and configuration (so adding a focal reducer, for example, would require
the focuser to be recalibrated).
To activate the Learning mode, press and hold the SET button for a few seconds until the
displa shows Mode: Learning. The word Learning will blink while the focuser is being
calibrated. The current position of the focuser is displa ed.
Press MODE once to view the current temperature. Wait until the temperature has
changed. A temperature change of 5°F is recommended for the most accurate calibration.
Once the temperature has changed, refocus the telescope (either manuall or using the
autofocus routine described in the next section). Return to the Learning menu and hold
SET again until the displa shows Mode: Idle. The temperature compensation is now
set.
Go to the Temp Comp menu and press SET to turn the temperature compensation on.
More advanced temperature compensation control is available through the MicroTouch
software.
Wireless
This turns the wireless communications on or off. The default for the MicroTouch
Autofocuser is OFF. If the autofocuser is upgraded to the wireless version, the mode
must be changed to ON.
Motor Rev
This reverses the direction of the motor.
Reset Position
The default position of the digital readout is 30000. The range of focus is 0-60000. If the
focuser is moved to either end of this range, press MODE until Reset Position? appears.
Press and hold the SET button until the displa blinks and resets. The position has now
been reset to 30000. If a different default position is desired, it is possible to program
this using the MicroTouch software (described below).
Installing the MicroTouch and FocusMax Software
Load the included CD. Alternativel , ou can download the latest installer from the
MicroTouch product page on Starizona.com.
There are several files that must be installed.
If ou do not alread have the ASCOM Platform installed on our computer, begin b
running the ASCOMPlatformXX.exe file. This will take a couple minutes to install.
Next, install FocusMax b running the FocusMax(3.8.0.20)setup.exe file.
Now we need to install the hardware drivers for the MicroTouch unit. Go into the
MicroTouch USB Driver folder. There are two driver installers, depending on whether
ou have a 64-bit or 32-bit operating s stem. Most computers with Windows 7 or newer
will be 64-bit. Run the StarizonaUSBDriverInstaller_x64.exe (or x32.exe if ou have a
32-bit OS).
Go back out of the Starizona USB Drivers folder to the main director . Run the
MicroTouchControllerSetup_X_X.exe installer. This will install the MicroTouch
Controller application.
Finall , run the MicroTouchDriverSetup_X_X.exe file that will install the ASCOM
drivers for the MicroTouch.
MicroTouch Software
The standalone MicroTouch Controller software lets ou manuall operate the
MicroTouch autofocuser, configure settings, train the temperature compensation, and
update the firmware.
Launch the MicroTouch Controller application. If ou are onl using one MicroTouch
unit, ou should be able to simpl press Connect. If ou are using multiple units, see the
instructions below.
Movement Tab
When ou first connect, ou should be on the Movement tab and will see the current
position of the MicroTouch displa ed in red numbers. You can move the focuser motor
in or out b pressing the up and down arrow buttons.
To move to a specific position, enter the desired value in the Target Position box and
press Goto. To stop the focuser during a goto movement, press the Stop button at an
time.
You can reset the current position to an value between 0 and 60000 b entering that
value in the Target Position box and pressing Reset to Target Position.
Common positions that ou use can be stored in the Favorite Locations boxes. For
example, if ou know our telescope focuses at about 12000 steps with an e epiece and
about 41000 counts with a camera, ou can quickl go between those positions.
Temperature Tab
The Temperature tab is where ou can view the current temperature reading from the
temperature sensor on the MicroTouch unit, and where ou can train and enable
temperature compensation.
To train temperature compensation, first focus the telescope, then check the box next to
Learn. This will snapshot the current position and temperature. You should then wait
some time while the temperature drops b several degrees. During this period ou can
otherwise use the MicroTouch as normal. Once the temperature has dropped b a few
degrees, refocus the telescope and uncheck Learn. This will take a second snapshot of
the current position and temperature and determine a Coefficient in counts per degree.
(It is also possible to manuall enter a coefficient in the bottom box and press New
Coefficient to appl it, but this normall isn't necessar .)
Once trained, ou can click the Snapshot button to get the current info from the
MicroTouch unit. You can then click Comp Immediate to update the position based on
the current temperature.
To run the temperature compensation continuousl , check the box next to Enabled. This
will continuousl read the temperature and update the position as needed until ou
uncheck Enabled.
Diagnostics Tab
In the Diagnostics tab ou can get info on the hand controller unit and (if ou have the
wireless MicroTouch) the motor controller unit.
The info on the hand controller will show the firmware version number. If ou do not
have a wireless version, the Number of Corrupted Packets and Number of Comm
Timeouts will alwa s read zero. If connected to a wireless unit, ou will also see the
firmware version of the motor controller and ma have values for corrupted packets and
timeouts.
Setup Tab
The Setup tab lets ou adjust the parameters of the MicroTouch unit.
Normall the Min and Max Values are set to 0 and 60000, respectivel . This is the full
range of the MicroTouch digital steps (but not necessaril the ph sical range, depending
on the focuser). If our focuser has less ph sical range, ou can limit the Min and Max
Values to keep the focuser from traveling too far.
The default value of Steps per Tick is 1. This means each position step corresponds to
one step of the stepper motor. This gives the best resolution. Changing this value to 2,
for example, moves the motor 2 steps per position number, making the movement faster
but less precise.