Moza Mini-P User manual

Mini-P
User Manual • Uživatelský manuál •
Užívateľský manuál • Használati utasítás •
Benutzerhandbuch

2
English
3 –16
Čeština
17 –31
Slovenčina
32 –45
Magyar
46 –61
Deutsch
62 –78

3
The product user guide contains product features, how to use, and the operating
procedure. Read the user manual carefully to get the best experience and avoid
unnecessary damage. Keep this manual for future reference. If you have any questions
or comments about the device, please contact the customer line.
✉www.alza.co.uk/kontakt
✆+44 (0)203 514 4411
Importer Alza.cz a.s., Jankovcova 1522/53, Holešovice, 170 00 Praha 7, www.alza.cz

4
Disclaimer and Warning
•This document is related to the safety use and legal rights of your equipment. Please
read it carefully before the first use.
•By using this product, you are deemed to have read, understood, endorsed and
accepted all the terms and content of this statement. You are solely responsible for
the use of this product and the consequences thereof. You undertake to use this
product for legitimate purposes and agree to the terms and any relevant regulations,
policies and guidelines formulated by Shenzhen Alza Technology Co., Ltd.
(hereinafter referred to as Alza). Alza is not responsible for damage, injury or any
legal problems caused by the direct or indirect use of this product. Users should
follow all safety guidelines including but not limited to this document.
•Mini-MX is professional videography equipment. Users need to have professional
videography and safety knowledge and need to be careful. Please read the user
manual carefully before the first use.
•This product is not a toy and not suitable for use by minors. Do not allow children to
operate this product.
•Do not use with products or accessories that are not provided or recommended by
Alza, and please strictly follow the safety guidelines in the product manual.
•The final interpretation of this document belongs to Shenzhen Alza Technology Co.,
Ltd. Updates are subject to change without notice. Please visit the official website
www.gudsen.com for the latest product

5
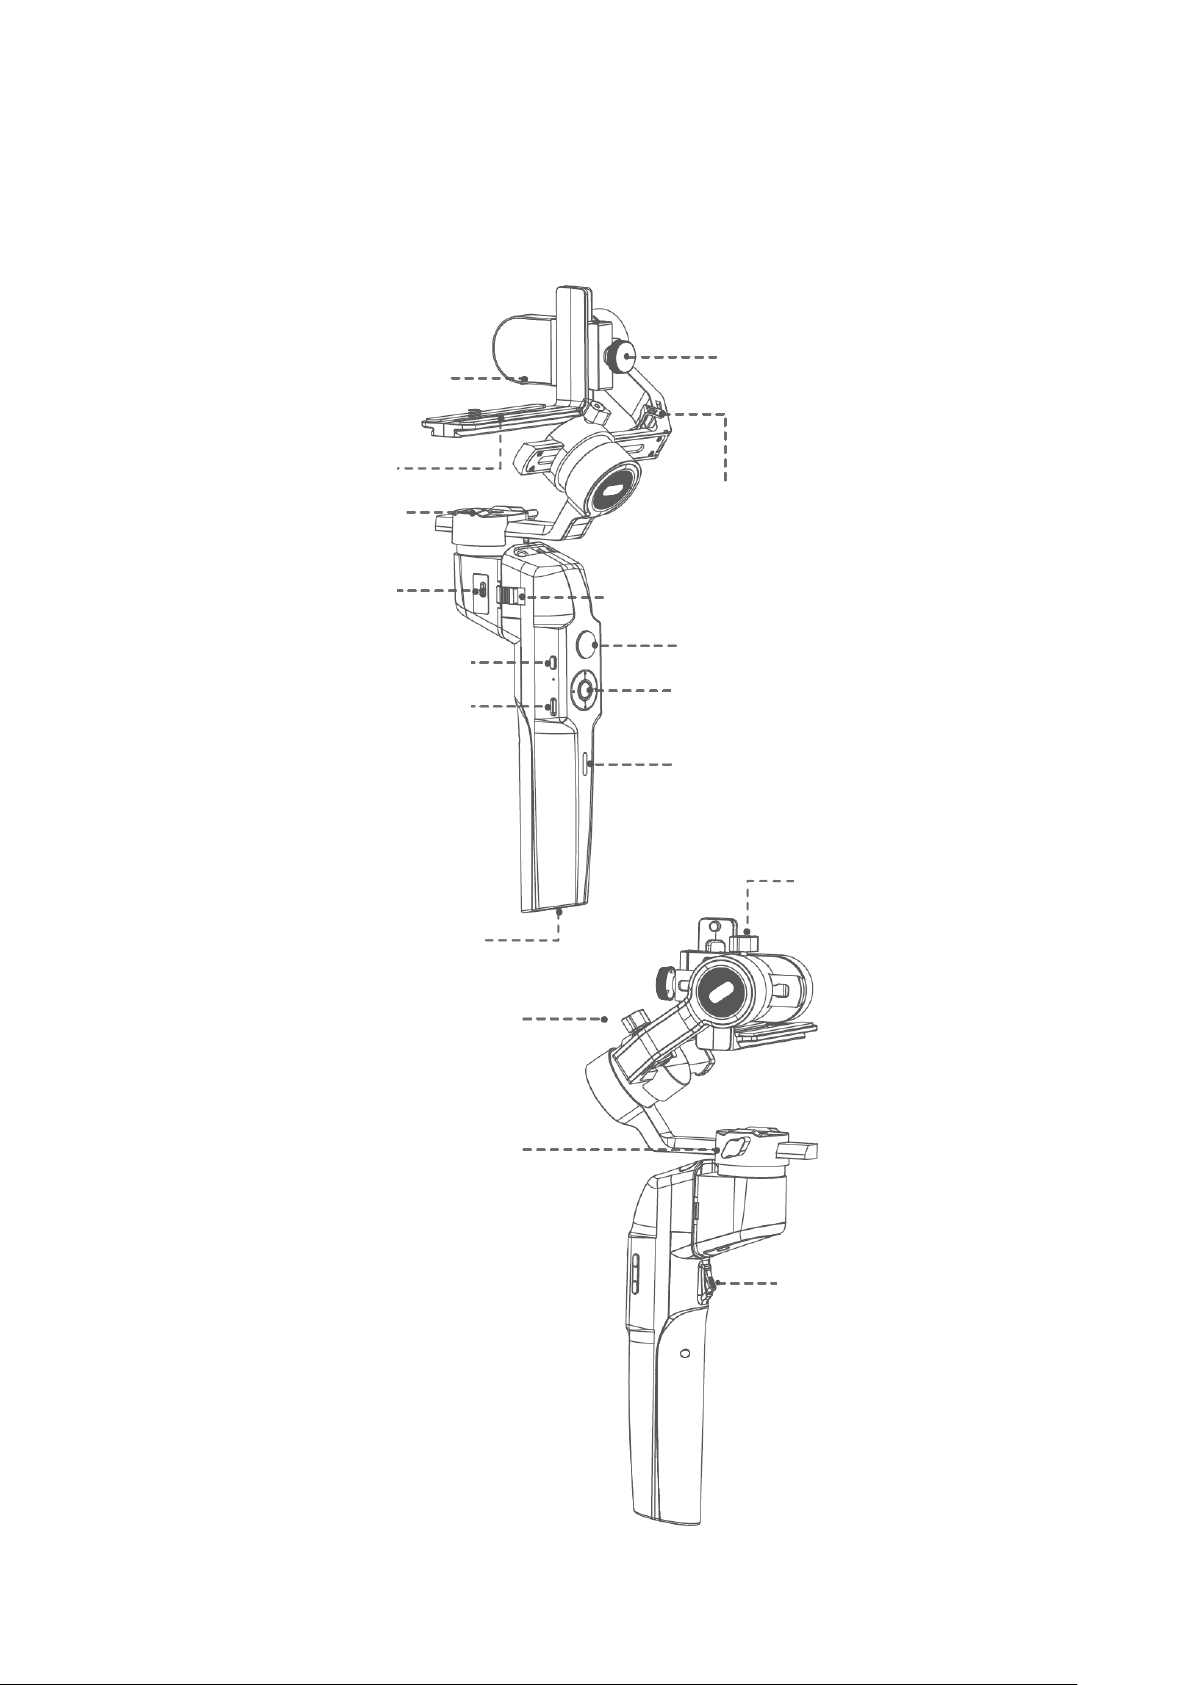
Mini-P Overview
L-Bracket Quick
Release Plate
Pan Motor Lock
Roll Storage Lock
Joystick
Power Button
L-Bracket Quick
Release Plate
Lock Knob
Tilt Storage Lock
Slide Lock
USB-C Charging Port
Dial Wheel
Camera Control Port
Battery Level Indicator
Tilt Knob
1/4″ Port
Roll Knob
Pan Knob
Trigger
6
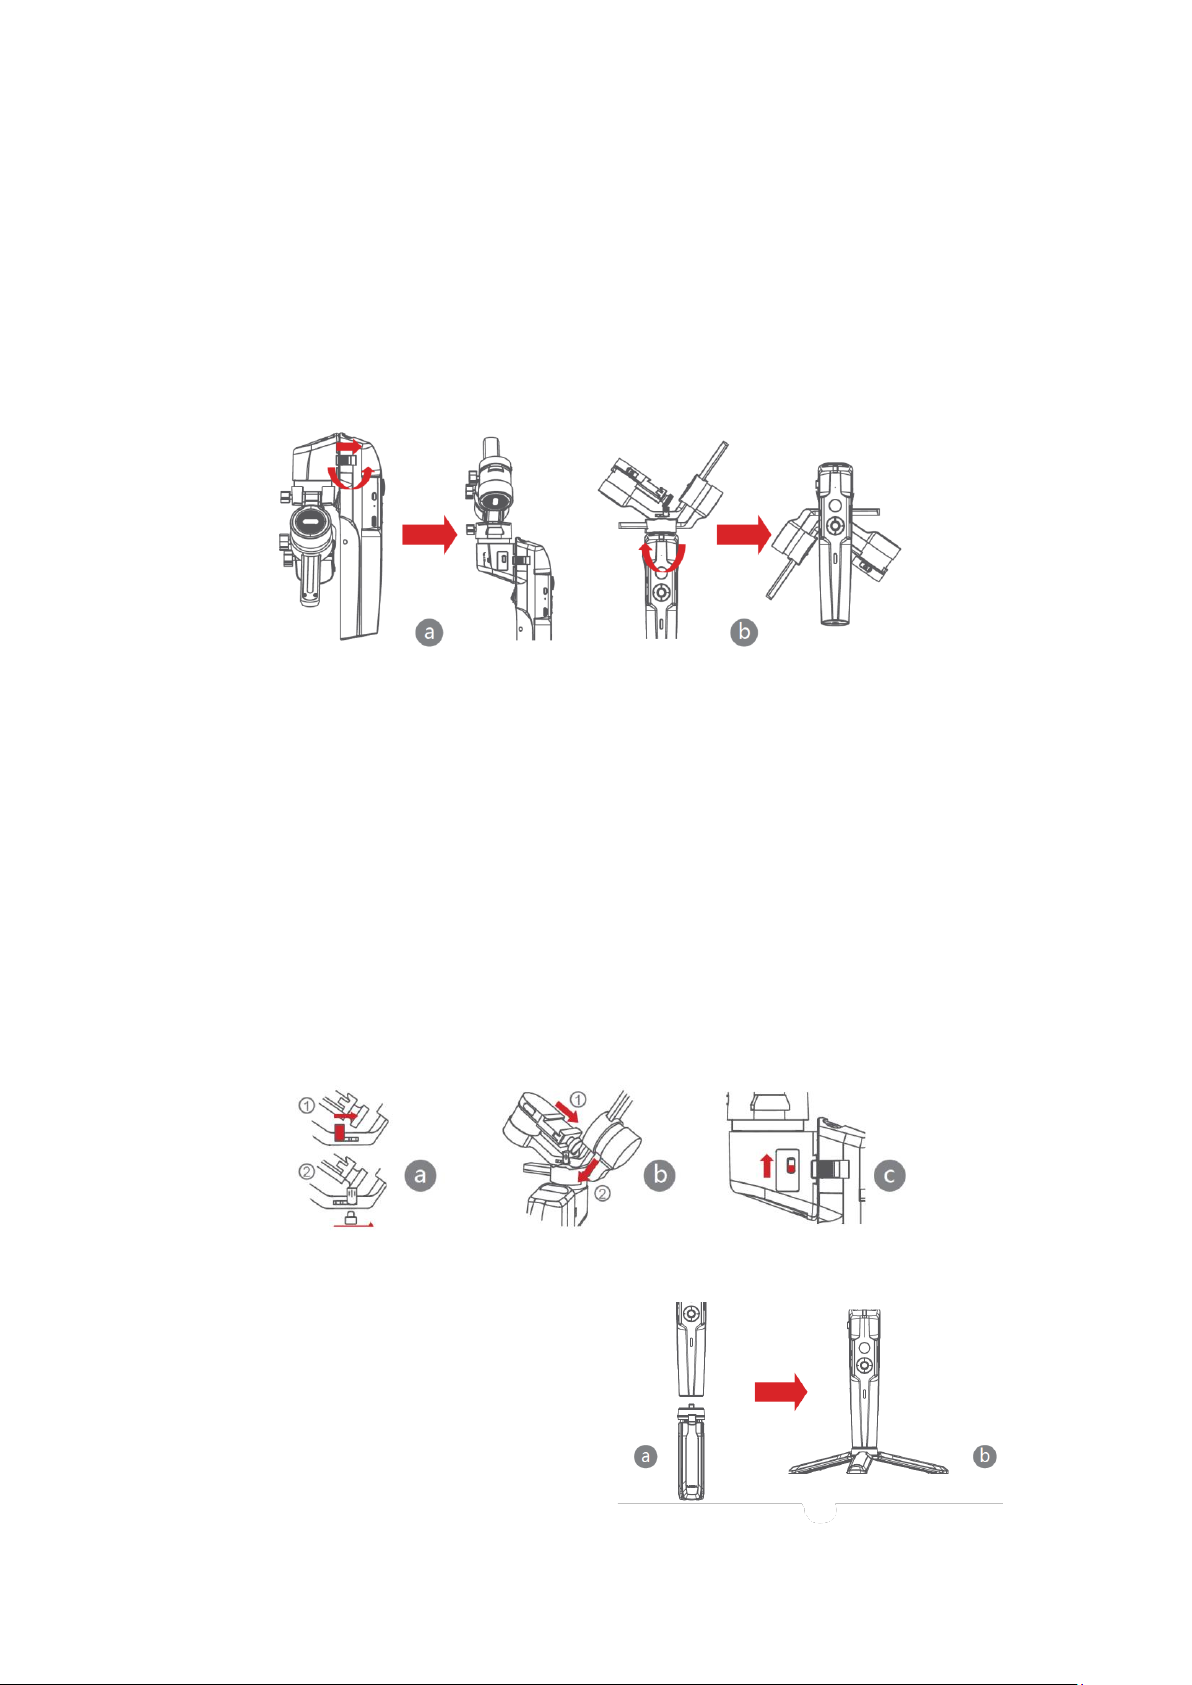
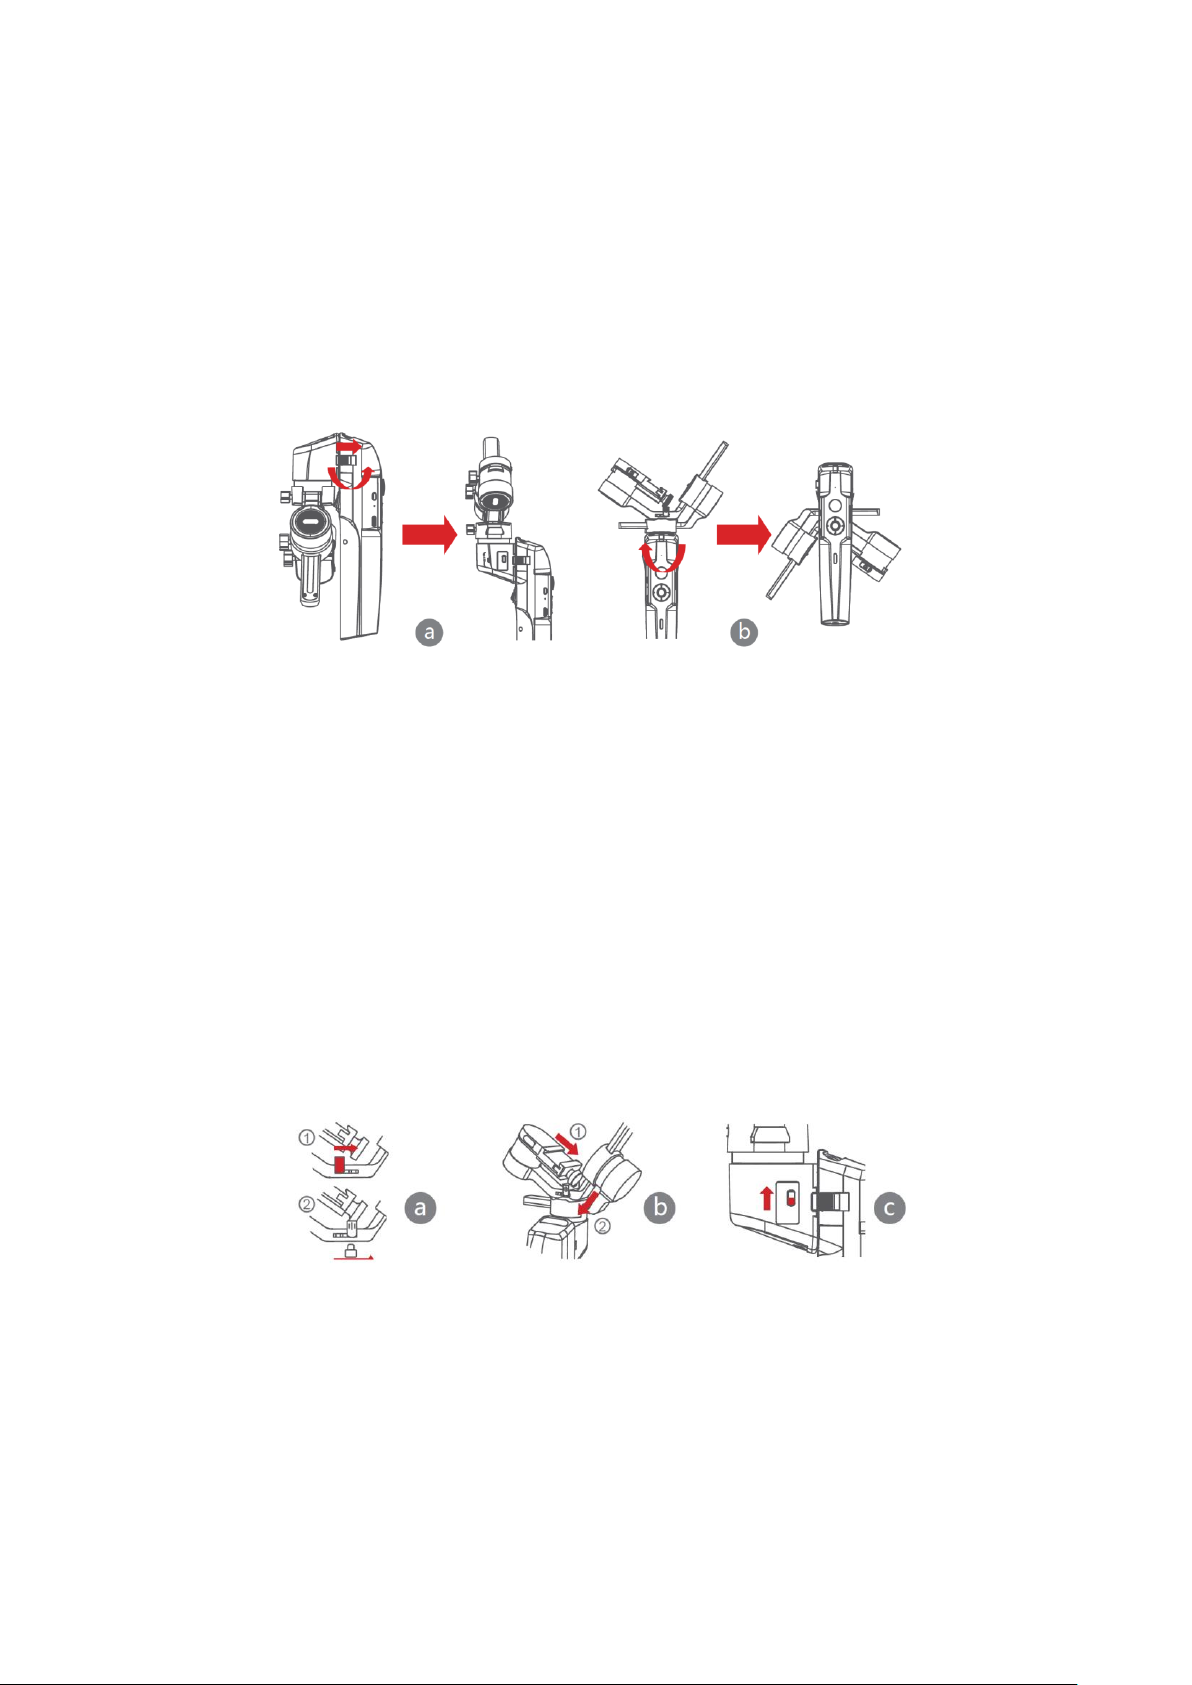
Mini-P Installation
Expanding and Folding the Mini-P main body
a) Folded Status: Slide the slide lock and rotate the gimbal 180° anticlockwise. Then it
locks automatically.
b) Expanded Status: Slide the slide lock and rotate the gimbal 180° clockwise. Then it
locks automatically.
Storage and Expand the Mini-P
Mini-P is equipped with three axes storage lock for gimbal storage, to protect from
constant movement.
a) Slide the tilt storage lock on the roll arm (Picture a), slide the tilt arm downwards
(Picture b), place the L-Bracket lock knob into the tilt storage lock groove, then the tilt
motor storage is complete.
b) Slide the roll arm downwards, place the roll arm between the 2 bosses on the
silicone sleeve of the pan motor (Picture b), then the roll motor storage is complete.
c) Slide the pan motor lock upwards (Picture c), then the pan motor storage is
complete.
Reverse the above steps to expand the gimbal
Attaching the Tripod
a) Screw the tripod tightly into the 1/4" hole
at the bottom of the gimbal.
b) Extend the three support feets, place the
gimbal on a flat surface
7
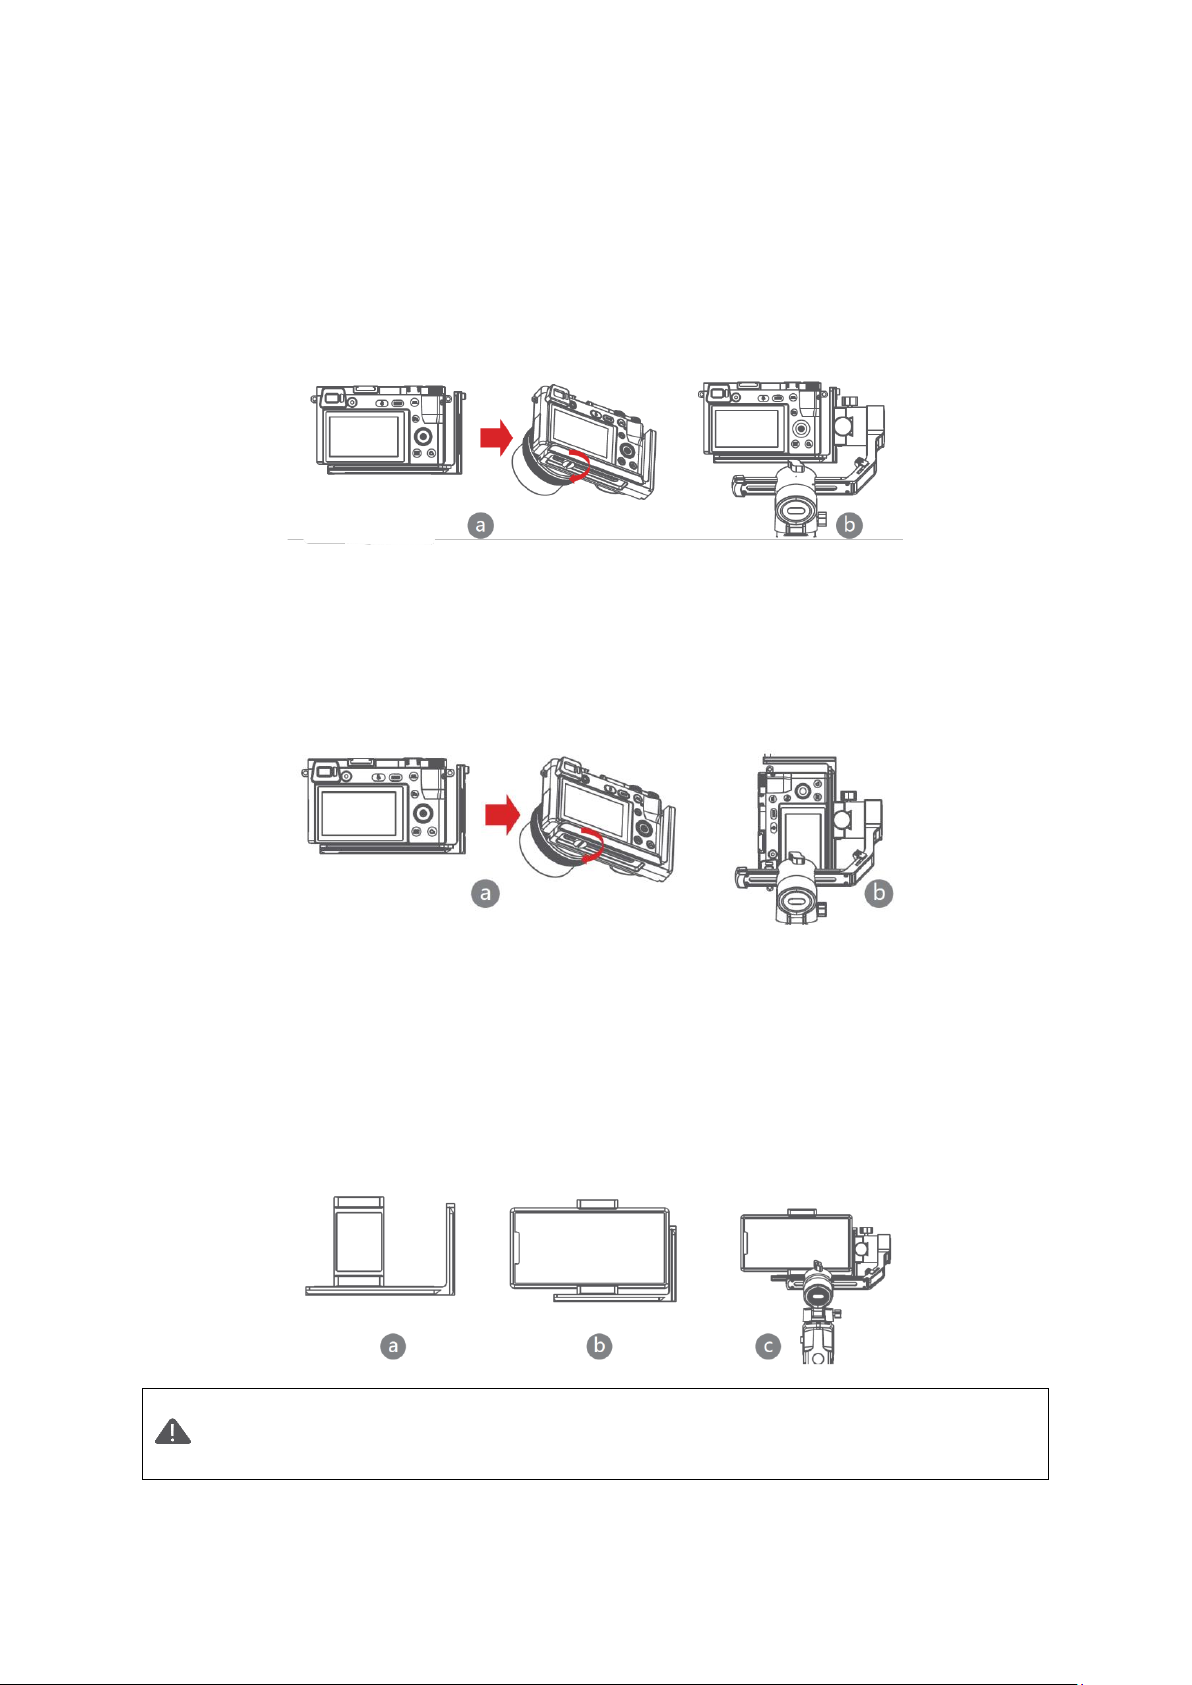
Mounting the Camera
Horizontal Mounting
a) Place the longer side of the L-Bracket under the camera, and secure the camera with
a 1/4”screw.
b) Loosen the L-Bracket quick release plate lock knob, slider the shorter side of the L-
Bracket quick release plate into center of the quick-release base, then lock the knob.
Vertical Mounting
a) Place the longer side of the L-Bracket under the camera to secure it, and lock the
camera with a 1/4”screw.
b) Loosen the L-Bracket quick release plate lock knob, slider the longer side of the L-
Bracket quick release plate into center of the quick-release base, then lock the knob.
Mounting the Mobile Phone
a) Fix the phone holder on the longer side of the L-Bracket qucik release plate with
1/4”screw, Make sure the side with clips is backward
b) Put the phone in the phone holder, ensure that the clips do not touch the power key
or volume key;
c) Loosen the L-Bracket quick release plate lock knob, slider the shorter side of the L-
Bracket quick release plate into center of the quick-release base, then lock the knob.
Note: Please hold your phone or camera tightly when loosening the L-Bracket
quick release plate lock knob and removing the L-Bracket quick release plate.
Preventing the mobile phone or camera from falling to the ground.

8
Balancing
a) Loosen the tilt knob, and adjust the
tilt arm back and forth until the lens
is horizontally forward, then lock the
knob.
b) Rotate the camera until the lens is
facing up, loosen the L-Bracket quick release plate lock knob, and adjust the L-
Bracket quick release plate back and forth until the lens is straight up (leveled), then
lock the knob.
c) Loosen the roll knob, adjust the roll
arm left and right until the roll arm
remains horizontal, then lock the
knob; The camera or phone should
be leveled and can be positioned in
any direction (up or down) and it
stays there.
d) Hold the stabilizer horizontally and make the pan arm parallel to the ground, then
loosen the pan knob, adjust the pan arm left and right until the pan arm remains
horizontal, and then lock the knob. Your camera or phone should be leveled and can
be move to any direction (tilt, pan, roll) and stays on that position without hands
holding it.
Note: When adjusting the balance of an axis, please unlock the motor lock of
the axis first, otherwise it cannot be adjusted accurately; if the balance is not
adjusted accurately, it will cause the abnormal motor work, motor overheat,
unstable video, unavailable of certain functions, and also shorten battery life,
please make sure it is completely balanced before turning on the gimbal.
Connecting camera or mobile phone
a) After installing the camera to the gimbal, you need to use the camera control cable
to connect camera with gimbal, and then you can control the gimbal through the
MOZA Master App
b) After installing the mobile phone to the gimbal, please open the MOZA Genie App to
connect the gimbal, then you can control the phone to take photos or videos
through te gimbal.
Note: For camera functions and features, please use Moza
Master App. For Phone controls, please use Moza Genie App.
9
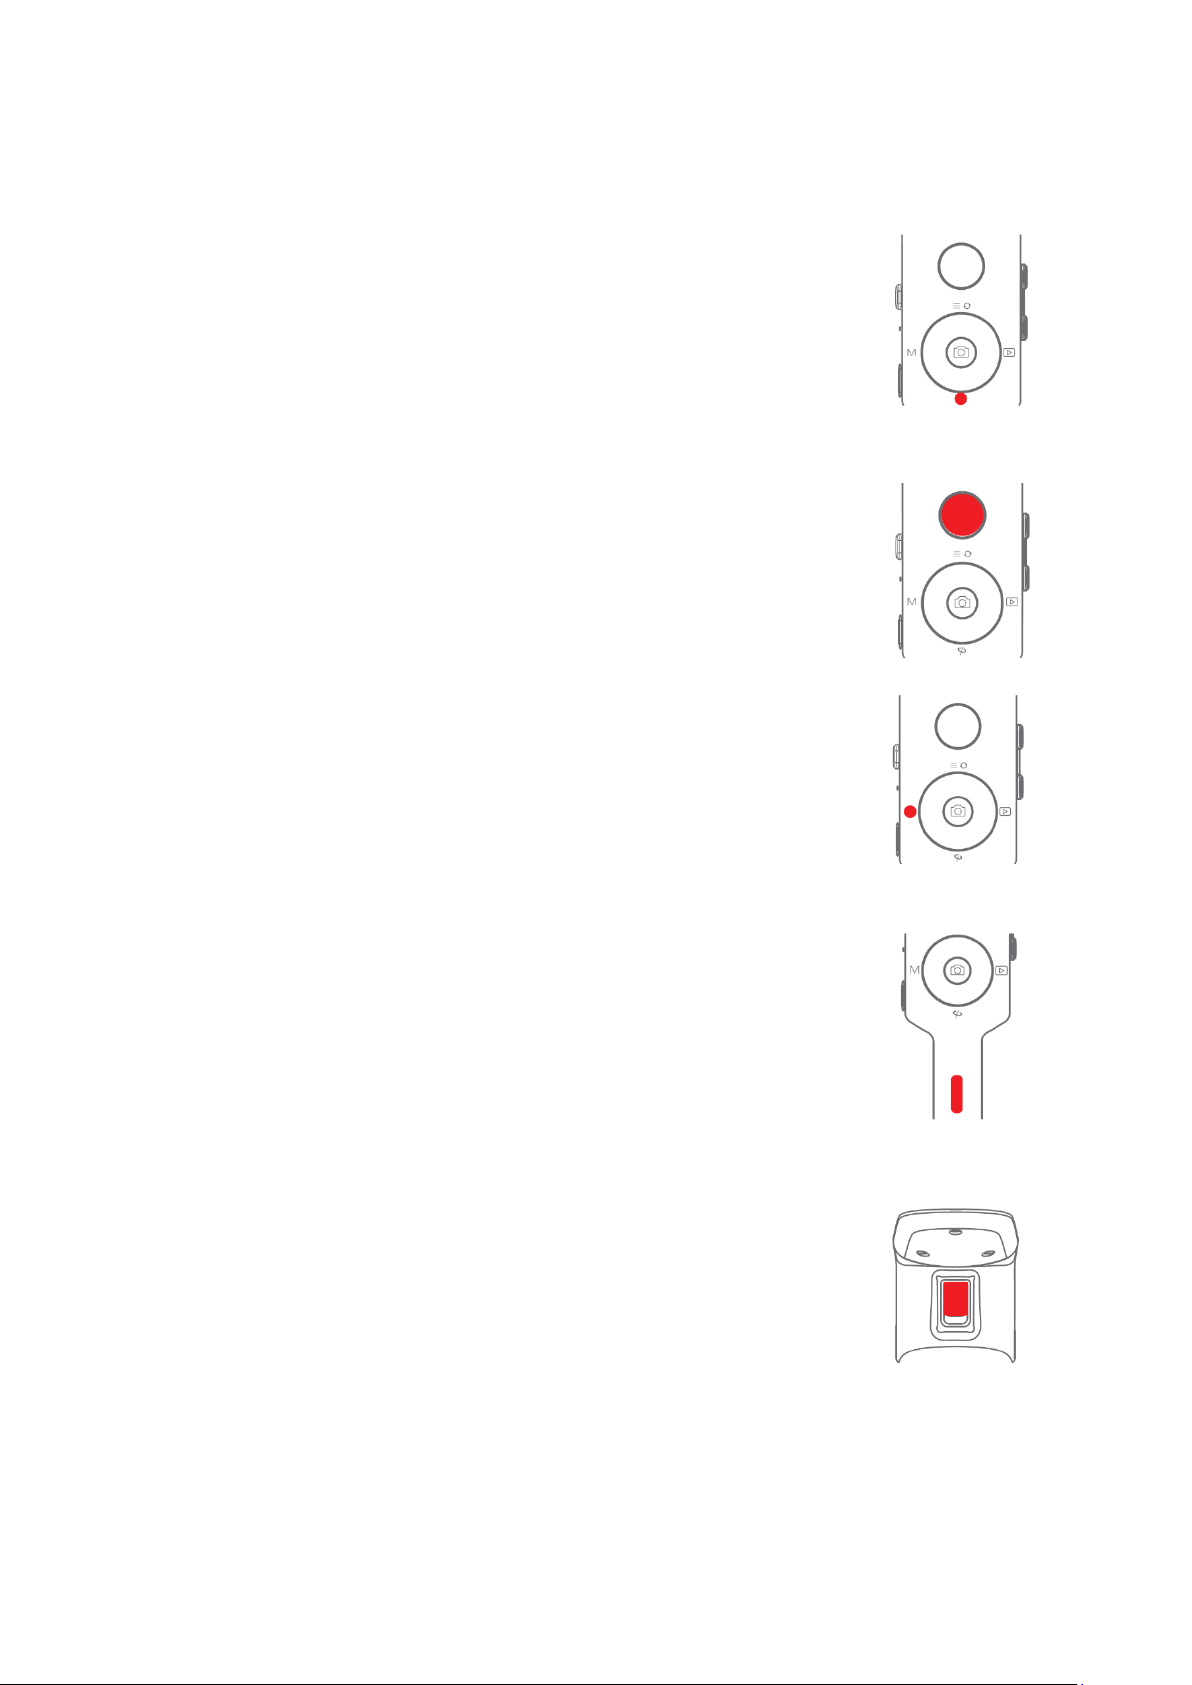
Button Features
Simplified Operation
Down Button
•Double press: Sports gear mode, double press again to exit sports
gear mode
•Triple press: Inception mode, Triple press again to exit inception
mode
Joystick
•Move upwards: phone camera turns up
•Move downwards: phone camera turns down
•Move leftwards: phone camera turns left
•Move rightwards: phone camera turns right
•The speed of camera moving increases with the larger moving
range of joystick
Follow Function
•Left Button
Press twice the left button: FPV mode. Press twice again to stop
Check the Battery Level
Status Indicator
•Blue light is always on: 60%-100% battery level
•Blue light flashes slowly: 20%-60%battery level
•Blue light flashes quickly: 0%-20% battery level
•Orange light flashes slowly: Gimbal motor enters to sleep mode
•Blue and orange lights flash quickly: FPV mode
•Blue and orange lights flash slowly in turn: Firmware upgrade mode
•The red light is always on: Charging
•The red light is off: Charging Completed
Trigger
•Double press: Re-center
•Single press: Auto focus (some cameras are not supported)
•Triple press: Switch to selfie mode
•Hold: Switch to tilt follow mode
•Double press and hold: Switch to All-locked mode
10
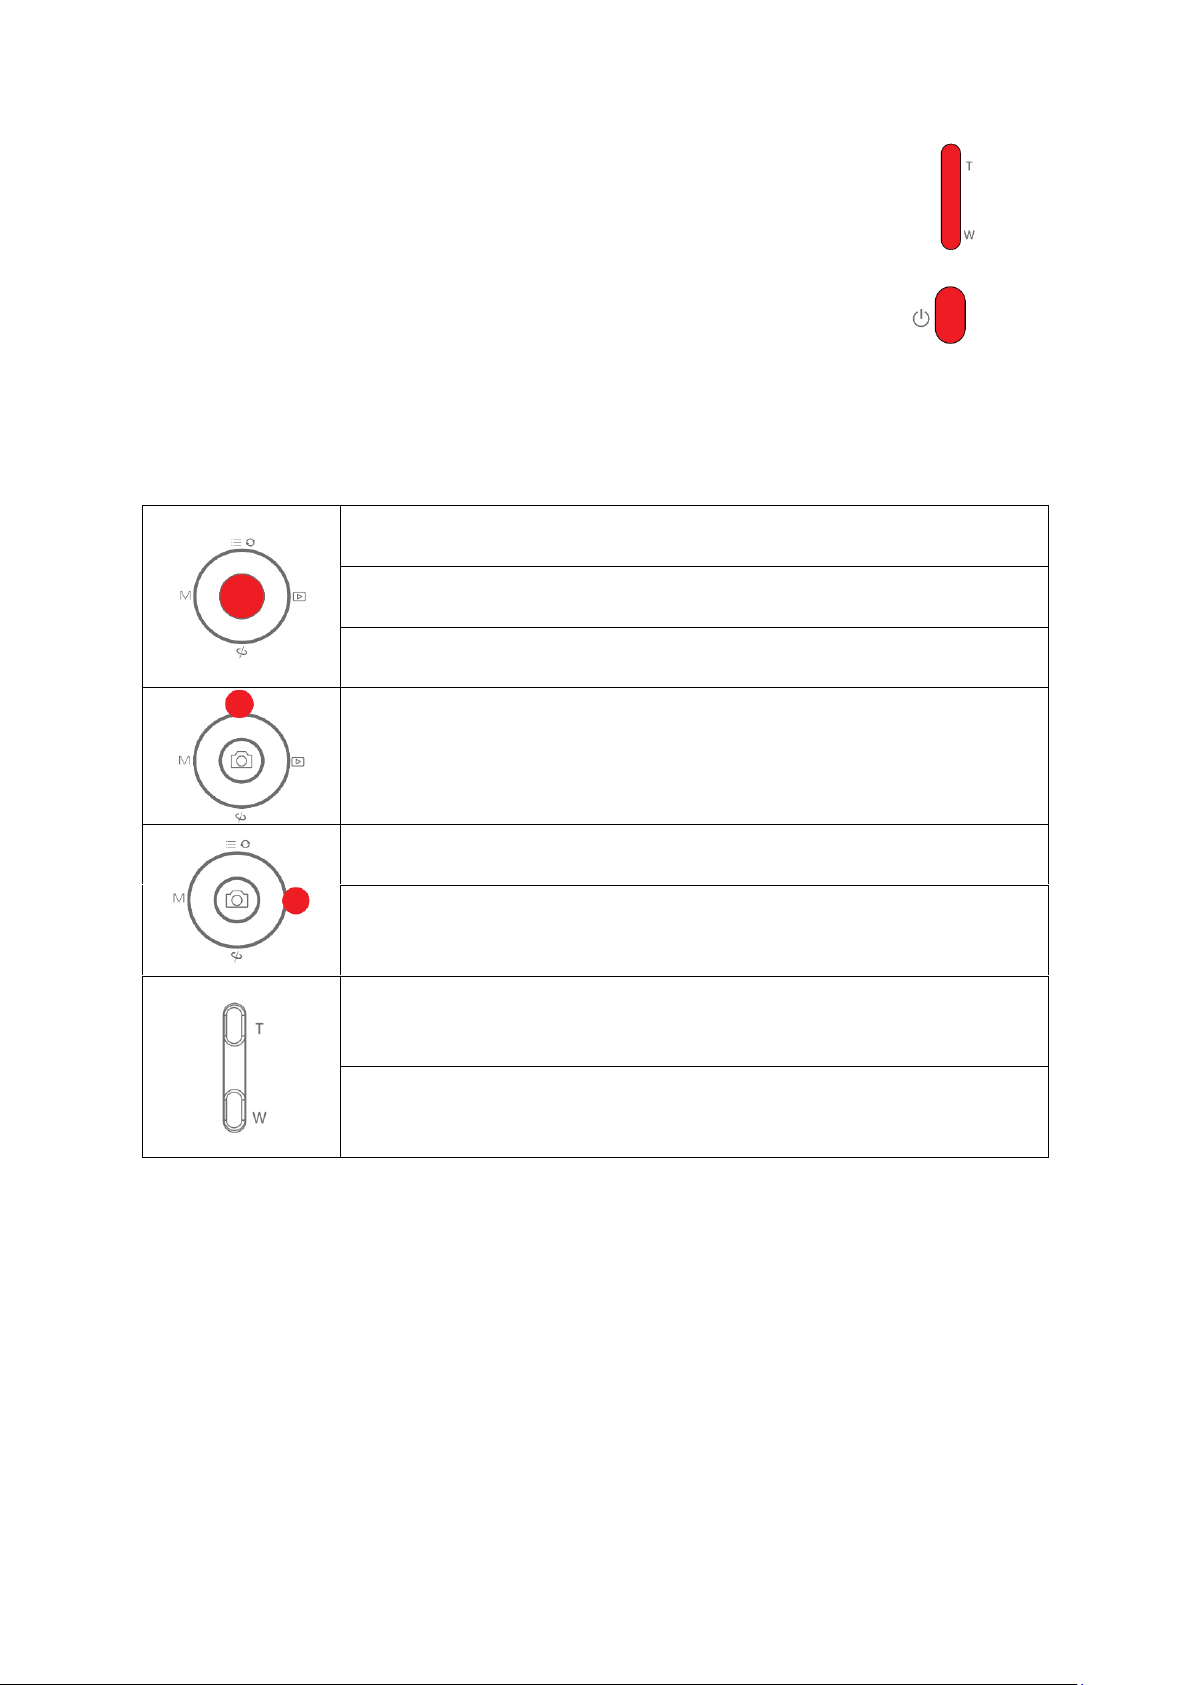
W-T Button
Triple press W button: Auto tune
Power Button
Press once : Sleep mode
Long press: Turn on / off
MOZA Genie App Control
Press the center button on the camera interface:
Video mode: start/stop recording; photo mode: take a photo
Double press the center button in video mode: take a photo during
recording
Long press the center button: confirm the timelapse points (in
advanced timelapse mode)
Press the top button once: open the menu
Press twice the top button: switch to video mode/photo mode
Long press the top button for 3s: switch to front camera/rear
camera
Press the right button once: photo playback in album.
Press once again to return to the camera
After the completion of timelapse points setting, long press the
right button: start/stop advanced timelapse shooting (in advanced
timelapse mode)
Press and hold the T button: zoom in (Zoom +)
Double-press the T button: zoomin automatically at constant
speed
Press and hold the W button: zoom out (Zoom-)
Double press on the W button: zoom out automatically at a
constant speed

11
Functions Description of the Gimbal
Control the camera or phone to record a video or take a photo
a) Install the camera on the gimbal, then you can use the shutter control cable to
connect the gimbal and camera. Press the center button once to take a photo in
photo mode. Press the center button once to start/stop recording in video mode.
b) Install the phone on the gimbal, then turn on the MOZA Genie App and connect the
gimbal to the MOZA Genie App. Press the center button once to take a photo in
photo mode. Press the center button once to start/stop recording in video mode.
c) Double press the top button to switch the video mode/photo mode
Mimic Motion Control
(requires 2 smartphones: one on gimbal and one to control the mimic. If planning to use
the camera on gimbal, only one smartphone is required)
a) Place the smartphone on the Gimbal through the phone holder;
b) Use a 2nd smartphone and open the “MOZA Master” App, connect it to the gimbal
and enter Mimic Motion Control Mode;
c) Rotate the 2nd phone and it will control the movement of the gimbal.
Timelapse
Use the MOZA Master App or MOZA Genie App to connect the gimbal, select “Creative
video” button and there will be multiple timelapse modes for shooting
Bidirectional Start
By default, we mount the camera handle near the tilt motor so that the camera control
port can be exposed. But in some special cases, we need to mount the camera control
port near the tilt motor for normal use.
The following situations will require reverse mounting:
a) The camera is too wide for forward mounting.
b) The lens used is too heavy to be balanced when forward mounting.
Reverse mounting steps:
a) Place the shorter side of the
L-Bracket next to the lens
and mount it on the bottom
of the camera.
b) Rotate the roll axis
180°around the roll motor, then the tilt motor will be on the left of the roll motor.
c) Mount the shorter side of the L-Bracket to the quick release baseplate.

12
Object Tracking
Install the smartphone to Mini-P and open the MOZA Genie App, connect the stabilizer,
click the hand-shapedbutton at the bottom of left corner to enter the object tracking
mode, and select the tracking object on the screen to start object tracking shooting.
Inception Mode
The Inception Mode is used to control the camera to rotate in the roll direction for
shooting upside down and rotating footage. Triple press the down button on the dial to
enter the Inception Mode. Press the left/right button on the dial then the motor rotates
to the left/right automatically.
Triple press the down button on the dial to exit the Inception Mode.
FPV
Double-click the left button on the dial to achieve FPV wide range follow movement.
Double-click the left button of the dial to enter the FPV Mode. In FPV mode, double-click
the left button of the dial to exit FPV mode.
Firmware Upgrade via Mobile App
a) When the gimbal is powered off, long press the center button, then press the power
button with the other hand until the battery indicator start flashing (Boot Mode).
b) Start the MOZA Master App, press Bluetooth to search for device then connect it.
c) The App will automatically enter the firmware upgrade interface, After the firmware
download is completed, click the "Upgrade" button to start the upgrade.
d) After the upgrade is completed, turn the gimbal off and back on again. Then calibrate
the gyroscope and accelerometer to get started. You can connect to the “MOZA
Master App” to check the version number of the Mini-P.
Note:
1. Make sure the gimbal is fully charged and the computer or mobile phone network
connection is normal during the upgrade.
2. Do not disconnect the gimbal from power, USB-C cable or Bluetooth during the
upgrade, otherwise the upgrade will fail.
3. When using the App upgrade, the upgrade process takes a longer time, please wait
patiently. Do not exit the app to the background, and do not turn off the screen to
avoid upgrade failure.
4. If all fails, reboot the gimbal and try to upgrade again until the upgrade is
completed.
5. The firmware of the MOZA Mini P can be upgrade via both MOZA Master App and
the MOZA Genie App. If you have any questions during the upgrade process, please
consult our after sales service.

13
Calibration
The MOZA Mini-P needs to be calibrated when:
a) The device works abnormally;
b) There is a deviation in the horizontal angle after the gimbal is turned on (not
levelled), and it is unable to resolve after one-click re-centre;
c) Deviation caused by the environment in which the gimbal is used.
Calibration method: Please scan the QR code at the end of the page for details.
Mobile App
If you use the camera on the gimbal, you can scan the QR code to download the MOZA
Master App, or you can search for "MOZA Master" directly in the mobile app store to
download. (See App download QR code at the end of the page)
Note:
1. The mobile phone system supported by MOZA Master are iOS and Android.
2. Smartphone cannot be paired with the gimbal directly via Bluetooth.
You must use the MOZA Master App to connect.
If you use a mobile phone on the gimbal, you can directly scan the QR code to download
"MOZA Genie "(Android 5.0 or higher, IOS 9.0 or higher), or you can search for" MOZA
Genie "directly in the mobile app store to download. (See the QR code at the end of the
page)
Note
1. When using the Mini-P with a mobile phone to take photos, please use the app
“MOZA Genie”, which is customized for the Mini-P, so that you can use various
functions of gimbal more creatively.
2. Please check for the latest version of the App, which is subject to update without
notice. For updates or latest information, please visit MOZA's official website, WeChat
subscription account and mobile application stores.
3.The smartphone and the Bluetooth of Mini-P cannot be paired directly, you must
use the MOZA Genie App to connect the smartphone and Mini-P.

14
Specifications
Payload
130g~900g / 0.29lbs~1.98lbs
Weight
710g/1.57lbs
Dimensions (mm)
Gimbal (unfolded): 305*51*166
Gimbal (folded): 198*166*102
Supported Phone Size
58 ~ 88mm
Battery Life
20 (h)
Battery Specs
Standard Voltage: 7.4 V
Battery capacity: 2000 mAh
Charging Time
1.5 (h)
Mechanical Endpoint
Range
Pan:360°
Roll:330°
Tilt:330°
Warranty Conditions
A new product purchased in the Alza.cz sales network is guaranteed for 2 years. If you
need repair or other services during the warranty period, contact the product seller
directly, you must provide the original proof of purchase with the date of purchase.
The following are considered to be a conflict with the warranty conditions, for
which the claimed claim may not be recognized:
•Using the product for any purpose other than that for which the product is intended
or failing to follow the instructions for maintenance, operation and service of the
product.
•Damage to the product by a natural disaster, the intervention of an unauthorized
person or mechanically through the fault of the buyer (e.g. during transport, cleaning
by inappropriate means, etc.).
•Natural wear and aging of consumables or components during use (such as
batteries, etc.).
•Exposure to adverse external influences, such as sunlight and other radiation or
electromagnetic fields, fluid intrusion, object intrusion, mains overvoltage,
electrostatic discharge voltage (including lightning), faulty supply or input voltage and
inappropriate polarity of this voltage, chemical processes such as used power
supplies, etc.
•If anyone has made modifications, modifications, alterations to the design or
adaptation to change or extend the functions of the product compared to the
purchased design or use of non-original components.

15
EU Declaration of Conformity
Identification data of the manufacturer's / importer's authorized representative:
Importer: Alza.cz a.s.
Registered office: Jankovcova 1522/53, Holešovice, 170 00 Prague 7
IČO: 27082440
Subject of the declaration:
Title: Moza MINI-P
Model / Type: MINI-P
The above product has been tested in accordance with the standard(s) used to
demonstrate compliance with the essential requirements laid down in the
Directive(s):
Directive No. (EU) 2014/53/EU
Directive No. (EU) 2011/65/EU as amended 2015/863/EU
Prague, 01.09.2021

16
WEEE
This product must not be disposed of as normal household waste in accordance with
the EU Directive on Waste Electrical and Electronic Equipment (WEEE - 2012/19 / EU).
Instead, it shall be returned to the place of purchase or handed over to a public
collection point for the recyclable waste. By ensuring this product is disposed of
correctly, you will help prevent potential negative consequences for the environment
and human health, which could otherwise be caused by inappropriate waste handling of
this product. Contact your local authority or the nearest collection point for further
details. Improper disposal of this type of waste may result in fines in accordance with
national regulations.

17
Uživatelská příručka k výrobku obsahuje funkce výrobku, návod k použití a postup
obsluhy. Přečtěte si pozorně uživatelskou příručku, abyste získali co nejlepší zkušenosti a
předešli zbytečným škodám. Tento návod si uschovejte pro budoucí použití. Máte-li
jakékoli dotazy nebo připomínky k zařízení, obraťte se na zákaznickou linku.
✉www.alza.cz/kontakt
✆+420 255 340 111
Dovozce Alza.cz a.s., Jankovcova 1522/53, Holešovice, 170 00 Praha 7, www.alza.cz

18
Zřeknutí se odpovědnosti a varování
•Tento dokument se týká bezpečnostního používání a zákonných práv vašeho
zařízení. Před prvním použitím si jej pečlivě přečtěte.
•Používáním tohoto produktu se má za to, že jste si přečetli, pochopili, schválili a
přijali všechny podmínky a obsah tohoto prohlášení. Za používání tohoto výrobku a
jeho důsledky nesete výhradní odpovědnost. Zavazujete se používat tento produkt k
legitimním účelům a souhlasíte s podmínkami a všemi příslušnými předpisy,
zásadami a pokyny formulovanými společností Shenzhen Alza Technology Co., Ltd.
(dále jen Alza). Společnost Alza nenese odpovědnost za škody, zranění nebo jakékoli
právní problémy způsobené přímým nebo nepřímým používáním tohoto výrobku.
Uživatelé by měli dodržovat všechny bezpečnostní pokyny, mimo jiné včetně tohoto
dokumentu.
•Mini-MX je profesionální videografické zařízení. Uživatelé musí mít profesionální
videografické a bezpečnostní znalosti a musí být opatrní. Před prvním použitím si
pečlivě přečtěte uživatelskou příručku.
•Tento výrobek není hračka a není vhodný pro použití nezletilými osobami. Nedovolte
dětem, aby tento výrobek obsluhovaly.
•Nepoužívejte jej s produkty nebo příslušenstvím, které nejsou dodávány nebo
doporučovány společností Alza, a důsledně dodržujte bezpečnostní pokyny uvedené
v návodu k obsluze produktu.
•Konečná interpretace tohoto dokumentu náleží společnosti Shenzhen Alza
Technology Co., Ltd. Aktualizace mohou být změněny bez předchozího upozornění.
Nejnovější informace o produktu naleznete na oficiálních webových stránkách www.
gudsen.com.
19
Přehled zařízení Mini-P
L-držák rychloupínací
desky
Zámek motoru
otáčení
Zámek uložení
naklápění
Joystick
Tlačítko napájení
Zámek L- držáku
rychloupínací destičky
Zámek uložení
naklánění
Pojistka
Nabíjecí port USB-C
Kolečko voliče
Port pro ovládání
fotoaparátu
Indikátor stavu nabití
baterie
Knoflík
naklánění
Port 1/4″
Knoflík
naklápění
Knoflík
otáčení
Spoušť
20
Instalace Mini-P
Rozložení a skládání hlavního těla Mini-P
a) Složený stav: Posuňte pojistku a otočte gimbal o 180° proti směru hodinových
ručiček. Poté se automaticky uzamkne.
b) Rozložený stav: Posuňte zámek a otočte gimbal o 180° ve směru hodinových ručiček.
Poté se automaticky uzamkne.
Uložení a rozbalení Mini-P
Mini-P je vybaven tříosým úložným zámkem pro uložení gimbalu, který chrání před
neustálým pohybem.
a) Zasuňte zámek uložení náklonu na rameni náklonu (obrázek a), posuňte rameno
náklonu dolů (obrázek b), umístěte knoflík zámku L-držáku do drážky zámku uložení
náklonu, pak je uložení motoru naklánění dokončeno.
b) Posuňte rameno naklápění směrem dolů, umístěte rameno naklápění mezi 2 šrouby
na silikonovém pouzdře motoru otáčení (Obrázek b), pak je uložení motoru
naklápění dokončeno.
c) Posuňte zámek motoru otáčení směrem nahoru (Obrázek c), pak je uložení motoru
otáčení dokončeno.
Obrácením výše uvedených kroků gimbal rozbalíte.
Other manuals for Mini-P
1
Table of contents
Languages:
Other Moza Camera Accessories manuals


Popular Camera Accessories manuals by other brands


Trojan
Trojan GC2 48V quick start guide

Calumet
Calumet 7100 Series CK7114 operating instructions

Ropox
Ropox 4Single Series User manual and installation instructions

Cambo
Cambo Wide DS Digital Series Main operating instructions

Samsung
Samsung SHG-120 Specification sheet

Ryobi
Ryobi BPL-1820 Owner's operating manual