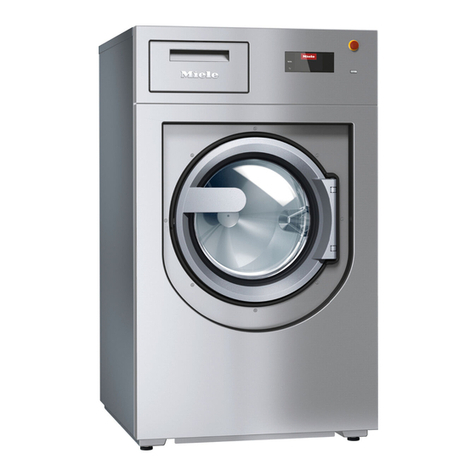
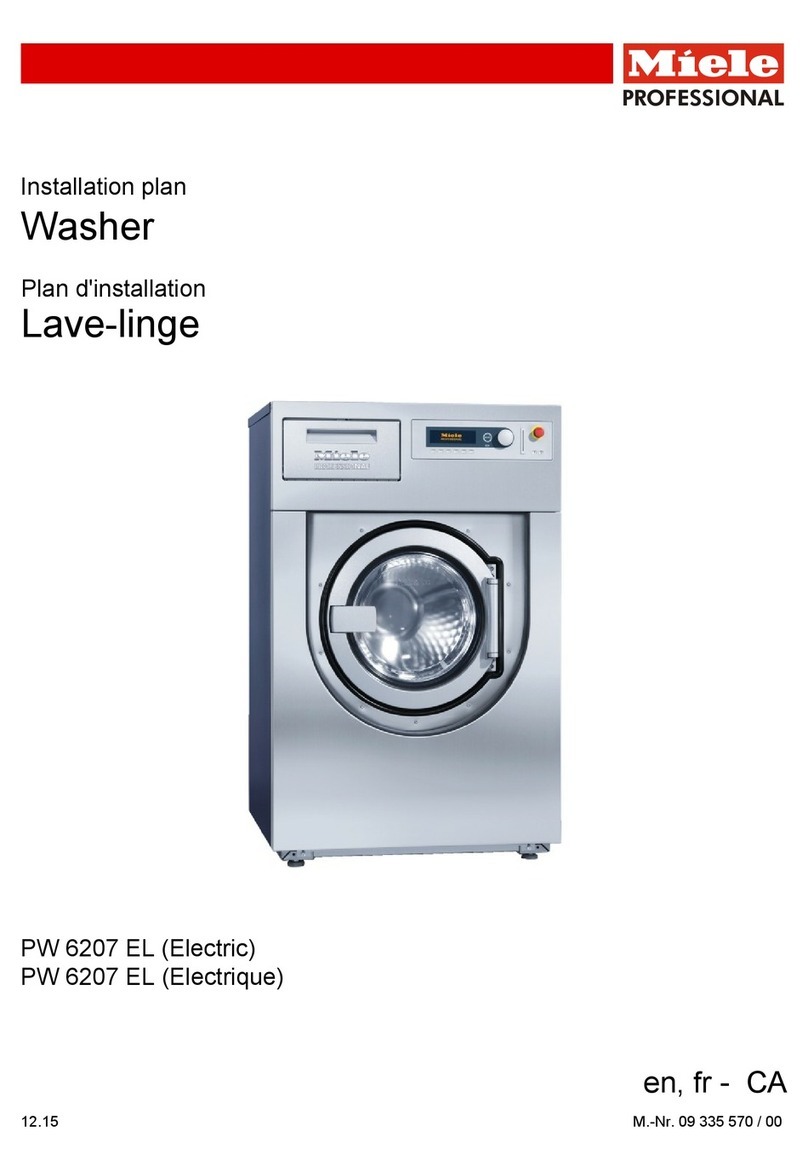
Miele PW 6080 VARIO User manual

Operating and Installation
Instructions
PW 6080 Vario
To prevent accidents
and machine damage
read these instructions
before
installation or use. M.-Nr. 09 622 930
en - US, CA

IMPORTANT SAFETY INSTRUCTIONS. . . . . . . . . . . . . . . . . . . . . . . . . . . . . . . . . 4
Guide to the Washer . . . . . . . . . . . . . . . . . . . . . . . . . . . . . . . . . . . . . . . . . . . . . . . 9
Control panel ......................................................9
Display ..........................................................10
Operating the washer ..............................................12
Tips . . . . . . . . . . . . . . . . . . . . . . . . . . . . . . . . . . . . . . . . . . . . . . . . . . . . . . . . . . . . 13
1. Sort the laundry .................................................13
2. Load the drum ..................................................14
3. Select a program ................................................14
Wash care label symbols . . . . . . . . . . . . . . . . . . . . . . . . . . . . . . . . . . . . . . . . . . 15
Quick guide . . . . . . . . . . . . . . . . . . . . . . . . . . . . . . . . . . . . . . . . . . . . . . . . . . . . . 16
Select a program . . . . . . . . . . . . . . . . . . . . . . . . . . . . . . . . . . . . . . . . . . . . . . . . . 20
Selecting/changing a program .......................................20
Favorites . . . . . . . . . . . . . . . . . . . . . . . . . . . . . . . . . . . . . . . . . . . . . . . . . . . . . . . . 22
Saving a favorite program ...........................................22
Extras . . . . . . . . . . . . . . . . . . . . . . . . . . . . . . . . . . . . . . . . . . . . . . . . . . . . . . . . . . 23
Pre-wash ........................................................23
Starch stop.......................................................23
Rinse hold .......................................................24
Intensive* ........................................................24
Water plus* ......................................................24
Peak load shut-off .................................................25
Timer . . . . . . . . . . . . . . . . . . . . . . . . . . . . . . . . . . . . . . . . . . . . . . . . . . . . . . . . . . . 26
Spin speed . . . . . . . . . . . . . . . . . . . . . . . . . . . . . . . . . . . . . . . . . . . . . . . . . . . . . . 27
Maximum final spin speed...........................................27
Rinse and interim spin ...........................................27
Changing the program sequence . . . . . . . . . . . . . . . . . . . . . . . . . . . . . . . . . . . 28
Coin mechanism ..................................................28
Interrupting a program..............................................28
To cancel a program ...............................................28
Changing a program ...............................................28
Detergent . . . . . . . . . . . . . . . . . . . . . . . . . . . . . . . . . . . . . . . . . . . . . . . . . . . . . . . 29
Washing with several components ....................................30
Fabric softeners / liquid starch .......................................31
Automatic dispensing of fabric softener or liquid starch .................31
External dispensing system..........................................32
Empty sensor ..................................................32
Contents
2

Cleaning and care . . . . . . . . . . . . . . . . . . . . . . . . . . . . . . . . . . . . . . . . . . . . . . . . 34
Cleaning the machine ..............................................34
Cleaning the inlet hose filter .........................................37
Frequently asked questions . . . . . . . . . . . . . . . . . . . . . . . . . . . . . . . . . . . . . . . . 38
The program does not start ..........................................38
A fault message appears in the display ................................39
General problems .................................................40
Poor wash results..................................................41
The door will not open ..............................................42
To continue a program after a power failure .............................42
Service interval display .............................................43
Opening the door during a power failure or when the drain is blocked ........44
Drain the machine. ..............................................44
Cleaning the drainage system .....................................45
Opening the drum door ..........................................46
After sales service . . . . . . . . . . . . . . . . . . . . . . . . . . . . . . . . . . . . . . . . . . . . . . . . 47
Installation instructions . . . . . . . . . . . . . . . . . . . . . . . . . . . . . . . . . . . . . . . . . . . 49
Installation . . . . . . . . . . . . . . . . . . . . . . . . . . . . . . . . . . . . . . . . . . . . . . . . . . . . . . 50
Front view........................................................50
Rear view ........................................................51
Side view ........................................................52
View from above ..................................................52
Installation .......................................................52
Installation on an elevated base ......................................53
Coin mechanism ..................................................53
Installation site ....................................................54
Removing the shipping struts ........................................54
Re-fitting the shipping struts .........................................55
Leveling the machine...............................................56
Plumbing ........................................................57
Recycled water connection .......................................58
Hot water supply................................................58
Drainage ........................................................59
Drain pump ....................................................59
Electrical connection ...............................................60
Technical data . . . . . . . . . . . . . . . . . . . . . . . . . . . . . . . . . . . . . . . . . . . . . . . . . . . 61
Help protect our environment. . . . . . . . . . . . . . . . . . . . . . . . . . . . . . . . . . . . . . . 62
Contents
3

,WARNING - To reduce the risk of
fire, electric shock or injury to
persons while using your appliance
follow basic safety precautions,
including the following:
This appliance complies with current
safety requirements. Improper use
of the appliance can lead to
personal injury and material
damage.
Read all instructions before
installation or use of the washer to
prevent injury and machine damage.
All personnel working with this
machine must be fully trained in all
aspects of its use and safety.
Keep these operating instructions in
a safe place and pass them on to
any future user.
READ AND SAVE THESE
INSTRUCTIONS
WARNING - To reduce the risk of fire,
electric shock or injury:
Correct application
~Only use the washing machine to
wash items which the fabric care label
specifies as being machine washable.
Any other use may be dangerous.
~The washer must be operated
according to the operating instructions
and must be serviced and checked
regularly.
~This washing machine is not
intended for outdoor use.
~Persons who lack the physical,
sensory or mental ability or experience
to operate the appliance should not use
it without supervision or instruction by a
responsible person.
~Do not allow children to play on or in
the appliance. Close supervision is
necessary when the appliance is used
near children.
~Make sure that no unattended
children can access the machine.
There is a potential danger that children
can be trapped in the drum. This may
cause serious injuries.
~The drum door glass will be hot
when washing at very high
temperatures. Do not touch the glass.
Danger of burns! Keep children away
from the washer when in use.
~This machine is designed for
industrial use only. Do not use in
residential homes or areas, which can
be accessed by the public.
~It is the responsibility of the operator
to ensure that the disinfection standard
is maintained, by carrying out
appropriate routine tests according to
local codes and regulations.
Disinfection programs must not be
interrupted, as this can have an
adverse effect on the disinfection
results.
~Before the appliance is removed for
service or discarded, remove the door.
IMPORTANT SAFETY INSTRUCTIONS
4

Technical safety
~Check the packaging, the washer
and accessories for any signs of
damage before installation and
operation.
Do not install or operate a damaged
washer.
~Before using the washer for the first
time, ensure that the shipping struts are
removed (see "Installation").
~GROUNDING INSTRUCTIONS
This appliance must be grounded. In
the event of a malfunction or
breakdown, grounding will reduce the
risk of electric shock by providing a
path of least resistance for electric
current. This appliance is equipped
with a cord having an equipment-
grounding conductor and a grounding
plug. The plug must be plugged into an
appropriate outlet that is properly
installed and grounded in accordance
with all local codes and ordinances.
~WARNING - Improper connection of
the equipment-grounding conductor
may result in a risk of electric shock.
Check with a qualified electrician if you
are in doubt as to whether the
appliance is properly grounded.
~Installation, repair and maintenance
work should be performed by a Miele
authorized service technician. Work by
unqualified persons could be
dangerous and may void the warranty.
~Do not install your washing machine
in rooms where temperatures below
freezing may occur.
~Before hanging the drain hose in the
sink, make sure the water will drain
away quickly enough.
Secure the hose. The force of the water
exiting the hose can cause an
unsecured hose to pop out of the sink.
~Do not repair or replace any part of
the appliance or attempt any servicing
unless specifically recommended in
these operating instructions.
~Before connecting the machine,
ensure that the connection data on the
data plate (fusing, voltage and
frequency) match the mains electrical
supply. If in doubt contact an
electrician.
~Do not use an extension cord to
connect this appliance to the power
supply. Extension cords do not
guarantee the required safety of the
appliance (e.g. danger of overheating).
~Do not use old hoses to connect the
machine to the water supply. Inspect
the hoses regularly for damage. They
should be replaced as needed in order
to prevent water damage.
~Do not modify the plug provided
with the appliance - if it will not fit into
the outlet, have a proper outlet installed
by a qualified electrician.
~If the power cord is damaged it
must only be replaced by a Miele Ser-
vice technician with a genuine Miele
power cord.
IMPORTANT SAFETY INSTRUCTIONS
5

~Defective components must be
replaced with genuine Miele spare
parts only. Only these parts are
guaranteed by Miele to comply with
safety requirements.
~Do not use force when opening the
drum door. It is fitted with a safety
device to prevent it being opened by
mistake.
~If this appliance is being used in a
industrial environment, please ensure
that all relevant health and safety
regulations are obeyed.
~This appliance must not be used in
mobile installations (e.g. ships).
~During extended absences close
the water supply.
~Under certain conditions, hydrogen
gas may be produced in a hot water
system that has not been used for 2
weeks or more. HYDROGEN GAS IS
EXPLOSIVE. If the hot water system has
not been used for such a period, turn
on all hot water faucets and let the
water flow from each for several
minutes before using the washing
machine. This will release any built-
hydrogen gas. Do not smoke or use an
open flame during this time, the gas is
flammable.
IMPORTANT SAFETY INSTRUCTIONS
6

Safety
~Do not wash articles that have been
previously cleaned, washed or soaked
or spotted with gasoline, dry-cleaning
solvents or other flammable
substances. These articles generate
fumes that could ignite or explode. Do
not add these items to the wash load.
~Do not add gasoline or dry-cleaning
agents that contain solvents to the
wash water. The use of such products
can damage the appliance and
generate toxic fumes. Fire hazard and
danger of explosion!
~Never use or store gasoline,
petroleum-based substances or other
easily flammable substances near the
machine. Fire and explosion hazard!
~Do not use cleaning solvents on or
near the machine or the controls.
Contact with these solvents will
damage the surface.
~Do not use dyes unless they are
recommended for use in washing
machines. Closely follow the
manufacturer's instructions.
~Color removers contain sulphur
compounds which can lead to
corrosion. Therefore, do not use color
removers in the washer.
~Do not use a pressure washer or
hose to clean the washer.
~Ensure that no foreign objects are
left in pockets (e.g. nails, coins, paper
clips, etc.) this can cause damage to
clothes and the machine.
~Proper dosing of the detergent will
eliminate the need to remove lime
deposits. However, if heavy limescale
does form on the washer, select a
descaling agent with corrosion
protection. Closely follow the
instructions of the descaling
manufacturer.
~It is particularly important to observe
the manufacturers' instructions when
using a combination of cleaning agents
and special products. Only use the
product for the application described
by the manufacturer in order to avoid
any material damage or strong
chemical reactions.
IMPORTANT SAFETY INSTRUCTIONS
7

Chlorine damage to
components
How to handle chlorine bleach and
perchloroethylene (PCE)
~Heavy use of chlorine products
increases the risk of damage to the
appliance components.
Depending on the chlorine
concentration, the exposure time, and
the temperature, the use of liquid and
powdered chlorine-based bleaches
can erode the stainless steel protective
layer and lead to corrosion of the
appliance components. Therefore, it is
recommended that these products not
be used. Instead you can use
oxygen-based bleaches.
If you still need to use chlorine-based
bleaches for special cases, you will
always need to perform a neutralizing
step. Failure to do so can result in
permanent and irreversible damage to
the washing machine and the
laundered items.
Chlorine neutralization
Chlorine neutralization must be done im-
mediately following the use of a
chlorine-based bleach. For best results,
use hydrogen peroxide or an
oxygen-based laundry detergent or
bleach, without draining the drum.
If thiosulfate is used (especially with hard
water), lime deposits can form, leading to
residue on the laundered items or
deposits on the washing machine. The
preferable alternative solution is to use
hydrogen peroxide, because it promotes
the neutralization of chlorine.
The exact amounts to be used and the
temperatures selected should be
based on the neutralizer manufacturers'
recommendations, then checked for
efficacy. The laundry will need to be
tested to ensure that no active chlorine
remains behind after neutralization.
Accessories
~Only use genuine Miele
accessories. If unapproved parts are
used, guarantee, performance and
product liability claims may become
void.
Disposing of your old
appliance
~Ensure that the appliance presents
no danger to children while being
stored for disposal. Before discarding
an appliance, unplug it from the outlet,
cut off its power cord and remove any
doors to prevent hazards.
SAVE THESE INSTRUCTIONS
AND REVIEW THEM
PERIODICALLY
IMPORTANT SAFETY INSTRUCTIONS
8

Control panel
aDisplay
See the following pages for more
information.
bDirect select buttons
To select a wash program directly.
You can also save a "Favorite" wash
program on these buttons.
cStart button
dPC / Optical interface
Allows a service technician to check
and update the wash programs
eJog shuttle
Turn to select menus
Press to confirm the selection
fOn-Off button s
* Contents in the display will vary with program offering
Before using for the first time
Before using the machine for the first time ensure that it is correctly installed
and connected. See "Installation". Also check that the drain filter is securely
tightened to prevent the risk of water leaks during use.
See the separate booklet supplied with the machine "Commissioning the
machine / Program chart / Settings".
Guide to the Washer
9

Display
Display contents will vary with program offering.
Main menu
1 Cottons Uni. 60°C Program selection...
2 Minimum iron 40°C Settings F...
3 Delicates 40°C
4 Woollens H30°C 10:00
When the machine is turned on, the display shows the main
menu (with "Favorites" listed). "Program selection" is
highlighted.
If the display is dark (in Standby mode) turn the jog shuttle.
Jog shuttle
Turn the jog shuttle to select a program or setting.
Press the jog shuttle to confirm the selection.
Direct select buttons
The first four programs shown in the display on the left are the
"Favorites". They can be selected with the direct select
buttons.
The Favorites can be individually set to your desire. See
"Favorites" for more information.
The direct select buttons have different functions in the other
menus. In these menus an arrow His displayed above the
respective button with the function description of the button.
Program selection options
There are two ways of selecting a program:
–Option 1: Select and confirm the menu "Program selection"
in the display with the jog shuttle.
–Option 2: Press one of the direct select buttons
DEFGfor direct access of the basic menu for
the selected program.
Guide to the Washer
10

Program selection menu
Program
selection
Cottons Hygiene V
Cottons Uni.
Minimum iron
Delicates H
All programs can be selected with the jog shuttle. Depending
on the direction the jog shuttle is turned the highlighter moves
up or down.
The arrows e- at the right side of the display show that more
selections are available.
^Press the jog shuttle to open the basic menu of the
selected program.
Wash program main menu
Cottons Uni. 60°C 1300 rpm
Duration: 0:53 h
Extras
H
Timer Y
H
Back A
H
The program components (program, temperature and spin
speed) can be selected by turning the jog shuttle. The
selected component is highlighted. Press the jog shuttle to
select the component. The respective submenu is displayed.
The submenus "Extras" and "Timer" can be selected with the
direct select buttons.
^To go back to the main menu press G"Back".
All components can also be selected and confirmed using
only the jog shuttle.
Settings menu J
The "Settings" menu allows you to adjust the washer to
individual needs. See "Settings" for more information.
Guide to the Washer
11

Operating the washer
The appearance of the main menu will vary depending on
the "Control" setting selected.
The machine is operated either with the direct select buttons
D,E,F,Gor the jog shuttle.
WS direct select buttons, basic
1 Cottons Uni. 60°C
2 Minimum iron 40°C
3 Delicates 40°C
4 Woollens H30°C
Four programs are available. To specify which programs are
available go to the "Settings - Supervisor level" menu.
WS direct select buttons + Logo
M
PROFESSIONAL
30°C
H
60°C
H
95°C
H
More
H
Twelve programs are available. To specify which programs
are available go to the "Settings - Supervisor level" menu.
Guide to the Washer
12

1. Sort the laundry
^Empty all pockets.
,Foreign objects left in pockets
(e.g. nails, coins, paper clips, etc.)
can cause damage to clothes and
the machine.
^Pre-treat stains.
Tough stains (blood, egg, coffee, tea
etc.) or badly soiled areas (collars and
cuffs) should be pre-treated with a stain
remover or a paste made of powder
detergent and warm water. Dab stains
with a damp light colored cloth. Do not
rub.
,Do not use chemical solvents in
the machine.
^Sort the laundry.
General tips
–Dark fabrics often bleed the first few
times they are washed. They should
be washed separately several times
before being included in a mixed
load.
–Remove any lead weights or strips
from curtains before washing.
–Loose under-wires should be
removed or sewn in place before
washing.
– Woolens and knitted garments
should be turned inside out.
– Close zippers and hooks and eyes
before washing.
– Comforter covers and pillowcases
should be fastened in order to
prevent small items from getting
trapped inside of them.
Do not machine wash items if it is not
recommended on the fabric care label
(hsymbol).
Tips
13

2. Load the drum
^Switch the machine on with the K
On/Off button.
^To open the drum door pull on the
handle.
Do not use force as it is fitted with a
safety device to prevent it being
opened by mistake. Forcing the door
handle can cause damage to the
locking mechanism (see "Frequently
asked questions - The door will not
open").
^Load the laundry loosely into the
drum.
For best results, wash mixed loads of
small and large items. This will improve
washing effectiveness and help
distribute the load evenly.
The most efficient use of energy and
water is achieved when a full load is
washed. However, do not overload as
this causes creases and reduces
cleaning efficiency.
,Make sure that no items are
caught between the door and the
drum.
^Close the drum door. Press the door
firmly shut then lock the handle into
position.
Do not slam the door.
3. Select a program
^Select an appropriate program for
your wash load.
See the separate booklet supplied with
the machine "Commissioning the
machine / Program chart / Settings".
Tips
14

Washing
The number shown in the bucket is
the maximum temperature the
garment can be washed at. The
number of bars under the symbol
indicate the level of agitation
permitted.
9No bar under the symbol:
= normal agitation
4One bar under the symbol:
= reduced agitation
cTwo bars under the symbol:
= much reduced agitation
/Hand wash (if no temperature
is specified use the lowest
temperature or cold)
hDo not wash
Drying
The number of dots indicates the
drying temperature
qNormal temperature
rLow temperature
sDo not tumble dry
Ironing
The number of dots indicates the
ironing temperature
IHot iron (max sole plate temp.
approx. 392°F/200°C)
HMedium hot iron (max sole
plate temp. approx.
302°F/150°C)
GCool iron (max sole plate
temp. approx. 230°F/110°C).
Do not steam iron garments
carrying this symbol.
JDo not iron
Professional cleaning
fDry clean only. The letters
indicate the type of cleaning
agent required.
p
wProfessional Wet Clean only
DDo not dry clean
Bleaching
xAny oxidizing bleaching
agent can be used
{Only use an oxygen based
bleach or a non-chlorine
bleach
zDo not bleach
Wash care label symbols
15

,Be sure to read both the "Tips"
and "Wash care label symbols"
sections before starting a wash load.
aSort the laundry
bLoad the drum
^Turn on the machine.
^Open the drum door.
^Load the laundry loosely into the
drum.
,Make sure that no items are
caught between the door and the
drum.
^Close the drum door (1.). Press the
door firmly shut then lock the handle
into position(2.).
Do not slam the door.
Quick guide
16

cSelect a program
^Select the most appropriate program
for the load being washed.
See the separate booklet supplied with
the machine "Commissioning the
machine / Program chart / Settings" for
a list of available programs.
You can select a program either by:
–selecting a "Favorite" by pressing the
respective direct select button, or
– selecting from the "Program
selection" menu by turning the jog
shuttle.
^If desired, select "Extras" and/or a
"Timer" start time with the respective
submenus.
Coin mechanism
If a coin mechanism operates the
machine, please regard the displayed
request to pay.
If the door is opened after a
program has started or if the
program is canceled the credit is
lost.
Quick guide
17

dAdding detergent
Use detergent according to the laundry
soiling and water hardness.
Too little detergent may cause:
–Laundry not getting properly clean,
and with time may become grey and
hard to the touch.
–Greasy particles clinging to laundry.
–Limescale deposits on the heater
elements.
Too much detergent may cause:
– Over sudsing with minimal drum
movement; poor wash, rinse and
spin results.
– Higher environmental burden.
See "Detergent" for more information.
This machine is set up for
connection to an external
dispensing system for dispensing
liquid agents (see "Detergent -
External dispensing system").
^Pull out the detergent drawer and
add detergent to the compartments
as follows:
i= Detergent for the pre-wash
(1/4of the total recommended
amount of detergent)
j= Detergent for the main wash
§= Fabric softener or liquid starch
^Close the detergent drawer.
The detergent drawer must not be
opened during a program. It must
remain closed while the machine is
in use.
The §compartment is not used
during disinfection programs. Do not
put anything in the §compartment.
Quick guide
18

eStarting a program
"Start" flashes when a program can be
started.
^Press the "Start" button.
The "Start" button lights.
The display shows the approximate
program run time. It will count down in
minutes. In the first 10 minutes the
washer calculates the water
absorbency of the laundry. The overall
program time may be shortened or
lengthened.
Additionally the sequence cycle is
displayed. The washer shows the
current program step.
Press one of the following direct select
buttons during the running program:
– Button D"Extras"
can be used to select or de-select
extras.
– Button E"Timer"
the time of day and the approximate
program end is displayed.
–Button G"Cancel"
to cancel the currently running
program. The wash water will be
drained away.
fAt the end of a program
"Finish" will appear in the display.
^Open the drum door.
^Remove the laundry.
Check the drum for any missed
pieces of laundry. Items
inadvertently left in the washer may
get damaged (e.g. shrink or
discolor) during the next wash cycle.
^Close the drum door. Otherwise
foreign objects may find their way
into the drum. These could be
inadvertently washed and cause
damage to laundry.
^Turn the machine off using the
"On/Off" button.
Quick guide
19

Selecting/changing a program
Main menu
1 Cottons Uni. 60°C Program selection...
2 Minimum iron 40°C Settings F...
3 Delicates 40°C
4 Woollens H30°C 03:00
^Press direct select button D.
Main menu
Cottons Uni. 60°C 1300 rpm
Duration: 0:53 h
Extras
H
Timer Y
H
Back A
H
^Using the jog shuttle you can then highlight the following
options in the display: Program, Temperature or Spin
speed and confirm your selection by pressing the jog
shuttle.
Depending on the option highlighted, the following will be displayed:
– Program selection
Program
selection
Back A
Cottons Hygiene
Cottons Uni.
Minimum iron H
^Use the jog shuttle to select the desired program and
confirm. The main menu will reappear.
Select a program
20
Other manuals for PW 6080 VARIO
4
Table of contents
Other Miele Washer manuals

Miele
Miele W 829 User manual

Miele
Miele PW 6163 User manual

Miele
Miele W1070 - User manual

Miele
Miele G 7804 User manual

Miele
Miele W 833 User manual

Miele
Miele WS 5425 MC 7 Professional User manual

Miele
Miele WCA 030 Active User manual

Miele
Miele G 7804 User manual

Miele
Miele WKH 130 WPS User manual

Miele
Miele PWM 912 User manual

Miele
Miele W 4446 WPS User manual

Miele
Miele WSG 663 Series User manual

Miele
Miele PW 6065 User manual

Miele
Miele W3039i Parts list manual

Miele
Miele PWM 920 SI/SD User manual

Miele
Miele PWM 916 SI/SD User manual

Miele
Miele WWI 860 User manual

Miele
Miele W 820 User manual

Miele
Miele WCD 320 User manual

Miele
Miele PW 6201 EL User manual