Mienta Cook'n'Fry User manual

Instruction Manual 1
Instruction Manual
Cook ´n´ Fry DF15302A
www.mienta.fr

Thank you for choosing
products
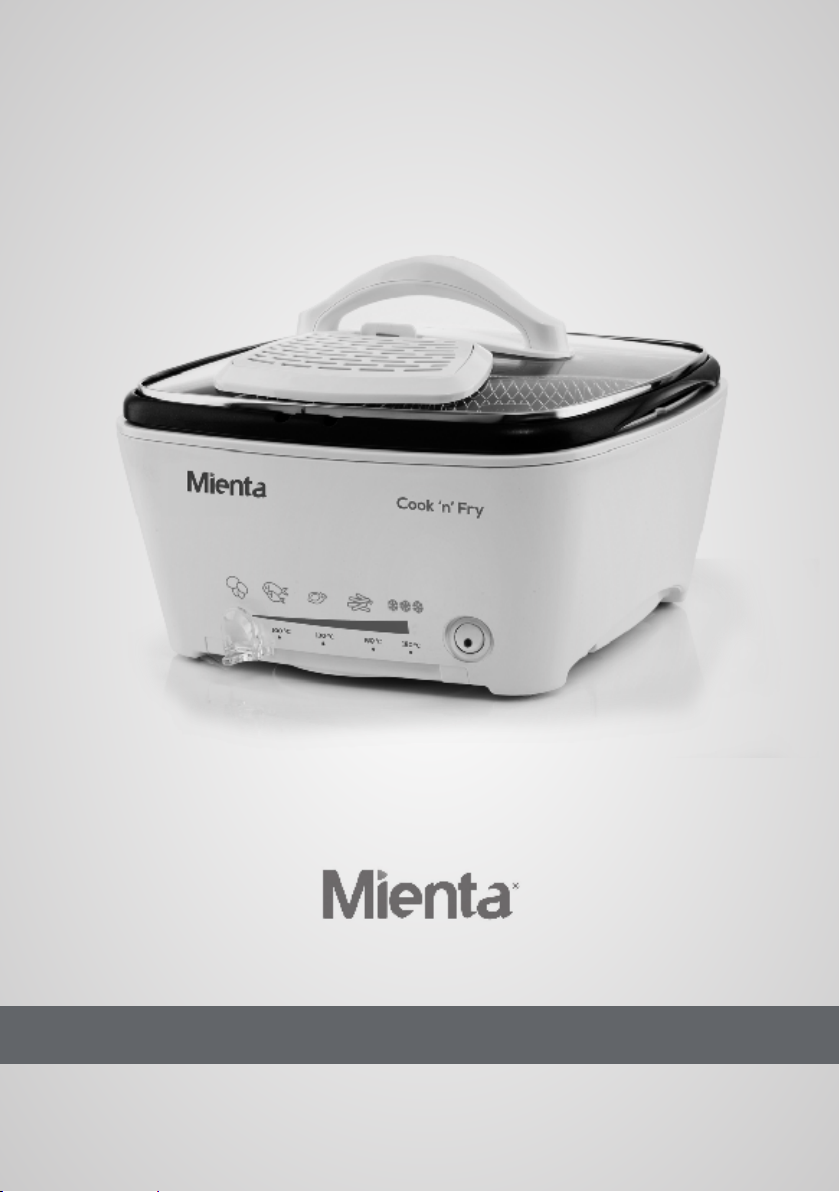
Components
A. Filter with cover
B. Lid
C. Basket with foldable handle
D. Removable bowl
E. Maximum level for oil (FRY 2)
F. Temperature selector
G. On/Off switch
H.
I.
J.
Cool wall body for maximum security
Low steam rack
High steam rack
Before using your appliance, you must familiarize yourself with the different components
of your appliance. Every letter corresponds to one of the components of your appliance.
I
J
2Instruction Manual

Instruction Manual 3
Safety instructions
Please carefully read the instructions before using your appliance
for the first time. Any use that does not conform to the following
instructions does not hold accountable and cancels your
product’s warranty.
This appliance can be used
by persons with reduced
physical, sensory or mental
capabilities, or lack of experi-
ence and knowledge. If they
have been given supervision
or instruction concerning use
of the appliance in a safe
way and if they understand
the hazards involved. Chil-
dren should not be allowed
to play with the appliance.
This appliance shall not be
used by children. Keep the
appliance and its cord out of
reach of children.
This appliance has been
designed for domestic use
only. Any commercial use,
misuse or failure to conform
with the instructions cancels
the warranty and frees
from all responsibility.
Use the appliance on flat,
stable and heat-resisting
surfaces only.
Distance the appliance from
water splashes.
Never use this appliance if it
is not working properly or
presents signs of damages. In
such cases, directly contact
an approved service center
(see list in warranty certificate).
Any intervention other than
cleaning and normal mainte-
nances must be carried out by
an an approved service
center.
Never put the machine, the
power cord or the plug into
water or any other liquid.
Unplug the appliance as soon
as you stop using it, before
assembly and disassembly and
during the cleaning process.
Make sure that the voltage
rating of your appliance is
compatible with that of your
household’s electrical supply.
This appliance matches the
current security directives.
Any connection error cancels
the warranty.
The machine must be con-
nected to an earthed plug.
Never leave the power cord in
contact with the hot parts of
your appliance, near a source
of heat or over sharp edges.
•
•
•
•
•
•
•
•
•
•
•
•
•
•

Do not use the appliance of
the power cord or the plug
are damaged. To avoid
accidents, they must be
replaced at an approved
service center (see
list in warranty certificate).
For your own safety, only
use the spare parts and
accessories that are suitable
to your appliance.
Never turn on the fryer
without filling the bowl with
the necessary amount of oil
or fat.
The fryer is equipped with a
thermostatic safety device
which automatically cuts off
the electrical power in case
of an accidental overheating.
Never move the fryer while in
use or while the oil is still hot.
Hot oil may cause extremely
dangerous burns.
It is necessary that you wait
for the oil to cool down before
emptying the fryer.
Never block the odor filter (A)
situated on the lid with your
hands or any other objects
(fabrics, dishes, plates, etc....)
as you run the risk of getting
burnt.
Always make sure that the oil
or fat level is situated above
the “min” level in your bowl
(D), and that it does not
exceed the “Fry2” level.
Oil and fats are flammable
products. If the oil or fats
catch fire, unplug the fryer on
the spot, cover it with its lid or
using a damp cloth to sup-
press the flames, but never
use water.
•
•
•
•
•
•
•
•
•
4Instruction Manual

Before your first use
Unpack your appliance and remove all packaging (stickers, papers, plastic bags, etc…)
before use.
Wash the bowl, the basket, the steam racks and the lid with warm water and washing
soap. Rinse thoroughly, and dry gently. You may also wash them in a dish-washer.
Place the bowl back into the base in such a way that the bowl’s 4 feet get fixed into
their holes (situated inside the base). If the bowl does not fit correctly into its place, turn
it around a half-turn until the pouring spout points to the back.
Using the appliance
Adding oil or other fats
Remove the lid and the basket before filling the bowl with oil or fat.
Depending on the type of use (cooking rice, simmering soups, stir-frying or deep-frying),
fill the bowl with the appropriate quantity of oil. Follow the table below for the best results.
If you use solid fats, make sure to melt them in a separate pan before pouring it into the
bowl. In the case of melted fat, use the same quantity of melted fats as you would oil.
Cooking
method
Cooking
rice
Simmer Sauté /
Stir-fry
Light fry Deep-fry
Oil volume 2-5 spoons 1 to a few
spoons
1 to a few
spoons (do
not exceed
0.5L)
1-1.5L (do
not exceed
the Fry 1
level)
2L do not
exceed the
Fry 2 level)
When filling oil, never exceed the “Fry 2” level indicated on your bowl.
If you are using solid fat, cut it into pieces and melt it in a separate pan, then pour it into
the bowl. Never use the basket or the bowl to melt the solid fat.
After pouring the oil and/or the solid fat into the bowl, plug your appliance in.
Never remove the bowl while the appliance is plugged in and in use. For stirring food,
avoid using metal utensils, or any other type that could damage the bowl’s non-stick
coating. Never fill your bowl with a quantity of oil exceeding the “Fry 2” level, so as to
avoid overspills.
Instruction Manual 5

Your Mienta Cook’n’Fry is a versatile appliance and can be used for more than
10 functions:
1.
2.
3.
4.
5.
6.
7.
8.
9.
10.
11.
Deep fry (without the basket) food such as panées, fish and escalopes
Deep fry (using the basket) food such as French fries or chicken nuggets
Fry eggs or make pancakes
Steam vegetables, meat and fish using the high steam rack
Cook rice
Slow cook stews
Cook a whole chicken using the low steam rack
Boil pasta
Simmer
Pan fry steaks
Stir fry vegetables
The following sections will guide you through to obtain the best results while using your
appliance, depending on the cooking modes and recipes. Remember that the following
suggestions may be altered according to your own tastes and preferences.
6Instruction Manual

Helpful hints
You may add extra ingredients (raw or cooked) with the rice and water for cooking.
Raw ingredients: vegetables, raisins…etc.
Stir fried ingredients: these ingredients can be stir fried in the bowl prior to putting in the
rice and water. Examples of such ingredients are: vegetables, minced meat or chicken,
pine seeds, almonds, cardamon seeds, other condiments…etc
1. Set the temperature to 100 ˚C and turn on the appliance. Keeping the lid open, allow
enough time for the rice to fully absorb the water.
2. Once the water is absorbed, turn down the temperature setting to 80˚C, close the lid,
and allow the rice to cook for 30 minutes.
Note: Please keep in mind that water quantities to match rice quantities may vary and
can be adjusted to your own taste.
Type of rice Amount of rice to cook Adequate amount of water
to add
Basmati rice
1 cup
Maximum capacity: 4 cups
(rice) + 4 cups (water)
1 cup water for every cup of
rice
American grain
white
1 cup
2 cups
3 cups
4 cups (max)
1.5 cups of water
3 cups of water
4 cups of water
5 cups of water (max)
Egyptian grain
white
1 cup
For every additional cup of rice
Maximum capacity: 4 cups
(rice) + 6 cups (water)
1.5 cups
1.5 cup of water for every
additional cup of rice
(example: 4 cups of rice)
Cooking rice
Before cooking the rice, wash it thoroughly under cold running water to remove the
excess starch. It is recommended to use a sieve for this purpose. Make sure to remove
the wire basket from the bowl prior to cooking the rice.
1. Measure the adequate quantity of rice and the equivalent amount of water to be
added. As different types of rice require different amounts of water, please refer to
the table below for the suggested measures. Please remember these measures are
mere suggestions; you may choose to follow them or not according to your own taste.
Note: Do not exceed in any case a maximum of 4 cups of rice and 6 cups of water in
any given preparation, or go above the mark “FRY 2” in the bowl.
2. Pour the washed rice and the water in the bowl.
3. Add salt, pepper and other spices as per your own taste.
4. Add a small amount of cooking oil with the mix. This amount usually ranges between
2 - 5 tablespoons depending on the number of cups of rice to be cooked.
Instruction Manual 7

Simmering soups and stir-frying vegetables
• Pour water or oil into the pan, depending on the recipe. You may cover the bowl or
not while cooking.
• Set the thermostat to:
* 100°C to simmer various soups
* 130°C to stir-fry vegetables and other ingredients
Your appliance may be used as a simmering or sauté- pan.
After the cooking process is over, set the thermostat to the position 0 and unplug the
appliance.
Below are 's suggestions regarding cooking times and quantities. Remember that
they are only suggestions, and may be altered according to your tastes and preferences.
Fresh Foods Quantities Temperature Cooking Times
Onion soup
Minestrone Soup
Risotto
Sauted Vegetables
Salmon
Paella
Breaded
Beef Bourguignon
Chili con Carne
Breaded escalope
1.5L
2L
300g
800g
800g
500g
1 Kg
800g
4 pieces
100°C
100°C
130°C then 100°C
130°C then 100°C
160°C
130°C then 100°C
130°C
130°C then 100°C
130°C then 100°C
130°C
20 min.
60 min.
20 min.
20 min.
4-6 min.
40 min.
9-10 min.
90 min.
60 min.
5-7 min.
Frozen foods Quantity Temperature Cooking Times
Fish sticks 350g 130°C 10 min.
Stir-Fry tips
-
-
-
For stir frying set the thermostat to the position 130º C.
For best results pre heat the oil before cooking your food.
Once the indicator light in the goes off this means that the oil has
reached the correct temperature, and is therefore ready to use.
Using your steam racks
Your appliance comes with 2 steam racks; a low one and a high one. The low steam
rack is used when you want to steam/cook a large item, such as a whole chicken or
a large piece of meat. The high steam rack is used for steaming smaller items such as
sliced vegetables, salmon filet...etc.
Choose the steam rack that is more suitable for your preparation. Put a suitable amount
of water in the pot before putting the rack in place and then put your food on the rack.
Set your thermostat to MAX until the water starts to boil then turn it down to 100º C
for best result. Make sure that there is a sufficient amount of water in the pot at all times.
You must never use the pot while it is completely dry as this will damage the appliance
and void your warranty.
8Instruction Manual

Light and deep fry
Fill your bowl with the oil or solid fat in accordance with the amounts recommended in
this manual. You may choose to cook with or without the lid.
Set the thermostat to the position:
* 160°C for light-fry
* 180°C for deep-fry
• To obtain the best results, preheat the oil before cooking your food. The indicator light
goes off to indicate that the oil has reached the correct temperature, and is therefore
ready for the cooking.
• Slowly lower the basket into the oil from its draining position and then close the lid.
• When the cooking process is over, uncover the appliance. Lift the basket gently and
hang it on the edge of the bowl so as to drain the oil. Remove the basket and serve
the food.
• Set the thermostat to the position 0 and let the oil cool down. Close the lid while the
appliance is not in use. To avoid any hazards, never put your hands above the odors
filtration zone.
• Unplug the appliance.
Filtering the oil
Remove the little crumbs of food with a skimmer. You may store the oil in the fryer, or in
Deep frying tips
a separate airtight container. Filter the oil after every use using a paper filter. Remaining
crumbs tend to burn and deteriorate the quality of the oil rapidly. For this reason, we
advise you to filter the oil regularly to avoid spoiling the oil.
Changing the oil
Unplug the fryer. Wait until the oil cools down. Remove the lid. Empty the oil in a container
and dispose of it responsibly.
-
-
-
-
Use the proper temperature in to ensure food cooks and doesn’t
absorb too much oil.
Never turn on without filling the bowl with the neccesary amout of
oil or fat and check the oil level to make sure it is enough.
Filter the oil after each use to keep it clean and healthy
It is neccesary that you wait for the oil to cool down before empying the
.
Instruction Manual 9

Helpful hints
Never switch your appliance on if the latter does not contain oil or other fats.
Always use a good quality blended vegetable oil which can resist high temperatures.
Do not mix different types of oils. Change the oil when it becomes brown (every 8 to 12
uses, or depending on the amount of cooking). If you are using sunflower, peanut or soya
oil, make sure to change it after every 5 uses.
Never use lard or dripping as it may lead to overflowing, smoking or represent a fire
hazard.
Important note for use of solid fats: before every use, make holes in the solid fat with
a non-metallic spatula in the bottom of the bowl, to allow any water trapped under the fat
to escape in the form of vapor. Set the temperature selector to 150°C to melt the solid fat.
Food preparation
Regardless of the recipe, all foods need to be completely dry. This will prevent overflowing
and extend the life of the oil. When cooking potatoes (fries, chips and potato sticks),
make sure to carefully wash them in cold water to get rid of the starch. This will prevent
them from sticking to one another. Let them dry completely before frying them. When
cooking frozen foods, remove all the ice crystals on the foods before cooking, by placing
the frozen food into the basket and gently shaking it over the sink.
Cooking
Avoid filling the basket to prevent the oil temperature from dropping too much. This tends
to make the food greasy and soggy.
Your fryer’s capacity is limited to:
• 1.2 kg of fresh fries – 900 g of frozen fries
For better results, we advise you to use
• 800 g of fresh fries – 500 g of frozen fries
Do not let your fryer heat up unnecessarily. This way, the oil will live longer.
Do not leave your cooked food inside the basket in the draining position for too long,
steam will make them soft and soggy.
Cooking times
The following cooking times are mere suggestions. You may choose to follow them or
not, according your own tastes.
10 Instruction Manual

Fresh Foods Quantities Maximum
Temperature Cooking Times
Fries (maximum quantity)
Fries (recommended qty)
Fried chicken leg
Breaded veal escalope
Breaded cod fillet
Breaded fish fillet
Fried calamari
Prawn fritters
Apple doughnuts
1200g
800g
8-10 pieces
3 pieces
2 pieces
2 pieces
12 pieces
12 pieces
8 pieces
180°C
180°C
160°C
160°C
160°C
160°C
180°C
180°C
160°C
13-16 min
11-13 min
13-15 min
8-10min
8-9 min
8-9 min
6-8 min
5-6 min
7-9 min
Frozen Foods Quantities Maximum
Temperature Cooking Times
Fries (maximum quantity)
Fries (recommended quantity)
Fried chicken leg
Chicken nuggets
Fried mushrooms
Fried cod fillet
Fish sticks
Fried calamari
Prawn fritters
Beef balls
900g
500g
1000g
1000g
8 pieces
8 pieces
8 pieces
8-10 pieces
12 pieces
15 pieces
180°C
180°C
180°C
180°C
180°C
180°C
180°C
180°C
180°C
180°C
10-12 min
7-9 min
14-15 min
6-9 min
5-6 min
6-7 min
5-7 min
4-5 min
4-5 min
8-10 min
For frozen foods, set the temperature selector at 180°C. Cooking times can be set
according to your own preferences.
For crunchy results, make sure to carefully dry the food before the frying process, the
latter applies especially for fresh potatoes.
Big chicken or potato chunks need a longer cooking time. Adjust the temperature
following the chart above, or follow the instructions on the food’s packaging.
When cooking battered food or doughnuts, remove the basket to prevent the food from
sticking to it. Carefully manipulate the pliers when removing the food from the oil. Slowly
and gradually soak the food into the oil.
Cleaning and maintenance
1. Unplug your appliance and let it cool down before cleaning it.
2. Use a damp cloth to clean the external body of the appliance. Do not use scouring
or alcohol-based abrasive material.
3. Never immerse your appliance in water.
Instruction Manual 11

Cleaning the bowl:
• Your appliance's bowl is removable. You may wash it separately using liquid detergent or
inside a dishwasher.
• Wash the bowl with a soft sponge, liquid detergent and warm water or inside a dishwasher.
Never use abrasive material or scourers.
Note: if burnt food has stuck to the non-stick coating surface of your bowl, immerse the latter
for a few minutes in warm water before washing it.
• When placing the frying bowl inside a dishwasher, make sure not to damage or scratch the
interior of your bowl.
• After a few dishwasher washes, make sure to wipe the non-stick surface of your bowl with
a lightly oiled cloth.
Note: the scratches that may appear on the surface of your bowl do not worsen the functioning
of your appliance. They are a result of regularly using the appliance for its intended purposes.
• After several dishwasher washes, wipe the surface of your bowl with a dry cloth to preserve
its quality.
• It is essential that you thoroughly dry the ends of the heating element situated under the
bowl. Make sure not to come close to their silicone covers, seeing as how they are ultra-
sensible. Use a soft and dry cloth for such purposes.
• Do not attempt to clean every stain or dirt mark appearing on the plugs. The of
the plugs is not affected by such marks.
• Place the bowl back in the base unit after cleaning.
Cleaning other accessories:
• The external body of your appliance and the removable wire may be cleaned using a soft damp
cloth. They must then be thoroughly dried.
Warning: under no circumstances must the internal part of the base unit come into contact with
water or any other source of liquid.
• The basket and lid can be washed in warm soapy water using a soft sponge, or inside a
dishwasher.
Important: remove the from the zone before placing the appliance in the
dishwasher.
• It is advisable that you change your after every 50 uses of your appliance. service centers
are equipped with all the necessary accessories and spare parts suitable to your appliances.
• To replace the
• Remove the lid from the base unit.
• Unclip the cover situated on the appliance’s lid.
• Take off the and clean the odor zone with a soft and soapy cloth, then dry thoroughly.
• Fix the new over the odor zone, and clip the cover back.
Warning: the degrading quality of your may cause a degradation of It must therefore
be cleaned and changed regularly.
• Avoid knocking or dropping the appliance, as this might damage it and make it unusable. In such
a case, please contact any service center for repair or replacement of the appliance.
Technical Specifications:
Model: DF15302A
Power Supply: AC 230V~50/60Hz
Power: 1600W
VER.B
12 Instruction Manual

Troubleshooting
Problem Reasons Solutions
Excessive odor
The oil has deteriorated. Change the oil.
The type of fat used is unsuitable
for this type of cooking.
Use quality oil or solid fats. Do not
mix different types of oils and/or
solid fats.
The filter is saturated Replace your filter at a
service center.
Steam is escaping from below
the lid.
The lid is not properly closed. Make sure the lid is properly
closed.
The fryer has been filled over its
capacity. Check the oil level inside the bowl.
Overflow of oil
Too many ice crystals on frozen
food/ too much water inside the
hot oil.
Remove ice crystals/ dry the food.
Slowly lower the basket into the oil.
The recommended quantities have
been exceeded.
Do not exceed the maximum
quantities : 1.2 kg of fresh fries to
fry in 2 stages or 900 g of frozen
fries.
Deformed basket. Change the basket
Mixing different oils and fats. Empty and clean the bowl. Fill it
with one type of oil.
The oil is not regularly changed.
Change the oil regularly (at least
every 8-12 uses, more often if using
sunflower oil). Use a high quality of
mixed vegetable oil.
The oil is too hot. Consult an approved
service center.
The filter is saturated Replace your filter at a
service center.
Food remains soft and does not
turn crunchy.
Cooking temperature is too low. Adjust the temperature selector to
the right cooking temperature.
The basket is filled with too much
food.
Do not cook quantities that exceed
those previously indicated.
The oil is not hot enough. Consult an approved
service center .
The food is too thick and contains
a lot of water.
Try a longer cooking time. Cut the
food into smaller pieces.
Potato chips stick together.
Potatos have not been washed
before putting them into the oil/ too
much starch.
Carefully wash and dry the
potatoes.
The oil does not heat. The bowl has been heated without
oil inside. Damaged thermal fuse.
Consult an approved
service center.
Instruction Manual 13
Instruction Manual 13
Mode D’emploi
Cook ´n´ Fry DF15302A
www.mienta.fr

*Merci d’avoir choisi la qualité
Avant d’utiliser votre appareil, vous devez vous familiariser avec les différentes parties
de votre friteuse. Les lettres ci-dessous correspondent aux différents composants de
votre appareil.
Caractéristiques et composants
A. Filtre et son couvercle
B. Couvercle
C. Panier à poignée pliable
D. Cuve amovible
E. Niveau maximal d’huile (FRY 2)
F. Variateur de température
G. Interrupteur marche/arrêt
H.
I.
J.
Paroi froide pour un maximum de sécurité
Grille du vapeur inférieure
Grille du Vapeur supérieure
I
J
Mode D’emploi 15

Consignes De Securite
Vous êtes priés de lire les instructions d’utilisation attentivement
avant d’utiliser votre appareil pour la première fois: toute utilisation
qui n’est pas conforme à ces instructions dégagerait de
toute responsabilité et annule la garantik.
Cet appareil n’est pas prévu
pour être utilise par des
personnes (Y compris les
enfants) dont les capacités
physiques, sensorielles ou
mentales sont réduites, ou
des personnes dénuées
d’expérience ou de connais-
sance, sauf si elles ont pu
bénéficier, par l’intermédiarie
d’une surveillance ou d’in-
structions préalables concer-
nant l’utitilisation de l’appar-
eil. Il convient de surveiller les
enfants pour s’assurer qu’ils
ne jouent pas avec l’appareil.
Cet appareil ne doit pas être
utilisé pas les enfants.
Gardez toujours cet appareil
et son cordon électrique
hors de porteé des enfants.
Ce produit a été conçu pour
un usage domestique. Toute
utilisation commerciale,
inappropritée ou non con-
frome dégage le fabricant de
sa responsabilité et annule
sa garantie.
Utilisez l’appareil uniquement
sur une surface plane, stable
et résistante à la chaleur.
Eloignez l’appareil de toute
projection d’eau.
N’utilisez jamais votre appareil
s’il ne fonctionne pas
correctement, ou s’il est
endommmagé. Dans un cas
pareil, contactez un centre
service agréé (voir le certificat
de garantie)
Tout intervention, à l’exeption
du nettoyage et de l’entretien
normal doit être effectuée par
un centre de service agréé.
Ne mettez jamais l’appareil, le
cordon d’alimentation ou la
prise l’eau ou tout autre
liquide.
Débranchez votre appareil dés
ques vous cessez de l’utiliser
et lors du nettoyage.
Vérifiz que la tension nominale
de cotre appareil correspond
bein à celle de votre alimenta-
tion électrique du réseau.
Cet appareil est confrome aux
norms de sécurité actuelles.
•
•
•
•
•
•
•
•
•
•
•
16 Mode D’emploi

Toure erreur de branhement
annule la garantie.
Il est essentiel que votre
appareil soit connecté à une
prise de terre.
Le cordon d’alimentation ne
doit jamais être en étroite
proximité d’une source de
chaleur ou reposant sur des
bords tranchants.
Si le cordon d’alimentation
ou la prise sont endom-
magé, n’utilisez pas votre
appareil. Pour éviter tout
risque, ils doivent être rem-
placés par un centre de
service agréé (Voir la liste
dans le certicat de garantie).
Pour votre propre sécurité
utilisez uniquement les
pieces détachées et acces-
soires qui sont adaptés à
votre appareil.
Ne faites jamais fonctionner
votre friteuse sans remplir le
bol de la quatité nécessaire
d’huile ou autre matiére
grasse.
La friteuse est protégée par
un themostat qui agit en
dispostif de sécurité. Il coupe
automatiquement l’alimenta-
tion électrique en cas de
surchauffe accidentelle.
Ne déplacez jamais votre
friteuse alors qu’elle est en
cours d’utilisation ou quand
l’huile est encore chaude.
L’huile chaude peut provoquer
de trés graves brûlures.
Il est essentiel que vous
attendiez que l’huile ait refroidi
avant de vider la friteuse.
Ne bloquez jamais le flitre des
odeurs situé sur le couvercle
avec votre main ou tout autre
objet (tissu, vaisselle, plaque,
etc.) sous risqué d’être brûlé.
Verifiez que le niveau d’huile
est au-dessus du “0.5”
indiqué dans la cuve, mais qui
ne dépasse pas le niveau
“FRY 2”/
L’huile et les matieres grasses
sont des produits
inflammbales. Si l’huile ou la
matiére grasse prenneur feu
dé bébranchez l’appareil,
vouvrez le avec son couvrecle
ou en vous servant d’un
chiffon humide pour étouffer la
flamme, mais ne jamais utliser
de l’eau.
•
•
•
•
•
•
•
•
•
•
•
•
Mode D’emploi 17

18
Mode D’emploi
Avant la première utilisation
Déballez votre appareil et enlevez tous les emballages (autocollants, papiers, sacs
plastiques…) avant l'utilisation. Assurez-vous qu’il ne reste aucun collage ou papier
entre la cuve et le corps de la friteuse.
Lavez la cuve amobile, le panier, les grilles de vapeur et le couvercle avec de l’eau tiède
et du savon vaisselle. Rincez et séchez soigneusement. Vous pouvez aussi les laver au
lave-vaisselle. Remettez la cuve en place de façon à ce que les 4 pieds de la cuve
pénètrent dans leur zone de fixation située au fond du corps. Si la cuve n’est pas bien
installée, retournez- la d’un demi tour et recommencez de façon à ce que le bec verseur
se situe à l’arrière.
Mode d’emploi
Ajout d’huile ou de matière grasse
Retirez le couvercle et le panier avant de remplir votre cuve d’huile ou matière grasse.
Suivant votre utilisation (Cuisson de Riz, Mijoter, Sauter, Frire dans peu d’huile ou frire
dans l’huile profonde), vous devez mettre une quantité différente d’huile. Pour vous
aider, propose de vous guider à l’aide du tableau ci-dessous. Si vous utilisez
de la matière grasse, il faut faire fondre cette matière à part et utiliser autant de matière
grasse que d’huile.
Mode de
cuisson
Cuisson de
riz
Mijoter Sauter Frire dans
peu d’huile
Frire dans
l’huile
profonde
Volume
d’huile
2 à 5
cuillères
1 à
quelques
cuillères
1 à
quelques
cuillères
(ne pas
dépasser
0.5L)
1 à 1.5 litre
(niveau Fry
1)
2 litres
(niveau Fry
2)
Ne dépassez jamais le niveau indiqué “FRY 2” dans la cuve.
Si vous utilisez une matière grasse solide, coupez-la en morceaux et faites-la fondre
dans une casserole séparément puis versez le liquide dans la cuve.
Ne faites jamais fondre les blocs de graisse dans le panier, ni dans la cuve.
Enfin, après avoir rempli l’huile/la matière grasse dans la friteuse, branchez la friteuse.
Il ne faut surtout pas retirer la cuve pendant que l’appareil fonctionne. Pour remuer, évitez
d’utiliser des ustensiles en métal qui pourraient endommager le revêtement anti-adhérent
de votre cuve. Finalement, et peu importe le type de cuisson, ne dépassez jamais le
niveau de 2L (marqué par FRY 2 dans votre cuve) pour éviter tout débordement.

Mode D’emploi
19
Votre Mienta Cook’n’Fry est un versatile appareil et peut être utilisé pour plus de
10 fonctions:
1.
2.
3.
4.
5.
6.
7.
8.
9.
10.
11.
Frire dans l’huile profonde (sans panier) pour les aliments comme pannées,
poissons et escalopes.
Frire dans l’huile profonde (avec panier) pour les aliments comme Frites ou
Nuggets de poulet.
Frire des œufs ou faire des crêpes.
Faire cuire à la vapeur les légumes, viandes et poissons en utilisant la grille de
vapeur supérieure.
Cuisson de riz.
Cuisson lente des ragouts:
Cuisson un poulet complet en utilisant la grille de vapeur inférieure.
Bouillir les pates.
Mijoter les soupes.
Frire des biftecks.
Faire des Légumes sautés.
Les différentes sections suivantes vous serviront de guide pour obtenir les meilleurs
résultats dépendamment de chaque type de cuisson. Ces consignes sont des conseils
que vous pouvez, à tout moment, altérer suivant vos préférences.
Cuisson de riz
Avant de cuire votre riz, lavez-le soigneusement en le passant sous l’eau froide afin de
vous débarrasser de l’amidon. Nous vous recommandons d’utiliser une passoire pour
cette opération. Assurez-vous de retirer le panier métallique avant de verser votre riz et
commencer la cuisson.
1.
Mesurez une certaine quantité de riz, puis ajoutez la quantité d’eau adéquate. Les
différents types de riz nécessitent différentes quantités d’eau pour cuire à la perfection.
Prière de vous référer au tableau ci-dessous pour les quantités précises.
2.
3.
4.
Versez le riz humide et l’eau dans la cuve.
Ajoutez du sel, poivre et autres épices, en fonctions de vos préférences et recettes.
Versez une petite quantité d’huile au riz. En principe, cette quantité varie entre 2 à 5
cuillères à soupe, dépendamment de la quantité de riz.
Remarque: vos préparations ne doivent jamais dépasser 4 verres de riz et 6 verres
d’eau, ou dépasser le niveau “FRY 2” indiqué dans la cuve de votre appareil.
Conseils pratiques
Vous pouvez ajouter des ingrédients (crus ou cuits) à votre préparation de riz.
Ingrédients crus: légumes, raisins secs, etc.
Ingrédients cuits: ces ingrédients peuvent être sautées dans la cuve avant d’y ajouter le
riz et l’eau. De tels ingrédients peuvent être: des légumes, des viandes émincées, des
pignons, des amandes, des graines de cardamone ou tous autres condiments.
1.
2.
Réglez le sélecteur de température à 100°C et mettez l’appareil en marche. Ne
couvrez pas votre appareil afin de permettre au riz d’entièrement absorber l’eau.
Une fois l’eau absorbée, baissez le niveau de température à 80°C puis couvrez
l’appareil. Laissez le tout cuire pour 30 minutes.
Remarque: les quantités d’eau adéquates à chaque mesure de riz sont uniquement
données à titre indicatif, elles peuvent varier d’un type de riz à l’autre ainsi qu’en fonction
de vos préférences.

20
Mode D’emploi
Type de riz Quantité de riz à cuire Quantité d'eau adéquate
Riz basmati
1 verre
Capacité maximale: 4v. (riz)+
4v. (eau)
1 verre d’eau pour chaque
verre de riz
Riz blanc
américain
1 verre
2 verres
3 verres
4 verres (max)
1.5 verre
3 verres
4 verres
5 verres (max)
Riz blanc
égyptien
1 verre
Pour chaque verre de riz
supplémentaire
Capacité maximale: 4v. (riz)+
6v. (eau)
1.5 verre d’eau
1.5 verre d’eau
supplémentaire (exemple: 4 v.
de riz = 6 v. d’eau)
Mijoter les soupes et sauter les legumes
•
•
Dépendamment de la recette, remplissez la cuve d’eau ou versez-y quelques gouttes
d’huile pour y cuire vos aliments. Vous pouvez cuisiner avec ou sans le couvercle.
Réglez le thermostat à la position:
100 ˚C pour mijoter les différentes soupes
130 ˚C pour sauter les légumes et les autres ingrédients
Ainsi, votre appareil vous sert de poêle et sauteuse simultanément.
En fin de cuisson, réglez le sélectionneur à la position 0.
Débranchez l’appareil.
Vouz trouverez ci-dessous les temps de cuisson suggérés par . Ces suggestions
sont données à titre indicatif uniquement. Vous pouvez les adapter selon votre propre gré.
Les aliments frais Quantité Température Temps de cuisson
Soupe à l’oignon
Soupe Minestrone
Risotto
Poêlée de légumes
Filet de Saumon
Paella
Filet de poisson pané
Bœuf bourguignon
Chili con Carne
Escalope panés
1.5 litre
2 litre
300 g
800 g
800 g
500 g
1 Kg
800 g
4 pièces
100 ° C
100 ° C
130 ° C puis 100 ° C
130 ° C puis 100 ° C
160 ° C
130 ° C puis 100 ° C
130 ° C
130 ° C puis 100 ° C
130 ° C puis 100 ° C
130 ° C
20 min.
60 min.
20 min.
20 min.
4 - 6 min.
40 min.
9 - 10 min.
90 min.
60 min.
5 – 7 min
Les aliments surgelés Quantité Température Temps de cuisson
Bâtonnets de poisson 350 g 130 ° C 10 min.
This manual suits for next models
1
Table of contents
Languages:
Other Mienta Fryer manuals


