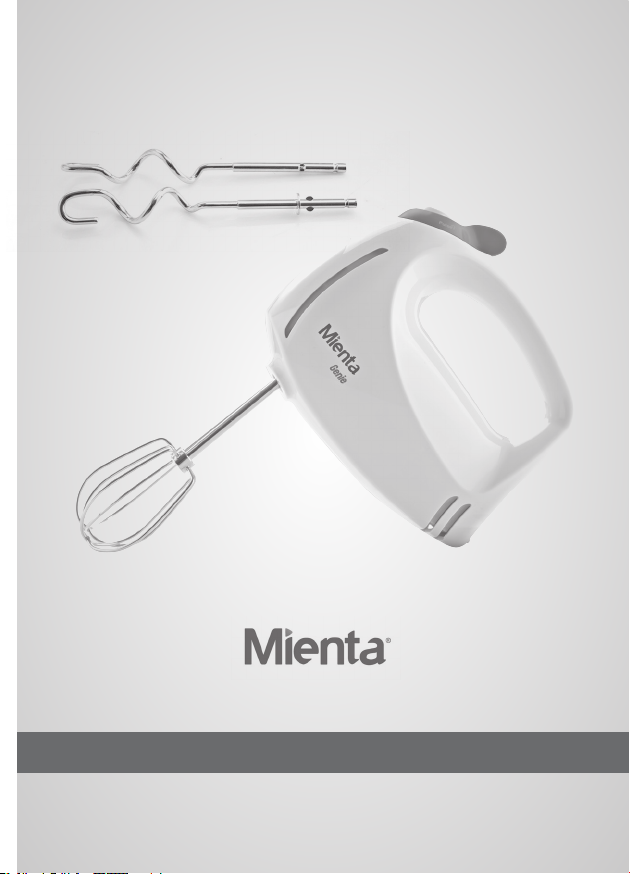
Mienta Genie HM13101A User manual

Instructions Manual 1
Instructions Manual
Hand Mixer Genie HM13101A

2Instructions Manual
Safety instructions
• Beforeusingthisappliance,read
theuserinstructionscarefully.
• Keeptheseinstructions,warranty
card, purchase receipt and, if
possible,thebox,togetherwith
innerpackaging.
• Thisapplianceisonlyfordomestic
use,andnotforcommercialuse.
• This appliance is not intended
for use by persons (including
children)withreducedphysical,
sensory or mental capabilities,
or lack of experience and
knowledge, unless they have
been given supervision or
instruction concerning use
of the appliance by a person
responsiblefortheirsafety.
• Childrenshouldbesupervisedto
ensurethattheydonotplaywith
theappliance.
• Alwaysdisconnectthemixerfrom
thesupplyifitisleftunattended
and before assembling,
disassemblingorcleaning.
• Donotallowchildrentousethe
mixerwithoutsupervision.
• Inspect the power cable and
applianceregularly.Ifanydefect
isfound,donotoperate.
• Do not attempt to repair the
unit yourself, but take it to an
authorisedrepairer.
• Ifthesupplycordis damaged,
it must be replaced by the
manufacturer, its service agent
oraqualiedpersoninorderto
avoidahazard.
• Keepapplianceandcableaway
from direct radiant heat from
thesun,fromdamp,fromsharp
edgesandotherdangers.
• Neveruseyourappliancewithout
payingattention!Alwaysunplug
theunitwhennotinuse,evenfor
amoment.
• Insertonlyoriginalparts(dough
hooks,beaters).
• Donotuseoutdoors.
• Neverimmersetheunitinwater
oranyotherliquids,orcomeinto
contactwiththem.Donotuseit
withwethands.
• Iftheapplianceshouldbecome
wetordamp,removeplugfrom
mainssocketimmediately.Donot
putyourhandsinthewater!
• Use this appliance only for its
intendedpurpose.
• Never touch the rotating tools
whilestillinmotion;alwayswait
forthemtostop.
• Toavoidsplashes,alwaysputthe
doughhooksorbeaterrightinto
thematerialtobemixedbefore
running.
• Neverusethisappliancetomix
orstiranythingotherthanfoods.
• Do not use during cooking
processesorwithboilingliquids.
Thank you for choosing products

Instructions Manual 3
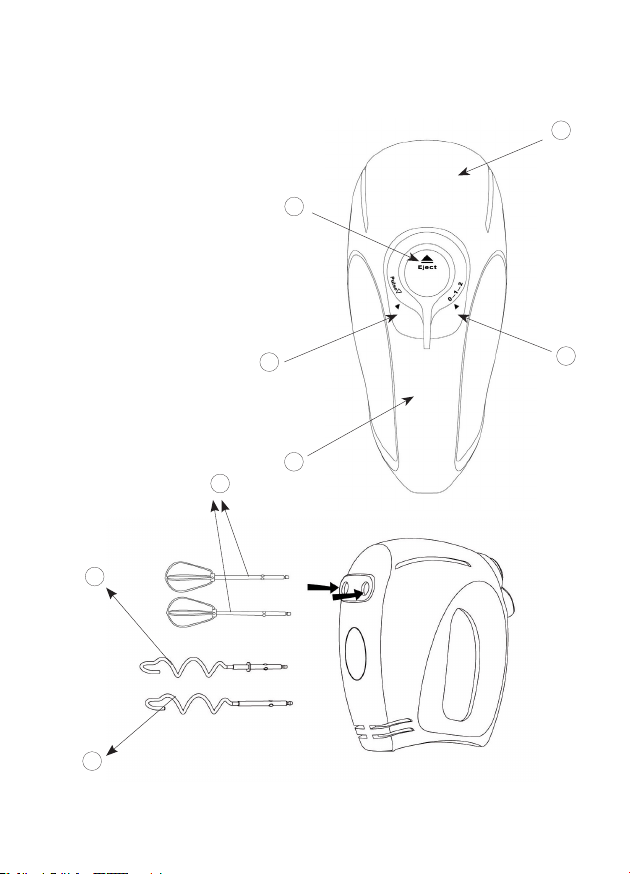
Description of Appliance
1.Main Body
2.Handle
3.Ejection button
4.Speed control
5.Pulse button
6.Beaters
7.Dough hook (for large hole)
8.Dough hook (for small hole)
2
6
7
8
5
3
1
4

4Instructions Manual
Preparing the dough hooks or beaters
Always check the mixer is switched off at the mains.
Inserting the dough hooks or beaters
• Insert the two beaters (6) into body of appliance, turn slightly
until they engage.
• Insert the two dough hooks (7, 8) into corresponding holes,
turn slightly until they engage.
• Never use beaters and dough hooks together.
Using your dough hooks or beaters
NB:
Do not run this appliance for more than 3 minutes without
interruption. Allow the appliance to cool down to room
temperature before continue operation.
Speed control (4):
0: stop
1: slow
2: fast

Instructions Manual 5
Pulse button (5):
For a short high-speed burst; press and release (Pulse action).
Once the turbo button is released, it will return back to “0”
position.
To remove dough hooks or beaters
To detach dough hooks / beaters, press the ejection button
(3). The ejection button will not work if the speed is not at “0”
position.
Short-time operation
The appliance is designed to process average domestic
quantities of food; it can be operated without interruption for a
maximum of 3 minutes, then it should be allowed to cool down
to room temperature before continue operation.
Operating Procedure
1.Ensure the speed control is at “0” position.
2.Insert plug into a mains socket (220-240V~ 50/60Hz).
3.Thrust the unit’s beating accessory(ies) into the material to
be beaten.
Adjust the speed control.
4.Gently move the unit up and down while beating.
NB:
For best results, use a medium-sized, high-sided bowl.

6Instructions Manual
Prepare dough with dough hook
accessories
Use a vessel with a height of 130 mm and an inner diameter of
170 mm at the top, tapering down to 150 mm at the bottom to
contain the 450g flour + 300g water.
Care of your appliance
• Remove plug from mains socket.
• Clean the mixer with a dry cloth after use.
• Wash beaters or hooks as normal with water and washing
liquid.
Technical Data
Model: HM13101A
Power Supply: AC 220V-240V 50/60Hz
Output: 180W
Instructions Manual 7
Batteur Genie HM13101A
Mode D’emploi

8Mode D’emploi
Consignes De Securite
• Cetappareiln’estpasconçupour
êtreutilisépardespersonnesaux
capacités physiques, mentales,
sensoriellesréduites,oumanquant
d’expérienceetdeconnaissances
(y compris les enfants), a moins
qu’ilsnesoientsurveilléesousous
l’instructionconcernantl’utilisation
de l’appareil par une personne
résponsabledeleursécurité.
• Les enfants doivent rester sous
surveillanceandegarantirqu’ils
nejouentpasavecl’appareil.
• Cet appareil est conçu pour
une utilisation exclusivement
domestique.
• Ne tirez pas sur le l pour
débrancherl’appareil,tireztoujours
surlaprisemâle.
• Nepasutiliserenextérieur.
• Pour des raisons de sécurité,
ne laissez jamais l’appareil
sans surveillance pendant qu’il
fonctionne.
• Si le câble d’alimentation est
endommagé,ildoitêtreremplacé
par le fabricant, son service
aprèsventeouunepersonnede
qualicationsimilaireand’éviter
undangerdechocelectrique.
• Nepasutiliserl’appareilsilesfouets
oumalaxeurssontendommagées
• Débranchez l’appareil quand
vous ne l’utilisez pas ou lors de
l’assemblage,désassemblagedes
fouetsoumalaxeurs,
• Tenirl’appareiletlecâbleàl’abri
delachaleurdirectedesrayonsdu
soleil,del’humidité,detoutobjet
aiguiséouautredanger.
• Toujours bien faire attention
lorsquevousutilisezvotreappareil!
Débranchez toujours l’appareil
lorsque vous ne l’utilisez pas,
mêmepouruninstant.
• N’insérezquelespiècesd’origine
(fouetsoumalaxeurs).
• Éteignez l’appareil avant de
changer les accessoires ou
d’approcher les pièces qui
tournentlorsl’utilisation.
• N’immergezjamaisl’appareildans
l’eauoutoutautreliquide.Nepas
utiliseraveclesmainsmouillées.
• Sil’appareilsetrouveêtrehumide
ou mouillé, débranchez-le
immédiatement.
• N’utilisezcetappareilquepource
quoiilaétéconçu.
• Netouchezjamaislespiècesqui
tournent tant qu’elles sont en
mouvement, attendez qu’elles
s’arrêtentcomplètement.
• Pour éviter les éclaboussures,
positionneztoujourslesfouetsou
malaxeurs verticalement dans la
préparationquidoitêtremélangée
avant de mettre l’appareil en
marche.
• N’utilisezjamaiscetappareilpour
mélangeroumixerautrechoseque
desaliments.
• Nepasutiliserlorsdelacuissonou
avecdesliquidesbouillants.
• Nepasutiliseravecdesglaçons,
alimentscongelésoutropdursqui
risqueraient d’endommager les
fouetsoumalaxeurs.
*Merci d’avoir choisi la qualité
Mode D’emploi 9
2
6
7
8
5
3
1
4
Caractéristiques Et Composants
1.Appareil
2.Poignée
3.Bouton d’éjection
4.Commande de vitesse
5.Fonction turbo
6.Fouets
7.Crochet pétrisseur (pour les gros trou)
8. Crochet pétrisseur (pour petit trou)

10 Mode D’emploi
Installation et Entretien
Insérer les malaxeurs ou les fouets
Toujours vérifier que le batteur est débranché.
Utiliser les malaxeurs ou les fouets
Ne pas utiliser l’appareil plus de 3 minutes. Laisser l’appareil
revenir à la température ambiante avant l’utilisation suivante.
Commande de vitesse (4):
0: arrêt 1: lent 2: rapide
Fonction turbo (5):
Pour un mixage court à très grande vitesse, réglez l’interrupteur
a la fonction turbo. Une fois que la fonction turbo est relâché, il
retourne sur la position “0”.
Retirer les malaxeurs ou les fouets
Pour retirer les malaxeurs 1 fouets, appuyer sur le bouton
d’éjection (3). Le bouton d’éjection ne fonctionnera pas si la
vitesse n’est pas sur “0”.
Cet appareil est conçu pour mélanger des quantités
domestiques moyennes, il peut être utilisé pendant un maximum
de 3 minutes, après quoi il faut le laisser revenir à température
ambiante avant de le réutiliser.

Mode D’emploi 11
Mise en marche
1.Vérifier que la commande de vitesse est sur “0”.
2.Fixer les malaxeurs ou les fouets
3.Brancher la prise sur secteur.
4.Positionner les fouets ou malaxeurs dans la préparation.
Ajuster la commande de vitesse.
5.Déplacer doucement l’appareil de haut en bas pendant
l’utilisation.
Pour un meilleur résultat, utiliser un bol de taille moyenne à
bords hauts (non fourni).
Entretien de votre appareil
Éteindre le batteur et retirer la prise du secteur.
Après utilisation, nettoyer le batteur avec un chiffon sec.
Laver les fouets ou malaxeurs à l’eau et au liquide vaisselle.
Spécifications Techniques
Model: HM13101A
Alimentation électrique : 220–240V~50H/60Hz.
Puissance électrique : 180 W

5مادختسا بيتك
ﻪﻇﻮﺤﻠﻣ
ﻦﺟﺎﻌﻤﻟا ماﺪﺨﺘﺳﺈﺑ ﻦﺠﻌﻟا ﺔﻴﻠﻤﻋ
زﺎﻬﺠﻟا ﻒﻴﻈﻨﺗ
ﺔﻴﻨﻔﻟا تﺎﻔﺻاﻮﻤﻟا
HM13101A
180

مادختسا بيتك 4
ﺔﻘﺤﻠﻤﻟا تﺎﻧﺎﺠﻌﻟا و ﻖﻓﺎﺨﻤﻟا ﺐﻴﻛﺮﺗ
ﺐﻴﻛﺮﺘﻟا ﺔﻘﻳﺮﻃ
(٤)ﺔﻋﺮﺴﻟﺎﺑ ﻢﻜﺤﺘﻟا رز
(٥) ﻊﻄﻘﺘﻤﻟا ﻞﻴﻐﺸﺘﻟا حﺎﺘﻔﻣ
تﺎﻧﺎﺠﻌﻟا و ﻖﻓﺎﺨﻤﻟا ﻚﻓ
ﻞﻴﻐﺸﺘﻟا ﺔﻘﻳﺮﻃ
220-240V~50/60Hz(

3مادختسا بيتك
ءازجا فصو

ماﺪﺨﺘﺳا ﺐﻴﺘﻛ 2
ﺔﻣﻼﺴﻟا تﺎﻤﻴﻠﻌﺗ
تﺎﺠﺘﻨﻣ رﺎﻴﺘﺧ ﻢﻛﺮﻜﺸﻧ@
1ماﺪﺨﺘﺳا ﺐﻴﺘﻛ
ماﺪﺨﺘﺳا ﺐﻴﺘﻛ
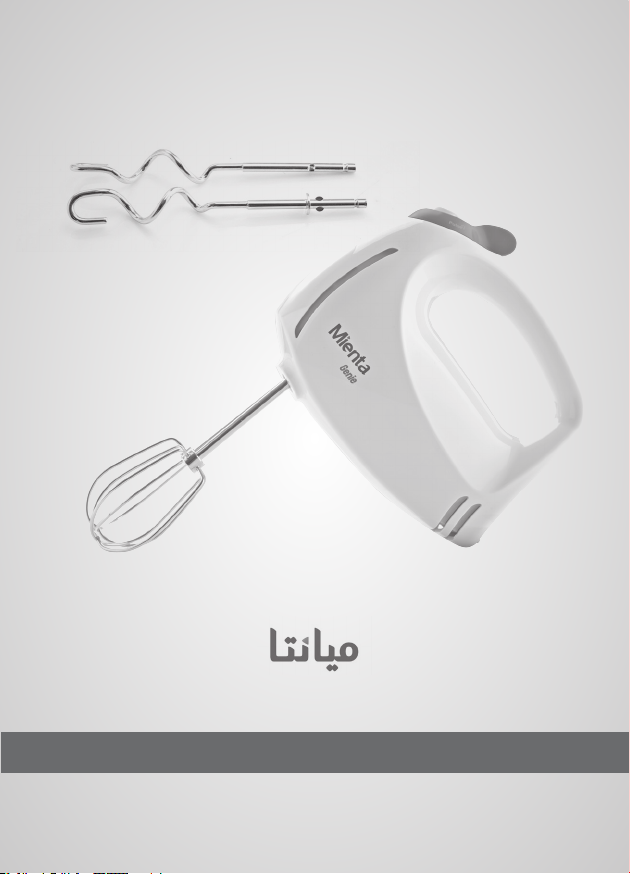
Genie HM13101A ﺾﻴﺒﻟا بﺮﻀﻣ
Table of contents
Languages:


