Mier products ACHT Series User manual

Also Available:
* BP Series - Enclosures with back panels. Some of
these are NEMA 4 and can be used with one of Mi-
er’s accessory heater/blowers if you only want heat.
* Non-Metallic Series - NEMA 4X & UL listed
polycarbonate enclosures (some models rated
up to NEMA 6/6P). These are also available with
heater/ blowers if you only want heat.
* Indoor DVR/CPU Lockboxes - Indoor standard,
tower, rack-mountable, 12RU rack-enclosure, and
12RU rack-cart models. All lockboxes come with
fans and louvers for ventilation
ATTENTION: When choosing an enclosure for your application,
careful consideration must be given in determining the heat load
and operating temperature parameters of the electronics mounted
within. Also consider the conditions of the environment where
the unit is to be mounted, and the moisture toleration of the
electronics mounted within. Based on these facts, the need for air-
conditioning, humidity control, heat, and/or fans can be determined
as well as the NEMA rating needed. (For example, if the electronics
cannot be exposed to moisture of any kind, a NEMA 3R fan-
ventilated unit would NOT work; you would need at least a NEMA 4
or NEMA 4X unit.) Mier commonly recommends the highest NEMA
rated and most effective Temperature Controlled units which are
the “ACHT” series enclosures.
NOTE: To keep NEMA Rating, installers must strictly
follow OEM installation instructions and must use water-
tight ttings on all openings.
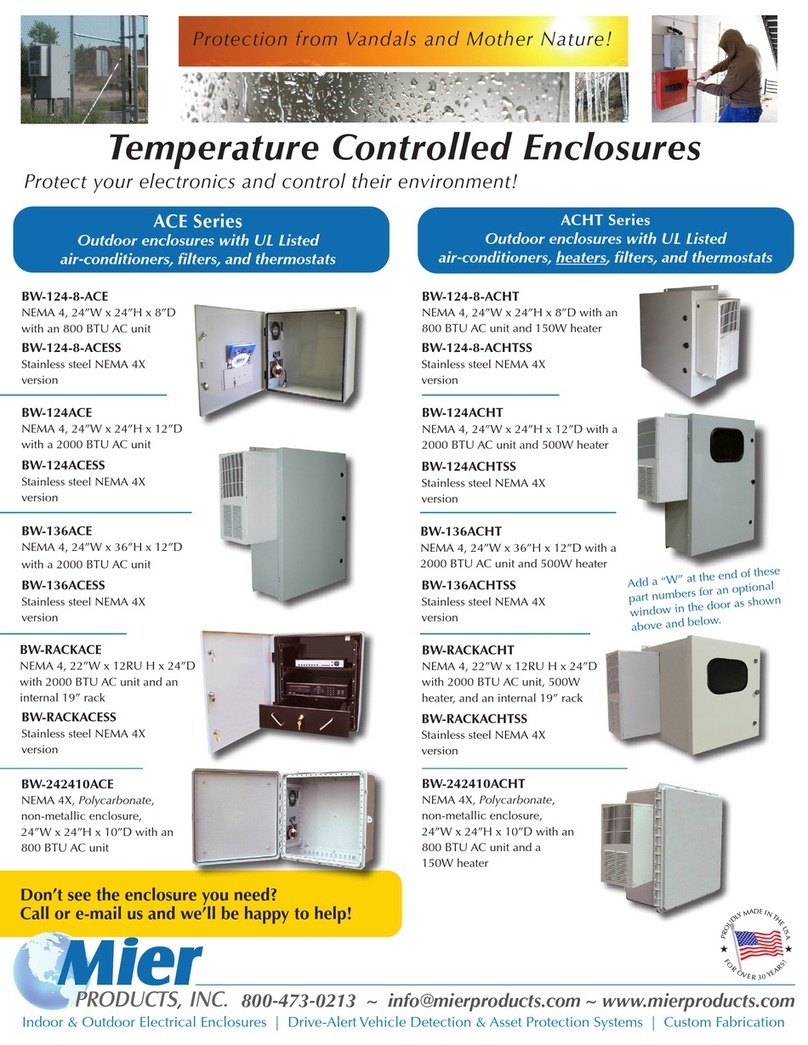
BW-124-8-ACHT
24”W x 24”H x 8”D with an
800 BTU AC unit and 150W heater
BW-136ACHT
24”W x 36”H x 12”D with a
2000 BTU AC unit and 500W heater
BW-124ACHT
24”W x 24”H x 12”D with a
2000 BTU AC unit and 500W heater
BW-RACK-8-ACHT
22”W x 12RU H x 24”D with an
800 BTU AC unit, 150W heater,
and an internal 19” rack
ACHT Series
NEMA 4 outdoor enclosures with UL Listed air-
conditioners, heaters, lters, and thermostats
Protection from Vandals and Mother Nature!
BW-242410ACHT
Polycarbonate enclosure,
24”W x 24”H x 10”D, with a 800
BTU AC unit and 150W heater
Add a “W” at the end of
these part numbers for
an optional window in
the door.
BW-RACKACHT
22”W x 12RU H x 24”D with
2000 BTU AC unit, 500W heater,
and an internal 19” rack
Don’t see the enclosure you need?
Call or e-mail us and we’ll be happy to help!
Indoor & Outdoor Electrical Enclosures | Drive-Alert Vehicle Detection & Asset Protection Systems | Custom Fabrication

Keep in mind, depending on the model you purchase, some ACE or ACHT units have less or more cubic volume inside.
Units with the 2000 BTU A/C Unit, and units with the 500 Watt Heater (aka: T-20s) - with an internal heat load of 200 watts:
Mier’s “• ACHT” and “ACE” models which come with a 2000 BTU A/C Unit, when installed and functioning properly, will maintain an internal
preset temperature of (+/- 30F). For example the BW-124ACE (enclosure size 24”W x 24”H x 12”D) is capable of maintaining an 800F internal
temperature (+/- 30F) up to an outside temperature of 1350F.
Mier’s “• ACHT” models which come with a 500W Heater integrated into the A/C unit, when installed and functioning properly, will maintain an
internal temperature (+/- 30F). For example the BW-124ACHT (enclosure size 24”x24”x12”) maintains a preset temperature (+/- 30F) up to a
maximum of up to 600F with an outside temperature of -200F. The BW-136ACHT (enclosure size 24”x36”x12”) maintains a preset temperature
(+/- 30F) up to a maximum of up to 600F with an outside temperature of -100F.
Units with the 800 BTU A/C Unit, and units with the 150 Watt Heater (aka: T-15s) - with an internal heat load of 100 watts:
Mier’s “• 8ACHT” and “8ACE” models which come with the smaller 800 BTU A/C Unit, when installed and functioning properly, will maintain
an internal preset temperature (+/- 30F). For example the BW-1248ACE (enclosure size 24”x24”x8”) is capable of maintaining an 800F internal
temperature (+/- 30F) up to an outside temperature of 1250F.
Mier’s “• 8ACHT” models which come with a 150W Heater integrated into the A/C unit, when installed and functioning properly, will maintain an
internal temperature (+/- 30F). For example the BW-1248ACHT (enclosure size 24”x24”x8”) maintains a preset temperature (+/- 30F) 400F inter-
nal temperature down to an outside temperature of -200F.
Mier’s Temperature Controlled Enclosures are completely sealed with no knockouts or holes in the enclosure other than those for
mounting the AC unit. When installed correctly with the AC unit they meet NEMA 4 standards and may be used either indoors or outdoors,
and provide a degree of protection to personnel against incidental contact with the enclosed equipment, and they provide a degree of protection for
the equipment within from windblown dust, splashing water, hose-directed water, rain, sleet, snow, ice, & dirt.
•Thisenclosureisproperlyinstalledwhenthetop&bottommountingearsareushagainstthewallormountingstruts,andheldsecurelywith
appropriate bolts, and the hinges face to the left after the enclosure has been mounted
•Watertightttingsmustbeusedonallopeningscreatedbytheinstaller.Thedoor-gasketprovidedaroundtheopeningoftheenclosuremustremain
in place and never be removed.
•TheAC/HeaterunitmustbemountedwiththeprovidedgasketsinstalledbetweentheAC/Heaterunitandtheenclosure,usingtheappropriatepre-
cut holes on the enclosure, and strictly following the unit’s OEM installation guidelines. Once attached, these AC/Heater gaskets must also remain in
place and never be removed
•Thetamperswitchshouldbemountedonthestudsatthetopoftheenclosure
•If you have ANY questions regarding the installation of these products, call Mier Products at 1-800-473-0213
Mier Products’ Temperature Controlled Enclosures
Installation and Warranty Information
Power:
Once installed correctly, the power cords for the AC unit and the heater are within the enclosure. Thus, the installer/electrician is responsible for get-
ting power inside the enclosure. It is up to the installer to cut, andproperlyinstallwithwater-tightttings, any holes needed to run power within or
run cables out of these enclosures.
Both the AC unit and the heater get their power from AC 115V, 60hz. Mier recommends the installer/electrician run power into the box via exible or
rigid conduit, with water-tight ttings, to outlet boxes mounted within the enclosure.
Wiring: use #12 AWG standard house wiring to a quad outlet box
Connection: the AC/Heater unit has a standard 3-prong NEMA 5-15P plug and the tamper switch connects to the standard low-voltage alarm circuit.
URGENT!
The AC UNIT which
accompanies this enclosure
MUST BE KEPT IN THE
UPRIGHT POSITION
AT ALL TIMES,
and handled with the utmost care
during shipping, storage, installation.
The AC UNIT must be mounted to the
enclosure using the pre-cut holes and
supplied gaskets.
The AC UNIT must be
installed in the upright position, and
following OEM instructions in order to
maintain NEMA rating.
ATTENTION:
WATERTIGHT FITTINGS MUST
BE USED ON ALL OPENINGS!
When installed properly per OEM’s specs:
* AC Unit is UL/cUL 50 Type 3R, 4, 12,
CE UL le SA6453
* Enclosure meets NEMA 4 Standards
* Paint meets NEMA 4, UL-1332
* Gasket meets NEMA 4, UL-50,
UL-844, & FMVSS302
Flammability & Code Compliance
* Tamper Switch is UL Pending
* DO NOT MOUNT enclosures equipped with air-conditioners on walls of apartments, ofces, condos or homes. Typical A/C vibration can
become a nuisance to those who live/work on the other side of the wall.
* If your installation is in warmer or cooler exterior environments, of if your internal heat load is greater, or if you are installing in a coastal or
highly corrosive area call Mier Products for advice on special order units
* Mier recommends only installing units with window in shaded areas; as interior temps of these units reach 200higher in direct sunlight than units
without windows
* Remember to schedule maintenance of Air-Filters which MUST BE CLEANED PERIODICALLY
* The unit with the MOST COOLING AND HEATING PER CUBIC INCH, and most highly recommended, is the “BW-124ACHT”
Form# MP0100802-3/16
For ON-SITE inspection & repair of A/C units, or A/C Tech Support, call McLean Customer Service at 763-422-2277
In the case of Temperature Controlled Enclosures, units needing repair are repaired onsite and should not be removed. In the rare case these units
would be returned, the returnee mustrstobtainanRMA#,followthestrictshippingandpackagingguidelines. The enclosures and AC Units must be
shippedontheirownskid,andwithintheoriginalpackaging.REMEMBER:TheACUnitmustbekeptuprightatalltimes.

ATTENTION: THERE IS NO NEED TO DRILL HOLES INTO THE ENCLOSURES TO MOUNT THE
POLE-MOUNT KITS. PLEASE SEE INSTRUCTIONS BELOW.
• For poles that are 2” in diameter up to 5”, our Pole-Mount Kits use two (2) rails
across the top and bottom of the enclosure and t between the enclosure and the pole,
and four (4) pole-brackets that go around the pole (two on bottom and two on top)
which are tightened down for a secure t. (see next page for 6” to 12” poles)
Part numbers for these kits are the BW-24PM2 (2” pole), BW-24PM3 (3” pole)
and BW-24PM4 (4” - 5” poles)
Example of a
Pole-Mount Kits for
2” to 5”
diameter poles
Pole-Mount Kits for 24” Wide METAL enclosures on 2”-5” Poles
1-800-473-0213 ~ www.mierproducts.com
Mier Recommends using at least two people to pole-mount
heavy enclosures, and preforming steps 1-2 PRIOR to going to
job site.
1) Attach the two (2) rails to the enclosure by placing them at
against the Mounting Brackets on top and bottom of the
enclosure, corresponding to the mounting holes. Then place the
3/8 x 16 Bolts through the Rails and the holes in the
enclosure Mounting Brackets. Secure with the 3/8” Washers on
the outside and 3/8 x 16 Flange-Nuts on the inside.
2) Twist and insert the four (4) pole-brackets into the two rails.
Two of these brackets go in the top rail, and two go in the
bottom rail with the curved sections facing inwards towards
each other to wrap around the pole (see photo):
3) Wrap the pole-brackets around the pole, insert the
attachment bolts, secure and tighten with the lock-nuts.
12
2
1
3
3
These pole-mount kits are used with the following Mier Products Enclosures:
BW-1248BP, BW-1248FC, BW-1248ACE, BW-1248ACHT, BW-124BP, BW-124FC,
BW-124ACE, BW-124ACHT, BW-136BP, BW-136FC, BW-136ACE, BW-136ACHT,
BW-RACKACE and BW-RACKACHT

ATTENTION: THERE IS NO NEED TO DRILL HOLES INTO THE ENCLOSURES TO MOUNT THE
POLE-MOUNT KITS. PLEASE SEE INSTRUCTIONS BELOW.
• For poles that are 6” in diameter to 12”, our Pole-Mount Kits use two (2) heavy-duty
adjustable bands which t inside the rails across the top and bottom of the enclosure
and t between the enclosure and the pole as pictured on the left and below.
Part numbers for these kits are the BW-24PM6 (6” to 8” poles), BW-24PM8 (8” to 10”
poles) and BW-24PM12 (10” to 12” poles)
Example of a
Pole-Mount Kits for
6” to 12”
diameter poles
Pole-Mount Kits for 24” Wide METAL enclosures on 6”-12” Poles
1-800-473-0213 ~ www.mierproducts.com
Mier Recommends using at least two people to pole-mount
heavy enclosures, and performing steps 1-4 PRIOR to going to
job site.
1) Mark the center point of each Mounting Rails (A).
2) Slide the Adjustable Band Guides inside both Mounting
Rails, and center them to the point marked on step 1 (B).
3) Place the 1/4” x 20 Screws and 1/4” Washers on the outside
of the Mounting Rails, run the bolts through the Mounting Rails
and Adjustable Band Guides, and secure with the 1/4” x 20
locknuts on the inside (C and B).
4) Insert the two (2) Heavy-Duty Adjustable Bands into the
two (2) Adjustable Band Guides inside the Mounting Rails.
The bands should curve outwards, away from the inside of the
Mounting Rails. One (1) of these Heavy-Duty Adjustable Bands
goes in each of the Adjustable Band Guides assembled inside
each of the Mounting Rails (D).
5) Attach the two (2) assembled Pole-Mount Rails onto the two
(2) Mounting Lips of the Enclosure using the four 3/8” x 16
Carriage Bolts entering through the inside of the Mounting Rail,
use TWO (2) of the eight 3/8” EXTRA THICK Washers ON EACH
bolt between the rail and the enclosure lip for proper spacing,
then use the 3/8” Standard Washers on the outside of the Enclo-
sure Lip with the 3/8” ange-nuts (E).
6) Wrap the bands around the pole and use a power driver with
a straight blade screw-driver, or a 3/8” socket tting, to tighten
the bands securely around the pole (F). F
C
D
A
E
B
These pole-mount kits are used with the following Mier Products Enclosures:
BW-1248BP, BW-1248FC, BW-1248ACE, BW-1248ACHT, BW-124BP, BW-124FC,
BW-124ACE, BW-124ACHT, BW-136BP, BW-136FC, BW-136ACE, BW-136ACHT,
BW-RACKACE and BW-RACKACHT

BW-136ACE and BW-136ACHT
Removable Door
Right
Side
Left
Side
Literature Tray with
key tabs for 3 sets of
keys located on the
inside of the door
Easily mount the removable back
panel on the 1” standoffs welded
into the back of the enclosure
BW-136ACE and BW-136ACHT with
AC unit or AC & Heater unit attached
on the left-hand side
Holes for mounting the
AC unit or AC/Heater
unit are pre-cut on the
left side
Ground Lug
22” x 34” sits on 6 standoffs
Rain-Channel and bulb-seal gasket for a
tight t with the door when the two 1/4-
turn latches are closed
Two 1/4-Turn
Latches, and
one Tubular Lock
with a set of two
keys
Dimensions and Weight
Outside dimensions• without AC attached:
24.8”W x 38.5”H x 12.8”D
Outside dimensions• with AC unit attached are:
32.75”W x 38.5”H x 12.8”D
Inside dimensions are: 23.9”W x 35.9”H x 11.9”D• Internal back panel dimensions: 22”x34”• Enclosure with back panel weighs 70 lbs• AC unit weighs 60 lbs• Shipping skid weighs 45 lbs•
External 0.580” mounting hole dimensions are:
20” center-to-center from left to right and
37 3/8” center-to-center from top to bottom
Removable Back Panel
AC
Unit
P
R
O
U
D
L
Y
M
A
D
E
I
N
T
H
E
U
S
A
F
O
R
O
V
E
R
2
5
Y
E
A
R
S
!
800-473-0213 | [email protected] | www.mierproducts.com
Mounting options
Wall-Mount• Free-Standing• using angle iron
and a concrete
slab (pictured)
Pole-Mount• using angle iron
This manual suits for next models
6
Table of contents
Other Mier products Enclosure manuals
Popular Enclosure manuals by other brands
JL Audio
JL Audio FATHOM IWS-SYS-108 installation manual
Altronix
Altronix Trove1HW1R installation guide
Pentair
Pentair Hoffman JIC manual
SUNRICH TECHNOLOGY
SUNRICH TECHNOLOGY S-340 user manual
DataDirect Networks
DataDirect Networks StorageScaler 8460 user guide
Martin Audio
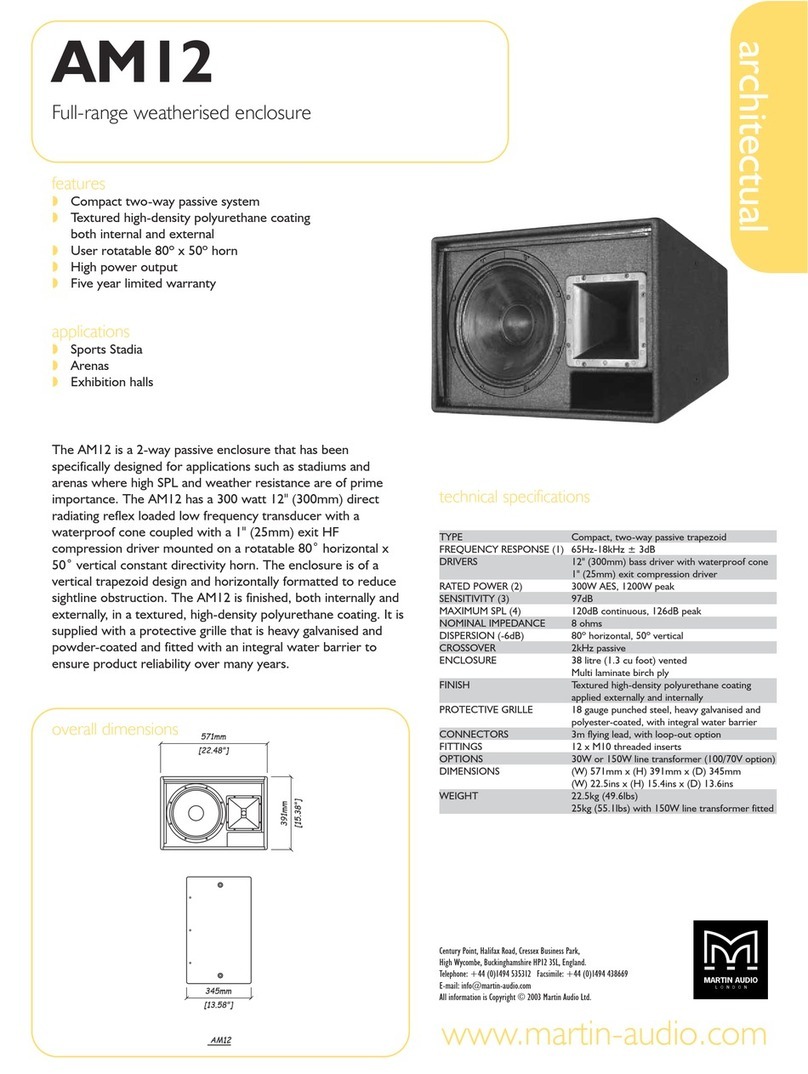
Martin Audio Full-range Weatherised Enclosure AM12 Technical specifications
