Milestone PrestoCHILL User manual

PrestoCHILL
Flash Chiller for Frozen Sections
Operator Manual - MM138


PrestoCHILL
MM138-003 –Operator Manual
3
Thank you for having selected our system and welcome to the ever growing world club of users for Milestone
laboratory instrumentation.
We are sure that you will be completely satisfied with this new tool entering your laboratory.
We invite you to read carefully this operator manual and to keep it in reach for convenient and fast
consulting.
For any possible clarification or any request for assistance please contact either our Representative in your
country:
Or contact
Milestone s.r.l.
Via Fatebenefratelli, 1/5
24010 Sorisole (BG) Italy
Tel. +39.035.412 8264
Fax +39.035.575498
web site www.milestonemedsrl.com
e-mail marketing@milestonemedsrl.com
Please read the user manual before using the device.
MM138-003 –PrestoCHILL –Operator Manual
2018-05

PrestoCHILL
MM138-003 –Operator Manual
4
SUMMARY
SUMMARY ........................................................................................................................................................ 4
1. INTRODUCTION .................................................................................................................................. 6
1.1. Symbol used...................................................................................................................................... 6
1.2. Biological and hygiene warnings ....................................................................................................... 7
1.3. Designated Uses ............................................................................................................................... 7
1.4. Technical specifications..................................................................................................................... 7
1.4.1. Touch control terminal ............................................................................................................... 8
1.5. Transportation and storage conditions .............................................................................................. 8
1.6. Warning information........................................................................................................................... 9
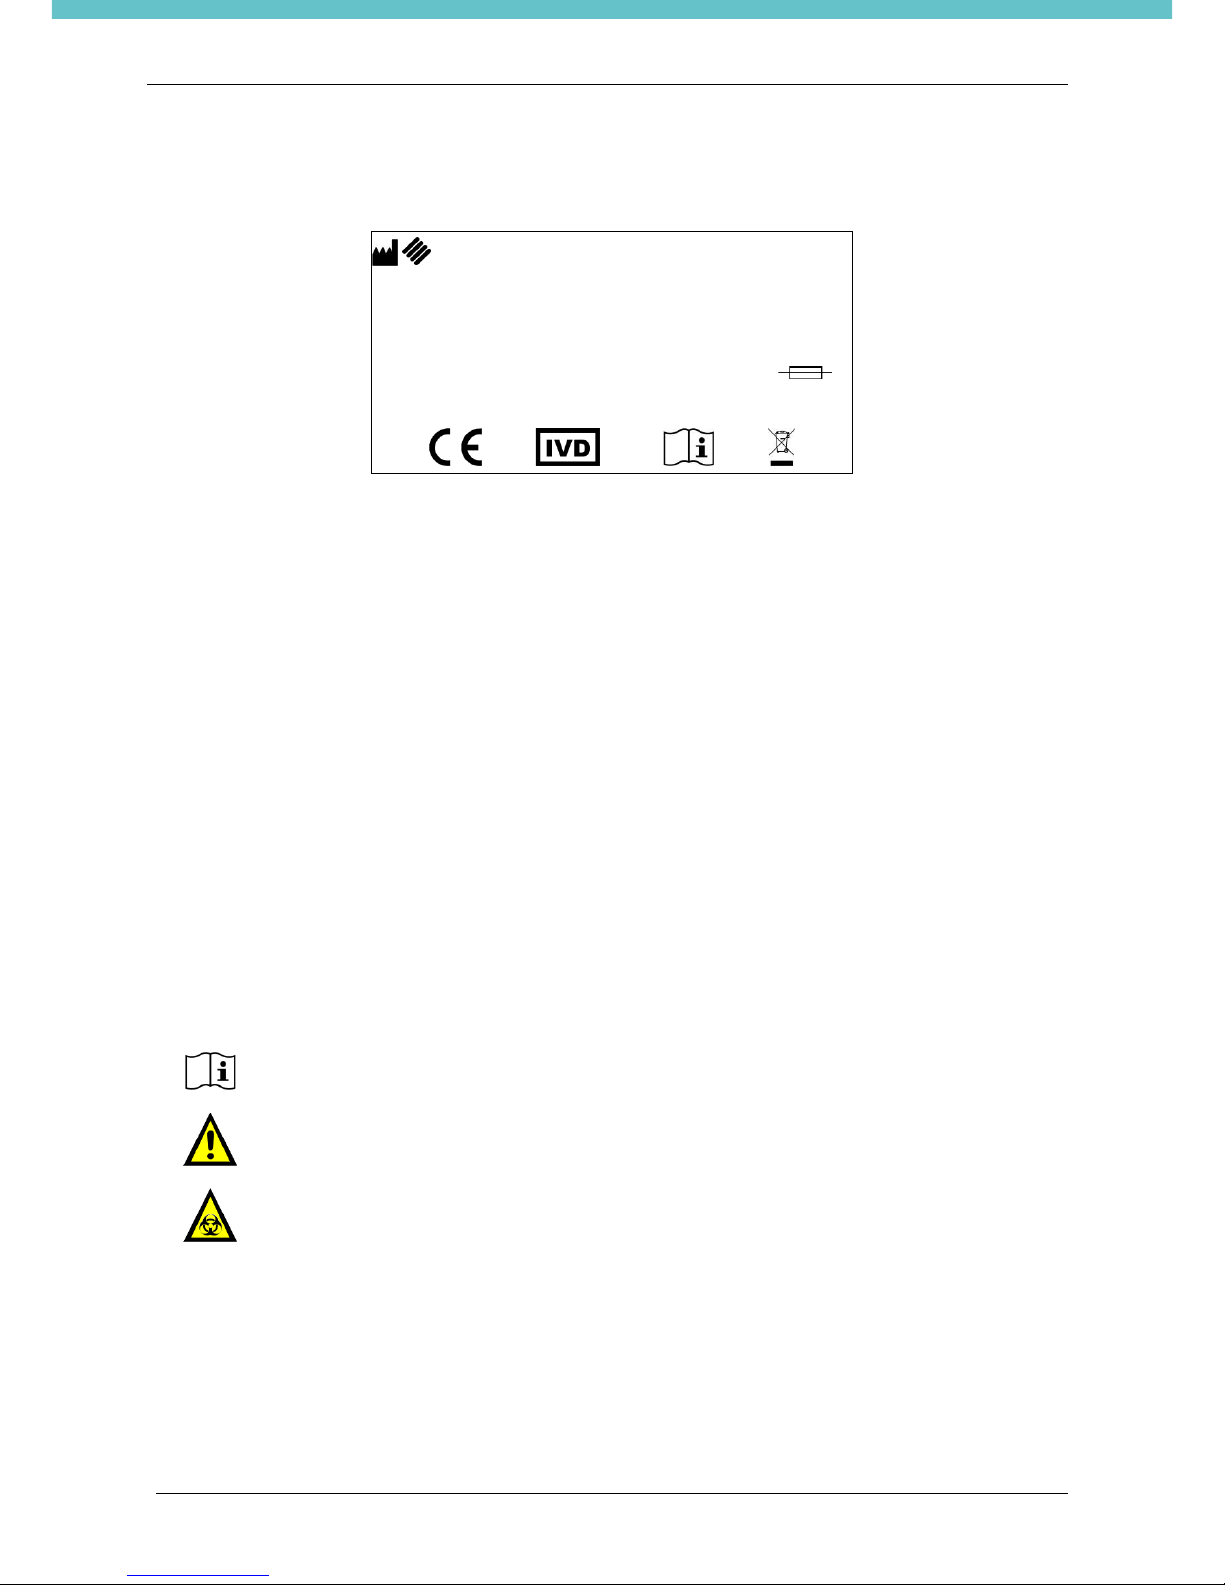
1.7. Labeling explanation........................................................................................................................ 10
1.8. Compatible reagents........................................................................................................................ 10
1.9. Waste disposal of the equipment .................................................................................................... 10
2. INSTALLATION .................................................................................................................................. 12
2.1. Space Requirements ....................................................................................................................... 12
2.2. Unpacking and Checking list ........................................................................................................... 13
2.3. Electrical installation ........................................................................................................................ 15
2.3.1. Power supply ........................................................................................................................... 15
2.3.2. Back side connection plate...................................................................................................... 15
2.4. Final placement ............................................................................................................................... 16
2.5. Unit overview ................................................................................................................................... 17
2.6. Plate conformation........................................................................................................................... 17
3. OPERATE WITH PrestoCHILL........................................................................................................... 18
3.1. Set Date and Time........................................................................................................................... 18
3.2. Change the language ...................................................................................................................... 18
3.3. Help.................................................................................................................................................. 19
3.4. Events log........................................................................................................................................ 20
3.5. Service............................................................................................................................................. 20
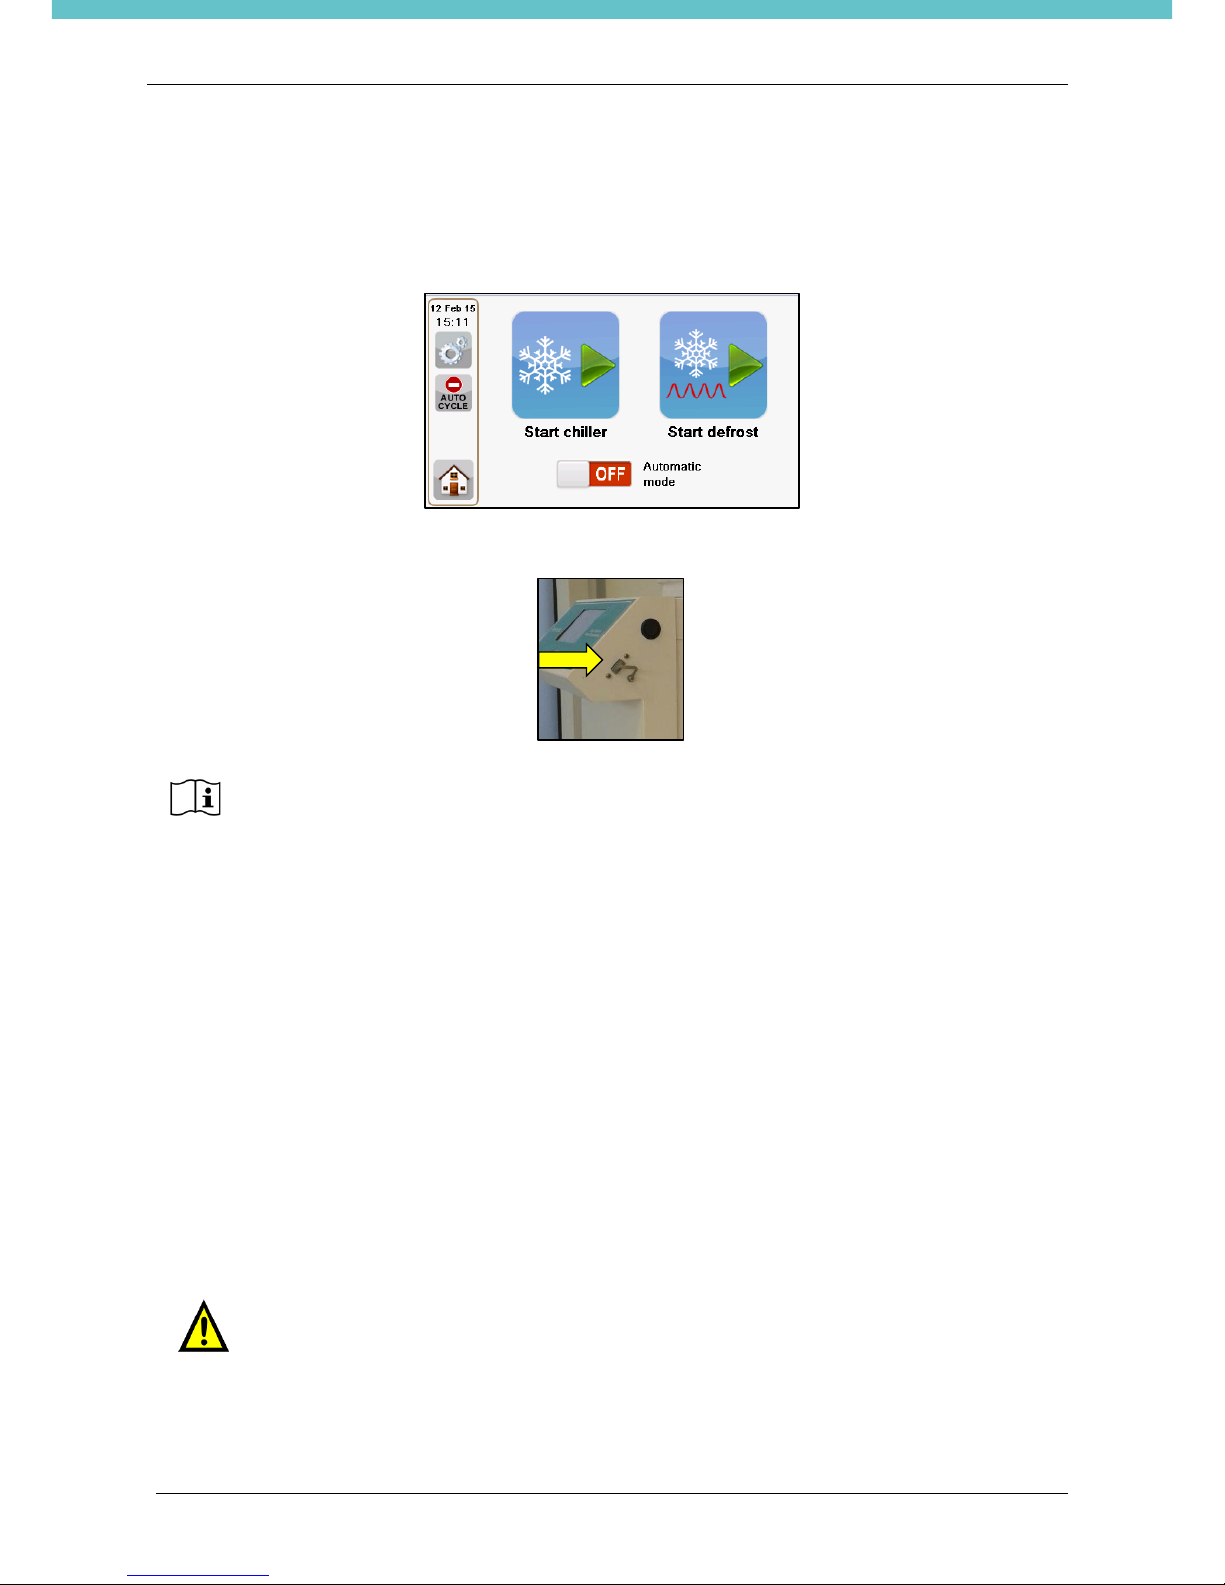
3.6. Start up MANUAL MODE ................................................................................................................ 20
3.7. Start up AUTOMATIC MODE.......................................................................................................... 21
3.7.1. Set automatic programs during the week................................................................................ 21
3.8. Set up freezing parameters ............................................................................................................. 26
3.9. Defrost ............................................................................................................................................. 26
3.9.1. HEPA12 Filter.......................................................................................................................... 27
3.10. Freezing a sample for Frozen Section............................................................................................. 28
3.10.1. Freezing time........................................................................................................................... 31
3.10.2. Using multiple timers ............................................................................................................... 31
4. MAINTENANCE.................................................................................................................................. 33
4.1. Introduction...................................................................................................................................... 33
4.2. Before/After each run....................................................................................................................... 33
4.3. Daily................................................................................................................................................. 33
4.4. Every 250 defrost pump hours ........................................................................................................ 34
4.4.1. How to change the HEPA12 filter............................................................................................ 34
5. DECONTAMINATION AND CLEANING............................................................................................. 36
5.1. Safety precautions........................................................................................................................... 36
5.2. PrestoCHILL decontamination and cleaning procedure.................................................................. 36
5.2.1. Detergents ............................................................................................................................... 36
5.2.2. Procedure ................................................................................................................................ 37
6. PrestoCHILL OPTIONAL.................................................................................................................... 38
6.1. Standard mould with different measures......................................................................................... 38
6.2. Mould for freezing in cryomould ...................................................................................................... 43
6.3. Mould for 55mm chuck .................................................................................................................... 44
6.4. Heat extractors ................................................................................................................................ 45
6.5. Box with 100 paper discs................................................................................................................. 45
6.6. Milestone Cryoembedding Compound (MCC)................................................................................. 45
6.7. Glass discs for MOHS procedure.................................................................................................... 46
6.8. Kit MOHS Rings (RNG-H5, REF 100880)....................................................................................... 47
6.9. Kit Ring H25 diameter 28mm (RNG-H25-28, REF 100890)............................................................ 48
6.10. Kit Ring H25 diameter 37mm (RNG-H25-37, REF 100891)............................................................ 49

PrestoCHILL
MM138-003 –Operator Manual
5
A. Appendix –Tips and Tricks ................................................................................................................ 50
A.1. Fat tissues........................................................................................................................................ 50
A.2. Muscle tissue................................................................................................................................... 52
A.3. Small Biopsies ................................................................................................................................. 53
A.4. Skin sample for MOHS with glass disc technique........................................................................... 55
A.5. Skin sample for MOHS with ring technique..................................................................................... 56
A.6. Freezing of high sample in vertical position..................................................................................... 58
B. Appendix –Freezing time................................................................................................................... 61
B.1. Recommended freezing time for moulds......................................................................................... 61
B.2. Freezing time changes .................................................................................................................... 62
C. Appendix –Use the extractor for chucks............................................................................................ 63
C.1. How to use the extractor for chucks ................................................................................................ 63
D. Appendix –How to change a mould................................................................................................... 65
D.1. How to change a mould................................................................................................................... 65
E. Appendix –Troubleshooting............................................................................................................... 66
E.1. Block detachment from the chuck ................................................................................................... 66
E.2. Gap between sample and medium.................................................................................................. 67
E.3. Block sticking to the mould.............................................................................................................. 67
E.4. Difficulty in unscrewing moulds ....................................................................................................... 68
E.5. Power failure.................................................................................................................................... 69
F. Appendix –How to manage an alarm................................................................................................. 70
F.1. How to manage an alarm................................................................................................................. 70

PrestoCHILL
MM138-003 –Operator Manual
6
1. INTRODUCTION
1.1. Symbol used
An instruction accompanied by this symbol provides important information and
requires more attention.
An instruction accompanied by this symbol provides a cautionary statement: failure to
follow the instruction may endanger the operator or cause damage to the instrument.
An instruction accompanied by this symbol provides a caution against electric shock.
Be sure to follow the instruction to prevent accidents resulting from electric shock.
Biohazard.
Be careful: parts identified with this symbol are zones with risks of crushing hand
and/or finger(s).
Surfaces identified with this symbol are at danger temperature.
CE logo: this instrument complies to European Community directives.
IVD medical device according to 98/79/EC directive.
Indicates a single-use medical device or one-patient use during a single procedure.
Indicates the manufacturer's batch code.
WEEE European directive symbol (2002/96/EC):
Electric/electronic device do not throw out in the environment.
Manufacturer.
Fragile.

PrestoCHILL
MM138-003 –Operator Manual
7
1.2. Biological and hygiene warnings
Please, carefully read the following note.
This instrument is an in-vitro medical device and it is installed in a location where there is presence of blood,
specimen and other biological tissues. For your safety, it is required to clean and disinfect the device before
entering in contact with it.
Also you should wear gloves when you touch it.
In addition, it is required that the unit is cleaned and disinfected before sending it to MILESTONE S.R.L.
Non-disinfected devices will no longer be accepted and you will be contacted to get the relative disinfection
cost.
In any case, international health rules forbid shipments in standard packages of biohazard materials (risk of
sanctions).
1.3. Designated Uses
The Milestone PrestoCHILL and its optional parts have been engineered for laboratory use and can
therefore withstand the hardest laboratory conditions for continuous use in freezing biological samples for
frozen sections.
The instrument is intended for laboratory use (indoor use) only.
The Milestone PrestoCHILL is specifically designed to produce frozen section blocks or frozen tissues in a
fast, reliable and standardized way.
The Milestone PrestoCHILL must be operated exclusively with the reagents listed in section “Compatible
reagents” refer to chapter 1.8.
Any other use of the instrument is considered improper and may void the warranty
provided by the manufacturer.
1.4. Technical specifications
Power supply:
PrestoCHILL REF 100851 115V~ 60Hz 250W
PrestoCHILL REF 100850 230V~ 50/60Hz 250W
Refrigerant: Helium
Time to reach -40°C (-40°F) about 40min from ambient temperature of 25°C (72°F)
Working Temperature: 15°C –25°C (59°F –77°F)
Humidity (relative): up to 80%
Maximum altitude: 2000m
Use temperature range: -24°C to -60°C (-11.2°F –-76°F)
Indoor use only.

PrestoCHILL
MM138-003 –Operator Manual
8
1.4.1. Touch control terminal
The following picture shows the Touch Control TERMINAL of the PrestoCHILL unit. It is possible to operate
the unit by simply touching the icons on the screen.
One USB PORT is located on the lateral sides of the Touch Control Terminal.
When not in use, it’s required to leave the USB protection inserted into the slot, as
shown in the picture above.
Characteristics: TFT-LCD 4.3” widescreen color display
Resolution 480X272,
Resistive Touchscreen
Mass storage 512MByte
1CPU 700MHz
Windows™ Compact Embedded 6
Programs: Customizable time and temperature
I/O-Interface: 1x USB port 2.0
The manufacturer reserves the right to change and/or improve specifications without notice and without
incurring any obligation.
1.5. Transportation and storage conditions
Temperature: –20°C up to +60°C (-4°F up to 140°F)
Humidity: up to 80% (up to 50% at 40°C –104°F) non–condensing
Before turning PrestoCHILL on (when coming from a storage room), let the unit reach
working environmental conditions (at least half an hour).
It is very important to ship and move the PrestoCHILL system in a vertical position to
avoid that the cooling plate could be damaged and unscrewed from its support.

PrestoCHILL
MM138-003 –Operator Manual
9
1.6. Warning information
Should the equipment be used in different ways than those specified by the manufacturer, the warranty
provided by the manufacturer may be void.
Main power plugs are considered disconnecting device. Disconnect all plugs from the socket outlet before
assembling of the system, before connection of the optional (if present) and before cleaning.
Equipment shall be connected to a main power socket outlet which is accessible and visible by the operator.
Equipment is provided with replaceable fuses, however their replacement is to be performed by properly
authorized service personnel. If the system is not properly working, please contact the local authorized and
trained service representative of the manufacturer.
Parts of this instrument may attain temperatures as low as –42ºC. It is important to avoid allowing bare skin
to touch such cold surfaces –when in doubt, wear gloves.
All parts of the equipment and all optional must be supplied only by the manufacturer.
DO NOT OPEN THE CHASSIS. Failure to follow the instruction in the documentation
might lead to a reduction of device safety. If the equipment is not working properly,
please contact your supplier or the manufacturer.
Do not remove the instrument, optional, panels or cover. Only authorized and
qualified SERVICE personnel may repair the instrument and access the
instrument’s internal components.
It is important that normal standards of safety and good laboratory practices are
employed. Always use common sense and the best known practice when operating
the instrument.
The institution owning the instrument has primary responsibility for accident-free
operation together with designated personnel who operate, service or repair it.
To avoid damage to the instrument, use only the reagents listed in chapter 1.8
Compatible Reagents. Failure to follow the instructions in the documentation might
lead to a reduction of device safety.
Low Temperatures are present in this equipment.
Extreme care should be taken.
DO NOT let bare skin come into contact with metal surfaces.

PrestoCHILL
MM138-003 –Operator Manual
10
1.7. Labeling explanation
MILESTONE SRL
Via Fatebenefratelli, 1/5 –24010 Sorisole (BG) –
ITALY
Tel. +39.035.4128264
Fax. +39.035.575498
PRESTO CHILL
REF
SERIAL NUMBER (SN)
FUSES
1.6AT 5X20
INPUT
MANUFACTURED:
For symbols explanation see chapter 1.1
1.8. Compatible reagents
1. Embedding medium: gel consisting of polyethylene glycol and polyvinyl alcohol which when frozen
has the same density as frozen tissue.
2. Alcohol-based detergents and polyphenolic based disinfectants to clean internal work plan and
PrestoCHILL optional.
1.9. Waste disposal of the equipment
This instrument is an in-vitro medical device and it is usually installed in a laboratory where specimens and
other biological tissues are present. For your safety, it is therefore required to clean and disinfect before
entering in contact with it. You must also wear gloves when operating the system.
In case of return it is required that the unit is cleaned and disinfected before sending it back to Milestone.
Non-disinfected devices will be no longer accepted and you will be contacted to pay the relative disinfection
cost.
International health rules require that shipments of biohazard materials are not done in standard packages
(risk of sanctions).
Do not remove the side panels of the unit during the cleaning operations.
Before doing any operation disconnect the power supply.
Do not use direct or high-pressure water to clean the instrument.
For safety reason, any operation without the individual protective devices must be
avoided.

PrestoCHILL
MM138-003 –Operator Manual
11
It is recommended to use polyphenolic based disinfectants to clean and disinfect the instrument.
For further information, please contact the manufacturer at application@milestonemedsrl.com.
Removal of equipment from use for disposal:
1) Switch OFF the unit. Disconnect the power supply.
2) Disconnect all the optional, if available.
3) Clean and disinfect all parts of the equipment according to the manufacturer specification.
4) Dispose all electric and electronic parts of the equipment.
Complying with directive 2012/19/EC of the European Parliament and of the Council of 04 July 2012 on
waste electrical and electronic equipment (WEEE), the separate collection environmental managed of
equipment is mandatory.
It is necessary to return the used equipment to the distributor or to inquire about the presence of a local
empowered system for collection and disposal of WEEE.
The in-observance of Directive 2012/19/EC or of the local law which acknowledge it can have potential
effects on the environment and human health.
This symbol indicates separate collection
for electrical and electronic equipment
If additional requirements on accident prevention and environmental protection exist in the country of
operation, this instruction manual must be supplemented by appropriate instructions to ensure compliance to
such requirements.

PrestoCHILL
MM138-003 –Operator Manual
12
2. INSTALLATION
Milestone PrestoCHILL is an instrument which requires the utmost care when it is unpacked and installed.
Provide a bench of at least 70cm (28in) in width and 70cm (28in) in depth and that can stand the
PrestoCHILL weight of 25kg (56lb).
At least 2 people should remove the unit from its box and locate it on the bench.
Then place PrestoCHILL on the bench, make sure that the unit is level and the bench is made of non-
flammable material and is vibration free. Ensure that the instrument has been positioned away from hot,
direct sunlight and is in a location completely free from drafts.
Make sure the unit is not placed against any side surface limiting the air cooling inlet/exhaust: allow
at least a distance of 20cm (7.9in) for each side and of 30cm (11.8in) behind.
2.1. Space Requirements
PrestoCHILL is delivered in a wood box with these dimensions:
Width: 420mm (17in)
Height: 680mm (27in)
Depth: 650mm (26in)
Unit dimensions:
Width: 300mm (12in)
Height: 450mm (18in)
Depth: 540mm (22in)
Space dimensions required to locate the unit:
Width: 700mm (28in)
Height: 800mm (31.5in)
Depth: 700mm (28in)

PrestoCHILL
MM138-003 –Operator Manual
13
2.2. Unpacking and Checking list
When unpacking, check that all parts correspond to the packing list included in the shipment. Utmost care
must be taken during unpacking of PrestoCHILL, to avoid scratching or damage of the external coating.
The PrestoCHILL unit (230V version REF 100850, 115V version REF 100851) includes the following items:
•Qty.1 Main power cable (Code 50036 for 230V version, Code 50391 for 115V version)
•Qty.3 Mould for 30mm chuck (REF 100606-A)
•Qty.3 Mould for 40mm chuck (REF 100609-A)
•Dispensing slides:
-Qty.3 REF 100551, large tip
-Qty.3 REF 100545, small tip
•Qty.1 Magnetic pen to work with the touch-screen terminal Code 50596/S
•Qty.1 Tool for mould exchange (Code 100575)
•Tweezers:
- Qty.1 Code 100593: the small one
- Qty.1 Code 100741: the large one

PrestoCHILL
MM138-003 –Operator Manual
14
•Qty.2 Heat extractor (Code 100533)
•Qty.4 Heat extractor slim (Code 100677)
•Qty.1 Box with 100 paper discs, diameter 22mm (REF 100622)
•Qty.1 Operator manual in electronic format
•Qty.1 Chuck Extractor (Code 100737L)

PrestoCHILL
MM138-003 –Operator Manual
15
2.3. Electrical installation
2.3.1. Power supply
Power supply line must have a ground connection (yellow/green, green or bare wire).
Do not use the blue/white wire (neutral of power line). Power supply neutral has to be referred to ground.
Carefully check that:
•A Ground Connection is made available in the lab to assure the unit works correctly. Do not connect a
Milestone unit without ground connection.
•Power supply line wires (their size and distance from the switch board) used in the laboratory are
compliant with the label positioned on the back side of units.
•Plug/socket is visible during the normal use and easily accessible.
Power line protection:
•115V: Miniature circuit breaker curve C, 6A, interruption more than 6000A.
•230V: Miniature circuit breaker curve C, 6A, interruption more than 6000A.
Residual current device: 30mA (Class I device).
230V version: a schuko terminated power cord is provided.
115V version: a NEMA 5-15P terminated power cord is provided.
Before connecting the plug to the laboratory’s socket CHECK that the power supply
voltage of the unit matches the power supply line of the laboratory.
Damages occur when wrong power supplies the instrument.
2.3.2. Back side connection plate
On the back side of the PrestoCHILL are positioned:
- the HEPA12 filter
- the electrical plug
- the label with unit serial number
- the vent
- the spare fuses box
See also the label of the instrument that provides some important information.
Always communicate the S.N. of the unit to Customer Support.

PrestoCHILL
MM138-003 –Operator Manual
16
2.4. Final placement
PrestoCHILL unit can now be positioned in its final place of use. Make sure that the unit is level.
Then connect:
•the main power cable into the electrical plug that is located on the back of the unit (see the picture
below),
•and the plug of main power cable into the wall socket.
•Now it is possible to turn the PrestoCHILL on.

PrestoCHILL
MM138-003 –Operator Manual
17
2.5. Unit overview
1. Work area cover
2. Touch control terminal
3. Main switch
4. USB port
5. Embedding medium and spare optional
storage area
6. Cool trap
1. Heat extractors
2. Heat extractors slim
3. Moulds for 30mm chucks
4. Moulds for 40mm chucks
We advise against the use of optional other than those provided by Milestone.
2.6. Plate conformation
The work area of the PrestoCHILL houses two different types of heat extractors: standard and slim, and six
5mm deep moulds.
The standard heat extractor can be used with any type of mould among those listed in
chapter 6.
The slim heat extractor can only be used with 5mm deep moulds.
The PrestoCHILL moulds can be replaced according to the laboratory requirements: size of frozen
specimens and type of chuck used. To change the moulds see appendix D and for the list of mould models
available see chapter 6.
The conformation used by the PrestoCHILL that ensures optimal performances is: four
5mm deep moulds and two moulds with depth of your choice.
If the PrestoCHILL conformation features moulds deeper than 5mm (7 or 10mm), we recommend positioning
the slim heat extractors near the 5mm deep moulds and the standard heat extractors near the deeper
moulds.
For optimal results, Milestone recommends using 5mm deep moulds.
Do not work with a different conformation to that indicated above.
1
2
3
4

PrestoCHILL
MM138-003 –Operator Manual
18
3. OPERATE WITH PrestoCHILL
3.1. Set Date and Time
Press the “Settings” icon from the status bar. Then select “Date” and set.
3.2. Change the language
Press the “Settings” icon from the status bar. Then select “Language” and set.
Select the language and press OK.
The software needs the reboot to make the language change effective. Do it immediately, pressing “Yes” to
the below question, otherwise the language change will be operative starting from the first turn on of the unit.

PrestoCHILL
MM138-003 –Operator Manual
19
3.3. Help
In the “Help” section in the “Settings” menu, it is possible to insert useful info: serial number (only for
service), technical, application and sales assistance contacts and website.

PrestoCHILL
MM138-003 –Operator Manual
20
3.4. Events log
Clicking on “Events log” icon , allows access to the PrestoCHILL actions list.
3.5. Service
This section is allowed only for service personnel.
3.6. Start up MANUAL MODE
The time required to reach the set temperature (-40°C) from room temperature
(approximate 20°C) varies from 40 minutes to 1 hour.
Before starting, wipe the work plate of the PrestoCHILL with paper or similar absorbent
material to dry it.
Switch on the unit. This page will appear:
Touch the button “Start chiller” to set the working temperature and the sample freezing time and to initiate
the cooling power. Software records the last set temperature and time data.
The spot near the actual temperature value is red if the plate has not reached the set temperature. In this
case it is better to not freeze any samples. When the actual temperature is ±4°C the set temperature, the
spot becomes green and the plate is ready for freezing.
Table of contents
Popular Chiller manuals by other brands

Gulf+Western
Gulf+Western ACWC-SC Service manual

Carrier
Carrier AQUASnap 30RB Installation, operation and maintenance instructions

Electrolux
Electrolux KBB5X operating instructions

York
York YCAL0019 Installation, operation and maintenance

Daikin
Daikin 2M56GV1G Service manual

Henny Penny
Henny Penny BCF-24/65/110 user manual