Milestone Husky X2 User manual

Milestone Systems
Milestone Husky™ X2 NVR
Hardware and service guide
September 2019

Contents
Copyright, trademarks, and disclaimer 4
Safety 5
About this guide 6
Support and information page 7
Husky Assistant 8
Husky Assistant properties 8
Choose your language 8
Storage management 9
Check data hard drive status 9
Replace a hard drive 11
Prepare hard drives 13
Apply optimizations 14
Support 15
Create a diagnostics file 15
Reconfigure 16
Reconfigure your unit 17
Locate the serial numbers 22
Serial numbers in the software 22
Serial number labels 23
Network interfaces 25
Connectors 25
Troubleshoot a network interface 26
Husky Switch Manager 27
Choose your language 27
Switch status 28
Switch management 30
Husky IO Module 34
Husky IO Module setup 34
Hardware and service guide | Milestone Husky™ X2 NVR
2|Contents

Copyright, trademarks, and disclaimer
Copyright © 2019 Milestone Systems A/S
Trademarks
XProtect is a registered trademark of Milestone Systems A/S.
Microsoft and Windows are registered trademarks of Microsoft Corporation. App Store is a service mark of Apple
Inc. Android is a trademark of Google Inc.
All other trademarks mentioned in this document are trademarks of their respective owners.
Disclaimer
This text is intended for general information purposes only, and due care has been taken in its preparation.
Any risk arising from the use of this information rests with the recipient, and nothing herein should be construed
as constituting any kind of warranty.
Milestone Systems A/S reserves the right to make adjustments without prior notification.
All names of people and organizations used in the examples in this text are fictitious. Any resemblance to any
actual organization or person, living or dead, is purely coincidental and unintended.
This product may make use of third-party software for which specific terms and conditions may apply. When that
is the case, you can find more information in the file 3rd_party_software_terms_and_conditions.txt located in your
Milestone system installation folder.
Hardware and service guide | Milestone Husky™ X2 NVR
4|Copyright, trademarks, and disclaimer

Safety
Warning!
This appliance does not contain any user-serviceable parts. Do not remove any covers or
attempt to gain access to the inside of the product.
Risk of explosion if battery is replaced by incorrect battery type.
Dispose of used batteries according to the instructions.
Caution
Replacement of a BATTERY with an incorrect type that can defeat a SAFEGUARD (for
example, in the case of some lithium BATTERY types).
Disposal of a BATTERY into fire or a hot oven, or mechanically crushing or cutting of a
BATTERY, that can result in an EXPLOSION.
Leaving a BATTERY in an extremely high temperature surrounding environment that can
result in an EXPLOSION or the leakage of flammable liquid or gas.
A BATTERY subjected to extremely low air pressure that may result in an EXPLOSION or the
leakage of flammable liquid or gas.
Make sure to connect the power cord to a socket-outlet with earthing connection.
Suitable for installation in Information Technology Rooms in accordance with Article 645 of
the National Electrical Code and NFPA 75.
Hardware and service guide | Milestone Husky™ X2 NVR
5|Safety

About this guide
This hardware and service guide for Milestone Husky™ Network Video Recorder (NVR) is a point of reference to
the Milestone Husky software and Milestone Husky hardware.
This guide describes Husky Assistant and Husky Switch Manager. These applications help you maintain and
reconfigure your system.
Husky Tools Installer gives you the most recent version of Husky Assistant and Husky Switch Manager. For updates
to Husky Tools Installer, check the Milestone website (https://www.milestonesys.com/downloads/).
This guide also describes how to replace data storage hard drives.
Hardware and service guide | Milestone Husky™ X2 NVR
6|About this guide

Support and information page
On the Milestone Husky support and information page (https://www.milestonesys.com/HuskyX2-support/), find the
following information about your Milestone Husky unit:
lManuals and guides
leLearning
lPerformance approved hard drives
lHusky Calculator
lCertifications
lFAQ
lSupport community
lKnowledge Base articles
lWarranty information
lHow to contact Milestone Support
lHow to handle a faulty unit
lOther additional content
Hardware and service guide | Milestone Husky™ X2 NVR
7|Support and information page

Husky Assistant
Husky Assistant is an application that helps you configure, maintain, and see the status of your Milestone Husky
system. Find the Husky Assistant shortcut on the Windows desktop.
Husky Assistant properties
The Husky Assistant has these features available:
Navigation element Description
Overview
A list of details about the unit:
lModel: Milestone Husky model
lVersion: Milestone Husky Assistant version
lImage: Husky firmware version
lSerial number: The hardware serial number of the unit
lMAC: The Husky unit physical address (MAC address)
You can change the language in which Husky Assistant appears.
Reconfigure the network and the storage. Additional device drivers will also
be installed.
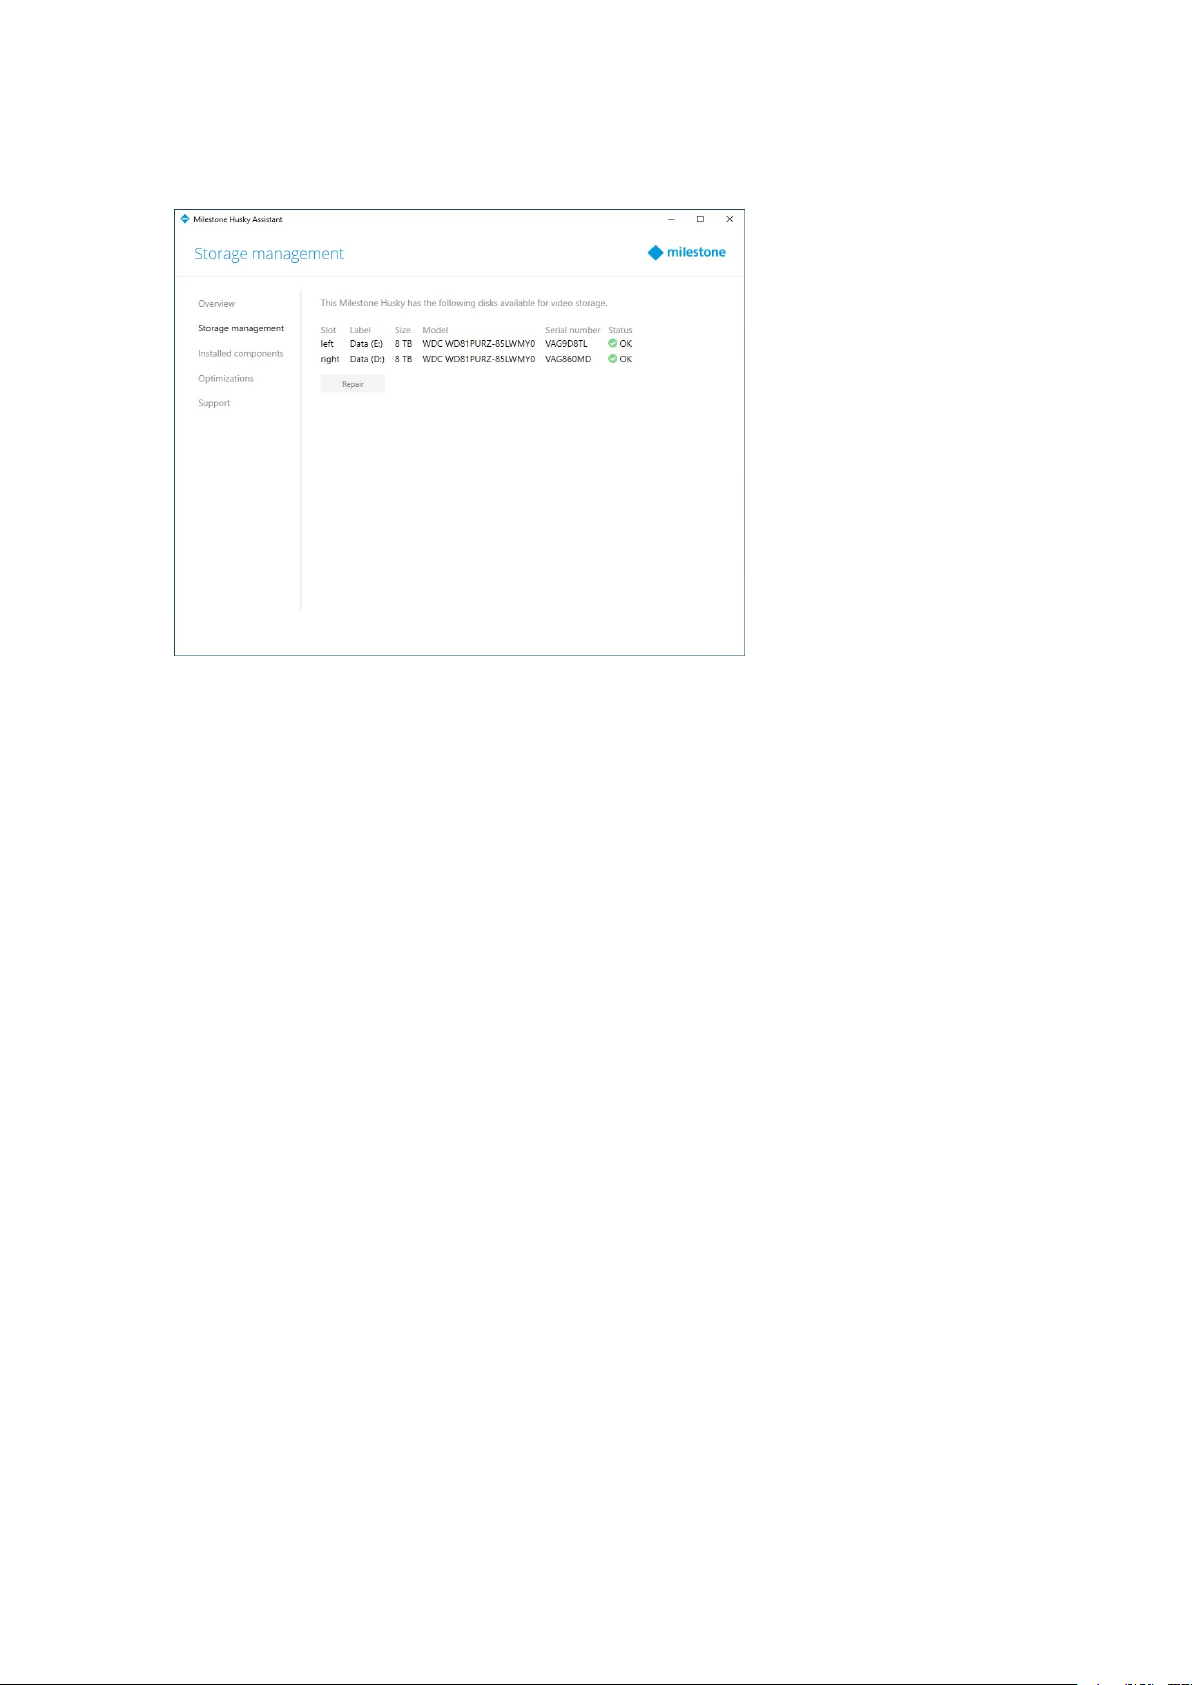
Storage management Information about the available data storage hard drives. You can also see the
status of the disks.
Installed components A list of installed Milestone software components and versions.
Optimizations A list of available optimizations you can apply.
Support
Always contact your Milestone reseller that you have
bought the unit from before contacting Milestone
Support.
Run the Milestone Diagnostics Tool to create files that are needed for the
Milestone reseller when the reseller helps you troubleshoot.
Visit the Milestone Husky support and information page.
Lists the information that you need to contact Milestone Support.
Choose your language
To select your preferred language:
Hardware and service guide | Milestone Husky™ X2 NVR
8|Husky Assistant

1. Open Husky Assistant.
2. On the Overview tab, select your preferred language from the list of available languages.
Husky Assistant chooses English by default. All language changes require a restart of
Husky Assistant.
Storage management
On this tab you can see information about and the status of data hard drives.
You can also identify a faulty hard drive and prepare new hard drives for use with Milestone XProtect VMS.
Check data hard drive status
To check the status of the left and right data hard drive:
Hardware and service guide | Milestone Husky™ X2 NVR
9|Husky Assistant

1. Select the Storage management tab.
Hardware and service guide | Milestone Husky™ X2 NVR
10 |Husky Assistant

2. The status of the data storage hard drives is shown. The different states are:
Status Description
OK Normal working state.
Needs attention
The hard drive is missing a configuration that you can apply.
For more information, see Prepare hard drives on page 13.
Failed
The hard drive is faulty. You need to replace it.
For more information, see Replace a hard drive on page 11.
Not approved
The hard drive performance is not approved for use with the Milestone
Husky products.
For more information on the approved hard drives, see the Milestone
Husky support and information page
(https://www.milestonesys.com/HuskyX2-support/).
If the disk status is Failed or Needs attention, the data hard drive LED status indicator on the front of your
unit, is red.
Replace a hard drive
If the data hard drive status is Failed or you want a higher storage capacity, this section will help you replace the
hard drive.
Hardware and service guide | Milestone Husky™ X2 NVR
11 |Husky Assistant

1. Locate the correct data hard drive tray (left or right).
2. Press the spring-loaded front of the tray to remove the faulty hard drive from the bay.
3. Remove the two screws on each side and pull the hard drive out of the tray.
4. Locate the replacement hard drive and slide the hard drive into the tray. Use the four screws to fasten the
hard drive to the tray.
Make sure that your hard drives performance is approved for use with the
Milestone Husky products. For information on performance approved hard drives,
go to the Milestone Husky support and information page
(https://www.milestonesys.com/HuskyX2-support/).
Hardware and service guide | Milestone Husky™ X2 NVR
12 |Husky Assistant

5. Slide the tray as far as you can into the empty hard drive bay located on the front of your unit.
6. Press the spring-loaded front of the tray to close it.
7. To prepare the disk for use in Milestone XProtect, complete the steps in the Prepare hard drives on page
13 section.
Prepare hard drives
If the disk status is Not approved you cannot use Husky Assistant to prepare the hard
drives.
How to prepare a disk for use in Milestone XProtect VMS:
1. If there are one or more hard drives in the list with a status Needs attention, click Repair.
2. Accept any user account control warning and wait for the repair to be completed.
Hardware and service guide | Milestone Husky™ X2 NVR
13 |Husky Assistant

3. A summary screen appears. Check that the hard drive status is OK.
Apply optimizations
If you have installed Milestone XProtect VMS without using Husky Assistant, you need to apply the available
optimizations. To check if any optimizations are available:
1. Select the Optimizations tab.
2. A list of the available optimizations appears.
3. If an optimization is available, click Optimize.
Hardware and service guide | Milestone Husky™ X2 NVR
14 |Husky Assistant

4. Accept any user account control warning and wait for the optimization to be applied.
5. Check that the optimization is applied.
Support
If you have a problem and need support, contact your Milestone reseller that you bought the unit from.
This appliance does not contain any user-serviceable parts. Do not remove any covers or
attempt to gain access to the inside of the product.
Create a diagnostics file
To help your Milestone reseller get logs and details about your system, create a Milestone diagnostics .zip file that
lists the system information:
Hardware and service guide | Milestone Husky™ X2 NVR
15 |Husky Assistant

1. Select the Support tab.
2. Click Milestone Diagnostics Tool.
3. Accept any user account control warning. The Main Page appears.
4. Click the Collect Defaults icon to start creating a diagnostics .zip file.
5. When finished, the diagnostics .zip file is saved on the Windows desktop. You can now move or transfer the
file to any preferred location.
6. Close Milestone Diagnostics Tool.
7. Provide your Milestone reseller with the diagnostics .zip file, when they assist you in troubleshooting a
problem.
Reconfigure
You can use Husky Assistant to add or reconfigure:
Hardware and service guide | Milestone Husky™ X2 NVR
16 |Husky Assistant

lComputer name and domain
lData drives
lNetwork switch DHCP IP range
lI/O Driver
lGeneric events
lInstall Milestone XProtect VMS (if not installed)
The reconfiguration may result in data loss and a temporary period with no recording or
viewing of video.
Reconfigure your unit
For more information about the reconfiguration process when Milestone XProtect VMS is
not installed, see the Milestone Husky X2 Getting started guide
(https://www.milestonesys.com/HuskyX2-support/).
To start reconfiguring your unit with Milestone XProtect VMS installed:
1. On the Overview tab, click Reconfigure.
2. Read the warning and click Reconfigure.
Hardware and service guide | Milestone Husky™ X2 NVR
17 |Husky Assistant

3. Accept any user account control warning and select your preferred language. Click Next.
4. Click Next to skip the name and the domain settings or:
1. Click Computer name / Domain changes to configure the computer name and domain, or the
workgroup settings. When completed, Windows requires a restart to apply the changes.
2. Restart Windows and wait for Windows to boot.
Husky Assistant restarts. Select your preferred language and click Next.
3. Because you have already configured the name and domain setting, click Next.
Hardware and service guide | Milestone Husky™ X2 NVR
18 |Husky Assistant

5. The storage detection completes. Click Next.
6. Select whether you want to format and to configure, or only configure the data drives, and click Next.
Hardware and service guide | Milestone Husky™ X2 NVR
19 |Husky Assistant

7. Define the PoE+ network switch IP address range for the devices connected to the switch (HX2P16 only).
Every device configured for DHCP that you connect to the switch gets an IP address in the defined range.
There are two predefined ranges:
l192.168.0.1 - 192.168.0.254
l10.0.0.1 - 10.0.0.254
You can also define your own range. Select Other: and specify the starting point of a range. Husky Assistant
automatically defines the end point of the range.
Select an IP range that matches all the manually assigned static IP addresses of your
connected cameras and devices.
If your system uses a network switch with 16 PoE ports, the IP address range splits
into two subnets, one for each 8-port module. Make sure to assign the camera or
the device to the correct subnet.
Changing the IP range of the network switch will restart the connected devices that
are powered by PoE. No recordings will be made until you change the IP address of
the devices in the XProtect Management Client.
8. After you have selected an IP range, click Next.
Hardware and service guide | Milestone Husky™ X2 NVR
20 |Husky Assistant
Other manuals for Husky X2
2
Table of contents
Other Milestone DVR manuals
Popular DVR manuals by other brands

TeleEye
TeleEye GN8808 quick start guide

Vista
Vista 0150-0267A user manual

Digital Watchdog
Digital Watchdog VMAX A1 DW-VAONE 41TB user manual

Component Solution Services
Component Solution Services Verity REC02U user manual

Dahua
Dahua NVR4832-I user manual

Taiden
Taiden HCS-8130M series Installation and operating manual