MILOO-ELECTRONICS STERYLIS BASIC-100 User manual

MODELS:
BASIC-100, BASIC-150, BASIC-300,
BASIC-400, BASIC-800, BASIC-1200
USER’S
MANUAL
PROFESSIONAL ROOM STERILISERS

Sterylis BASIC MANUAL | 2
Contents
1. Notes for service technicians..........................................................................................................................................................................................3
2. Notes for users .................................................................................................................................................................................................................... 4
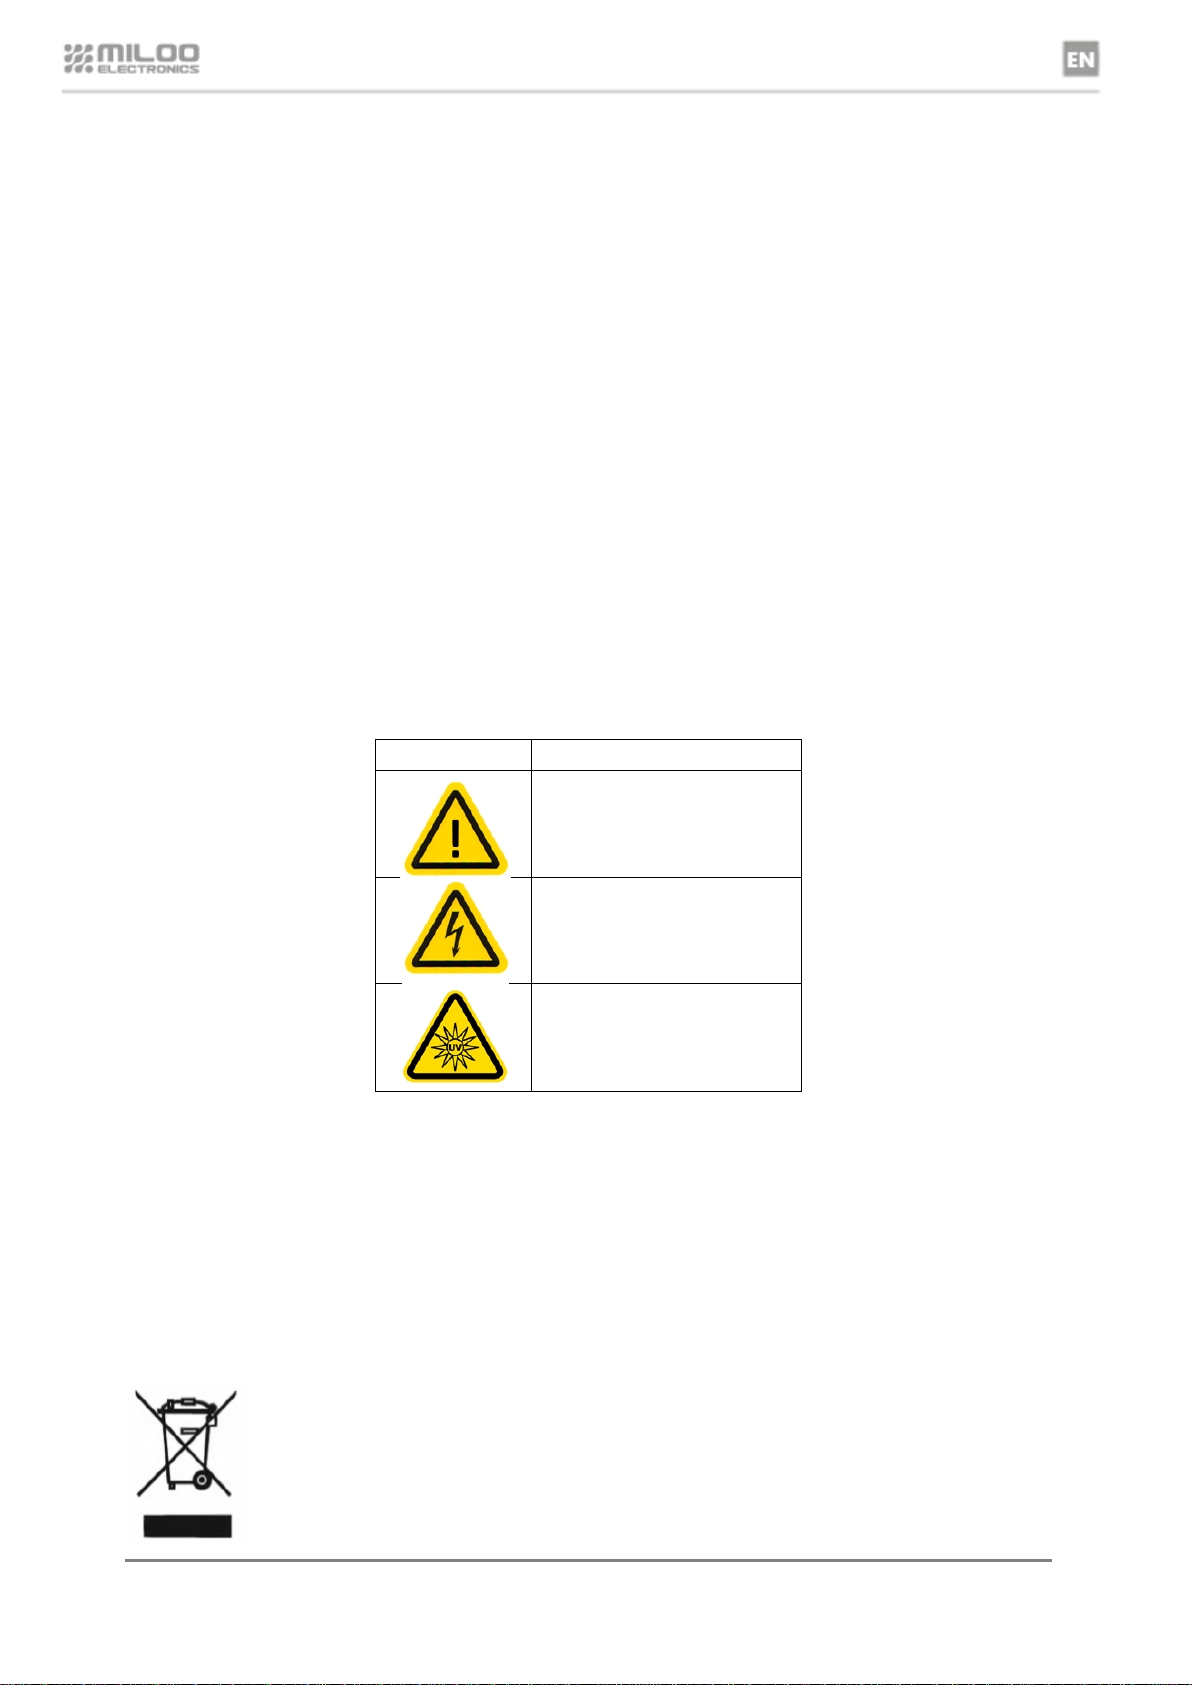
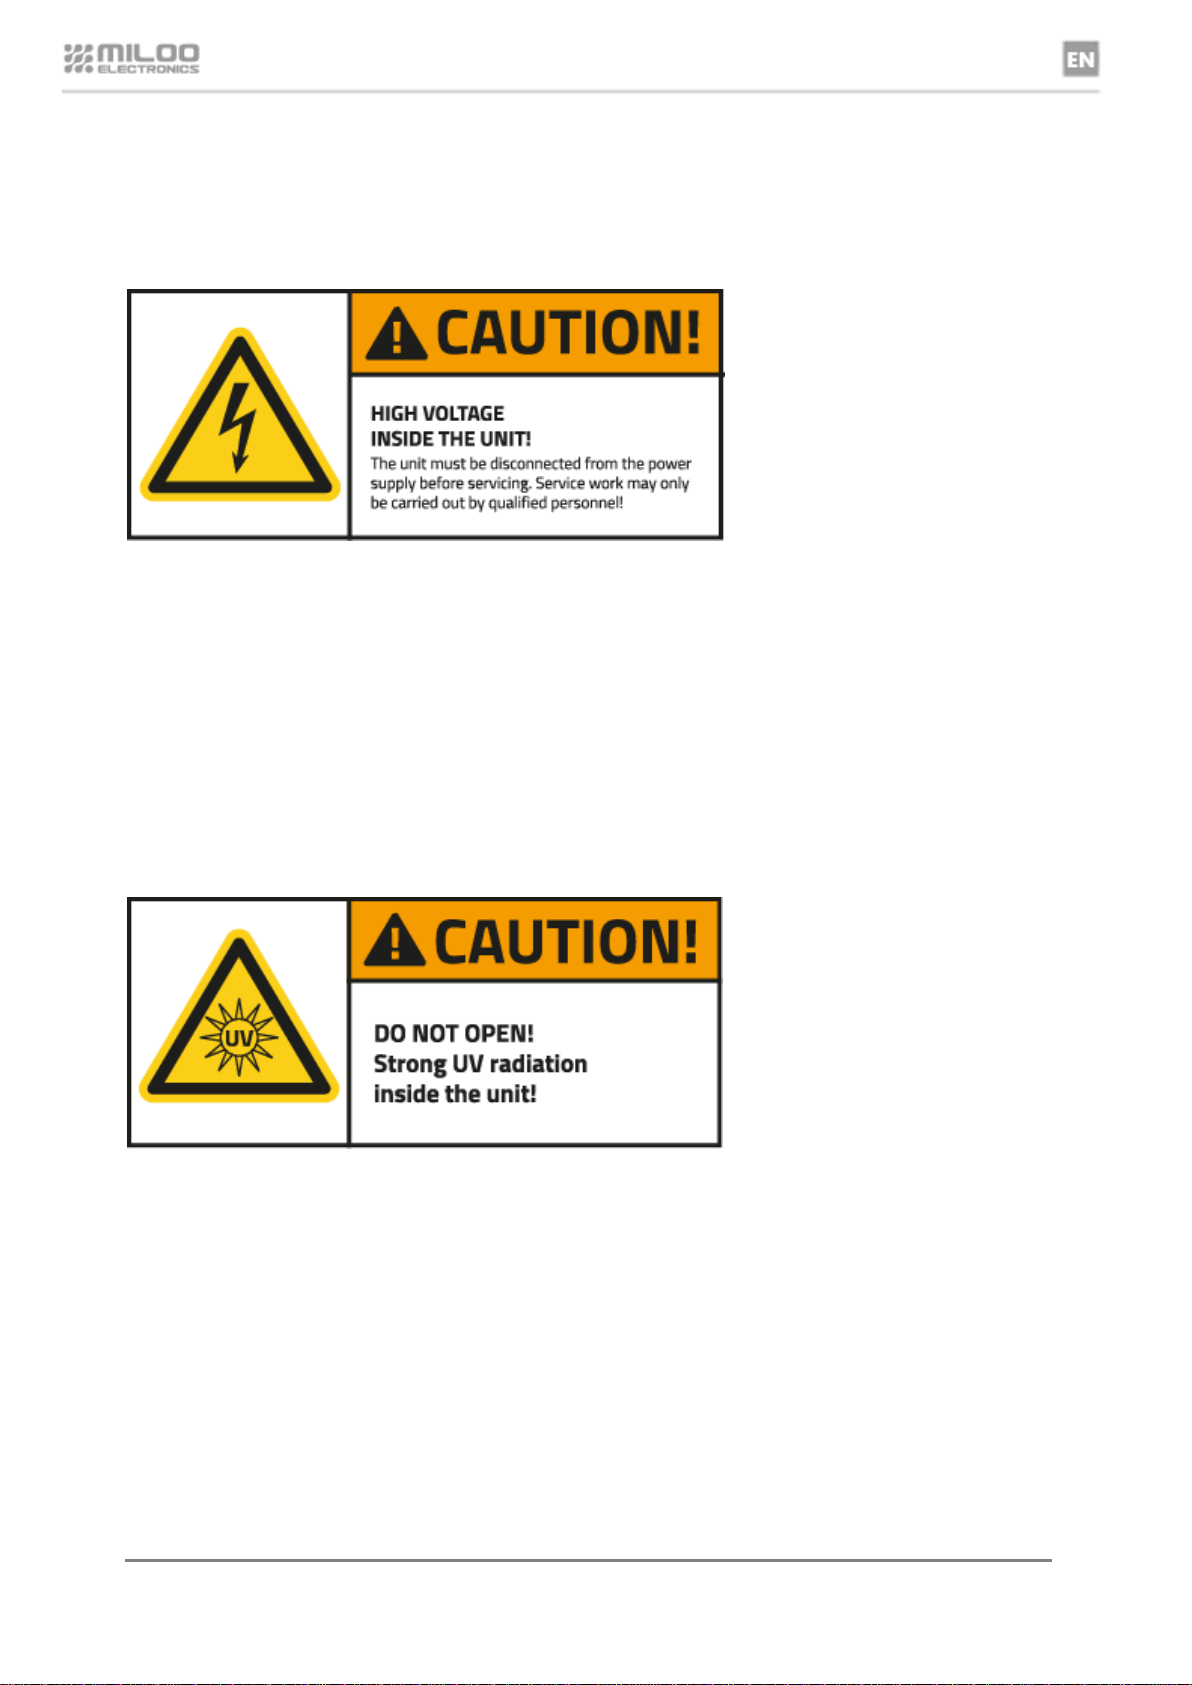
3. Important safety instructions .........................................................................................................................................................................................5
4. Product features..................................................................................................................................................................................................................7
4.1 Purpose ........................................................................................................................................................................................................................ 7
4.2 Product description .................................................................................................................................................................................................. 7
4.3 Principle of operation in disinfection mode ......................................................................................................................................................9
5. Packing contents.............................................................................................................................................................................................................. 10
6. Operation ............................................................................................................................................................................................................................ 11
6.1 Operation of the device........................................................................................................................................................................................ 11
6.2 Control panel ........................................................................................................................................................................................................... 12
6.3 Starting the device and selecting the operating mode .............................................................................................................................. 13
6.3.1 “Filtration” mode......................................................................................................................................................................................... 13
6.3.2 “UV-C air disinfection - standard mode” operating mode............................................................................................................. 13
6.3.3 “UV-C air disinfection –silent mode” operating mode................................................................................................................... 13
6.3.4 “UV-C air disinfection –automatic mode” operating mode ......................................................................................................... 14
6.4 Front panel locking mode .................................................................................................................................................................................... 14
6.5 Changing the configuration parameters......................................................................................................................................................... 15
6.6 Working time counters......................................................................................................................................................................................... 15
6.6.1 Electricity consumption counting .......................................................................................................................................................... 16
6.7 Other functionality of the device....................................................................................................................................................................... 16
6.7.1 AUTO-TEST function................................................................................................................................................................................................. 16
6.7.2 SET-TIME function .................................................................................................................................................................................................... 17
7. Maintenance..................................................................................................................................................................................................................... 18
7.1 Recommendations for maintenance ............................................................................................................................................................... 18
7.2 Replacing the filters .............................................................................................................................................................................................. 18
7.3 Replacing the UV-C lamps................................................................................................................................................................................... 21
8. Possible errors and messages..................................................................................................................................................................................... 22
9. Declaration of conformity.............................................................................................................................................................................................. 24
10. Warranty and Service................................................................................................................................................................................................... 25

Sterylis BASIC MANUAL | 3
1. Notes for service technicians
The following service instructions are intended exclusively for qualified service personnel. To reduce the risk of danger
(electric shock, UV-C exposure), persons without appropriate qualifications or without appropriate training should not
perform any servicing other than as described below.
When servicing this appliance, the service technician is exposed to dangerous UV-C radiation and high voltage. The
possible effects of exposure to these dangers and assistance in such cases are described later in the manual. It is essential
that you read this information before you start servicing. Before starting service work, you should also read the UV-C
radiation safety data sheet.
All service work must be carried out in accordance with the instructions for service technicians.
The voltage inside the device is high and can cause an electric shock. It is dangerous to touch any parts
inside the device. In the event of an injury, follow the first aid instructions on page 5 of this manual.
The device emits UV-C radiation hazardous to human health. Before servicing, make sure that the
fluorescent lamps do not emit UV-C radiation. Observe the general safety rules. Use protective measures
in accordance with this manual or the UV-C safety data sheet. In case of exposure to radiation, follow the
first aid instructions in this manual and the UV-C safety data sheet.

Sterylis BASIC MANUAL | 4
2. Notes for users
1) The STERYLIS room sterilizer can emit health hazardous UV-C radiation and is powered by a high voltage of 230V. For
this reason, please read these operating instructions very carefully, especially the chapter on safety!
2) Keep this manual and store it in a safe place. Do the same for the UV-C safety data sheet.
3) Special attention should be paid to the information specified in the grey fields with the warning sign and those in
bold.
4) Follow the instructions.
5) In case of detection of malfunctioning of the device, contact the manufacturer's service department.
6) For additional information not included in this manual, please contact the manufacturer directly.
7) It is essential that you read the meaning of the following warning icons. They are located in the manual, on the
housing of the device or on other parts of the steriliser and are directly related to it:
Symbol
Meaning
Important safety instruction. Be
sure to read it!
Warning, high voltage!
Dangerous UV-C radiation inside
the device.
Proper disposal of this product
This label indicates that this product should not be disposed of with other household waste throughout
the EU. To avoid harmful effects on the environment and human health from uncontrolled waste
disposal, the equipment should be recycled for material reuse. To return your used device, use the
equipment collection systems or contact the point of sale where you purchased the product. They can
accept this product for safe environmental recycling.

Sterylis BASIC MANUAL | 5
3. Important safety instructions
There are several warning stickers on the housing of the device, the contents of which are also presented below. It is
imperative that you comply with them! Failure to comply with the information contained therein may lead to a risk to the
health or life of the user or other persons, animals and living organisms, and may lead to the failure of the device.
High voltage inside the device is dangerous to human health. In case of electric shock with the parameters as in the
device, skin burns, muscle spasms, loss of consciousness and, in extreme cases, cardiac arrest can occur. Therefore, all
service work may only start after the unit has been disconnected from the power supply and may only be carried out by
qualified and properly trained personnel!
In the event of an electric shock, isolate the victim from the power source as soon as possible - turn off the fuses and then
unplug the plug from the electrical outlet. The second, but more risky way is to pull the victim away from the power source
with a wooden stick. Call an ambulance as soon as possible after the victim is isolated from the power supply. If the victim
is unconscious but breathing, circulation is maintained and spinal injury can be ruled out, the spine should be placed in a
lateral fixed position. If the victim is not breathing, artificial respiration must be performed and, if necessary, a heart
massage. If the victim has symptoms of concussion (pale, cold skin, sweat, chills, accelerated heart rate), place them in an
anti-shock position - on their back, with their legs raised.
Despite a specially designed disinfection channel and limiting switch protection (removing any of the air filters disconnects
the fluorescent lamps), there is always a minimal risk of UV-C radiation escaping outside the device due to improper use
of the product or the occurrence of an unforeseeable failure by the manufacturer. It is therefore necessary to read the
following information on the possible effects of UV-C exposure, first aid measures and protective equipment!
Fluorescent lamps inside the device emit UV-C radiation, which can cause negative effects on skin and eyes. The effects of
radiation exposure depend on the wavelength, the amount of radiation absorbed and the type of tissue exposed. The most
common symptom of skin exposure to this type of radiation is erythema (redness). The degree of redness and its course
depend on the size of the radiation and the wavelength of the radiation. A high dose of UV-C radiation can lead to skin
burns, which are manifested by painful swellings and blisters. Long-term exposure to radiation leads to unfavourable
changes in the epidermis: it accelerates the skin aging process and causes pre-cancer and neoplastic changes. Repeated
exposure of the skin to radiation, particularly high intensity, can cause excessive keratinization, which is a contributor to
the formation of cancers such as basal and squamous cell carcinoma and melanoma. UV-C radiation absorbed by the skin
can cause inflammation of the cornea, conjunctivitis, damage to the retina and cornea and can lead to photochemical

Sterylis BASIC MANUAL | 6
cataracts. The most common, acute symptom of eye exposure to UV-C radiation is inflammation of the cornea and
conjunctiva. Corneal inflammation manifests itself in photophobia, increased tearing, a feeling of a foreign body in the eye,
eyelid spasm, and sometimes visual impairment. The symptoms of inflammation appear after a period of concealment
lasting even less than 30 minutes, and the symptoms of inflammation disappear about 14 hours after exposure.
Radiation-induced conjunctivitis occurs after a latency period of 5 to 10 hours and is manifested by redness, itching,
burning and tearing. If a higher dose is used, the correct vision may be impaired. The symptoms disappear after 10 hours
to several days, depending on the exposure. For this reason, never open the device while the UV lamps are running!
Description of first aid measures:
General rules
All symptoms of exposure to UV-C radiation occur after the so-called
latency period lasting from several minutes to several hours.
Eyes
In case of slight symptoms of eye burn (slight pain, tearing, itching, redness):
avoid direct sunlight, cool your eyes (with a cloth dampened with cold water
or glasses with cooling gel). Do not scratch or rub your eyes. If you have
contact lenses, it is essential to remove them to prevent further irritation. An
appointment with an ophthalmologist is recommended.
In case of more serious symptoms (severe blinking pain, foreign body
impression in the eye) it is necessary to contact an ophthalmologist. Until an
ophthalmologist has given assistance, proceed as with lighter symptoms of
eye burns.
Skin
In case of slight burns, it is recommended to cool the skin with running water
or apply a cooling gel on the skin. Contact with a doctor is recommended.
In case of increased skin exposure to UV-C radiation, it is essential to consult
a doctor.
Personal protective equipment (UV-C radiation)
Skin protection
Laboratory apron or other laboratory skin
protective clothing
Hand protection
Nitrile gloves
Eye protection
Spectacles with side panels and UV400 marking,
protective goggles or full face shields. Filters in
the given protective measures must be marked at
least "3-1,2" (3rd part number, 1,2 degree of
protection). If glasses or goggles are used as eye
protection, cover the remaining skin of the face
with clothing.
This equipment may only be used by children at least 16 years of age and by persons with reduced physical and
mental capabilities and those without experience and knowledge of the appliance, if supervision or instruction
regarding the use of the equipment is provided in a safe manner, so that the hazards are understandable. Children
should not play with the equipment. Children without supervision should not clean or maintain the equipment.
The manufacturer shall not be liable for any damage to property or damage to health and life resulting from improper use
of the STERYLIS BASIC devices or from the general safety rules of use.

Sterylis BASIC MANUAL | 7
4. Product features
4.1 Purpose
The product is designed for air cleaning and disinfection. Depending on the operating mode, it can work as a standard air
purifier and an air purifier extended with sterilization lamps with UV-C light source (in standard or silent mode). The
recommended maximum cubic capacity of the room in which the product can work is given in the technical characteristics
of the product for each model. The device is designed for use in commercial areas.
4.2 Product description
STERYLIS BASIC room sterilizer is a device consisting of air filters, UV-C radiators of the fan(s) and a controller together
with a user panel. The whole device is closed in a housing made of stainless steel, powder coated on the outside. A pre-
filter (F1) is a standard filter made of fully synthetic non-woven fabric. The filtering capacity is achieved by the
phenomenon of attraction of pollutants by charged electrostatic fibres. The second filter is an active carbon filter (F2). It
attracts harmful gases through adsorption. It stops both particulates and unpleasant smells. UV radiator is a battery of
specialized light sources based on fluorescent tubes emitting UV-C radiation for air sterilization. A UV-C source does not
produce ozone during operation. The fan drags the right amount of air through the filters and the UV lamp, making the
cleaning and disinfection process possible.
In filter mode, the room air is cleaned with a pre-filter (F1) and an activated carbon filter (F2). A pre-filter with electrostatic
properties traps particles of harmful pollutants, including those of microscopic size (several micrometers). It also removes
harmful bacteria and allergens using a coating applied to the filter medium. In addition to particles, the active carbon filter
retains harmful gases and odours through adsorption.
In the UV-C disinfection mode the UV-C lamps between the two filters are activated. The lamps emit UV-C radiation with a
wavelength of 253.7 nm and power depending on the size of the device (see technical data). UV-C radiation irreversibly
inactivates viruses, bacteria, fungi, moulds and yeasts. The Sterylis steriliser has been designed in such a way that people
can stay inside when the device is in disinfection mode with the UV-C light source switched on. The UV-C radiation that
breaks down the DNA is enclosed in a specially designed light trap so that not even the smallest part of it can escape
outside the device.
In the silent disinfection mode, the unit operates in a similar way to the standard mode, but with reduced fan capacity.
This results in a significantly reduced sound power level of the steriliser.
In the automatic disinfection mode, the device can operate on various programs, which are described in Chapter 6.3.4.

Sterylis BASIC MANUAL | 8
STERYLIS BASIC is available in 6 versions, whose technical parameters are shown in the table:
Name
STERYLIS
STERYLIS
STERYLIS
Model
BASIC-100
BASIC-150
BASIC-300
Rated voltage
230 V
230 V
230 V
Frequency
50 Hz
50 Hz
50 Hz
Rated power*
140 W
170 W
220 W
Rated current*
0.6 A
0.7 A
1,0 A
Maximum airflow capacity
260 m3/h
300 m3/h
420 m3/h
Types of air filters
F-1: 095-908
F-2: 095-909
F-1: 095-908
F-2: 095-909
F-1: 095-908
F-2: 095-909
Number of UV-C sources / Model
6 / PHILIPS TUV PL-S
9W/2P
4 / PHILIPS TUV T8 25W
6 / PHILIPS TUV T8 25W
UV-C wavelength
253.7 nm
253.7 nm
253.7 nm
UV-C source standard
EN 61195
EN 61195
EN 61195
UV-C source electrical power
72 W
100 W
150 W
UV-C source radiated power
19,2 W
30 W
45 W
Average UV-C radiation intensity
127 J/m2
150 J/m2
257 J/m2
Net weight
16 kg
17 kg
31 kg
IP degree of protection
IP20
IP20
IP20
*in "UV-C air disinfection standard mode"
Name
STERYLIS
STERYLIS
STERYLIS
Model
BASIC-400
BASIC-800
BASIC-1200
Rated voltage
230 V
230 V
230 V
Frequency
50 Hz
50 Hz
50 Hz
Rated power*
400 W
690 W
800 W
Rated current*
1.7 A
3,0 A
3,5 A
Maximum airflow capacity
430 m3/h
780 m3/h
1240 m3/h
Types of air filters
F-1: 095-908
F-2: 095-909
F-1: 095-908
F-2: 095-909
F-1: 095-908
F-2: 095-909
Number of UV-C sources / Model
6 / PHILIPS TUV (Xtra)
25W
8 / PHILIPS TUV (Xtra)
55W HO
10 / PHILIPS TUV (Xtra)
55W HO
UV-C wavelength
253.7 nm
253.7 nm
253.7 nm
UV-C source standard
EN 61195
EN 61195
EN 61195
UV-C source electrical power
330 W
440 W
550 W
UV-C source radiated power
118 W
157 W
196 W
Maximum UV-C radiation dose
521 J/m2
382 J/m2
249 J/m2
Net weight
32 kg
45 kg
51kg
IP degree of protection
IP20
IP20
IP20

Sterylis BASIC MANUAL | 9
4.3 Principle of operation in disinfection mode
The UV-C lamps used in the device emit radiation of a strictly defined wavelength of 253.7 nm. It is a wavelength that has
a photolithic effect on microorganisms such as bacteria, moulds, yeasts and viruses. Ultraviolet light of this wavelength
effectively penetrates their cell membrane destroying the structure of their DNA and thus preventing their reproduction.
Subjected to high levels of UV-C radiation, microorganisms and viruses are permanently destroyed. In addition to the
disinfecting effect of the UV-C radiation used, we also obtain a high quality deodorising effect (removing odours from the
air). Due to the special design of the UV-C chamber, the device operating in disinfection mode can be used in rooms where
people are present. Specially designed light traps inside the device completely prevent invisible, harmful UV radiation from
escaping from the device. The specially selected type and high power of the UV-C light source with a selective emitted
wavelength of 253.7 nm, and the unique solution of the double quartz filter UV-C lamp used in STERYLIS sterilisers,
causes the harmonic components of the ozone-producing UV light emissions below 240 nm to be blocked inside the lamp.
Thus, in disinfection mode, the STERYLIS BASIC sterilizer does not produce any harmful ozone at all and is completely safe
for the people around it.

Sterylis BASIC MANUAL | 10
5. Packing contents
A user who has purchased any model of STERYLIS BASIC room sterilizer is included in the set:
1) Complete room steriliser ready for use
2) Detachable 3-meter long power cord
3) Additional 10-meter long power cord*
4) Operating manual
5) Safety data sheet
6) UV-C safety data sheet
7) Declarations of conformity in Polish and English
* if you purchase the device as an option with a longer power cord
If the manufacturer is not responsible for any of the above mentioned parts of the documentation, he should be contacted
for completion or downloaded from the website at the address: https://www.sterylis.com

Sterylis BASIC MANUAL | 11
6. Operation
The device should be operated in rooms whose parameters are consistent with the technical characteristics of the device.
In addition, they must be operated in accordance with the information contained in the chapters: "Maintenance" and
"Important safety instructions".
6.1 Operation of the device
To operate the room steriliser, use the user panel on the front of the device. The construction and operation of the user
panel is described in the following sections.
`
2
4
3
5
Handle to transport the device
Cassette filters (with activated carbon)
User panel
Cassette filters (pre-filters)
Feet (transport wheels for selected versions)
1
3
2
4
5
1

Sterylis BASIC MANUAL | 12
6.2 Control panel
3
6
5
2
6
4
7
AUTOMATIC MODE section with segmented display
OPERATION TIME section with operation time segmented display
Alarm icons for fan or UV-C fluorescent lamp system failure
UV-C section with graphic display
User panel switch
Operating modes section: standard disinfection, silent disinfection and filtration
TIMER section with segmented timer
1
3
2
4
5
6
7
1

Sterylis BASIC MANUAL | 13
6.3 Starting the device and selecting the operating mode
The device can operate in several operating modes, the activation of which is forced by means of appropriate buttons on
the user panel. The following modes are available: Filtration, UV-C air disinfection - standard mode, UV-C air disinfection -
silent mode and UV-C air disinfection - automatic.
To start the device, insert the power cord plug into an electrical outlet. The voltage required for proper operation is 230 V,
50 Hz. Then move the user panel switch to the “I” position.
When the device is started, it will be in standby mode, which means that it is ready for operation and waiting for a
command from the user. The display in the AUTOMATIC MODE section shows "Aut.x".
6.3.1 “Filtration” mode
To start the "Filtration" mode of operation, press and hold the START button located at the green filtering mode indicator.
The filter mode light will start blinking (the device will check the proper functioning of the relevant actuators - PRE-TEST
function) and then it will start to light steadily and the device will start working in the selected mode.
If any errors are detected during the PRE-TEST function, the device will display a tESt message, enter the standby mode
and then display the corresponding error codes on the display in the AUTOMATIC MODE section.
The filtration mode can also be directly selected if the device operates in any of the disinfection modes. To switch from
disinfection mode to filtration mode, press and hold the START button located at the green filtration mode light.
To interrupt the filtration process, press and hold the START button located at the green filtration mode light again.
6.3.2 “UV-C air disinfection - standard mode” operating mode
To start the "UV-C air disinfection - standard mode" operating mode, press and hold the START button located at the
green standard mode light. The standard mode light will start blinking (the device will check the proper functioning of the
relevant actuators - PRE-TEST function) and then it will start to light steadily and the device will start working in the
selected operation mode.
If any errors are detected during the PRE-TEST function, the device will display a tESt message, enter the standby mode
and then display the corresponding error codes on the display in the AUTOMATIC MODE section.
During operation of the device in disinfection mode, the display in the UV-C section is activated as standard.
The standard mode can also be directly selected if the device operates in any of the disinfection or filtration modes. To
switch from disinfection or filtration mode to standard disinfection mode, press and hold the START button located at the
green standard mode light.
To interrupt the standard disinfection process, press and hold the START button next to the green standard mode light
again.
6.3.3 “UV-C air disinfection –silent mode” operating mode
To start the "UV-C air disinfection - silent mode" operating mode, press and hold the START button located at the green
silent mode light. The silent mode light will start blinking (the device will check the proper functioning of the relevant
actuators - PRE-TEST function) and then it will start to light steadily and the device will start working in the selected
operation mode.
If any errors are detected during the PRE-TEST function, the device will display a tESt message, enter the standby mode

Sterylis BASIC MANUAL | 14
and then display the corresponding error codes on the display in the AUTOMATIC MODE section.
During operation of the device in disinfection mode, the display in the UV-C section is activated as standard.
The silent mode can also be directly selected if the device operates in any of the disinfection or filtration modes. To switch
from standard disinfection or filtration mode to silent disinfection mode, press and hold the START button located at the
green silent mode light.
To interrupt the silent disinfection process, press and hold the START button next to the green silent mode light again.
6.3.4 “UV-C air disinfection –automatic mode” operating mode
Automatic operation can be carried out in several programs: AUT.1, AUT.2, AUT.3 and AUT.4. The characteristics of these
work programs are presented in the table below.
Program code
Program name
Program description
AUT.1
WEEK
Work from 8.00 am to 4.00 pm, only on working days. Low fan speed
operation
AUT.2
HOME
Work from 6.00 pm to 9.00 pm, only on working days. Low fan speed
operation
AUT.3
MIX
Operation for 5 min at high fan speed and then 45 min at low fan speed
AUT.4
MAX_3H
3 hours of operation at high fan speed, then start silent disinfection mode
To start the unit in automatic disinfection mode, select the appropriate program code in standby mode. The program is
selected using the buttons +and –in the AUTOMATIC MODE section. Then press and hold down the button START in the
AUTOMATIC MODE section. The automatic mode light will start blinking (the device will check the proper functioning of
the relevant actuators - PRE-TEST function) and then it will start to light steadily and the device will start working in the
selected operation mode.
If any errors are detected during the PRE-TEST function, the device will display a tESt message, enter the standby mode
and then display the corresponding error codes on the display in the AUTOMATIC MODE section.
During operation of the device in the automatic disinfection mode, the display in the UV-C section is activated as standard.
The automatic mode can also be directly selected if the device operates in any of the disinfection or filtration modes. To
switch from disinfection or filtration mode to automatic disinfection mode, press and hold the START button located at
the green standard mode light.
To interrupt the automatic disinfection process, press and hold the START button next to the green automatic mode light
again.
6.4 Front panel locking mode
The STERYLIS BASIC room sterilizer is equipped with the possibility of activating a user panel lock. It is designed to block
the device in such a way that unwanted people cannot operate it.
To activate the front panel locking mode:
During active standby, automatic disinfection, silent disinfection, standard disinfection or filtration, press and hold the UV-
Cand FILT buttons in the OPERATION TIME section simultaneously for 3 seconds. Entering the lock mode will be
confirmed by displaying "L0CH" in the AUTOMATIC MODE section.
To deactivate the front panel locking mode:

Sterylis BASIC MANUAL | 15
During active front panel lock mode, press and hold the UV-C and FILT buttons in the OPERATION TIME section for 3
seconds simultaneously.
6.5 Changing the configuration parameters
To change the configuration parameters, press and hold the OK button in the "TIMER" section in the standby mode. Then
enter the appropriate code to change the parameters.
Entering the access code:
The 4-digit code entered is shown on the display under AUTOMATIC MODE. The +and -buttons change the value by 1
active digit. An active number is the one that flashes at a high frequency, inactive numbers light up constantly. The OK
button changes the active digit to the next one on the right. After entering the correct code, confirm it by long pressing the
START button. If the code is incorrectly entered, the code HHHH will be displayed and a short beep will occur. In this case,
the code must be re-entered.
You can change the following parameters:
Parameter
code
Description
Min value
Max value
Default value
C150
Date setting - day of the month
1
31
15
C151
Date setting - month
1
12
7
C152
Date setting - year
2020
2120
2020
C200
FIRMWARE revision (read only)
-
-
FW_REV
The individual parameters are changed using the +and -buttons in the AUTOMATIC MODE section. The code of the
selected parameter is displayed in the AUTOMATIC MODE section. The current value of the selected parameter is
displayed in the OPERATION TIME section. To change the value of the selected parameter, operate the +and -buttons in
the OPERATION TIME section. The selection of the active digit is made by means of the RESET button. To confirm the
value of the selected configuration parameter, press and hold the OK button in the AUTOMATIC MODE section. The
selected value will be confirmed by a short beep and all active displays will flash.
To return to the standby mode, press and hold the OK button in the TIMER section.
6.6 Working time counters
The device is equipped with the operating time counters listed in the table below. The user has the possibility to read the
indications of these counters and reset them.
To view or reset the counters, press and hold the OK button in the TIMER section in the device standby mode. Then enter
the appropriate code to change the parameters.
Entering the access code:
The 4-digit code entered is shown on the display under AUTOMATIC MODE. The +and -buttons change the value by 1
active digit. An active number is the one that flashes at a high frequency, inactive numbers light up constantly. The OK
button changes the active digit to the next one on the right. After entering the correct code, confirm it by long pressing the
START button. If the code is incorrectly entered, the code HHHH will be displayed and a short beep will occur. In this case,
the code must be re-entered.
You can interfere with the following counters:
Parameter code
Description
d102
UV-C lamp service interval timer [s]
d105
Fan service interval timer [s]
d120
Air filter interval timer [s]
d201
Active electricity consumption meter [kWh]

Sterylis BASIC MANUAL | 16
The individual parameters are changed using the +and -buttons in the AUTOMATIC MODE section. The code of the
selected parameter is displayed in the AUTOMATIC MODE section. The current value of the selected parameter is
displayed in the OPERATION TIME section. To reset the display of the selected counter, press and hold the RESET button
in the OPERATION TIME section. The reset will be confirmed by a short beep and all displays will flash.
To return to the standby mode, press and hold the OK button in the TIMER section.
You can also view the current meter value directly via the display in the OPERATION TIME section and the UV-C and FILT
buttons. Pressing any of the UV-C or FILT buttons will display in the OPERATION TIME section of the display the current
counter value, d102 and d120 respectively.
6.6.1 Electricity consumption counting
The device is equipped with a function of counting the total amount of electricity consumed. The energy is measured in all
operating modes, including standby and sleep mode. The value of the electricity consumed is previewed using the d201
meter.
6.7 Other functionality of the device
The remaining functionality of the device is described in the following sections. These include: AUTO-TEST, PRE-TEST,
SET-TIME and SET-FACTORY-SETTINGS function.
To access the above mentioned functionalities, press and hold the OK button in the TIMER section in the device standby
mode. Then enter the appropriate code to move to the above mentioned functions.
Entering the access code:
The 4-digit code entered is shown on the display under AUTOMATIC MODE. The +and -buttons change the value by 1
active digit. An active number is the one that flashes at a high frequency, inactive numbers light up constantly. The OK
button changes the active digit to the next one on the right. After entering the correct code, confirm it by long pressing the
START button. If the code is incorrectly entered, the code HHHH will be displayed and a short beep will occur. In this case,
the code must be re-entered.
The available functions are under the following codes:
Parameter code
Description
t200
AUTO-TEST function
t202
SET-FACTORY-SETTINGS function
t204
SET-TIME function
PRE-TEST function is started automatically when the selected operating mode is activated.
The individual parameters are changed using the +and -buttons in the AUTOMATIC MODE section. The code of the
selected parameter is displayed in the AUTOMATIC MODE section. To move to a given function, select it and press and
hold the OK button in the AUTOMATIC MODE section.
To return to the standby mode, press and hold the OK button in the TIMER section.
6.7.1 AUTO-TEST function
The function consists in an automatic check of the operating status of all actuators (fan and UV-C lamps). If the device
detects an error in one of the elements during the process, it will display the error. If an element error has been detected
during previous use of the unit, the AUTO-TEST function can erase this error if the unit will function correctly during this
function.

Sterylis BASIC MANUAL | 17
When the AUTO-TEST function is active, the mode lights and tESt on the display in the AUTOMATIC MODE section blink
quickly.
To interrupt the AUTO-TEST function, press any of the START buttons corresponding to filtration, silent disinfection,
standard disinfection or automatic disinfection modes.
When the AUTO-TEST function is completed, the unit will go into standby mode.
6.7.2 SET-TIME function
The function is used to set the current time on the controller. When the SET-TIME function is selected, the number active
on the display in the TIMER section flashes.
To set the current time:
The +and -buttons change the value by 1 active digit. The selection of the active digit is made by pressing the OK button
in the TIMER section. The time is saved immediately after changing any number, no additional approval is required.
To return to the standby mode, press any of the START or OK buttons in the AUTOMATIC MODE section.

Sterylis BASIC MANUAL | 18
7 Maintenance
7.1 Recommendations for maintenance
Note! All maintenance work should only be carried out when the unit is disconnected from the power
supply (with the exception of alarm removal activities)!
All service activities related to the ozone generators may only be performed by authorized personnel and
the manufacturer's factory service. For details on service, see the Warranty and Service section.
The device should be kept in a state of general cleanliness. Use only neutral detergents for cleaning.
Do not use for washing the water jet under pressure.
The air filters should be checked and replaced periodically as described in Chapter 7.2. The signalling of exceeding
the time of use / need to check the air filters is indicated on the user panel by displaying appropriate messages
(see: Section 9). Replacement of the filters must be carried out according to the instructions in chapter 7.2.1 and
7.2.2. Do not let the filters clog and avoid their excessive operation.
After the service life of the UV lamps (9,000 operating hours) in the steriliser, they should be replaced. This is
related not only to the possible burning of the lamp but also to the decrease of its maximum radiation dose over
time. The UV lamps' overrunning time is indicated on the user panel by displaying an appropriate message (see
Section 9). Only the qualified service technicians can replace the lamp/s!
7.2 Replacing the filters
Regular filter replacement and check of the condition of the filters is necessary for proper and efficient operation of the
device. This applies to both pre-filters and activated carbon filters. The condition of the filters should be checked every
500 operating hours. The filters must be replaced every year (unless the filters show no signs of wear).
The need to check/replace the filters is signaled by means of a check:
Displaying errors in the AUTOMATIC MODE section: F002 (filter inspection required) or F006 (filter replacement
required)
7.2.1 Pre-filter replacement (F1)
Make sure that the device is switched off and disconnected from the power supply.
Follow the instructions below:

Sterylis BASIC MANUAL | 19
1. Insert your index finger into the hole in the air
filter cartridge and pull it towards you with a
slight movement.
2. Pull the cassette out with a downward motion
3. Turn the front air filter cartridge towards the
floor
4. Remove the air filter from the cartridge
5. Insert a new air filter into the cartridge, making
sure that the direction of the arrow on the
cartridge and on the filter are aligned.
6. Turn the air filter cartridge as shown in the
picture opposite and put it back into the device
7. Push the cassette into the device housing
8. The filter has been properly replaced

Sterylis BASIC MANUAL | 20
A pre-filter that is pulled out of the destination causes a violation of the limiting switch. In case of violation of the limiting
switch in filtration or disinfection mode, the process will be stopped at the current moment and the unit will go into pause
mode. When the limiting switches of the filter cartridge are no longer violated (inserting the filter cartridge back), the unit
will resume the filtration/disinfection process. Violation of the end of the limit also results in a corresponding error on the
display in the UV-C OPERATION SCHEDULE section. If the limit violation ceases, the error is automatically deleted.
The safety limiting switches provide protection in case of an attempt to change the air filters during operation.
7.2.2 Active carbon filter replacement
Make sure that the device is switched off and disconnected from the power supply.
Follow the instructions below:
1. Remove the air filter cartridge out by pulling
it towards you
2. Remove the air filter from the cartridge
3. Place a new air filter in the cartridge. Make
sure that the direction of the arrow on the
cartridge is the same as the direction of the
arrow on the air filter
4. Insert the filter cartridge back into the
device and push it
5. The filter has been properly replaced
This manual suits for next models
5
Table of contents
Other MILOO-ELECTRONICS Steriliser manuals