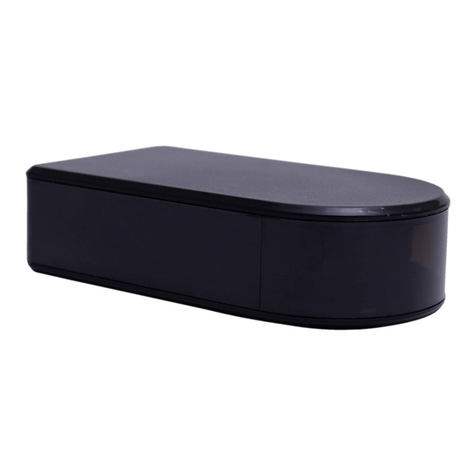
Mini Gadgets MCC1080Wifi User manual

Remote Surveillance Camera

Foreword
This manual provides a brief introduction to how to use the product and details for
product use and operation. Please be sure to carefully read and completely
understand the manual before use and keep it properly. We hope our product can
meet your demands and serve you for a long time.
Product Assurance
This product is certified by FCC&CE and other authorities to conform to the
recommended indicators. Customer safety is assured in use.
Product features
1It has a stylish appearance, and the camera body adopts
three-dimensional UV treatment.
2 It adopts 10 invisible black pearl night vision filling lights.
3With hidden video function;
4Operating during charging;
5Photographing, video recording, night vision, sound recording,
motion detection and alarm;
6. Point-to-point connection, can work without a network
connection;
7. Able to detect smoke and fire with motion detection function.
1

Operation instruction for electronic alarm clock
1. Product structure
1. Photosensitive sensor 2. Time display screen 3. F8 night vision lamp 4.
F85 night vision lamp 5. F3 night vision lamp 6. Function indicator light
(blue light) 7. Camera 8. Time-telling key 9. Mode key 10. Setup key
11. Up key 12. Down key 13. Snooze setting 14. Wifi connection indicator
light (red) 15. Loudspeaker 16. USB interface 17. Battery cover
2

2. Function introduction:
◇ Time display function: To display the current time, year, month and date;
◇ Alarm and snooze function: To set the alarm interval and snooze time interval
(1-60 minutes);
◇ Voice time-telling function: To broadcast the current time;
◇ Natural sound appreciation function: To set the time of appreciation (10-60
minutes)
3. Function setting:
1. Current time setting:
◇ Press “SET” key under time display mode to enter in year setting. When
“2010” displays and flickers on the screen, start setting by pressing “UP”
and “DOWN” keys.
◇ Press “SET” key to set time in order of month→ day →hour →minute. The
digits in corresponding position will blink when being set.
Time mode Set the year Set the month
Set the date Set hour Set minute
Instruction for quick operation of network surveillance camera
This product is a 25-frame HD (1,080P) network clock camera with an external TF
card and a multi-functional high-tech product integrating functions of video
recording, photographing, night vision, motion detection alarm, APP real-time
monitoring, and electronic alarm clock. It is equipped with high-capacity batteries,
and has functions of 5 megapixel HD recording, multilingual electronic
timekeeping. It supports up to 32GB TF card, long-time work and APP operation,
which makes it more convenient. Moreover, it works as the best anti-theft and
evidence-gathering tool with strong concealment.
3

1. APP software download
— —
(Picture 1) (Picture 2)
Method 1. Scan the QR (picture 1) code directly to go to the download
screen (picture 2). Select appropriate download software according to
your mobile phone system. (Note: . This kind of
installation is only available for Chinese Mainland).
Method 2: For Android phones, search for APP software named
“RMON” in Google Play, download and install it.
For IPhone, APP software named “RMON” in AppStore, download
and install it.
Wifi connection 1 (This connection method is suitable for all kinds of
home routers).
1. Ensure your mobile phone is connected to wifi and then power on
the device. (The blue light starts to blink 30 seconds later. The device
4

begins to work and then red light flickers normally).
2. Open APP software that is downloaded and installed in your mobile
phone. (Specific operation steps are shown in pictures.)
Step1 (enable ) Step2 (click ) Step 3 (enable)
Step 4 (Input the UID number of device or scan the QR code of the device)
Step 5 (Input the passwords for wifi and click
5

)
3. When it shows “WIFI setting complete
d”, click to add “network camera” and wait for about 10 seconds to
return to the main menu. The main menu will show that the device
under setting is now online and WIFI is set successfully.
4. After the device is connected to wifi, the red indicator light will keep
on.
3. Wifi connection 2 (The connection method is mainly suitable for
public network and some special routers)
1. If the device is not connected to wifi by using the first connection
method, the device will restart automatically 2 minutes later and enter
in the second connection.
2. The red indicator light then starts to blink slowly. Directly search for
wifi hotpot of the device on mobile phone and connect to it. (This step
will take about 3 minutes, please wait patiently.)
3. After wifi connection is successfully completed, return to APP
interface (open ——(click )—(open )—(Input the
UID number of device or scan the QR code of the device)—(select the
current WIFI)——( type in the passwords for the current wifi and
click ). Click to add “network camera” when it shows
“WIFI setting completed”. Wait for about 30 seconds to return to the
main menu. The main menu will show that the device under setting is
6

now online and WIFI is set successfully.
Point-to-point AP direct connection
1. When there is no network connection, open the device and search
for wifi hotpot of the device with your mobile phone. (It will take 3
minutes)
2. Connect to it, enable APP and click to search.
5. Screen shot, video recording and alarm
1 Click the online device to browse videos. There are three options “1080P 720P
480P” on the top of screen, which can be selected according to the current
network environment to adjust the image quality and video fluency. In addition to
that, the color contrast degree and brightness can also be adjusted autonomously.
Icons in respectively represent:
monitor, photograph, video recording, left/right rollover, up/down rollover. By
clicking “photograph” or “video recording”, the images or videos will be saved
in the phone memory (as shown below).
7

2. Long press the online device to start more settings.
8

1. Advanced configuration
(To remotely change basic functions of the device)
5. Administrator operation guide
1. Install the search tool in random disc on the computer. (Note:
administrator setting can only be made within LAN).
2. Click to display the devices connected to network (as below)
3. Double click the searched IP. Enter in the next page to type in user name (admin)
and click to confirm it. (Note: the original user name is admin, with no password)
(as shown below)
9

4. Enter in setting page after completing the above steps. Download the plug-in
and select a language for first use (click
to download and install).
10

5. Click
again to enter in setting page (as shown below).
6. Click to start setting (as shown below)
11

7. System management setting: to select the item to be set (as shown below).
6. Main function description
1. Time setting
Open system management page——click time setting——select time zone——
synchronize with host ——save.
3. Administrator password setting
Open “change password” ——type in the new password——confirm the new
password——save.
3. Change the password of device (original password: 8888)
Open “network setting” ——P2P setting——type in the new password——
save——return to system management to reboot the device. (it can also be set
remotely by APP).
4. Alarm setting
Open “alarm setting” ——start alarm setting——click IP Camera built-in——
select the required sensitivity. (Option 6 is suggested)
5. SD card setting
SD card should be formatted for the first time to insert——enter in SD card
setting to select the needed function before setting other functions.
6. View the content of SD card
Plug out the card directly and read with a card reader.
2. Open SD card video recording page, select and save the video file to be
viewed.
12

7. Specifications
Pixel 5 megapixel CMOS
Resolution 1080P
Video format AVI
Frames 25
View angle 90°
Night vision lamp 10 super strong night vision lamps in three sizes:
Ф8Ф5Ф3
Distance of motion
detection shooting
6 m straight-line distance
Minimum illumination 1LUX
Battery capacity 2400MA
Continuous shooting time Above 24 hours
Compressed format H.264
Sound recording range 5㎡
Power consumption 260MA/3.7V
Storage temperature -20-80℃
Operating temperature -10-60℃
Operating humidity 15-85%RH
Type of memory card TF card
Maximum capacity of
memory card
32GB
Play software VLCPlayer/SMPlayer
Computer operation
system
Windows/Mac OS X
Mobile phone operation
system
Android/iOS
Web browser IE7 and above,chrome,firefox safari.etc
Most important customers 4
13

8. Trouble shooting
1. Remote control is not enough.
Please select the most suitable definition according to the current network
environment.
2. SD card cannot save files.
SD must be formatted for first use.
3The device cannot be connected to network.
Please select the proper connection method according to the network nature.
3. The video in SD card cannot be played fluently on APP.
It is due to different decoding capacity of mobile phones. You can adjust the
definition of recording device to fit your mobile phone.
5. The passwords are forgotten.
Directly click the reset key of device for 10 seconds to restore factory settings.
4 Precautions
Use occasions: please strictly comply with relevant state decrees and do not use it
any other illegal purposes at your own risks. Software upgrade: to achieve better
product performance, the manufacturer will make continuous improvement to the
software. This product is designed for convenient software upgrade by customers.
Please ask your local distributor for the information and upgrading method of latest
version of software.
Working temperature: please use it under natural temperature. Do not operate it
under a temperature that is not adapted for human body.
Working humidity: please use it under an environmental humidity that is suitable
for human life. Do not put the product in a moist working environment since the
product is not designed with waterproof function.
Shooting luminance: please use the product in an environment with adequate light
sources. Do not point the camera directly to the sun and other superstring light
sources to avoid any damage to the optical elements.
Cleaning requirements: please do not use the product in an environment with too
much dust to keep the camera lens and other components free of dust that may
affect the shooting effect. The camera lens can be cleaned and maintained by
wiping with lens wiping paper or glasses cloth. Other matters: the product is a kind
of precision electronic product that should be kept safe from strong impact and
vibration. Please do not use in high magnetic field and strong electric field.
14

远 程 监 控 摄 像 机

前言
本用户手册将快速说明如何使用本产品,同时提供给您详细的信
息,包括使用、操作。使用前请仔细阅读本手册并完全理解。请妥善
保存本手册,我们希望本产品能满足您的需求并长期服务于您!
产品保证
本产品经 FCC & CE 等权威机构认证符合推荐指标,顾客使用具
有安全保证。
产品特点
1.外观时尚,机身采用立体 UV 处理。
1.采用 10 颗不可视黑珍珠夜视补光灯。
3.隐藏式录像功能。
5.边充边录.
6.拍照、录像、夜视、录音、移动侦测报警。
7.点对点直连,无网络同样使用。
8.移动侦测可以检测到烟雾和明火。
1

电子闹钟操作说明
一、产品结构
1.光敏感应器 2.时间显示屏 3.F8夜视灯 4.F5夜视灯 5.F3夜
视灯 6.功能指示灯(蓝灯) 7.摄像头 8.报时键 9.模式键
10.设置键 11.上键 12.下键 13.贪睡设置14.wifi 连接指示灯(红
色) 15.喇叭 16.USB 接口 17.电池盖
2

二、功能介绍:
◇ 时间显示功能,显示当前时间、年、月、日。
◇ 闹铃和贪睡功能,可设置闹钤和贪睡时间间隔(1-60 分钟)。
◇ 语音报时功能,语音播报当前时间。
◇ 自然声音欣赏功能,可设置欣赏时间(10-60 分钟)
三、功能设置:
1、 当前时间设置:
◇ 在时间显示模式按”SET”键进入年份设置,屏幕显示”2010”并闪烁,通过
“UP”.DOWN 键的配合进行设置
◇ 再按”SET”键依次设置月→日→小时→分钟,设置时相应位置的数字会闪烁.
时间模式 设置年份 设置月份
设置日期 设置小时 设置分钟
网络监控摄像机快速操作指南
本产品是一款外置T F卡存储器的高清25帧(1080P)网络摄像监控钟,集摄
像、拍照、夜视、、移动侦测报警、APP实时监控、电子闹钟、存储于一身的多
功能高科技新产品。本产品配备高容量电池。500万像素高清晰录像,多国语言
电子报时,最高支持32GB TF卡,可供长时间工作,APP操作更方便。隐蔽性强,
是居家防盗、监控取证的最佳工具。
3

一. APP 软件下载。
— —
(图1) (图2)
方式 1.直接扫描二维码(图 1),进入下载页面(图 2)。根据手机的系
统选择下载软件。(注: 此安装途径仅为中国
大陆使用)
方式 2.安卓在 Google Play 搜索名为 RMON 的 APP 软件,下载安装。
苹果在应用商店 AppStore 搜索名为 RMON 的 APP 软件,下载安装。
二、Wifi 连接方式一。(此连接方式适合所有家用路由器)
1.手机确保连接 wifi.打开设备开关。(30 秒后蓝灯闪烁,设备系统开
始工作,红灯正常闪烁)
2.打开下载安装好的 APP 软件。(具体操作如图)
4
Other manuals for MCC1080Wifi
2
Table of contents
Other Mini Gadgets Security Camera manuals

Mini Gadgets
Mini Gadgets DVBPR6 User manual

Mini Gadgets
Mini Gadgets B3000 User manual

Mini Gadgets
Mini Gadgets ALC-DVR User manual

Mini Gadgets
Mini Gadgets WiFi1080pBox User manual

Mini Gadgets
Mini Gadgets BB4KWiFiRouter User manual

Mini Gadgets
Mini Gadgets WiFiDIY4K User manual

Mini Gadgets
Mini Gadgets HCWiFiAdapter User manual

Mini Gadgets
Mini Gadgets HCWifiDock User manual

Mini Gadgets
Mini Gadgets CamStick100 User manual

Mini Gadgets
Mini Gadgets HS1450CCD User manual