miniCASTER mobile hardware User manual

user manual
version 1.0

Table of Contents
1) Introduction ....................................................................................................................................................... 3
2) Connections.................................................................................................................................................... 4/5
3) Production Scenarios ..................................................................................................................................... 6
4) Technical Specications ............................................................................................................................ 7/8
5) Encoding & Recording ...................................................................................................................................9
6) Remote Management ..................................................................................................................................10
6.1) Manage Prole .......................................................................................................................... 11
6.1.1) LAN Prole ...............................................................................................................................12
6.1.2) WiFi Prole ...............................................................................................................................13
6.1.3) 2G/3G Prole .......................................................................................................................... 14
6.1.4) Input Prole .............................................................................................................................15
6.1.5) Encoding Prole .....................................................................................................................16
6.1.6) Output Prole .........................................................................................................................17
6.1.7) Delivery Prole .......................................................................................................................18
6.2) Manage Users .............................................................................................................................18
6.2.1) Create User ..............................................................................................................................19
6.2.2) Edit User Rights.........................................................................................................................19
7) Edit device .........................................................................................................................................................20
7.1) Web interface .............................................................................................................................21
7.1.1) miniCASTER® Status ........................................................................................................... 21
7.1.2) Selected proles .................................................................................................................. 21
7.1.3) miniCASTER® to VLC ............................................................................................................ 21
7.2) Device menu ............................................................................................................................. 22
8) Firmware update ........................................................................................................................................... 23
9) Support .............................................................................................................................................................. 23
9.1) Documentation .........................................................................................................................23
9.2) Email support..............................................................................................................................23
2

3
miniCASTER®
1. Introduction
Thank you for purchasing the miniCASTER. This User Manual will show you how to handle
the device.
What is miniCASTER®?
miniCASTER® is a truly mobile hardware based H.264 live encoder that converts any camera
or video source signal into an IP based H.264/MPEG4 Live stream and delivers it via landline,
WiFi, satellite or cellular networks to the leading Content Delivery Networks (CDNs) , Wowza
and Adobe Media Servers and live video platforms like USTREAM.tv.
Through a built-in lithium-ion battery it is possible to work stand-alone. miniCASTER®
generates one HD and one SD Stream in parallel and is able to record on SD-Card in the
device itself at the same time. The mobile live encoder in pocket size comes in three dierent
versions (SDI-in, HDMI-in, Composite-in) and can be operated in real-time via a web-based
remote management portal and/or local interface. The HDMI and SDI version come with a
DE-Interlacer on board. So your interlaced signals get a smooth look. Since miniCASTER® is
passively cooled it can get quite warm. This is normal and should not bother you at all.
The On-Board menu
Memory Paging backward Paging forward
Power
on/o
Enter
Info
Display
Backlight
Start/Stop Streaming

4
One-to-One Broadcasting
Bottom side (Analog SD model)
1. S-Video Input
2 Tripod mount
3. Optional Analog Audio Input
4. Power Input (Micro USB)
Top side (All models)
1. LAN Connector
2. For future use
3. USB Slot (for WiFi, 2G/3G Stick or Memory Stick)
4. Reset button
132
1 3
2
4
4
Why not start with a local LIVE stream straight to your PC/VLC Player?
*Please note that Delivery mode TS is only available from Firmware 1.3.1 or higher. (The port number could be 7000 or
10000. You will nd further infos for this scenario in chapter 4.1.7 Delivery Proles)
With miniCASTER® you can establish a quick and
cheap One-to-One connection between your PC/
Notebook and your miniCASTER®. Please make
sure to use a port that is not used on the pc and
not blocked by a rewall. Then choose TS as
Delivery Mode Prole. This prole needs the Host
address of the PC and up to three free ports.
After that you are able to decode the stream on
your PC with the VLC player. Therefore please start
the player, click on „open network stream“ and
type in a URL like: udp://@:<portnumber>*.
Connections
2. Connections

5
Left side (All models)
1. SD Card slot for Recording
Connections
1
Bottom side (SDI SD/HD model)
1. SDI Input
2. Optional Analog Audio Input
3. Power Input (Hi-Rose)
13
2
* via break-out cable
Bottom side (HDMI® SD/HD model)
1. HDMI® Input
2. Optional Analog Audio Input
3. Power Input (Hi-Rose)
1
3
2

6
Production Scenarios
3. Production Scenarios
Thank you for purchasing the miniCASTER®. This User Manual will show you how to handle
the device. miniCASTER® enables you to stream to a single destination or to many viewers
and this is what your set-up should look like for these production scenarios:
For streaming to a single destination you need a decoder, where the miniCASTER® pushes
the stream to. For streaming to many, you need a server like a Wowza Media Server or a
Adobe Media Server in between. Companies nike Akamai and Limelight oer a full streaming
service.
Before you can start with any miniCASTER®, every device must be registered under
my.minicaster.com rst.
One-to-One One-to-Many
You are only 6 steps away from going LIVE!
1. Connect your miniCASTER® to the power supply unit
2. Connect your miniCASTER® to your network via LAN cable
(DHCP must be available)
3. Push the Power-Button and wait until the boot sequence has ended
4. Press the Info-Button , go to “Show network status” and press . Flip through the
menu by pressing the buttons and double check your valid IP address
5. Press the Info-Button , go to “Show system info” and press . Flip through the menu
by pressing the buttons and note the displayed and unique registration code
6. Go to https://my.minicaster.com. Create an account* and register your miniCASTER®.
You are all set!

Technical Specications
4. Technical Specications
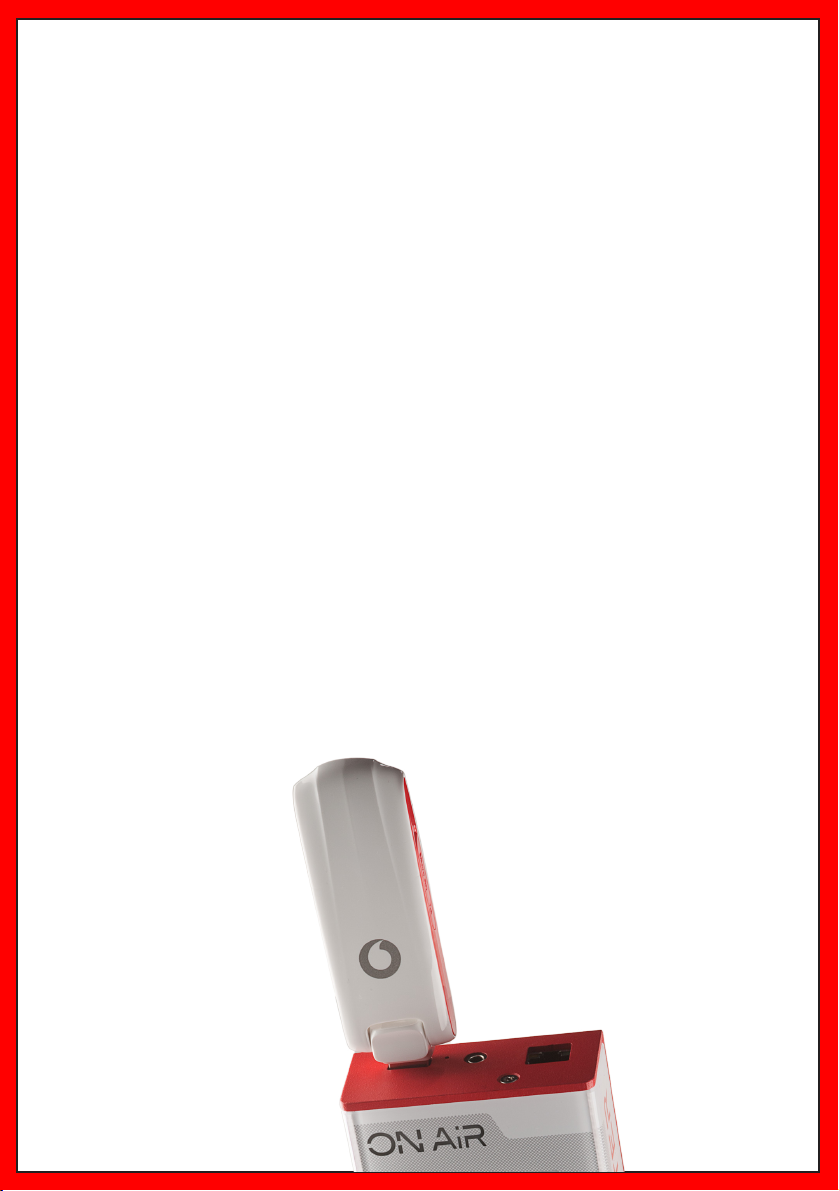
miniCASTER® is a MPEG-4 AVC H.264 SD/HD mobile encoder family – it comes in three
dierent versions: miniCASTER® analog, miniCASTER® HDMI® and miniCASTER® SDI.
Supported Features
SD Resolutions (Analog, HDMI®, SDI models)
HD Resolutions (HDMI®, SDI models)
Composite Video Input/RCA connector* (Analog, HDMI®, SDI models)
S-Video Input / mini-DIN connector (Analog model)
HDMI® Input (HDMI® model)
SDI Video Input w/ embedded Audio / BNC connector (SDI model)
Stereo Analog Audio input / RCA connector* (Analog, HDMI®, SDI models)
Rechargable Battery Li-Ion (Analog, HDMI®, SDI models)
Hardware De-Interlacer and Image Enhancer (HDMI®, SDI models)
Signal-Input Specications:
SD/HD/3G-SDI: 0.8 VP-P, 75 Ohm (BNC, embedded audio support / SMPTE259M, SMPTE292M, SMP-
TE424M)
HDMI: Type C, HDMI specication 1.1
Composite: 1 VP-P, 75 Ohm
S-Video: 1 VP-P (Y), 0.3 VP-P (C – Pal), 0.286 VP-P (C – NTSC), 75 Ohm
Video standards:
PAL, NTSC / Video resolutions:
1920x1080p 30/29.97/25Hz, 1920x1080i 60/59.94/50Hz, 1280x720p 60/59.94/50/30/29.97/25Hz,
720x576i 50, 720x480i 59.94
Audio Inputs:
Stereo: unbalanced, AC coupled,
Audio nominal level: -10 dBV (0,316Vrms),
Maximum level: 2 VP-P, Microphone nominal level: -60 dBV (1mVrms)
SDI embedded Audio 2CH: SMPTE 272M, SMPTE 299M
HDMI embedded Audio 2CH: HDMI 1.1. compatible audio interface
Encoding Specications:
H.264 (MPEG-4 AVC Part 10; ISO/IEC 14496-10)
Supported proles: Baseline, Main-, High-; supported levels: 1.- 4.1.
De-Interlacing:
HDMI-in + SDI-in models come with a intergrated De-Interlacer and image enhancer
Video Encoding Bitrates:
250Kb/s – 8 Mb/s, CBR, low latency enabled
Audio Encoding:
MPEG-4 AAC LC (ISO/IEC 14496-3)
7

8
Technical Specications
4. Technical Specications
Supported Sample Rates:
16/22.05/32/44/48 kHz (analog Audio) / 48kHz(SDI Audio, 16Bit Sample Rate, 16-128 kbit data rate
Stream Output:
MPEG2-Transportstream (ISO/IEC 13818-1) encapsulated in RTP (RFC 3550) including Audio (AAC) and
video (H.264) or RTMP with limitations in bandwith (appr. 2 Mbit/s)
I/O Specications Network:
10/100TX Ethernet, RJ45, half/full duplex, auto-sensing
Streaming Trac:
Unicast and Multicast trac supported
USB:
1x USB 2.0 (on board Connector), High Speed, Type A socket
Management:
Full monitoring, Updates and maintenance over web based repository service
(https://my.minicaster.com)
Environmental Agency Approvals:
CE, FCC , RoHS
Humidity:
Up to 90%, non-condensing
Temperature:
0 to +35°C environment temperature, fanless
Weight:
260 grams (SD Analog), 360 grams (SD/HD SDI or HDMI)
Dimensions (H/W/D):
75mm x 125mm x 33mm
Power:
5V DC / 2.1 A (SD Analog – Micro USB), 8-24V DC / 2A (SD/HD SDI/HDMI – Molex locking connector)

9
Encoding & Recording
Resolution Bandwith Frames H.264 Level Recorded
768x432 3 Mbit/s 25 4.1 High or < YES
640x360 1.5 Mbit/s 25 4.1 High or < NO
512x288 750 Kbit/s 25 4.1 High or < NO
Resolution Bandwith Frames H.264 Level Recorded
768x432 2 Mbit/s 25 4.1 High or < YES
640x360 1 Mbit/s 25 4.1 High or < NO
Multi Stream Table I
Multi Stream Table II
5. Maximum Encoding Values
Resolution Bandwith Frames Network Delivery Record 3 Streams parallel 2 Streams parallel H.264 Level
1280x720 6 Mbit/s 25 WiFi RTP/TS NO NO NO 4.1 High
1280x720 4 Mbit/s 50 WiFi RTP/TS NO NO NO 4.1 High
1280x720 3.5 Mbit/s 25 WiFi RTP/TS YES NO NO 4.1 High
1920x1080 3 Mbit/s 24 WiFi RTP/TS NO NO NO 4.1 High
768x432 2.5 Mbit/s 25 WiFi RTP/TS NO NO NO 4.1 High
768x432 2 Mbit/s 25 WiFi RTP/TS YES NO YES 4.1 High
768x432 1 Mbit/s 25 WiFi RTP/TS YES NO NO 4.1 High
1920x1080 6 Mbit/s 25 LAN RTP/TS NO NO NO 4.1 High
1280x720 4 Mbit/s 25 LAN RTP/TS YES NO NO 4.1 High
768x432 3 Mbit/s 25 LAN RTP/TS YES YES YES 4.1 High
1280x720 2.5 Mbit/s 25 LAN RTMP NO NO NO 4.1 High
768x432 2 Mbit/s 25 LAN RTMP YES NO NO 4.1 High
768x432 1 Mbit/s 25 3G RTMP Valu NO NO 4.1 High
* Only one quality can be recorded at the same time!
* 3G: Depends on quality of your Provider-Network

10
Remote Management
After logging in to my.minicaster.com, you will enter this page. Now you are able to manage
proles or users, browse and edit your devices and add a new miniCASTER to your Account.
For editing your miniCASTER® please click „Edit device“ right under your device. You will
nd further informations on this in chapter 5.1. This page also shows you all your registered
miniCASTER’s and their actual connection status.
6. Remote Management
my.minicaster.com - Your web based real time operating platform.
The rst thing to to, before you can start working with the Remo-
te Management website is to create an account. After this is done,
you can log in to my.minicaster.com and start registering your
miniCASTER®. You can regsiter more than one device with one
account.

11
Remote Management / Proles
There are two dierent types of proles. Global proles are default settings which are availa-
ble to every user on my.minicaster.com. Custom proles are customer specic proles.
Every user of one customer can use the custom proles and depending on his allowed privi-
leges he is able to modify them. With the “view device list” button users are able to publish
the proles to dierent devices.
When creating or editing a prole you always have the rst eld that species the name of it.
With the checkbox at the bottom of creating a new prole you have the option to make the
prole available to all your devices.
miniCASTER® works with stored proles. For each process of miniCASTER®s tasks (Input,
LAN, WLAN, 2G/3G, Output, Delivery) the device needs several specic information to do the
job the way you want. Some information is too long and complicated to edit via the device.
So, we created the remote management. A web based service which allows you to edit, save
and upload settings under proles on your device. Once they are stored, you can easily recall
them by one click of a button.
6.1 Manage Proles
At this point, you are able to manage proles for all your miniCASTER’s. You are also able to
create new proles by clicking , edit existing proles or delete them.

12
Remote Management / LAN
6.1.1 LAN Proles
The most relieable way to go LIVE is to use the LAN connection. You can use a DHCP connec-
tion, or type in your specic IP Adress. Make sure, that your Firewall and port restrictions are
turned o. Otherwise you could face trouble when trying to operate miniCASTER® remotely.
When creating a new LAN prole, you can specify
the IP Address, Subnetmask, Gateway and DNS
Server. If you aren’t selecting DHCP, you have to
type in Name, IP address and Subnetmask, Gate-
way and DNS Sever credentials.
After typing in all required informations please
click the “save new” button to make your new
prole available.
For assigning a DHCP address you are able to get
the MAC-Address of your device on the miniCAS-
TER® Webinterface or on the Information menu
on your miniCASTER®. These steps are explained
on chapter 5.

13
Remote Management / WiFi
6.1.2 WLAN Proles
Wireless streaming is easy and set up in a few seconds. Please do only use the certied CISCO
WiFi stick, that comes with your miniCASTER® since it is certied by us and connects quickly
with your new device. After setting up your system incl. your local WiFi/Access point creden-
tials, miniCASTER® will always try to connect to one of the known WiFi Network.
Pleae note: miniCASTER® will always try to establish a LAN connection rst. If this is not
possible it will try the WiFi network. If you are planning to use WiFi only, please unplug your
LAN cable.
When creating a new WiFi Prole, you can specify
the IP Address, Subnetmask, Gateway and DNS
Server. If you aren’t selecting DHCP, you have to
type in a Name, IP address and Subnetmask.
Gateway and DNS are optional. With the check-
box at the bottom you have the option to make
the new prole available to all your devices.
Your Access Point parameters have to be typed
in the led „WLAN options“. Please look these up
in your ocial Access Point papers and double
check before clicking the „save new“ button.
Maximum recommended Bandwith when using
WiFi is 3.5 Mbit/s. Line of sight between your
miniCASTER® and your Access point is a must!

14
Remote Management / 3G/4G
6.1.3 2G/3G/4G Proles
Wireless connections, especially 3G/4G, are not very relieable. More and more people are
online with ther Tablets and Smart phones, therefore upload capacity is limited at crowded
places. If you are planning to go LIVE via 3G/4G, please keep in mind, that miniCASTER® can
only accept one Surfstick on it´s USB port. Depending on coverage and quality of your Tele-
communication provider results can vary. We have seen upload speed from 256 kb to 5 Mbit
in dierent countries and situations. If you seriously have to rely on 3G/4G LIVE streaming
you should invest in an external channel bonding device which is available in our shop:
http://shop.minicaster.com.
After clicking „Create new prole“ a pop-up
window will appear. In this area you can type in
your personel credentials which should be shown
in your contract details coming from your Telco
company. Please keep in mind, that it is your own
contract and your own data card / data plan.
Therefore you are the only person having access
to these informations. Our technical support can
not help you in this case ;).
Make sure to click „save new“ to apply your new
prole to your miniCASTER®
Surfsticks / Mobile Hotspots
You should work with one of our recommended Sticks or Hotspots. We provide an actual
overview on our website: http://www.minicaster.com/3g4g-supported-device/

15
Remote Management / Input
6.1.4 Input Proles
When clicking on edit input proles, you will be able to create new input proles. You can
decide whether the Audio signal should be ingested embedded in the SDI or HDMI® signal
or whether it should be ingested coming from an external source. In this case the Audio
signal should be ingested via the minijack port on the bottom side of your miniCASTER®
Click on cropping to set exact cropping pixel parameters regarding on the signal you are
ingesting, in order to adjust your encoding prole.
When creating a new Input Prole you have to
give that prole a name.
After that please choose the kind of signal
you want to ingest, by clicking „SDI“, „HDMI®“,
„SVIDEO“ or „COMPOSITE“ within the drop down
menu as shown on the left.
Available options are:
Video in:
- HDMI/SDI (with embedded or analog audio source)
- SVIDEO
- COMPOSITE
Audio in:
Stereo, Left or Right
Audio rate:
16 – 48 KHZ
Please make sure to click the „save new“ button
to apply your new prole to your miniCASTER®.

16
Remote Management / Encoding
6.1.5 Encoding Proles
When unboxing the device and bringing it online
for the rst time, you will nd some common 4:3
and 16:9 Encoding proles on your miniCASTER®.
Of course you can delete these and/or create
multiple proles meeting your specic needs. In
the Video area you can type in your individual
Size, Bandwith, Framerate and Keyframe interval.
Within the H.264 settings you can choose bet-
ween dierent available Levels. Bandwith and
Audio mode can also be set individually.
In the Compatibility area you can see if your pro-
le setting can be displayed on iPod, iPhone and
iPad. The chart below shows the required settings
for these devices.
IPod IPhone IPad Common
Width 320 640 1280 -
Height 240 480 720 -
Prole Baseline Baseline Main, Baseline
Base-line
h.264 Level 1.3 3.0 3.1 1.2
Video BW 768 900 2500 386
Audio BW 128 160 160 -

17
* TS is only available from Firmware 1.3.1 or higher. Direct streaming to a VLC Player/local host is also explained at point 5.1.3 in this manual.
Remote Management / Output
6.1.6 Output Proles
One of the most important areas is the Output Prole setting area. You can basically create
any kind of Resolution and/or Bandwith. The greatest advantage is that you can set up to
three dierent stream qualities and then decide on the y, which one/two streams should
be streamed simultaniously. You can also stream and record at the same time. If your Upload
Bandwith is poor, simply stream the low quality LIVE and record the high quality for on
demand playout or as a back-up le.
The left screenshot shows you the detailed view
of an existing and already created Output Prole.
In this case we chose three dierent qualities
while attending NABShow 2012. You will receive
this detailed information after clicking on the
„ “ symbol.
Whean creating a new Output prole you should
give this prole a specic name. miniCASTER® is
able to generate three streams at the same time,
therefore it makes sense to choose diferrent re-
solutions/qualities. If your playout should be able
to detect the users bandwith quality....the most
suitable stream will be played out and displayed.
Again it is possible to apply this prole to one or
all of your miniCASTER® devices by clicking the
„save new“ button.

Remote Management / Delivery
6.1.7 Delivery Proles
When it comes to Delivery, miniCASTER® is pretty much open. Since you can choose bet-
ween the RTP and RTMP protocols, it is quite easy to adress common CDNs or LIVE platforms.
RTP should be ingested to a Wowza Media Server, RTMP should be ingested to a Adobe
Flash Media Server or also a Wowza Media Server.
Choose between RTP, RTMP or TS* as Delivery mode. For RTP please type in a specic Name,
a valid Host and the correct Port numbers for all three Stream qualities you want to deliver.
For RTMP you should type in a specic name and choose a Provider (for example „Generic“)
within the drop down menu. Please do also enter the correct FMS URL and Stream details
which should be provided by your CDN or LIVE platform.
Please note : If you should decide to ingest to a WowzaMedia Server Infrastracture, you can
also nd a very helpful tutorial by Wowza here:
http://www.wowza.com/forums/content.php?374-How-to-use-Minicaster-live-stream-enco-
der-with-Wowza-Media-Server
18

Remote Management / User Management
6.2 Manage Users
Within my.minicaster.com you can create and edit users at any time. You can also set and
exchange specic rights, or delete single users whenever you want it.
6.2.2 Edit user rights
Admin rights: Root rights within the customer area
Prole rights: Prole specic rights to create, edit or delete
Global miniCASTER® Rights: Global rights to add devices or to control them
miniCASTER® Access Rights: Rights to control dierent miniCASTER® devices
6.2.1 Create User
Every user can receive individual rights through clicking on the „Key“ button after being
created. Mandatory elds are marked with a star „*“.
19

20
Remote Management / Device Editing
7.1 Web interface
my.minicaster.com is structured in two main areas. On the left side you will nd general
informations like name, actual status, input signal etc.. On the very low left side you will see
the Serial, MAC adress and also Firmware version. The right side is your dashboard and oers
all important prole settings as described on the rst pages of this manual.
You will get realtime feedback from miniCASTER®. You can edit every setting on the y and
start/stop your miniCASTER® with a single click. Once your miniCASTER® is online and has
received a valid IP adress and Input signal, please start the stream as shown above. When
choosing the Default Delivery Prole, you will see a Hyperlink next to the „STREAM ON“
button called „PREVIEW“. By clicking on this „PREVIEW“ button the TV1.EU preview player will
start in a pop-up frame. This enables you to check the LIVE stream that is generated by your
miniCASTER® and delivered by the TV1.EU CDN.
Please note: Before this works, you have to choose a LAN prole (should be DHCP) and Input
prole. Make sure that you have set the „STREAM“ button to „ON“. Input signal detection can
only be started after pushing the „ON“ button due to miniCASTER® architecture.
Select one of the Preset-Output proles. (For example the Default Delivery Prole as discribed above)
Once this is done and conrmed/executed on your miniCASTER® you should be LIVE!
Table of contents
Popular Media Converter manuals by other brands

ZyCast
ZyCast HDME-804 User guide and installation manual

TV Ears
TV Ears DAC instructions

WisyCom
WisyCom MRK16 Quick user guide

Interlogix
Interlogix DED2500-E Installation & operation instructions

Digi
Digi One SP quick start guide

Alpha Technologies
Alpha Technologies LPR48-300 Installation & operation manual