Mitra 3D Mic Pro User manual

Immersive microphone systems
Instruction Manual
Version 1.0
Mitra
3D Mic Pro

2

Record immersive sound with your 3D Mic Pro
Preserve you most treasured memories, family events, music performances in life-like,
high denition, 3D sound image. You may not need to watch the video, just close your
eyes and you will feel as if you are there. It is an experience you have never had before; it
will be as if you can touch and feel the sound.
3

Guide to parts 5
Installing baeries 7
Connecng to cameras and recorders 8
Phantom power warning 10
Aligning the 3D Mic Pro 11
Recording process 13
Baery fuel gauge 13
Mountng to a speaker stand 14
Mounng to a boom pole 15
Eding 3D Mic Pro recording 17
Equalizing the audio 17
Recording ps 18
Grip technique 18
Panning technique 19
Reducing the wind noise 19
Care and maintenance 20
Limited lifeme warranty 20
Technical specificaon 21
4

5

1) End grills
2) SHEM (Simplified Human Ear Model)
3) Handle base
4) Hand grip
5) Microphone barrel
6) Power Switch
7) XLR connector lechannel
8) XLR connector right channel
9) Fuel gauge for baery A
10) Fuel gauge for baery B
11) Phono output
12) ¼” tripod mount hole
13) Handle screw mount
14) Baery cable connector
15) Baery clamp
16) Baery snap
6

• Unscrew the hand grip from the handle screw mount
• Connect baery snaps to two 9V PP3 baery terminals
• Secure the baeries in the baery clamps
• Turn on the power switch and check to see that both baery fuel gauges are glowing
equally bright and green
• Turn offthe power switch
• Screw in the hand grip on handle screw mount
7

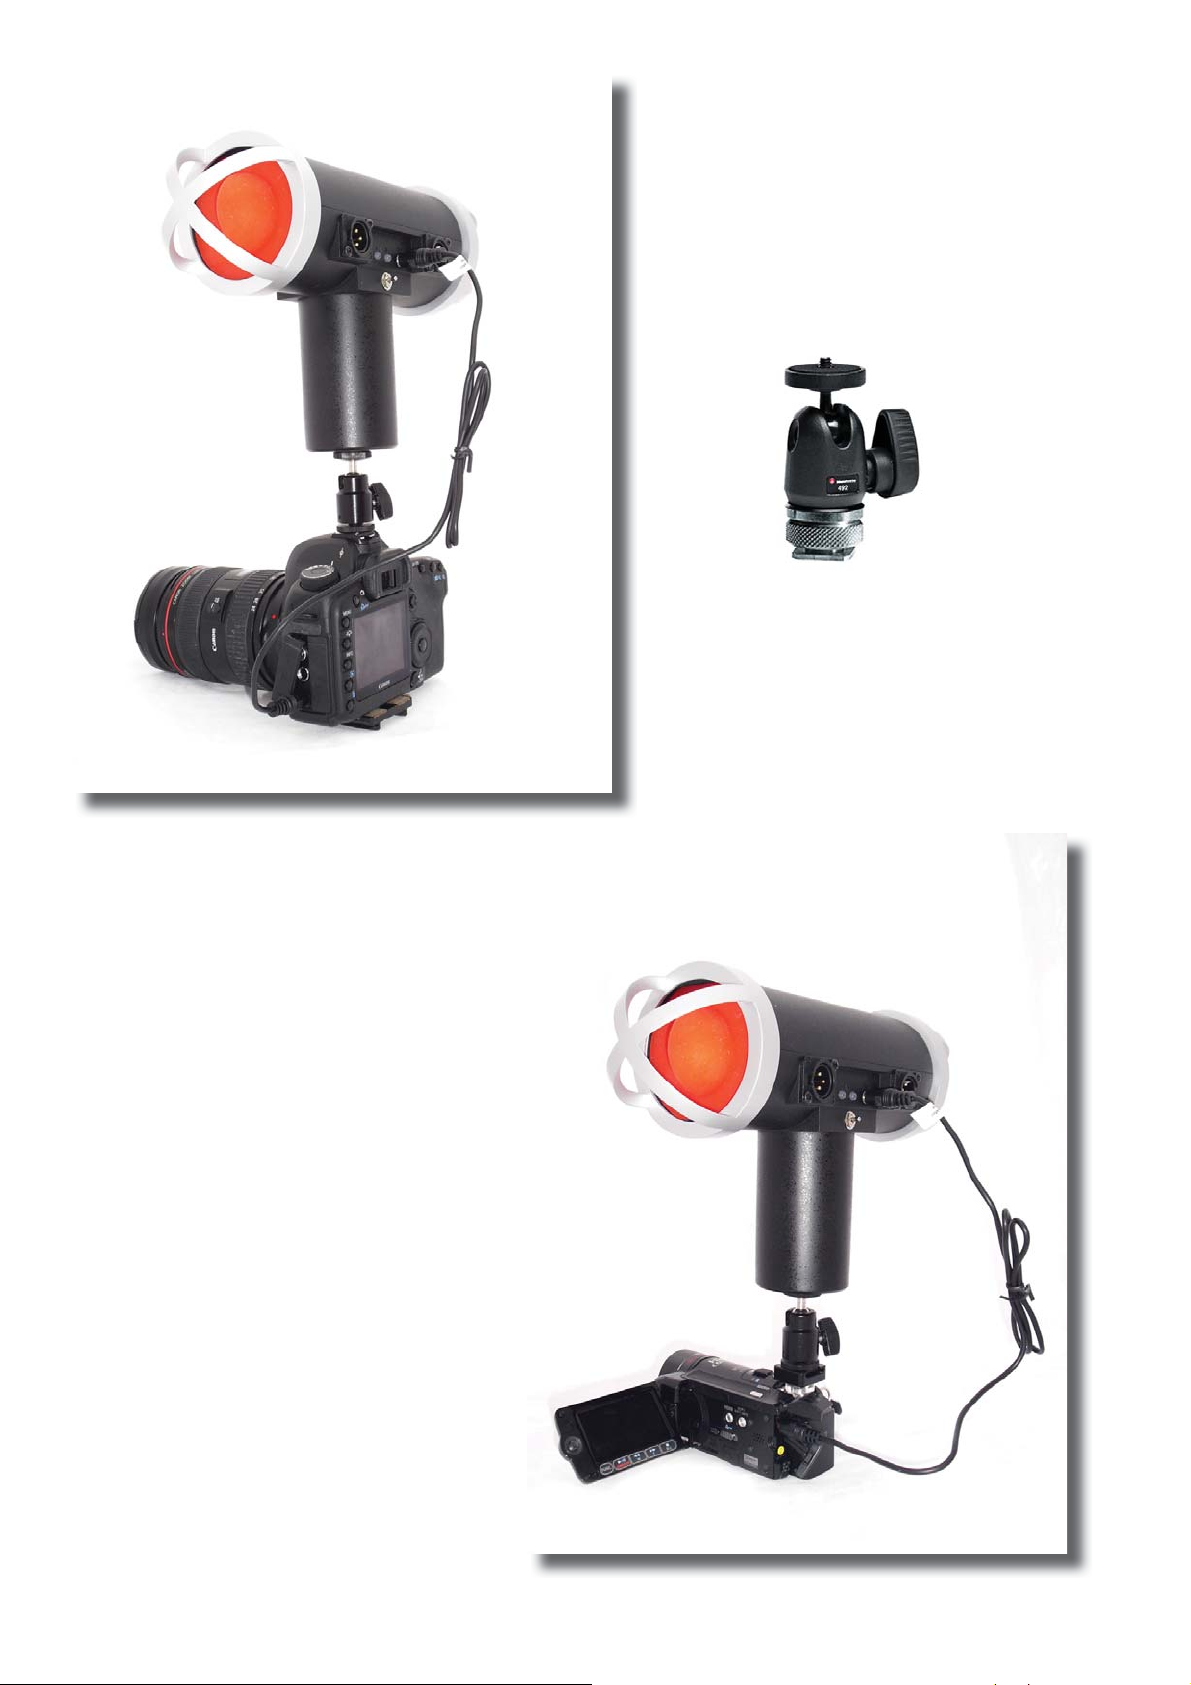
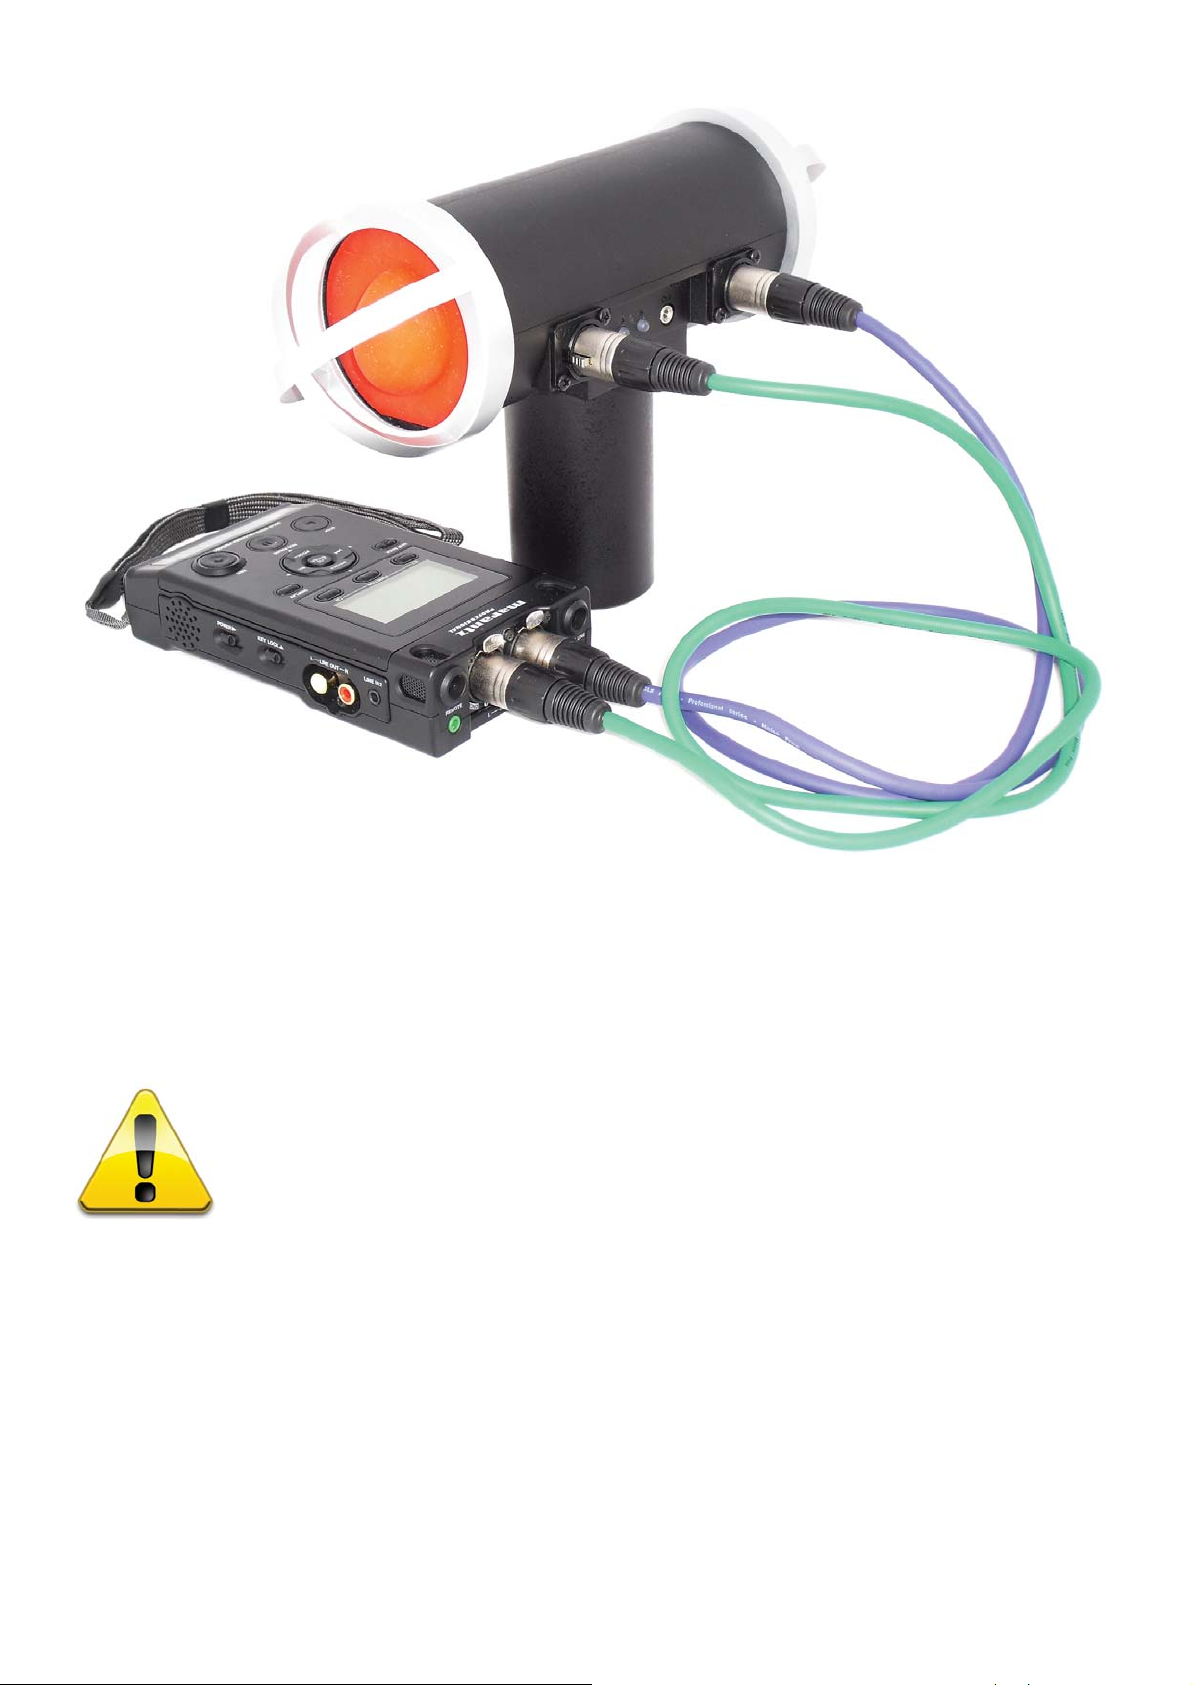
You can connect your 3D Mic Pro to any audio/video recorder, DSLR and video cameras
by using a XLR or 3.5 mm stereo phono connector. The 3D Mic Pro provides low
impedance Line level output so that you can run long phono wires and XLR cables from the
3D Mic Pro to your camera or recorders Line
level input without picking up electro magnec
interferance and power supply hum.
Many DSLRs and video cameras only accept Mic
level input. Use the supplied aenuator cable
to connect your 3D Mic Pro to Mic input of
DSLRs or video cameras. The aenuator cable will
reduce the 3D Mic Pro Line level output for
perfect Mic level recording. You can idenfy the
aenuator cable by the white “aenuator cable”
labled flag and the blue ring in the phono jack.
8

The 3D Mic Pro connected to a
DSLR using a third party hot shoe ball
head.
The 3D Mic Pro connected to a
consumer HD camera using a third
party hot shoe ball head.
A typical hot shoe ball head,
which you must use to mount
the 3D Mic Pro to any
standard camera hot shoe.
9

The 3D Mic Pro connected to a professional audio recorder using XLR cable.
Phantom Power Warning while using XLR connector
Audio recorders or video cameras with XLR inputs may also provide 48 volt
phantom power for the condenser microphone through the XLR cable. The
3D Mic Pro is self powered and injecon of 48 volt phantom power to the XLR output
of the 3D Mic Pro may damage its internal elecronic circuit. We have built a protecon
mechanism to prevent such damage, however prolonged exposure to phantom power or
high voltage/current from a faulty phantom power supply can sll damage the 3D Mic
Pro’s internal electronics. Such damage is not covered under limited lifeme warranty. So
please make sure to turn offphantom power in the recorder or the video camera before
connecng the 3D Mic Pro.
10

The 3D Mic Pro should be aligned correctly to the camera lens opcal axis to get the
accurate 3D sound image. Mounng the 3D Mic Pro on most camera hot shoes will
help you to achieve this. If your camera hot shoe is offthe opcal axis of the camera, you
will need to mount the 3D Mic Pro on a camera bracket, tripod or a boom and then
align it with the camera opcal axis. The figure below illustrates correct alignment of the
3D Mic Pro on a DSLR.
11

Examples of incorrect alignment
12

• Connect the 3D Mic Pro to your audio recorder or a video camera
• Turn on the 3D Mic Pro
• Adjust the recording level in your camera or audio recorder
• Start Recording
• Stop recording
• Turn offthe 3D Mic Pro
3D Mic Pro is designed for long baery life. A
pair of 9V Alkaline LP3 baery will power it for 12
hours.
The two baery fuel gauges A and B indicate
the voltages of baery A and B respecvely. The
baery IDs are marked at the boom lecorner
of the baery clamps
When the 3D Mic Pro is tuned on, and both
the baeries are within operang voltage range,
the gauges glow green.
When any baery voltage falls to approximately 7
volt, the corresponding baery gauge turns red. At this point the microphone may sll work
for several minutes but you should promptly replace that baery.
Both baeries are within operang voltage range Baery `A’ voltage is low, needs replacement
13

You can mount the 3D Mic Pro to any
standard speaker stand by using the 3D
Mic Pro shock mount. This oponal
accessory allows you to aach the 3D
Mic Pro to speaker stand or camera
support system equipped with 1/4” or 3/8”
20 pitch screw lugs.
14

3D Mic Pro can be fied on a 3D Mic
Pro boom pole or any third party boom pole
by using a 3D Mic Pro shock mount. The
3D Mic Pro should be hung upside down as
shown in the photograph.
Mitra 3D Mic Boom Pole
Hanging the microphone upside down will laterally invert the 3D sound image. To correct
this, connect the 3D Mic Pro leXLR output to the right XLR input of the recorder and
3D Mic Pro right XLR output to leXLR input of the recorder.
If you use a stereo phono cable, then you may not be able to swap the channels like with
a XLR cable. In that case, during post producon, swap the leand right audio channels in
the audio or video editor. This 3D sound image correcon is necessary beacuse the mic is
hanged upside down.
15

16

17
3D Mic Pro does not employ any propritory encoder to record the psychoacousc
informaon in the audio recording. 3D Mic Pro records everything as sound, so the
sound recordings are nothing but 100% regular digital sound files. They can be edited in
your exisng video NLE or audio DAW using the same workflow you used to use. The edited
3D recording can be played back in any MP3 players, smartphones, tablet computers and
home theater systems.
Equalizing the audio
Human ear is more sensive at certain sound frequencies due to its complex outer ear
structure. The 3D Mic Pro’s patent pending technology adds a similar transfer funcon
to the recorded sound to create the psychoacouscs. This also makes the 3D Mic Pro
more sensive towards certain sound frequencies just like human ear. The frequency
response graph of this transfer funcon is shown below.
In some recording applicaon, you
may like to equalize this transfer
funcon by using equalizer plugin of
your audio editor. The figures below
show some typical equalizaon
setups using open source audio editor
Audacity and popular commercial
audio editor Cubase. Please check the Support/F.A.Q secon at 3dmicpro.com website for
more informaon and sound samples on this subject.
Equalizaon using Cubase GEQ-30
Equalizaon using Audacity
Equalizaon plugin

Grip technique
Consumer digital HD video cameras are geng smaller
everyday. While using the 3D Mic Pro with such a small
camera, it is easier to grip the whole system by the 3D
Mic Pro’s hand grip. This technique will allow you to
shoot more stable videos by balancing 3D Mic Pro and
the camera like a camera stabilizer. You will also find it easier
to shoot low angle shots by using this grip technique.
18

Panning technique
While shoong video, it is absolutely necessary to keep the 3D Mic Pro aligned with
the video camera. However, while recording only audio, you can physically move or rotate
the mic to create a panning effect for a staonary sound source. For example, if you record
someone singing while standing at the same spot and you slowly rotate the 3D Mic Pro
about its handle axis, then in the 3D sound recording the listener will feel the singer is
singing while walking around the listener.
Reducing the wind noise
Recording clean audio in a windy situaon is always a great challenge for everyone. Use a
3D Mic Pro Grey Fox windscreen. This oponal accessory will cut the wind noise and
allow you to record clean audio.
Mitra 3D Mic
Grey Fox
windscreen
19

3D Mic Pro is designed for rugged field use and does not require much care or
maintenance except changing baeries as required. To get the most enjoyment from your
3D Mic Pro, just clean the surface of your 3D Mic Pro using a micro fiber cloth.
You may wet the micro fiber cloth with plain water and wring it dry to prevent any dripping
water. Then use that damp micro fiber cloth to wipe offany dirt or grime.
• Do not use any solvents, chemicals, or cleaning soluons containing alcohol, ammonia,
or abrasives.
• Do not allow any liquids to spill into any openings.
• Do not poke or insert any object in the SHEM opening.
The 3D Mic Pro covered by a limited lifeme warranty of the product. Details of the
limited warranty are provided on the product registraon card that came with your system.
Please fill out the informaon secon on the card and mail it to Mitra Corp. or register on-
line at hp://www.3dmicpro.com within 15 days of the purchase.
Customer service
20
The 3D Mic Pro cabinet and electronic components are sealed to
protect them from elements. No user-serviceable parts inside. Any aempt
to open the cabinet will result in physical damage of the unit and void the
hp://www.3dmicpro.com/info/contactUs page for your any service and
support needs. We will get you going in no me.
Table of contents