Mitsubishi Electric CP-31W User manual

DEUTSCH FRANÇAISENGLISH
COLOR VIDEO COPY PROCESSOR
MODEL
CP31W
OPERATION MANUAL
THIS OPERATION MANUAL IS IMPORTANT
TO YOU.
PLEASE READ IT BEFORE USING YOUR
COLOR VIDEO COPY PROCESSOR.

WARNING:
In the USA or Canada, use the AC power cord according to the recommendation as below, in
order to comply with UL60601-1 and CAN/CSA C22.2 No. 601.1.
Case 1. Connect to the 120V receptacle of the room or the host equipment.
Use the attached AC power cord.
The AC power cord should be UL or CSA approved and consist of type SJT, size
16AWG, length 2.5m or shorter cord with IEC60320-1/C13 type, 125V 13A or higher
rating connector and NEMA 5-15 type, 125V 13A or higher rating, Hospital Grade plug.
Case 2. Connect to the 230V receptacle of the room or the host equipment.
The AC power cord should be UL or CSA approved and consist of type SJT, size
16AWG, length 2.5m or shorter cord with IEC60320-1/C13 type, 250V 13A or higher
rating connector and NEMA 5-15 type, 250V 13A or higher rating, Hospital Grade plug.
CAUTION:
Changes or modifications not expressly approved by the party responsible for compliance
could void the user’s authority to operate the equipment.
NOTE:
This equipment has been tested and found to comply with the limits for a Class A digital de-
vice, pursuant to Part 15 of the FCC Rules.
These limits are designed to provide reasonable protection against harmful interference when
the equipment is operated in a commercial environment. This equipment generates, uses,
and can radiate radio frequency energy and, if not installed and used in accordance with the
instruction manual, may cause harmful interference to radio communications.
Operation of this equipment in a residential area is likely to cause harmful interference in which
case the user will be required to correct the interference at his or her own expense.
Information:
This class A digital apparatus complies with Canadian ICES-003.
"CLASSIFIED BY UNDERWRITERS LABORATORIES INC.®
WITH RESPECT TO ELECTRIC SHOCK, FIRE AND MECHANICAL HAZARDS ONLY IN AC-
CORDANCE WITH UL60601-1 AND CAN/CSA C22.2 No. 601.1."
Indications according to IEC60601-1
1. Functions and intended usage of this product
This product receives signals from diagnostic imaging equipment or various signal equip-
ment, and automatically prints and ejects the received image data on the paper.
2. Classification of this product
• According to the type of protection against electric shock: Equipment energized from an
external electrical power source, Class I equipment
• According to the degree of protection of the applied part against electric shock: - (No ap-
plied part)
• According to the degree of protection against harmful ingress of water: Ordinary equip-
ment (Enclosed equipment without protection against ingress of water)
• According to the degree of safety of application in the presence of a flammable anesthetic
mixture with air or with oxygen or nitrous oxide: Equipment not suitable for use in the pres-
ence of a flammable anesthetic mixture with air or with oxygen or nitrous oxide
• According to the mode of operation: Continuous operation with intermittent loading
3.
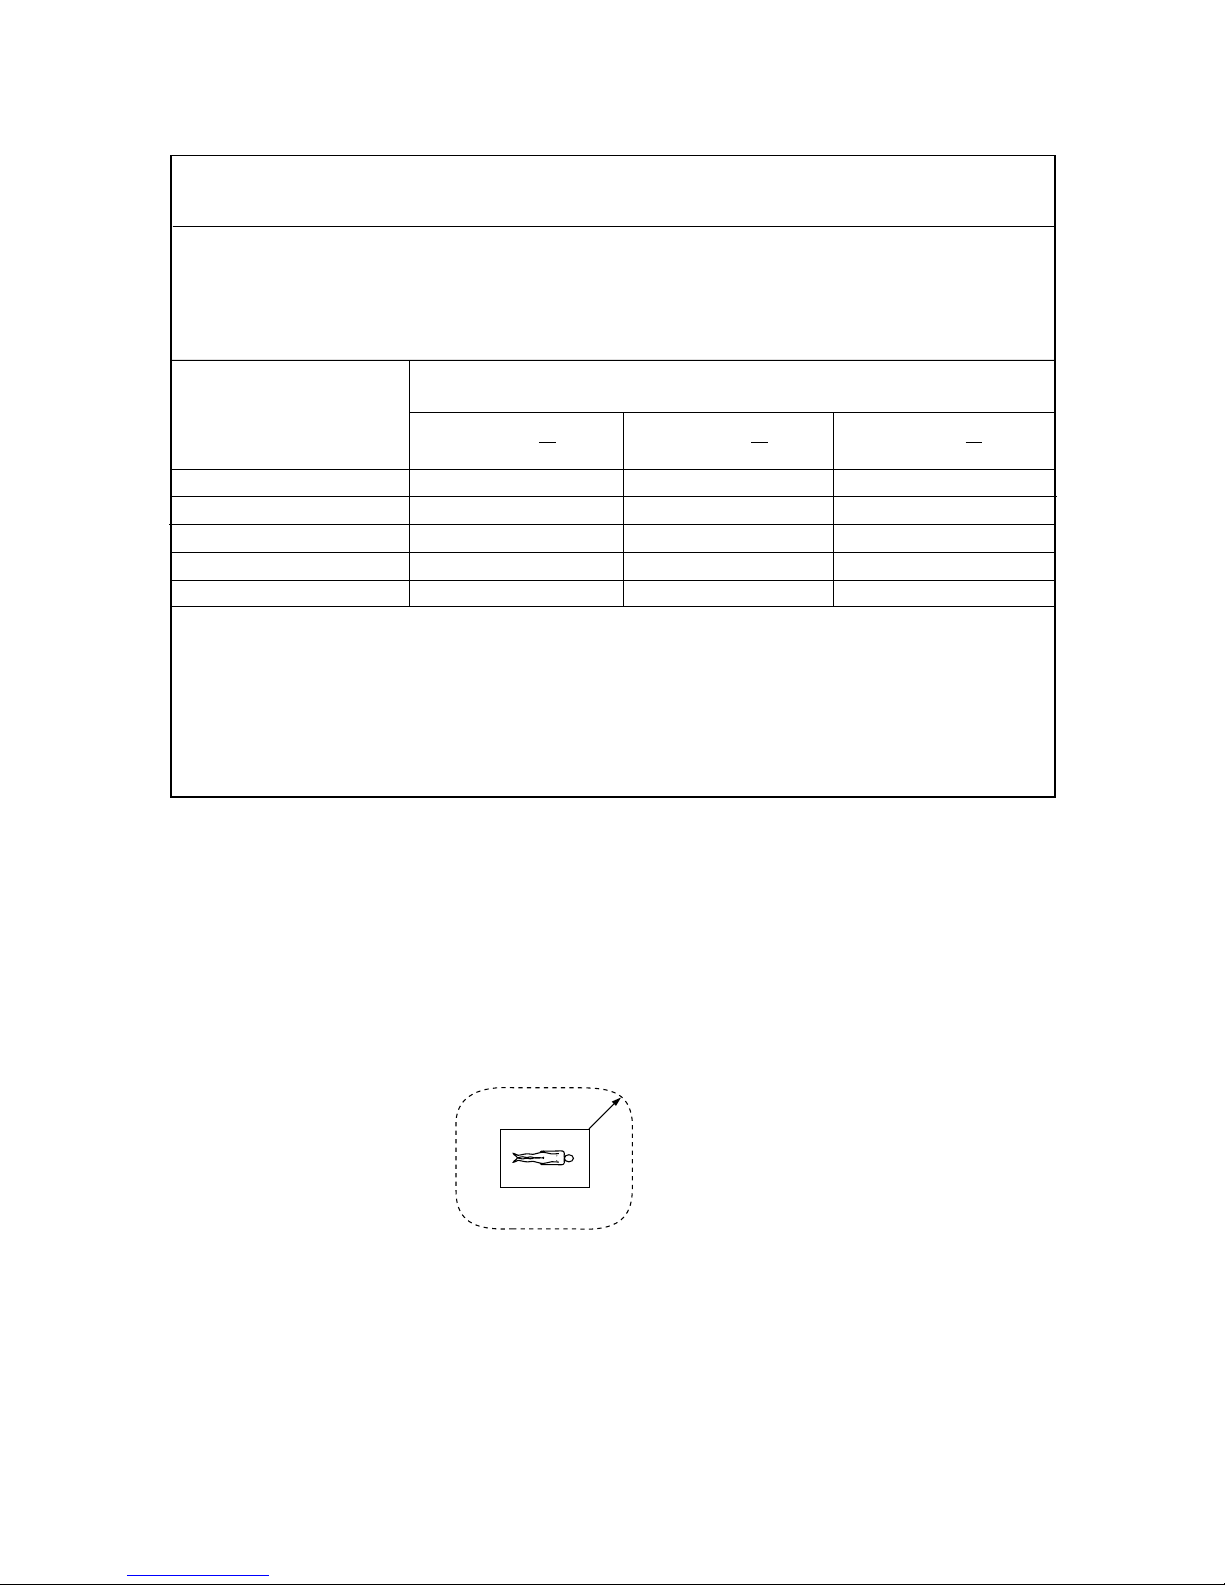
CAUTION: Do not put your hand inside the product from the paper cassette loading
slot or ribbon cartridge loading slot. This product has mechanical parts (switches and roll-
ers) and parts that are heated to a very high temperature or sensitive to static electricity.
4.
CAUTION: There are no user or field serviceable components. Do not open covers
under any circumstances.
5. CAUTION: Use screws 5-mm long for main body installation.
6. Follow the applicable laws and regulations in your country or region or the hospital rules
when disposing of this product or the accessories or consumables thereof.

CONNECTIONSPRECAUTIONS FEATURES PREPARATION TROUBLE-
SHOOTING OTHERSPRINTING ADJUSTMENTS
The lightning flash with arrowhead symbol, within an equilateral triangle, is
intended to alert the user to the presence of uninsulated “dangerous voltage”
within the product's enclosure that may be of sufficient magnitude to constitute
a risk of electric shock.
The exclamation point within an equilateral triangle is intended to alert the user
to the presence of important operating and maintenance (servicing) instructions
in the literature accompanying the appliance.
The “Caution, hot surface” symbol indicates that the marked item may be hot
and should not be touched.
The “Electro Static Discharge (ESD) warning” symbol indicates that trouble
(including equipment malfunction) due to static electricity may occur in certain
conditions.
This symbol indicates the possibility that the user may get his/her fingers caught
in the door, slot, or other mechanism.
This symbol indicates the possibility that the user may get injured when he/she
touches certain areas of the product.
The “Nonionizing radiation” symbol
The “ON/OFF” symbol indicates connection to or disconnection from the mains,
at least for mains switches.
The “Equipotentiality” symbol identifies the terminals connected each other.
The potential of various parts of equipment or of a system is equalized.
The “Alternating current” symbol indicates that the equipment is suitable for al-
ternating current only.
RISK OF ELECTRIC SHOCK DO NOT OPEN.
TO REDUCE THE RISK OF ELECTRIC SHOCK,DO NOT REMOVE COVER (OR
BACK)
NO USER-SERVICEABLE PARTS INSIDE. REFER SERVICING TO QUALIFIED
SERVICE PERSONNEL.
CAUTION:

WARNING:
Install and use this appliance in accordance with the operation manual for safety and EMC
(Electromagnetic Compatibility). If it is not installed and used in accordance with the operation
manual, it may cause interference to other equipment and/or other risk.
To prevent fire or shock hazard, do not expose this appliance to rain or moisture.
This appliance must be earthed.
In Europe, use the attached AC power cord according to the recommendations as below.
Connect to the 230 V receptacle of the room or the host equipment.
The AC power cord should be VDE approved and consist of core size 0.75 mm2or bigger,
length 2.0 m or shorter cord with IEC60320-1/C13 type, 250 V 10 A or higher rating connector
and CEE(7)VII type, 250 V 10 A or higher rating plug.
Use the video cable and/or S-video cable according to the recommendations as below, in
order to comply with safety and EMC standards.
The video cable shall be 2 m long or shorter, 75 Ωcoaxial, 3C-2VT or equivalent one, with
BNC plug at each end.
The S-video cable shall be 1.5 m long or shorter, shielded wire or equivalent one, with DIN 4P
plug at each end.
This product is to be employed with medical equipment, just for reference purpose, not for
medical diagnostic purpose.
Your MITSUBISHI ELECTRIC product is designed and manufactured with
high quality materials and components which can be recycled and reused.
This symbol means that electrical and electronic equipment, at their end-of-
life, should be disposed of separately from your household waste.
Please, dispose of this equipment at your local community waste collection/
recycling centre.
In the European Union there are separate collection systems for used electri-
cal and electronic product.
Please, help us to conserve the environment we live in!
Note: This symbol mark is for EU countries only.
This symbol mark is according to the directive 2002/96/EC Article 10 Information for
users and Annex IV.
WARNING:
The socket outlet shall be installed near the equipment and
shall be easily accessible.
: Manufactured on : to be combined with date code YYYY-MM
: Manufacturers Identification (name address)
: Serial number
: Authorised representative in the European Community

CONNECTIONSPRECAUTIONS FEATURES PREPARATION TROUBLE-
SHOOTING OTHERSPRINTING ADJUSTMENTS
INSTRUCTIONS FOR MEDICAL USE
<according to the Medical Safety/EMC standard EN 60601-1-2>
MEDICAL ELECTRICAL EQUIPMENT needs special precautions regarding EMC and needs
to be installed and put into service according to the EMC information provided in the ACCOM-
PANYING DOCUMENTS.
Portable and mobile RF communications equipment can affect MEDICAL ELECTRICAL
EQUIPMENT.
Electro Static Discharge (ESD)
1 Electro Static Discharge (ESD) warning symbol
2 The areas identified with this symbol should not be touched as much as possible because
they are sensitive to ESD and may cause equipment malfunction and failure due to ESD.
When it is inevitable to touch these areas in installation, maintenance, or inspection, the
following ESD precautionary procedure should be used.
3 ESD precautionary procedure
(1) The power plug should be disconnected for safety’s sake first.
(2) The worker should wear an antistatic strap and attach it to the ground pin of the power
plug or the metal sheet on the bottom surface of the product. This eliminates the potential
difference between the product and the worker to prevent electro static discharge. (When
no antistatic strap is available, the worker may work while touching the ground pin of the
power plug or the metal sheet on the bottom surface of the product with one hand.)
(3) The necessary work for installation, maintenance, or inspection should be performed
under the above-mentioned conditions.
4 It is recommended that all staff involved in the work in which they may touch the areas
identified with the ESD warning symbol should receive an explanation of the ESD warning
symbol and training on the ESD precautionary procedures.
5 Required minimum contents in the explanation and training on the ESD precautionary pro-
cedures
(1) Explanation on the principle of occurrence of static electricity and the ESD precaution-
ary procedures should be provided.
(2) Training on the ESD precautionary procedures using the actual product should be pro-
vided.
Technical description
List of all cables and maximum length of the cable and other ACCESSORIES
AC power cord
Video cable
S-video cable
PAPER/INK
RIBBON SET
Maximum length
2 m
2 m
1.5 m
Reference page in this operation manual
This page, the previous pages for safety and page
53 for accessories
This page, the previous pages for safety
Page 19 and 54 for PAPER/INK RIBBON SET
WARNING:
The use of ACCESSORIES and cables other than those specified, with the exception of cables
sold by the manufacturer of the Model CP31W as replacement parts for internal components,
may result in increased EMISSIONS or decreased IMMUNITY of the Model CP31W.
WARNING:
The Model CP31W should not be used adjacent to or stacked with other equipment and that if
adjacent or stacked use is necessary, the Model CP31W should be observed to verify normal
operation in the configuration in which it will be used.

Guidance and manufacturer's declaration - electromagnetic emissions
The Model CP31W is intended for use in the electromagnetic environment specified below.
The customer or user of the Model CP31W should assure that it is used in such an environment.
Emissions test
RF emissions
EN 55011
RF emissions
EN 55011
Harmonic emissions
EN 61000-3-2
Voltage fluctuations /
flicker emissions
EN 61000-3-3
Compliance
Group 1
Class B
Class A
Complies
Electromagnetic environment - guidance
The Model CP31W uses RF energy only for its internal
function. Therefore, its RF emissions are very low and
are not likely to cause interference in nearby electronic
equipment.
The Model CP31W is suitable for use in all
establishments, including domestic establishments and
those directly connected to the public low-voltage
power supply network that supplies buildings used for
domestic purposes.
Guidance and manufacturer's declaration - electromagnetic immunity
The Model CP31W is intended for use in the electromagnetic environment specified below.
The customer or user of the Model CP31W should assure that it is used in such an environment.
Immunity test
Electrostatic
discharge (ESD)
EN 61000-4-2
Electrical fast
transient/burst
EN 61000-4-4
Surge
EN 61000-4-5
Voltage dips, short
interruptions and
voltage variations
on power supply
input lines
EN 61000-4-11
Power frequency
(50/60 Hz) magnetic
field
EN 61000-4-8
EN 60601 test
level
±6 kV contact
±8 kV air
±2 kV for power
supply lines
±1 kV for input
/output lines
±1 kV line(s) to
line(s)
±2 kV line(s) to
earth
< 5%
U
T
(> 95% dip in UT)
for 0.5 cycle
40%
U
T
(60% dip in
U
T)
for 5 cycles
70%
U
T
(30% dip in
U
T)
for 25 cycles
< 5%
U
T
(> 95% dip in U
T
)
for 5 sec.
3 A/m
Electromagnetic environment - guidance
Floors should be wood, concrete or
ceramic tile. If floors are covered with
synthetic material, the relative humidity
should be at least 30%.
Mains power quality should be that of a
typical commercial or hospital
environment.
Mains power quality should be that of a
typical commercial or hospital
environment.
Mains power quality should be that of a
typical commercial or hospital
environment. If the user of the Model
CP31W requires continued operation
during power mains interruptions, it is
recommended that the Model CP31W be
powered from an uninterruptible power
supply or a battery.
Power frequency magnetic fields should
be at levels characteristic of a typical
location in a typical commercial or
hospital environment.
Compliance
level
±6 kV contact
±8 kV air
±2 kV for power
supply lines
±1 kV for input
/output lines
±1 kV line(s) to
line(s)
±2 kV line(s) to
earth
< 5%
U
T
(> 95% dip in
U
T
)
for 0.5 cycle
40%
U
T
(60% dip in
U
T)
for 5 cycles
70%
U
T
(30% dip in
U
T)
for 25 cycles
< 5%
U
T
(> 95% dip in
U
T
)
for 5 sec.
3 A/m
NOTE UTis the a.c. mains voltage prior to application of the test level.
Compliance with the following EMC guidance is assured only for the use in Europe (220 - 240 V).

CONNECTIONSPRECAUTIONS FEATURES PREPARATION TROUBLE-
SHOOTING OTHERSPRINTING ADJUSTMENTS
Guidance and manufacturer's declaration - electromagnetic immunity
The Model CP31W is intended for use in the electromagnetic environment specified below.
The customer or user of the Model CP31W should assure that it is used in such an environment.
Immunity test
Conducted RF
EN 61000-4-6
Radiated RF
EN 61000-4-3
EN 60601 test
level
3 Vrms
150 kHz to 80
MHz
3 V/m
80 MHz to 2.5
GHz
Electromagnetic environment - guidance
Portable and mobile RF communications
equipment should be used no closer to
any part of the Model CP31W, including
cables, than the recommended
separation distance calculated from the
equation applicable to the frequency of
the transmitter.
Recommended separation distance
d=1.2√P
d=1.2√P 80 MHz to 800 MHz
d=2.3√P 800 MHz to 2.5 GHz
where P is the maximum output power
rating of the transmitter in watts (W)
according to the transmitter manufacturer
and d is the recommended separation
distance in meters (m).
Field strengths from fixed RF transmitters,
as determined by an electromagnetic site
survey,ashould be less than the
compliance level in each frequency
range.b
Interference may occur in the vicinity of
equipment marked with the following
symbol:
Compliance
level
3 Vrms
3 V/m
NOTE1. At 80 MHz and 800 MHz, the higher frequency range applies.
NOTE2. These guidelines may not apply in all situations. Electromagnetic propagation is affected
by absorption and reflection from structures, objects and people.
aField strengths from fixed transmitters, such as base stations for radio (cellular/cordless)
telephones and land mobile radios, amateur radio, AM and FM radio broadcast and TV
broadcast cannot be predicted theoretically with accuracy. To assess the electromagnetic
environment due to fixed RF transmitters, an electromagnetic site survey should be
considered. If the measured field strength in the location in which the Model CP31W is used
exceeds the applicable RF compliance level above, the Model CP31W should be observed to
verify normal operation. If abnormal performance is observed, additional measures may be
necessary, such as reorienting or relocating the Model CP31W.
bOver the frequency range 150 kHz to 80 MHz, field strengths should be less than 3 V/m.

Recommended separation distances between
portable and mobile RF communications equipment and the Model CP31W
The Model CP31W is intended for use in an electromagnetic environment in which radiated RF
disturbances are controlled. The customer or the user of the Model CP31W can help prevent
electromagnetic interference by maintaining a minimum distance between portable and mobile RF
communications equipment (transmitters) and the Model CP31W as recommended below, according
to the maximum output power of the communications equipment.
Rated maximum output
power of transmitter
W
0.01
0.1
1
10
100
150 kHz to 80 MHz
d=1.2√P
0.12
0.38
1.2
3.8
12
80 MHz to 800 MHz
d=1.2√P
0.12
0.38
1.2
3.8
12
800 MHz to 2.5 GHz
d=2.3√P
0.23
0.73
2.3
7.3
23
For transmitters rated at a maximum output power not listed above, the recommended separation
distance d in meters (m) can be estimated using the equation applicable to the frequency of the
transmitter, where P is the maximum output power rating of the transmitter in watts (W) according
to the transmitter manufacturer.
NOTE1. At 80 MHz and 800 MHz, the separation distance for higher frequency range applies.
NOTE2. These guidelines may not apply in all situations. Electromagnetic propagation is affected
by absorption and reflection from structures, objects and people.
Separation distance according to frequency of transmitter
m
Safety Notices for use in combination with other devices
1. All the equipments connected to this unit shall be certified acording to Standard
IEC60601-1, IEC60950-1, IEC60065 or other IEC/ISO Standards applicable to the equip-
ments.
2. When this unit is used together with other equipment in the patient area*, the equipment
shall be either powered by an isolation transformer or connected via an additional protective
earth terminal to system ground unless it is certified according to Standard IEC60601-1.
* Patient Area
R1.5 m
3. The leakage current could increase when connected to other equipment.

Contents .................................................................................... 1
Safety precautions .................................................................. 2-5
Special features ...................................................................... 6-7
Unpacking.................................................................................. 8
Features and functions ......................................................... 9-12
Front panel ............................................................................9-10
Control panel............................................................................ 11
Rear panel................................................................................12
Connections........................................................................ 13-18
Connection with a monitor........................................................14
Connection with video or S-video signal equipment ................15
Connection with RS-232C equipment .................................16-17
Menu display example .............................................................18
Before operation ................................................................. 19-22
Paper/ink ribbon set .................................................................19
Loading print paper .............................................................19-20
Loading ribbon cartridge ..........................................................21
Usage and storage of paper/ink ribbon set ..............................22
Printing................................................................................ 23-29
Before printing.....................................................................23-24
Memory print / Multi-image setting ......................................25-27
External remote terminal 1 .......................................................28
External remote terminal 2 .......................................................29
Setting the functions ........................................................... 30-45
Menu chart ..........................................................................30-31
Selecting and setting menus ....................................................32
PROGRAM menu.....................................................................33
INPUT menu.............................................................................33
LAYOUT menu .........................................................................34
PRINT menu........................................................................35-36
COLOR ADJ menu...................................................................37
OUTPUT menu.........................................................................38
SETUP menu ......................................................................39-45
Toubleshooting.................................................................... 46-51
Indication on the status display & countermeasures...........46-47
Overcoming paper jams ...........................................................48
Before calling for service.....................................................49-50
Repairing a torn ink ribbon .......................................................51
Cleaning................................................................................... 52
Spec & options.................................................................... 53-54
Specifications ...........................................................................53
Options.....................................................................................54
CONTENTS
1
CONNECTIONSPRECAUTIONS FEATURES PREPARATION TROUBLE-
SHOOTING OTHERSPRINTING ADJUSTMENTS

In the interest of safety, please observe the following precautions:
POWER REQUIREMENT
This product is designed to operate at 120/220-240 V AC 50/60 Hz in the U.S.A. and Canada,
and 220-240 V AC 50/60 Hz in Europe. Never connect to any outlet or power supply having a
different voltage or frequency.
WARNING: THIS APPARATUS MUST BE EARTHED.
This equipment is classified as class , according to the type of protection against electric shock.
PROTECTIVE MEASURES
IF ABNORMALITIES ARISE
If the printer emits smoke or abnormal sounds, immediately unplug the power cord from the
printer or power outlet. Continued use may be dangerous. Contact your dealer about having
the printer checked and serviced.
NEVER INSERT ANY OBJECT INTO THE UNIT
Nothing other than supplies for this printer should ever be inserted into the printer. Other items
can cause a safety hazard and extensive damage to the mechanism and electronics.
DO NOT SET HEAVY OBJECTS ON TOP OF THE UNIT
Heavy objects can damage the unit and/or cause malfunction.
AVOID DAMAGING THE POWER CORD
Do not set anything heavy on the power cord nor allow it to become pinched, or cut. If the
power cord becomes damaged, replace it immediately to avoid shock hazard or electrical fire.
When the power cord is replaced, use the same type as originally supplied, it is designed to
reduce interference to radio & TV reception.
When unplugging the power cord, hold the plug, and remove it carefully.
KEEP THE UNIT DRY - DO NOT PLACE WATER OR OTHER LIQUID
CONTAINERS ON TOP OF THE UNIT
Liquids which get into the unit can cause serious damage to the unit and potential shock or fire
danger. If liquid is spilled into or seeps into the unit, unplug the Power Cord immediately and
seek service as soon as possible to avoid additional or possible damage due to corrosion.
“In the interest of safety, avoid handling of liquids near the unit.”
DO NOT REMOVE THE CABINET. THERE ARE NO USER SERVICEABLE
PARTS INSIDE AND YOU WILL EXPOSE YOURSELF TO HAZARDOUS
VOLTAGES AND/OR YOU MAY CAUSE DAMAGE TO THE UNIT.
Touching internal parts is dangerous, and may cause a malfunction. Contact your dealer to
carry out internal checks and adjustments. Disconnect the power cord before opening the
cover to clear a paper jam, etc.
DO NOT USE THIS UNIT WHEN DROPPED OR DAMAGED THE CABINET
Using a unit dropped or damaged its cabinet may cause fire or electric hazard.
SAFETY PRECAUTIONS
2

UNPLUG THE POWER CORD DURING A LONG ABSENCE OR DURING AN
ELECTRICAL STORM
Turn off the Main Power switch and unplug the power cord during a long absence or during an
electrical storm.
WHEN TRANSPORTING THE UNIT
When transporting the unit, remove the ribbon cartridge and paper. Make sure to unplug the
power cord and other cables.
BE CAREFUL AROUND PAPER CASSETTE LOADING SLOT, RIBBON
CARTRIDGE LOADING SLOT AND PRINT OUTLET
Do not insert your fingers or any object into the paper cassette loading slot, ribbon cartridge
loading slot and print outlet during printing.
Do not touch the rubber roller and sensors inside. It can cause injury, damage on the parts,
and malfunction caused by static electricity.
DO NOT PLUG OR UNPLUG POWER CORD BY WET HAND
It may cause shock hazard.
DO NOT TOUCH THE THERMAL HEAD AND METAL PARTS
It becomes hot during printing and may remain hot for a time, causing injury. Oils, salts and
moisture from your hands will contaminate the head and may spoil the prints.
CONNECTING CABLES
Use the power cord supplied with the printer.
INSTALLATION LOCATIONS
MAINTAIN GOOD VENTILATION
Ventilation slots and holes are provided on the rear, sides and bottom of this unit. Place the
unit on a hard and level surface and keep a space between the unit and the walls to ensure
proper ventilation. When installing the unit in a system rack, leave space between the unit and
the back of the rack.
SUITABLE LOCATIONS
Avoid installing the printer in unstable locations with high vibration or in hot-springs areas
where hydrogen sulfide and acidic ions are likely to be generated.
AVOID PLACES WITH HIGH HUMIDITY AND DUST
Do not place the unit in locations with high humidity and dust, as this can cause extensive
damage. Avoid places where unit is likely to be exposed to oily fumes and vapors.
AVOID PLACES LIKELY TO BE EXTREMELY HOT
Places exposed to direct sunlight, or near heating appliances can attain extremely high
temperatures which may deform the cabinet, or cause other damage.
PLACE THE UNIT ON A HORIZONTAL SURFACE
The operation of the unit is likely to be affected if it is tilted, inclined or in unstable places.
3
CONNECTIONSPRECAUTIONS FEATURES PREPARATION TROUBLE-
SHOOTING OTHERSPRINTING ADJUSTMENTS

PROTECT AGAINST DEW FORMATION
When the unit is moved from a cold area into a warm area, moisture can condense inside the
unit and prevent operation. Allow the temperature to stabilize before use.
When print paper and ribbon cartridge are loaded, remove them.
Replace the wet print paper and ribbon cartridge with new ones.
OPERATING AMBIENT TEMPERATURE RANGE
The operating temperature range is 41°F - 104°F (5°C to 40°C) and humidity of 30 - 80% RH.
When using the unit in a system rack, make sure that the temperature inside the rack does not
exceed this range.
FOR LONG OPERATING LIFE
UNSUITABLE MATERIALS FOR THE PRINTER
Paint coat flaking and plastic deformation are likely to occur if the unit is wiped with chemical
dusters, benzene, thinner or any other solvent, if rubber or PVC items are left in contact with
the unit for a extended period, or if the unit is sprayed with insecticide.
CARE OF THE CABINET
Unplug and clean with a soft cloth slightly moistened with a mild soap and water solution. Allow
to dry completely before operating. Never use petroleum based solutions or abrasive cleaners.
HEAD ABRASION
The thermal print head, like a video head, wears out. When it is worn, it becomes hard to print
out fine details of the picture. If it occurs, consult your dealer about having the head replaced.
CONNECTING DEVICES
Read thoroughly the Safety Notices, Cautions and Operating Precautions of the instruction
booklets for the other devices connected with the unit.
CAUTION ON RELOCATING
When transporting the unit, make sure it is not likely to be subjected to impacts. This can be
a primary cause for damage. Before moving the unit, make sure to disconnect the power cord
from the power outlet, and the cables from the connected devices.
SAFETY TECHNICAL CHECKS
Periods: According to the recommendations of the manufacturer of medical device.
Scope: a) Visual inspection
Housing, leads, controls, displays, labels/ markings, accessories, operation
manual.
b) Functionality test
Testing of functions (according to operation manual) as well as compatibility and
usability of device and accessories.
c) Electrical test
Testing of electrical safety of the system according to EN60601-1.
High humidity or dust
Avoid locations with high humidity and dust in order to avoid malfunction.
Also avoid locations subject to corrosive gasses and smoke.
Heat
Direct sunlight, heaters or other heat sources may deform the housing and subsequently
cause malfunctioning.
SAFETY PRECAUTIONS
4

TECHNICAL DESCRIPTION
The supplier will make available on request such circuit diagrams, component part lists,
descriptions, calibration instructions or other information which will assist the User’s
appropriately qualified technical personnel to repair those parts of the EQUIPMENT which are
classified by the manufacturer as repairable.
The use of ACCESSORY equipment not complying with the equivalent safety requirements of
this equipment may lead to a reduced level of safety of the resulting system. Consideration
relating to the choice shall include:
- use of the accessory in the PATIENT VICINITY
- evidence that the safety certification of the ACCESSORY has been performed in accordance
to the appropriate EN60601-1 and/or EN60601-1-1 harmonized national standard.
The transportation and storage environmental conditions are:
Temperature : -20°C - +60°C (-4°F - +140°F)
Humidity : 30%-80% RH
Atmospheric pressure : 50 kPa - 106 kPa
Note : The above transportation environmental conditions indicate the storage
environmental conditions during transport.
OTHER CAUTIONS
Dust or other foreign matter adhering to the print paper or the ink ribbon, or deformation
resulting from exposure to extremely low or high temperatures could cause loss of color,
uneven color or lines, or wrinkles in the print images.
Turn off the power of this unit after completing auto loading/ejecting of the ribbon cartridge.
NOTE:
MEMORIZED IMAGES ARE STORED IN VOLATILE MEMORY AND MAY BE LOST IN THE
EVENT OF POWER FLUCTUATION OR MALFUNCTION.
5
CONNECTIONSPRECAUTIONS FEATURES PREPARATION TROUBLE-
SHOOTING OTHERSPRINTING ADJUSTMENTS

SPECIAL FEATURES
EASY LOADING AND UNLOADING
You can load a ribbon cartridge just by inserting it into the ribbon cartridge loading slot (auto-
loading), and can unload it by pressing the RIBBON EJECT button only (auto-ejecting).
HIGH SPEED PRINTING
Printing speed is approx. 16 seconds per sheet (in S size print, without surface lamination).
HIGH QUALITY PRINTING
High quality print is available in dye sublimation mode. It also employs 256 gradients in each
YMC and about 16,700,000 colors in total.
423 DPI HIGH RESOLUTION
423 DPI (Dots per Inch) high resolution gives precise illustrations and sharp photo images.
AVAILABLE IN VARIOUS MEDICAL FIELDS, INCLUDING ENDOSCOPY
DIAGNOSIS
Several colouring characteristics (gamma curve) are employed, which are the best for medical
diagnostic devices, including endoscope requiring precise images and ultrasound diagnostic
equipment etc. The colour is reproducible for each diagnostic equipment with easy operation.
Each gamma curve is adjustable for each user flexibly.
2 PRINT SIZES ARE AVAILABLE ACCORDING TO THE PURPOSE
2 printing sizes, L size (max.100 x 148 mm) and S size (max.100 x 94 mm), are selectable.
MULTI PRINT FUNCTION BY THE CAPACIOUS FRAME MEMORY
As this unit has 8 frame memories, it can store an image during its printing. So the time of
diagnosis will be shorten remarkably.
MULTI PRINT FOR VARIOUS DEMANDINGS
2 and 4 images of multi print are available. Several multi print modes are selectable according
to demanding.
WIDE COMPATIBILITY WITH A VARIETY OF INTERFACE AND SYSTEMS
(1) Input and output control signals from RS-232C/Rear remote interfaces
(2) Stroboscope sync. function responding to fundus camera system
(3) Image adjusting function such as contrast, brightness, etc. of printing image
(4) Capable of storing 3 kinds of setting and adjustment according to each using condition.
SPECIAL FEATURES
6

PRODUCT OUTLINE
The color video copy processor CP31W uses the thermal dye sublimation printing system.
This printer is able to print color images on the paper. This printer is connected to various
signal equipment via video and S-video interface. Color images such as CT, MRI, ultrasound,
and CR images transmitted from the various signal equipment are printed via video and
S-video interface.
This printer creates prints electronically (mainly in image processing and printing processing),
not optically or chemically.
INTENDED USE
The color video copy processor CP31W is intended for use as a hard copy device for an image
generated by a diagnostic imaging equipment.
This product is intended to be used together with medical equipment and to be used for
reference purpose, not for diagnostic purpose.
7
CONNECTIONSPRECAUTIONS FEATURES PREPARATION TROUBLE-
SHOOTING OTHERSPRINTING ADJUSTMENTS

Take the unit out of the box by the following procedures. Be sure to check the accessories.
Open the box.
Carefully take the unit out of the box.
Lift the printer from the box.
Remove the packing cushion containing the
accessories out of the box.
Be careful not to drop the accessories.
COLORVIDEOCOPYPROCESSOR
MODEL
CP31W
OPERATIONMANUAL
THISOPERATIONMANUALISIMPORTANT
TOYOU.
PLEASEREADITBEFORE USING YOUR
COLORVIDEOCOPYPROCESSOR.
VIDEOSTAMPANTEACOLORI
MODELLO
CP31W
MANUALEDʼUSO
SIPREGADILEGGERE ATTENTAMEMTE
ILPRESENTEMANUALEDʼUSO PRIMA
DIUTILIZZARELAVIDEOSTAMPANTE
ACOLORI.
Power cords
Paper cassette
UNPACKING
UNPACKING
Unwrap the packing.
NOTE
When you lift up this unit, do not insert your hand to the
print outlet.
CONTENTS
Accessories are packed on the cushion. Verify content and report any missing items.
Operation manuals
8

CONTROL PANEL
Use this panel to set the input signal
and functions. When the center of this
panel is pressed, this panel comes out.
STATUS DISPLAY
The status display indicates current
printer condition.
MEMORY BUTTON ( )
Press to memorize the image to be
printed. When signal is not inputted,
memory is not available.
PRINT BUTTON ( )
Press to print the image memorized by
the MEMORY button. When image is
not memorized, printing is not available.
POWER BUTTON ( )
Press to turn on and off the power.
Each time this button is pressed, ON/
OFF is switched.
MONITOR BUTTON ( )
Switches the display on the monitor.
When this button is pressed, the picture
on the monitor screen switches between
the picture of the input signal (source
image) and the memorized image.
5
4
2
1
3
9
10
11
12
13
14
7 86
15
16
17
18
STATUS DISPLAY
FEATURES & FUNCTIONS
DIMMER BUTTON ( )
This button controls the brightness of
the print outlet illumination that is lit on
the photo; the button also controls the
brightness of the print status indicator.
When this button is pushed and held,
the remaining amount of ink ribbon on
the status indicator display is reset.
MODE BUTTON ( )
Each time this button is pushed, the light
of the print outlet switches as follows:
turn-on...The light always illuminates.
turn-off...The light is always turned off.
blinking for 5 seconds...
The status changes according to
the printer status.
1. During printing: blinking slowly
2. After printed paper ejection: illuminates for 5 seconds
3. Occurence of error: blinking rapidly
RIBBON CARTRIDGE LOADING
SLOT
A flap (cover) to protect inside of the
unit is attached.
RIBBON EJECT BUTTON ( )
Press to eject the ribbon cartridge.
FRONT PANEL
9
CONNECTIONSPRECAUTIONS FEATURES PREPARATION TROUBLE-
SHOOTING OTHERSPRINTING ADJUSTMENTS

RIBBON SIZE INDICATOR
This indicator shows the size of the
ink ribbon being loaded. It blinks
during loading or ejection of the ribbon
cartridge.
PRINT STACK SENSOR
When printed paper exceeds stack
level, this sensor will detect it and an
alarm sounds. Printing will become
unavailable if you touch this sensor.
When you remove the printed paper
stacked on the print outlet during
continuous printing, take care not to
touch the printed paper to this sensor.
ACCESS COVER
Open cover only when a paper jam
occurs. Turn dial knob towards arrow to
clear paper jam.
PAPER CASSETTE LOADING
SLOT/PRINT OUTLET
Paper cassette loading area. Prints are
released on the upper part of the paper
cassette.
(Ink ribbon remain-
ing amount)
STATUS DISPLAY
RIBBON INDICATOR ( )
This indicator illuminates for ink ribbon
notification.
See page 46.
PAPER INDICATOR ( )
This indicator illuminates or blinks for
paper notification. See page 46.
ALARM INDICATOR ( )
This indicator illuminates for error
conditions.
See page 46.
STATUS INDICATOR
This indicator shows the remaining
amount of the ink ribbon, error status,
and print status.
It illuminates during printing as shown
below.
Each time a ribbon cartridge is ejected
or loaded, the counter of the ink
ribbon remaining amount on the status
indicator is set to the initial value.
For error indications, see page 46.
When the temperature of the thermal
head gets high, this indicator ( ) keeps
blinking slowly until the temperature
drops to a level where printing becomes
available.
FEATURES & FUNCTIONS
10

CLEAR/STOP BUTTON
Press this button for more than 1
second to clear the memorized image.
When this button is pressed during
printing, the number to be printed will be
reset to 1 and the continuous printing
will be cancelled.
MEM PAGE BUTTON
Use to select the image memorized.
The memory page is switched every
time this button is pressed.
ENTER BUTTON
When this button is pressed, the set
values will be memorized or the setting
conditions will be carried out.
CONTROL PANEL
MENU BUTTON
Press this button to display menus and
set various functions. When this button
is pressed during displaying menu, the
menu is closed.
See page 30.
, , , BUTTONS
Use to set the menu. Values are
increased/decreased and the cursor
position is changed with these four
buttons. These buttons are also used
to select one of memorized images.
Q’TY BUTTON
Use to set the number of copies to be
printed. The set number of copies is
displayed on the monitor. When this
button is pressed, the number of prints
changes 1, 2 ...to 5.
When the or button is pressed
after pressing this button, the number
to be printed can be decreased or
increased. See page 27.
6
5
3
2
1
4
Press the center of the control panel, and it comes out slightly. Pull it out completely to use.
After use, press the center again to close the panel.
11
CONNECTIONSPRECAUTIONS FEATURES PREPARATION TROUBLE-
SHOOTING OTHERSPRINTING ADJUSTMENTS

4
3
12
6
7 5
REAR PANEL
S-VIDEO INPUT/OUTPUT
TERMINALS
Use these terminals to connect to
S-VIDEO signal equipment. See pages
14, 15.
VIDEO SIGNAL INPUT/OUTPUT
TERMINALS
Use these terminals to connect this unit
to VIDEO signal equipment. See pages
14, 15.
AC LINE SOCKET
Connects to the provided power cord.
Insert the cord firmly.
POTENTIAL EQUALIZATION
CONNECTOR ( )
Connect this terminal and that of the
connected device.
This terminal is used to equalize the
potential of the device connected to the
unit.
Be sure to make this connection for
safety purpose.
RS-232C PORT
Use these terminals to connect this unit
to a device equipped with RS-232C
interface. See pages 16-17.
FEATURES & FUNCTIONS
REMOTE TERMINAL 1 (STEREO
JACK) ( )
Memorizing images is available by the
remote signal inputted through this
terminal. It is necessary to make a
circuit for remote control unit to use the
function. See page 28.
REMOTE TERMINAL 2 (MINI DIN
8 PIN) ( )
Memorizing images and printing is
available by the remote signal inputted
through this terminal. It is necessary to
make a circuit for remote control unit to
use the function. See page 29.
12
Other manuals for CP-31W
1
Table of contents
Other Mitsubishi Electric DVD Player manuals

Mitsubishi Electric
Mitsubishi Electric DD-5000 User manual

Mitsubishi Electric
Mitsubishi Electric DD-6030 User manual

Mitsubishi Electric
Mitsubishi Electric DD-8030 User manual

Mitsubishi Electric
Mitsubishi Electric DD-8040 User manual

Mitsubishi Electric
Mitsubishi Electric DD-6000 User manual

Mitsubishi Electric
Mitsubishi Electric DD-4030 User manual

Mitsubishi Electric
Mitsubishi Electric DD-8020 User manual

Mitsubishi Electric
Mitsubishi Electric DD-7040 User manual

Mitsubishi Electric
Mitsubishi Electric CP910E User manual

Mitsubishi Electric
Mitsubishi Electric DD-4020 User manual