Innovations–Made in Germany
The German company MOBOTIX AG is known as the leading pioneer in network camera technology and its decen-
tralized concept has made high-resolution video systems cost-ecient.
MOBOTIX
AG
•
D-67722
Langmeil
•
Phone:
+49
6302
9816-103
•
Fax:
+49
6302
9816-190
•
[email protected] Security-Vision-Systems
EN
Quick Install MX-BPA-Box
32.319-002_EN_07/2015
MX-OPT-BPA1-EXT
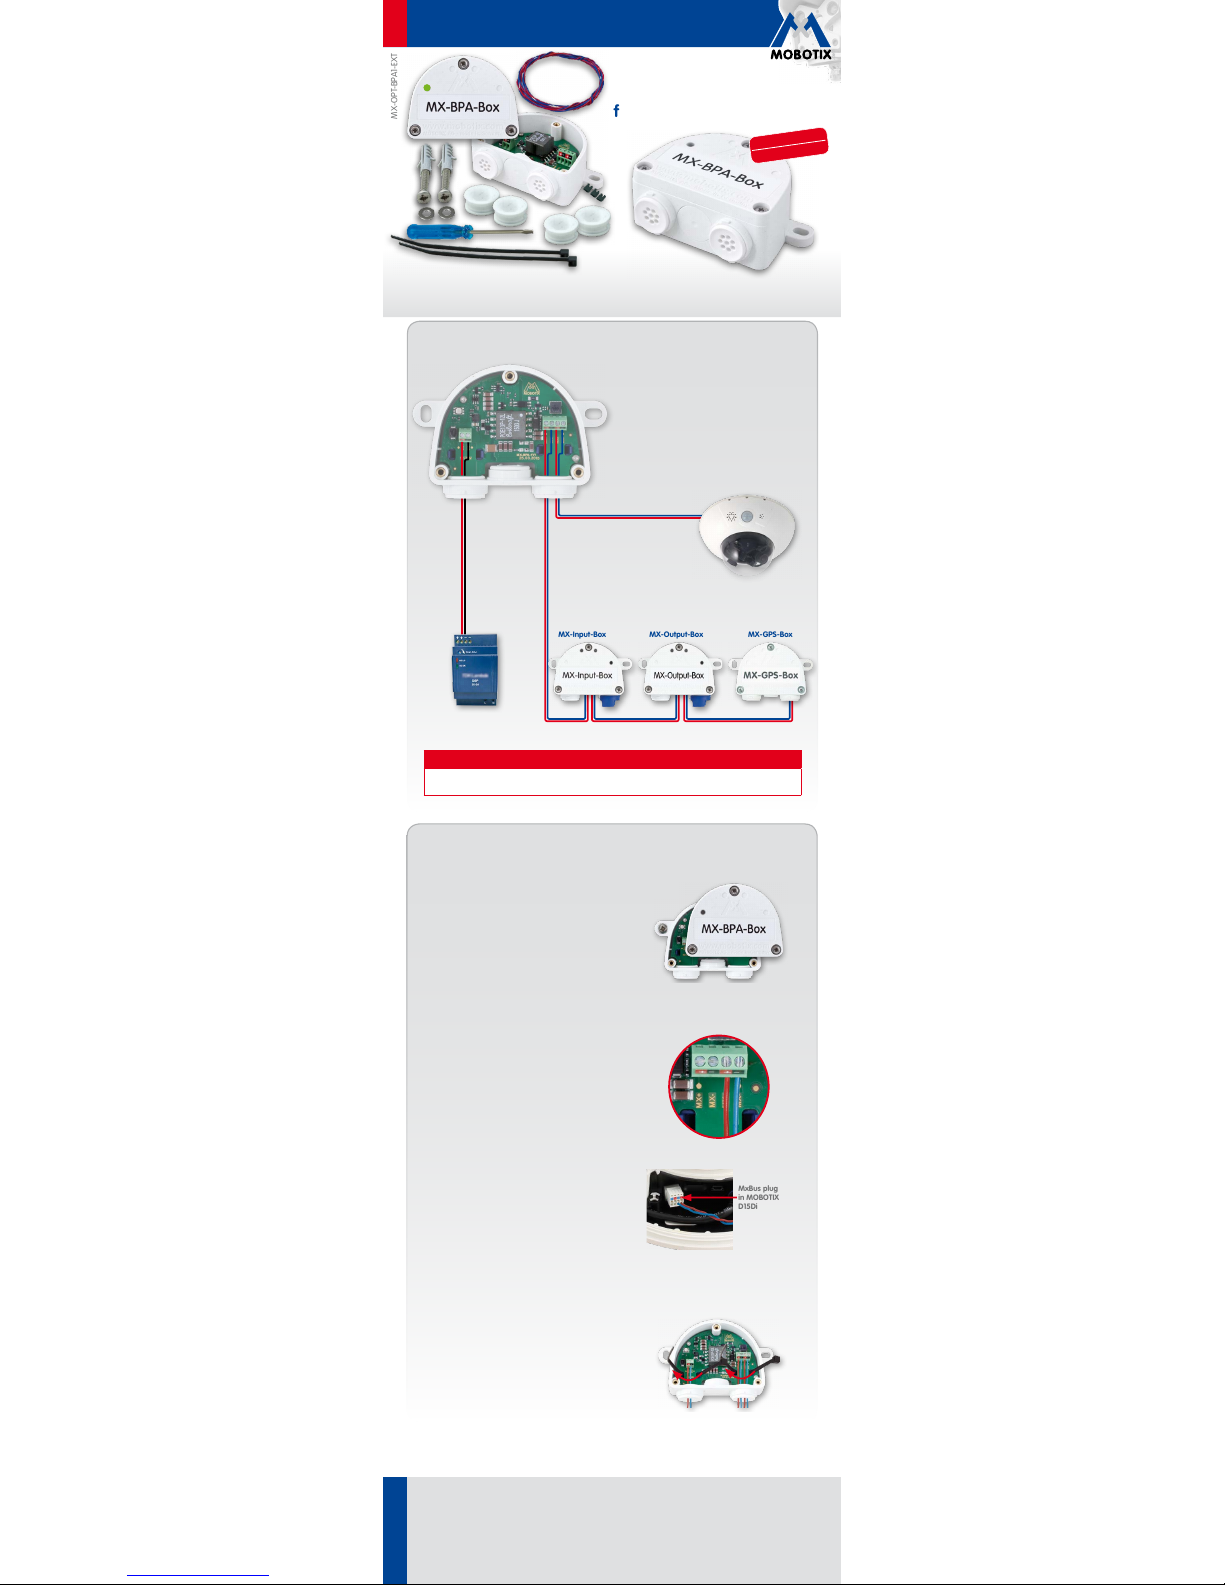
Connection Example
MX-Input-Box MX-GPS-Box
MxBus connection wires
J-Y(St)Y, twisted wire pairs
MxBus connection wires
J-Y(St)Y, twisted wire pairs
External power supply
12–48VDC
Maximum length of the entire MxBus wiring (to the MxBus master): 100m/110 yd
MX-Output-Box
MOBOTIX MX-BPA-Box
MX-OPT-BPA1-EXT
MxBus Clients
MOBOTIX D15Di DualDome
MX-D15Di-Sec-DNight 6MP
MxBus Master
Caution
• One MX-BPA-Box must not be connected to more than one camera (MxBus master)!
• Make sure that only one MX-BPA-Box is connected to one MxBus!
Weatherproof Power Supply
for MOBOTIX MxBus Modules
• 1 terminal for ext. power supply 12–48VDC
• 2 MxBus terminals (2 x 2 for MxBus master and for
additional MxBus modules)
Alternative power supply for several MxBus
modules.
More information: www.mobotix.com>
Products> Accessories> Interface Boxes
Weatherproof (IP65)
–30 to +60 °C/–22 to +140 °F
Installation Instructions
1. Attach the box
Attach the MX-BPA-Box at the mounting position
with the cable ports pointing downward (torque
0.4Nm). Next, remove the box cover (three screws).
2. Establish connection to the camera
•
Before proceeding, make sure there is no
current on the MxBus wires!
•
Cut the MxBus cable to size (2-wire, 0.6–0.8mm
diameter). When using
wires without jacket
, strip
the insulation of the wires for 5mm and push
the wires through the eight-wire plug (center).
• When using a
cable with jacket
, remove the
pre-installed eight-wire plug and insert the
appropriate cable plug (3to 5mm or 5to 7mm).
Press the rubber plug into the casing in such
a way that the rims stick out equally on both
sides. Push the cable through the plug, remove
the sheath on a length of 15mm and strip the
insulation of the wires for about 5mm.
• Connect the MxBus wires to the terminals of
the MX-BPA-Box using the screwdriver. Make
sure to maintain the polarity (see sticker in front
of the terminal).
• Connect the MxBus wires as described in the
corresponding manual to the MOBOTIX cam-
era or to another MxBus module connected
to a camera (e.g. KeypadRFID, MX-DoorMaster).
Make sure not to exceed the overall length of
the MxBus wiring (max. 100 m/110 yd).
3. Connect the peripheral devices
Connect the other wires/cables as required and
use the corresponding cable plugs (power sup-
ply, MxBus).
4. Tie down the cables
Insert both cable ties as shown. Pull the cable ties
tightly around the wires in order to provide strain relief.
5. Mount the cover
Mount the cover back onto the MX-BPA-Box and
tighten it using the cover screws (torque 0.4Nm).