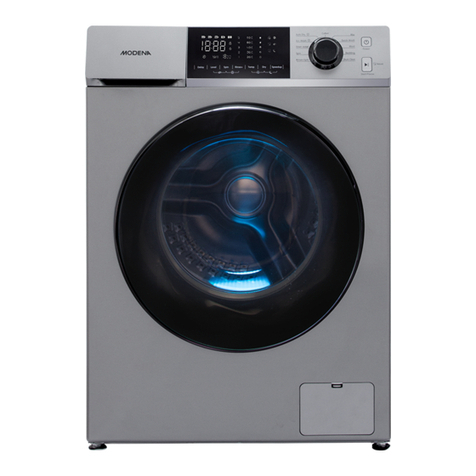
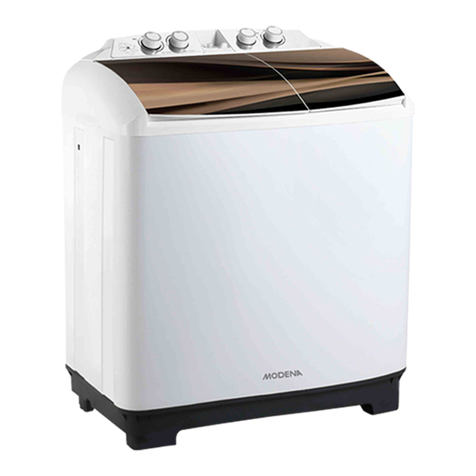
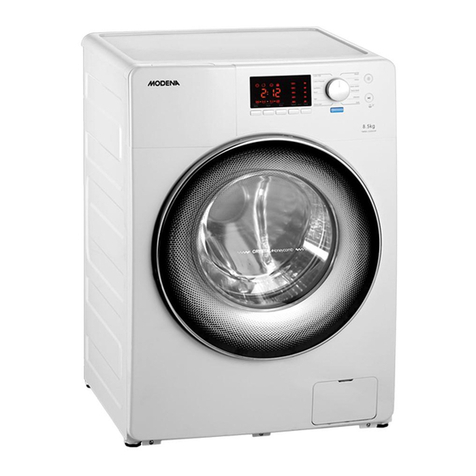
Modena WF 0652 WSR Owner's manual

User
Manual Book
Washing Machine
WF 0652 WSR
WF 0952 WSR
WF 1052 WSR

TABLE OF CONTENT
SAFETY & WARNING 1
Intended Use 1
Electrical Safety 2
Water Safety 3
Positioning 3
Correct Use 3
FEATURES 5
Control Panel 5
Control Panel Description 5
Washing Options 6
INSTALLATION 8
General Information 8
Fixing Screws Removal 8
Positioning of Appliance 9
Installation Under Worktop 10
Water Supply Inlet Hose 11
Water Drainage 12
Before Use 13
Electrical Connection 13
This Appliance Requires an Earth Wiring 13
HOW TO USE 15
Washing Instructions 15
Laundry Selection 16
Starting Washing Programs 18
MAINTENANCE 20

Cabinet 20
Detergent Drawer 20
Cleaning Detergent Drawer 20
Drain Pump Filter Cleaning 21
Emptying Procedure 22
Cleaning of Electro Valve and Water Supply Hose Filters 23
Water Loading Test 24
TROUBLESHOOTING 25
If Washing Machine is Noisy, Unable to Spin or Shakes 25
If Washing Machine Moves 25
If Laundry is Ruined/ Torn 26
If Laundry Stained by Other Clothes 26
Possible Remedies 27
SPECIFICATION 30
APPENDIX 33
Washing Programs, Durations and Options 33
Laundry Symbols for Washing Machine 37
Laundry Symbols Not for Washing Machine 37
This guidebook explains everything you need to know about your new
product. Please contact our Customer Care should you need further
assistance through www.modena.com

1
SAFETY & WARNING
This washing machine complies with current safety norms and
regulations. If improperly used, it can provoke damage to people and/or
goods around you. Before using the washing machine for the first time,
please read this user guide carefully. It contains important instructions
for the safety, use and maintenance of the washing machine. This will
prevent any possible danger for yourself and damage to the appliance.
Please keep the user guide with you and give it to other users, if
necessary.
Intended Use
Please, note that this washing machine is only for domestic use and only
to wash clothes which have been indicated by the manufacturer as
suitable for washing in water on the label. Any other use can turn
dangerous. The manufacturer cannot be held liable for damages caused
by an improper and/or incorrect use of the household appliance. In other
cases, the washing machine must not exceed one washing cycle a day.
Some examples are:
•Staff kitchen areas in shops, office, and other working
environments.
•Farmhouse.
•By clients in hotels, motel, and other residential type
environments.
•Bed and breakfast type environments.
•Areas for communal use in blocks of flats or in launderettes.

2
Electrical Safety
•Before plugging the washing machine into the electrical socket,
be sure that the power supply is in line with the data (power,
frequency) indicated in the technical data label. If any doubt,
consult to qualified electrician.
•The electrical safety of the appliance can only be guaranteed
when it is connected to an electrical system which is compliant
with all legal standards and equipped with a separate magneto
thermal differential switch (circuit breaker) and earthed. Do not
use extension leads or adapters.
•This is a key safety requirement. Verify this condition and in case
of any doubt, it is advised to call check the electrical system.
ATTENTION!
•This appliance can be used by children of at least 8 years
old and by people with limited physical, sensorial, or mental
ability or with no required knowledge, if they are kept under
surveillance or they have been instructed about safety
norms to apply for the use of the appliance and possible
risks.
•Children shall not play with the appliance.
•Cleaning and maintenance operations must not be made by
children without supervision.
•Children under the age of 3 must be supervised while the
appliance is in function.
CAUTION!
When washing at high temperature, be aware that the door glass
could become very hot (about 90oC). Prevent children from
touching it.

3
•The appliance can only be repaired by an authorized technician.
If it is not the case, the manufacturer cannot be held liable for
any possible damage that could arise.
•If not properly repaired, the user may be exposed to danger, for
which the manufacturer cannot be held liable.
•If the power supply cable is damaged, it must be replaced by an
authorized technician to avoid any possible danger.
•In the event of faults, prolonged absences or to clean the
appliance, disconnect it from the electrical mains.
•The appliance is disconnected from the mains when:
-The power cable is unplugged from the socket.
-The central switch has been turned off.
Water Safety
•To connect the appliance to the water supply, use only new
hoses. Do not use old hoses.
•Be sure that during the washing cycle, the detergent drawer is
always closed and turn off the water tap at the end of each
washing cycle.
•It is not possible to make modifications to the appliance without
a prior authorization by the manufacturer. Before connecting the
draining hose to the sink, make sure that the water is easily
drained.
•Secure the draining hose so that it cannot move because the
strong the sink.
Positioning
The appliance must not be installed on roofs, balconies, under canopies
or in places where it may be exposed to atmospheric agents.
Correct Use
•Before using the appliance for the first time, remove the
transport securing screws from the rear (see installation
chapter). If those screws are not removed, it will damage the
4
appliance or adjacent furniture or other appliances during the
spinning.
•Make sure garments are not washed together with foreign
objects (i.e. nails, needles, coins, paper clips). These foreign
objects may damage the appliance (i.e. the drum or the tub) and,
in turn, the damaged parts may damage the garments.
•Garments that have been pre-treated with solvents or products
containing solvents, must be carefully rinsed with clean water
before washing in the appliance.
•Never use detergents with solvents (i.e. petrol,
trichloroethylene). These products may damage some
components of the appliance and produce toxic vapors which
could potentially provoke fires, blasts, or damaged surfaces.

5
FEATURES
Control Panel
WF 0652 WSR
WF 0952 WSR & WF 1052 WSR
Control Panel Description
1. Program Knob
The Program selector Knob allows you to select the required
program and turn off the appliance by setting it to OFF. It can be
turned clockwise and counterclockwise to have an easy and
quick program selection.
2. Temperature Regulation
This button allows to regulate the temperature. To modify the
set value, press the button repeatedly until it reaches the
required temperature.

6
3. Spin Regulation
This button allows to regulate the spin speed. To modify the set
value, press the button repeatedly until it reaches the value
required.
4. Delayed Start
This button allows to program the end of the wash cycle; by
selecting a delayed start. The remaining time to the end of the
wash cycle is expressed in hours (from 0 to 24h).
5. Stain Level
This button allows to optimize the washing performance by
adapting it to the dirty intensity of the laundry.
6. Options
This button allows to scroll through the different washing
options. Push the button repeatedly to visualize the desired
option. The selected option starts to flash and confirm press the
button 7 “Confirm Option”. The activation of the option is marked
by a steady illumination of the corresponding icon.
7. Option Confirmation
This button allows to confirm the selected options.
8. Start / Pause
Push the Start/Pause button to start the wash cycle (led on) or
to pause it (flashing led).
Washing Options
1. Pre –Wash
The pre –wash function is used to make a low
temperature wash before the main wash with the aim
of removing stains.
Mild
a
Normal
Intense

7
2. Extra Rinse
The extra rinse function adds 1 or 2 rinses to the
standards wash cycle with the aim of removing any
possible residual detergents on garments.
3. Soak
The soak function allows to keep the laundry in water
for 30 or 60 minutes before the main wash phase with
the purpose of removing the most stubborn stains.
4. Rinse Hold
•This function allows to stop the washing ma-
chine with water in drum without draining and
spinning.
•To start draining and spinning, it is necessary to push
button 8 (START/ PAUSE)
5. Eco
The function Eco allows to reduce the energy
consumption of the appliance ensuring the same
washing performance.
6. Child Safety
To set child safety, once the wash cycle commences,
keep pushing buttons 6 and 7 at the same time until
the icon starts to flash. To deactivate this function,
hold pressed buttons 6 and 7 until the icon switches off.
7. Locked Door
When this icon is on steady, it means that the door is
locked and can be opened only after the icon light is
off.

8
INSTALLATION
General Information
The assembled group of the appliance is secured by 4 fixing screws
(which protect it during handling and transport operations) as shown in
Figure 1.
Fixing Screws Removal
1. Before using the appliance, it is necessary to remove the fixing
screws by turning counterclockwise.
2. Once unscrewed, pull them out with spacer bushes as shown in
Figure 2.
3. Seal the holes with the appropriate caps provided as shown in
Figure 3.
Figure 1

9
Positioning of Appliance
1. To avoid damages or malfunctions, the appliance must not be
installed on roofs, balconies, under canopies or in places where
it may be exposed to atmospheric agents.
2. Make sure the electrical cable and hoses (water inlet and drain
hoses) on the rear of the appliance are not pressed.
3. To ensure the stability of the appliance, avoiding strong
vibrations during washing and spinning cycles, it is necessary to
put the appliance on a levelled, smooth, dry, solid surface not
raised from the floor level. To balance any difference in levels of
Figure 2
Figure 3
NOTES!
If the fixing crews are not removed, this will cause strong vibrations
and irregular movements during the washing cycle with
subsequent damages.
Foot
Cabinet
Figure 4

10
the floor, it is possible to intervene on the feet modifying the
height by screwing and unscrewing in accordance with the
necessities as shown in Figure 4.
4. After regulating the feet, since vibration may modify its level, it
is advisable to tighten the docking nut on the feet until it is
blocked as shown in Figure 5.
5. It is recommended to avoid putting cardboard, pieces of wood
or similar material upon or around the appliance since it may
obstruct the airflow.
Installation Under Worktop
It is possible to position the appliance under a worktop only if there is
place of minimum 3cm on the upper side, 8cm on the sides and 8cm on
the back side. An example of a typical installation is represented in
Figure 6. The top table of the appliance cannot be removed for electric
and mechanical safety reasons.
Nut
Figure 5
8 cm
8 cm
3 cm
Figure 6

11
Water Supply Inlet Hose
1. The water supply inlet hose has to be connected to a cold water
tap with threaded hole of 3/4” and to the appliance. Only use the
hose supplied with the appliance and make sure that the rubber
gaskets are properly placed on the ends of the hose.
2. If the water supply system is new or it has not been used for a
long time, before connecting the hose it is necessary to let the
water run until it is clear. Figure 8 shows the connection to hot
water. This option is available only on demand.
3. Be sure the hot water temperature does not exceed 55°C to
avoid damages to the clothing and to the washing machine. Use
Figure 7
Figure 8

12
only the water supply inlet hose which is supplied with the
appliance.
Water Drainage
The water drain hose can be positioned in three different ways:
1. On the edge of a sink, using a U-hook plastic (not supplied).
Make sure the hose is well fixed on the sink.
2. Into a drainage line placed at minimum height of 60 cm and not
exceeding 90 cm.
3. Direct drain into the siphon of sink. It is advisable to use a hose
clamp (not included)
Figure 9
NOTE!
It is not advisable to use hose extensions for the water drainage
hose.

13
Before Use
Before using the washing machine for the first time, it is necessary to do
a washing cycle (program cotton) with detergent and without laundry,
setting the temperature at 60°C.
Electrical Connection
•The appliance is supplied with a power cable and plug for the
connection to the 230V/ 50Hz AC grid.
•Make sure the Schuko plug is always accessible so that washing
machine can be disconnected from the mains if necessary. The
electrical system must meet the provisions VDE 0100. The
maximum consumption of the washing machine is 10 Ampere.
•It is strongly recommended never to connect the appliance using
extension cables, multiple sockets, or similar devices to avoid
overheating and potential fire hazard. The manufacturer accepts
no liability for damages resulting from lack or interruption of the
protective earth conductor. With the purpose of increasing the
safety level, VDE institute, by Directive DIN VDE 0100 part 739,
recommends equipping the appliance with an automatic
differential switch (circuit breaker) with trip off current of 30mA
(DIN VDE 0664).
•If an automatic differential switch is used, make sure it is of type
A, in accordance with DIN VDE 0664 and sensitive to pulsating
currents.
•The identification plate provides information about the nominal
power consumption and its appropriate protection. Please
compare these data with the data of the electrical mains.
This Appliance Requires an Earth Wiring
For individual personal safety and of the environment, this appliance
must be connected to the mains with an earthing which provides a direct
path to the ground, correctly verified and in compliance with current laws
and regulations. Its installation must be equipped with a magnetothermal
differential switch (circuit breaker).
•This appliance is supplied with a type (A) power cord and a type
(B) plug.

14
•In order to avoid risks of electrical shocks/fires, the cable must
be connected to a wall socket (C) suitable for the type of plug
(B).
•Do not modify the connection cable nor use adaptors or
extension leads (D).
•If the wall socket is not available, it is the customer’s
responsibility and obligation to install it by a qualified
electrician.
•Do not change/modify the electrical power cord and do not use
adaptors or extension leads (D)

15
HOW TO USE
Washing Instructions
•The appliance shall not be used by children or vulnerable
persons without appropriate supervision.
•Children shall not be allowed to play with the appliance.
•For each garment, follow the washing instructions written on the
clothing labels Make sure there are no coins, pins etc. into the
pockets of the garments to be washed.
•Do not use gasoline, alcohol, trychlorethylene etc. on garments
destined to be washed into the appliance.
•It is advisable to put small size pieces of laundry like socks, belts
etc. into a mesh laundry bag before washing them; thus
preventing them from getting caught and snag into the drum.
•Use the softener within the maximum recommended dose, since
an excessive quantity may damage the garments.
•When the appliance is switched off, let the door half-opened,
thus better preserving the gasket and avoiding musty odours.
•Before opening the door, always make sure that the water has
been drained.
•Always turn off the water tap at the end of every washing cycle.
•Unplug the appliance if it is not used for long periods of time.
Figure 10

16
Laundry Selection
To ensure you are getting the best from your washing machine, clothing
shall belong to one of following types:
•White Clothes
•Coloured
•Synthetics
•Delicates
•Wool
More specifically, it is important to consider that:
•New coloured clothes may stain the first washing. Therefore it
is advisable to always wash them separately.
•White clothes will lose their “whiteness” if washed together with
colored clothes.
•Before washing, it may be needed to previously remove stains
from particularly dirty clothing with a special detergent.
•
Carpets, damaged clothes, hair, threads, dirty substances in
general may clog up the drainage system.
Loading Laundry
•To get the best washing results, it is necessary to place the
laundry in the drum, one item at a time thus preventing it from
knotting and twisting. Efficiency results are strongly affected by
quantity and by the way garments are loaded into the appliance.
•An excessive load or lower than half the rated load capacity may
undermine the reliability of the washing machine and it makes
the appliance noisier.
IMPORTANT!
Follow the washing instructions of the fabric labels and make sure
that there are no metallic objects (such as clips, needles, screws,
coins, curtain hooks etc.) in the laundry.

17
•In case of excessive load or lower than half the rated load
capacity, it is recommended to reduce to a minimum the spin
speed to avoid strong vibrations during the spinning cycle.
•Before closing the door, make sure that no garment has been left
on the edge of the gasket. This is to prevent any damage to the
gasket.
•Please close the door with a slight push.
Detergent Dosage
For each washing cycle, the correct amount of detergent must be
decided depending on the soil intensity of the laundry, as well as
considering the load size and water hardness. For each washing cycle,
both detergent and softener must be put before starting to wash.
Liquid detergent Bulkhead Insert
1. To use the liquid detergent, it is necessary to put the bulkhead
insert provided in the kit with the appliance as shown in Figure
12.
Figure 11
Figure 12
This manual suits for next models
2
Table of contents
Other Modena Washer manuals

Modena
Modena Semplice Series Owner's manual

Modena
Modena WF 1030 VDWH Owner's manual

Modena
Modena WT 1121 WAM Owner's manual

Modena
Modena WF 741 WAM Owner's manual

Modena
Modena WF 1156 Owner's manual

Modena
Modena WF Series User manual

Modena
Modena WT 0820 UGWH Owner's manual

Modena
Modena Calma Series Owner's manual

Modena
Modena Tiziano Series Owner's manual

Modena
Modena WF 730 Owner's manual