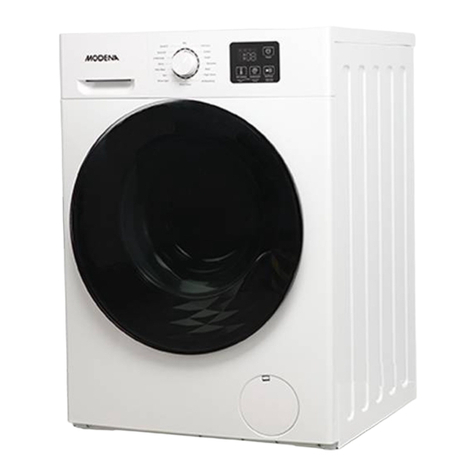
Modena Calma Series Owner's manual

User
Manual Book
Wash & Dry Machine
Calma Series
WD 1157

1
Thank you for your trust in choosing MODENA products for your household
needs. With your satisfaction as our priority, we constantly aim to deliver stylishly
designed products equipped with state-of-the-art technology to assist you in
your daily activities.
This is your guidebook containing everything you need to know about our
product. Please reach out to us if you need further assistance or other
information via our Customer Care or our official website www.modena.com.

2
CONTENTS PAGE.
• Introduction 22
• Part 1 : Name of Parts 24
• Part 2 : Understanding Control Panel 24
• Part 3 : First Step Before Installation 25
• Part 4 : Installation 26
• Part 5 : How to Use 27
• Part 6 : Maintenance 31
• Part 7 : Precaution Action 34
• Part 8 : Troubleshooting 35
• Part 9 : Specification 37
• Appendix 1: International Textile Care Label 38
• Appendix 2: Useful Hint For Dirt Vanishing 39

3
* Features and accessories are depended on product series.
WD 1157
Remark:
1. Power
2. Start/Pause
3. Programming knob
4. Display
Part 1: Name of Parts
Part 2: Understanding Control Panel

4
Display Panel
1. Display
2. Program
3. Delay
4. Level
5. Mute
6. Spin
7. Child lock
8. Rinse +
9. Temperature
10. My cycle
11. Dry
12. Washing at night
13. Speedup
When the installation is ready, make sure that the power supply has fuse with the specification of 15A,
220V, 50 Hz. When the heating function is used, the maximum current of the washing machine is 10A.
Make sure the power supply (current, voltage, and cable) fills the requirement to operate this appliance
on a normal load.
-The washing machine must be grounded, so whenever there is a problem, the current can be
conducted to the ground and minimize the risk of short circuits. If you are not sure if the washing
machine has been properly grounded or not, you can contact the experienced technician.
-The pressure of supply water is between 50kPa until 800kPa for the normal operation of the
washing machine. If the water supply is too low, the input water valve may not work normally or the
washing time becomes longer, and the display will show error code “SF”.
-Check all connections on input water supply, valve, and faucet to avoid water leakage.
-The result of the washing machine depends on the effectiveness of the detergent. The dirt on the
clothes may not be able to vanish by using bad quality detergent. Please clean the dirt on the
clothes like explained on this book before being washed by washing machine.
Part 3: First Step Before Installation

5
Take the washing machine out from the cardboard box and put it on a flat and sturdy floor. Don’t place
the washing machine on an incline, not flat, on the carpet, or on the wooden floor. Don’t place the
washing machine outdoor, and avoid a humid place that can cause damage.
1. Loosen all bolts behind the washing machine
-For transportation purposes, this washing machine is locked
with added polyfoam. Before operating the washing machine,
loosen all bolts like the picture on the right.
-Fill the holes with supplied covers at the
back of the washing machine.
-Keep the polyfoam and bolts for transportation purposes and
use it again before transporting the washing machine.
2. Leg adjustment
- For a stable operation, place the washing machine on a flat
surface.
- Your washing machine is equipped with legs that can be adjusted.
If the floor surface is not flat, loosen the leg bolts manually and
adjust the height of the legs to stabilize the washing machine.
- Turn left to raise and turn left to lower.
- After the washing machine is stable, tighten the leg bolts.
3. Connecting the water supply hose
a) Water supply hose
- Connect the water hose to the water inlet on the back of the
washing machine.
- Connect the other side of the hose with the faucet.
- Don’t pull the hose if it is too short. Change to a longer hose.
Part 4: Installation

6
or
- Check if there is leakage on the connection
with the faucet.
b) Drain hose
-We recommend you to use a drain hose
attached to the machine and directly inserted
into the floor drain with the width of the entry is
no less than 4 cm.
-If you don’t have a direct floor drain, the drain
hose can be connected to the sink hose drain
with the width of the sink entry shall not less
than 4 cm or directly to the sink with a maximum
height of 90 cm.
-If the drain hose is too long, it can cause the
washing machine doesn’t work optimally.
4. Connecting with electricity
- Make sure the voltage used is 220 volts and 50 Hz.
- Insert the power cord to the grounded socket.
- Avoid using extension cables, adapters and multiple sockets.
!
Attention!
Before operating the machine, it is suggested to check things as follows:
- Is the washing machine door closed properly?
- Is the water faucet opened?
- Is the drain hose placed correctly?
- Is the electricity connected?
In every washing make sure that:
- The connector of water supplies are safe, the water tap is turned on and the
drain hose has been placed in the right position.
- Cycle Options (P) or the power button is OFF.
- Then, with dry hands, plug the power cord into the wall socket.
- Sort / sorting clothes to be washed by the type of fabric / material.
Part 5: How to Use

7
- Make sure there are no objects (such as coins, safety pins, etc.) in the pocket
of the laundry that will be washed because it may damage the washing
machine, filters, and clothes itself.
- Open the washing machine door.
- Put in the clothing that will be washed (make sure the weight of the clothing
put into the washing machine does not exceed the capacity of the washing
machine) and close the washing machine door.
Detergent Drawer
The detergent drawer contains these parts:
- Detergent container for prewash → Powder detergent
- Detergent container for main wash → Powder or liquid detergent
- Container for softener
Caution: Don’t open the drawer during washing process.
Operating the Washing Machine
WD 1157
- Choosing the Program
Choose the program according to the type of the laundry by rotating the program knob. The
recommended temperature and the speed of the spin will be displayed. Press the “Start/Pause”
button to start the washing program.
!
Attention:
During the washing, It is recommended to sort the laundry and choose the program based on the
type of fabric, colors, and the temperature of the water. (look at the label of the clothing)
- Main Programs
Based on the type of fabrics, these are the available main washing programs:
- Cottons
This program is used for washing cotton textiles, underwear, towel, shirts, tablecloth, etc.
- Auto dry
This program is suitable for drying the cotton, linen, and mix fabrics.
Note:
* Do not put material like wool, silk, leather, feather and other protein fiber
* Do not put clothes like suits, sweaters, woolen coats and dress
* Do not put clothes with lace, printing and other easy to stain, cracking and clothing.
- Air Wash
It is suitable for clothing dehumidifying, degerming and deodorizing.
Softener
Pre-wash
Main wash

8
Note: This program cannot dry the clothing completely
- Down Jacket
This program is suitable for washing down feather clothing (not applicable to pillow or quilt).
- Spin
Program to spin spare water from laundry
-Rinse + spin
Suitable for laundry that uses spin only or spins with softener.
- Mix
This program is used for washing cotton and linen, chemical fiber and similar clothes with mixed
materials.
- Quick Wash
This program is suitable for washing slightly soiled clothing that is worn only once or needs a
little washing with a special smell.
- Wool
This program is suitable for washing machine – washable woolen fabrics. Washing capacity is
max 2.0 kg.
- Bedding
This program is suitable for washing bedspread, bed sheet, quilt cover, etc. The optimal
washing effect can be achieved when only washing one type of bedding below 2.0 kg.
-Drum Clean
This program is suitable for washing the inner drum. This program is designed to remove dirt
and bacteria inside the drum. When the cylinder icon is on, it means the inside cylinder of the
washing machine needs to be cleaned.
- Additional Program
For certain condition, below programs can be used.
Attention: Additional program can be different depending on product type.
-Rinse +
Suitable for adding extra rinse on washing cycle, and it can minimalize the remains of detergent
on clothes. So the bad effect of remaining detergent can be minimized on sensitive skin (baby,
allergic, etc.). The maximum additional rinse is five times.
-My Cycle
After selecting this function, any common or special washing program can be designed and will
be memorized.
It will bring much convenience when washing the clothing of the same kind. (Set this function
according to the water temperature, spin speed and degree of dirt, etc.) Setting method of My
cycle: 1. Press “Power” button to start the washing machine
2. Select the desired washing program by rotating “Program” knob, and set the
other parameters
3. Press “Temp.” and “Stains” buttons and keep for 3 seconds, the current
program and option settings will be saved, and LED light will be on
When washing the clothing of the same kind next time, the saved washing program and option settings
will be chosen automatically after selecting My cycle. You may repeat the above steps to modify the
settings of My cycle.
-Time Delay
This function makes it possible to delay the starting time up to 24 hours. The setting can be
made at intervals of 30 minutes. This function can be activated by following these steps:
1. Press “Delay” button to select the desired delay time.
2. Press “Start/Pause” to activate this function.
3. Press “delay” and “power” to cancel this function.
9
-Drum Clean
If the Icon light is on, the inner drum of washing machine needs cleaning.
This cycle is specially set in this machine to clean the drum and tube. With proper amount of chlorine bleaching,
the barrel cleaning effect will be better. When you run this program, we suggest not to put any clothes, you can use
this procedure after the laundry is finished.
-Level water
Press the “Level” button to select an appropriate water level according to the quantity and type of
clothing. Set the water level at “0-1-2-3” position by the “Level” button. When the water level is at “3”,
press the “Level” button again to cancel the increase of water level. In the process of setting, the icon
on LCD displays the increase or decrease of water level.
-Child Lock
Child Lock function can be set to prevent the reach of children.
This function can lock the buttons other than “Power”. In this way, the selected washing program will
not be changed due to any miss-operation from children.
Setting method of Child lock:
During the program, press “Rinse+” and “Level” buttons together for more than 3 seconds, this function
will be selected and Child lock indicator light will be on.
Cancellation method:
Press “Rinse+” and “Level” buttons together for more than 3 seconds once again, this function will be
cancelled.
-Dry
The "Dry" button has 5 levels of drying, specifically dry, strong, standard, wrinkle free and dry.
-Mute
Press the “Mute” button for muting the buzzer.
-Speedup
Press the "Speedup" button for washing clothes under 2 kg and takes at least 18 minutes and requires
detergent 20 g
-Washing at night
Pres the “ Dry “ and “ Speedup “ button for 3 seconds, and the night wash function will be turned on.
When the night indicator is on, the buzzer will not make a sound no matter the washing machine
operation is done or alarming.
-Temperature adjustment
The temperature has been set automatically for each programs and will be displayed, but it can
be set according to the needs and the washing program by pressing the “Temperature” button
in which the increment level is around 10oC. For cold washing, the display will show “_”.
- Time Display
The display will show the time needed for finishing one cycle program. The duration can be different
from washing machine program, this condition can be caused by different water pressure,
temperature, water contents, and the amount of laundry, additional program chosen and the voltage
of power supply.
90oC
For laundry with normal dirtiness levels, white cotton material and linen materials
60oC
For laundry with normal dirtiness levels, clothes made from linen (not faded),
cotton or synthetic garments made of linen with a mild degree of dirtiness.
40oC
30oC
Cold
For the laundry with mixture garments include synthetic and wool or other soft
fabric clothes.

10
- Start the washing program
For choosing the program please follow below steps:
1. Connect the cable to power supply.
2. Choose the program by rotating program knob.
3. Adjust the spin speed and another additional program if it is wanted.
4. Push START/PAUSE button to start program.
5. The symbol related to program (start symbol, door lock, etc.) will be showed in display.
Program progress
The progress and the temperature are shown on the lighted up indicator. Display shows the estimated
washing time.
Changing the washing program
In order to change the current washing program to a new washing program, you can follow these steps
below:
1. Push and hold “START/PAUSE” button for 3 seconds to stop and cancel the previous program
(ex: “Cotton”)
2. Rotate the program knob to the new program (ex: “Wool ”)
3. Then push “START/PAUSE” button to start the program.
- Adding or taking the laundry out.
Push Start/Pause button to change the status to Pause. The indicator lamp related to the program
is blinking. Wait until the door can be opened. Open the door and add or take the laundry out. Close
the door again. Reset again the additional program, temperature, and speed if needed. Push
Start/Pause button to start the washing process again.
Attention: Door can’t be opened if the temperature or water level is too high.
- Ending Program
When the washing process is ended, the chosen program symbol will turns on and the display will
show “00”, which indicate that the process has ended.
MODENA washing machine is specifically designed for long term use. Thus it does not require complex
treatment. However, there are some things that recommended for your washing machine to make sure
the quality of the washing machine is maintained.
Before performing maintenance, make sure to:
1.Unplug the power plug from the socket
2. Turn off the water tap.
Clean the
cabinet, door’s
rubber and
washing
machine door
-Clean the cabinet of the washing machine regularly with a soft wet cloth.
Then dry it with a soft dry cloth.
-Clean the rubber doors and the door of the washing machine after each
washing with a soft dry cloth.
Part 6: Maintenance

11
Cleaning Soap
Detergent
Drawer
periodically
-Clean the detergent drawer if there is a
pile of powder detergent in the drawer
-To clean it, remove the detergent drawer
by pressing the hook and pull the drawer
together from its place (a strong pull is
required in order to pass through the
stopper).
-Clean the drawers by putting them under
running water then clean it with a dry
cloth. Do not use solvents to clean.
Note:
If more than normal amount of water and
softener mixture starts to gather in the
softener compartment, the siphon must be
cleaned
-Wash the detergent drawer and the
siphon with plenty of lukewarm water in a
washbasin. Wear protective gloves or
use an appropriate brush to avoid
touching the residues in the drawer with
your skin when cleaning.
-Insert the drawer back into its place after
cleaning and make sure that it is seated
properly.
-If your detergent drawer is the one
indicated in the following figure:
Note: Lift the rear part of the siphon to remove
it as illustrated. After performing the above
mentioned cleaning procedures, place the
siphon back to its seating and push its front
section downwards to make sure that the
locking tab engages.
Empty the water
in emergency
If the washing machine cannot work normally or there
is a power outage when the washing machine is
working and there is the rest of the water in the tube,
then to empty the remaining water follow the
procedures below:
-Turn off the water faucet and turn the Cycle button
to OFF position.
-Wait until the water in the washing machine to cool
down. Put a water container.
-Open the filter cover.
-Rotate the dryer hose cover.
-Pull the dryer hose water.
-Remove the water drying hose cover then put the
hose to the container and let the water flow naturally.

12
Cleaning the
Pump Filter
-Clean the pump filter regularly. Make sure the
washing machine is empty and there is no water in
the tube. Ensure that electrical current has been
disconnected.
-To clean it, place a container or cloth under the cover
or filters to contain the remaining disposal water.
-Remove the filter by turning it counter-clockwise and
pull it out.
-Rinse the filter by putting it under running water.
Make sure that the particles contained in the filter
have been lifted.
-Replace the filter into its place by turning it clockwise
until it clicks into position.
To clean the
water entry
filter
Cleaning the
loading door
and the drum
-Clean the water entry filter on a regular
basis or if the water filling time is too
long.
-Close the tap water and remove the
water inlet hose by turning it counter
clockwise.
-Clean the filter on the back of the
washing machine with a soft brush and
rinse it with water.
-Reinstall the water inlet hose as before.
-Residues of softener, detergent and
dirt may accumulate in your machine in
time and may cause unpleasant odors
and result of unclean laundry.
-To avoid this, use the Drum Cleaning
program. If your machine is not
featured with Drum Cleaning

13
program, use Cottons-90 program and
select Additional Water or Extra
Rinse auxiliary functions as well.
- Run the program without any laundry in the machine. Before starting the program, put max. 100
g of powder anti-limescale into the main wash detergent compartment. If the anti-limescale is in a
tablet form, put only one tablet into compartment main wash.
- Dry the inside of the bellow with a clean piece of cloth after the program has ended.
Note: Repeat Drum Cleaning process every 2 months. After every washing, make sure that no
foreign substance is left in the drum.
If the holes on the bellow shown in the figure is blocked, open the holes using a toothpick.
Foreign metal substances will cause rust stains in the drum. Clean the stains on the drum
surface by using cleaning agents for stainless steel. Never use steel wool or wire wool.
Warning: Never use sponge or scrub materials. These will damage the painted and plastic
surfaces.
Do not pull or plug in the
plug to the socket with
wet hands.
The washing machine
must be connected
with the electric source
that has been
grounded.
Do not use branched
wiring with other
electrical tools.
Do not place the
washing machine in a
place with direct
sunlight or near other
heat source.
The washing machine
door cannot be
opened until 3 minutes
after the cycle is over
or the washing
machine is turned off.
For maintenance, plug
out the washing
machine from socket
Do not pull the cable or
other parts of the
machine to remove the
plug from the power
socket.
After usage, it is
suggested to plug out
the electric cable from
the socket, turn off
the water faucet and
close the washing
machine door.
Part 7: Precaution Action

14
Do not use damaged power cord or plug, especially if the plug
cannot fit to the outlet.
If there is damage to the power cord immediately contact
the MODENA call center for replacement. Replacing the
power cord must be done by personnel with experience and
understanding of electricity. Never replace the power cord
by yourself, due to the dangers that could lead to harm to
you and the others.
This appliance cannot be used by children and persons with limited
physical, sensory or mental capabilities or lack of experience and
knowledge.
The glass on the door of the washing machine may become hot when
using programs with high temperatures. Keep the unit out of the children.
Children are forbidden to play with this appliance and should be watched
closely.
Program cannot be
started or selected.
-Machine may have switched to self-protection mode due to an
infrastructure problem (such as line voltage, water pressure, etc.).
Reset your machine by pressing ’Start/pause’ button for 3 second.
Vibrate and eject noise
-Machine might be unbalanced.
Adjust the feet to level the machine.
-A hard substance might have entered into the pump filter.
Clean the pump filter.
-Transportation safety bolts are not removed.
Remove the transportation safety bolts.
- Laundry quantity in the machine might be too little.
Add more laundry to the machine.
-Machine might be overloaded with laundry
Take out some of the laundry from the machine or distribute
the load.
-Machine might be leaning on a rigid item.
Make sure that the machine is not leaning on anything.
Machine stopped shortly
after the program started.
-Machine might have stopped temporarily due to low voltage.
It will resume running when the voltage restores to normal
level.
Program time does not
countdown. (On models
with display)
-Timer may stop during water intake.
The timer indicator will not countdown until the machine takes an
adequate amount of water. The machine will wait until there is a
sufficient amount of water to avoid poor washing results due to the
lack of water. Timer indicator will resume countdown after this.
-Timer may stop during heating step.
Part 8: Troubleshooting

15
Timer indicator will not countdown until the machine reaches the
selected temperature .
-Timer may stop during spinning step.
The automatic unbalanced load detection system might be
activated due to unbalanced distribution of the laundry in the
drum. Machine does not continue to spinning step when the
laundry is not evenly distributed in the drum to prevent any damage
to the machine and to its surrounding environment. Laundry should
be rearranged and re-spun.
Foam is overflowing from
the detergent drawer.
-Too much detergent is used.
Mix 1 tablespoonful softener and ½ l water and pour into the main
wash compartment of the detergent drawer.
Laundry remains wet at
the end of the program
-Excessive foam might have occurred and automatic foam
absorption system might have been activated due to too much
detergent usage.
Use recommended amount of detergent
If there is an error code on the digital display, the explanation is below:
Problem Code
Description
Solution
Drying board communication is not
normal
Contact the call center
Water supply is not normal
Check if water supply is active.
Check is the faucet is good.
Check the water pressure.
Water draining is not normal
Check if the drain hose is connected well.
Clean the drain filter
Abnormal water heating tube
Contact the call center
Abnormal motor
Contact the call center.
Water level is high
Check the drainage pump
Abnormal communication
between computer board and motor
Contact the call center.
Abnormal temperature sensor
Contact the call center.
Computer board fault
Wait for interference disappearing, restart the
machine after power off.
Contact the call center.
Dry heating tube failure
Contact the call center.
Air inlet NTC is abnormal
Contact the call center.
Air outlet NTC is abnormal
Contact the call center.
Fan is abnormal
Contact the call center.
Alarm
Check and adjust the position of the load. The
load should be balanced.

16
* Without Spin ** Data on Normal Washing Program
W= White S = Stainless V = Silver G = Grey L = Black
Specifications of this appliance may change without notice to improve the quality of the product. The pictures in
this manual are schematic and may not exactly match your product. Values stated on the machine labels or in the
documentation accompanying it are obtained in laboratory in accordance with the relevant standards. Depending
on operational and environmental conditions of the appliance, values may vary.
MODEL
WD 1157
Type
Front Loading
Wash Capacity (kg)
11
Dry Capacity ( kg )
6
Spin speed (rpm)
1400
Color
Titanium
Inner drum material
Stainless
Number of washing program (+ drying)
11
Display
LED
Self-clean
Yes
Temperature adjustment
Yes
Quick Wash
Yes
Extra rinse
Yes
Without spin program
Yes
Child lock
Yes
Door lock
Yes
Power consumption with cold water (watt) *
194
Spin power consumption (watt)
568
Power consumption with hot water (watt) **
2000
Voltage (Volt)
220
Frequency (Hz)
50
Water pressure (KPa)
50 ~ 800
No load water consumption (liter) **
30.7
Washing time (minute) **
79
Shock Absorbers
Yes
Adjustable legs
Yes
Lint Filter
Yes
Dimension(L x W x H) mm
600 x 670 x 845
Weight (Kg)
79.5
Part 9: Specification

17
Notice the wash code symbols on attached clothing labels. In taking care of your clothes, preferably
before washing by the machine, you need to pay attention to the wash code symbols on the label
attached to your clothing, the description is outlined below:
Normal wash action
Washing temperature max. 95 °C
Gentle wash action
Washing temperature max. 60 °C
Washing by hand
Washing temperature max. 40 °C
Do not wash
Washing temperature max. 30 °C
Bleach
Chlorine bleach can be used
Do not give the bleach
Ironed
Can be ironed until 200 °C
Can be ironed until 100 °C
Can be ironed until 150 °C
Do not ironed
Dry cleaning
Dry cleaning with all abstergent
Dry cleaning with besin, pure
alcohol and R111
Dry cleaning with perchloride,
petrol, pure alcohol, R111 and
R113
Do Not dry clean
Drying
Drying by stretched
Drying with machine dryer at high
temperatures
Drying by swing
Drying with machine dryer at low
temperature
Drying using hangers clothing
Do not dry using the dryer
Appendix 1: International Textile Care Label (ITCL)

18
Stain removal instructions below are approximate and can only be used on clothing / materials
that can be washed.
Alcoholic Beverages :
Clean up the material with water first, then use the liquid and rinse water-glycerin
with a vinegar-water liquid.
Blood Spot:
Soak the clothes for 30 minutes in cold water. Use liquid ammonia to remove stains.
(4 liters of water - 3 tablespoons of ammonia)
Shoes polish:
Without damaging the material, removes stain carefully by rubbing it with detergent.
If this does not help, provide the water and liquid alcohol (2:1) and rub the material,
then wash with warm water.
Ice-cream, Milk and Cream:
Put the clothes in cold water for a few moments. Rub with detergent, and rinse with
warm water. If there is residual fat, get rid of it using oxygen water.
Tea and Coffee:
Pour hot water on the stain. If the material is white, pour a little bleach and rinse with
water.
Chewing Gum:
Harden the gum stains by putting ice on it. Then wash the stain carefully.
Moss:
Do not let stains moss materials for too long. Put the clothes into the cold water for
a few moments, rub with detergent, and rinse with warm water. If there is residual
fat, eliminate using the oxygen water.
Chocolate:
Soak the clothes in cold water for a few moments. Rub with detergent, and rinse
with warm water. If there is residual fat, get rid of it using oxygen water.
Fruit:
Pour cold water on the stain and do not use warm water to rinse it. Let it be for 2
minutes and remove the stains with white vinegar and rinse it.
Tomato paste:
Rub hardened tomato paste and soak it in cold water for 40 minutes. Rub with
detergent and then rinse.
Ink:
Wet the stain on the clothes with cold water and wait until the ink stain lost. Then rub
with lemon juice and detergent. Let the stains for 5 minutes and rinse the clothes.
Appendix 2 : Helpful Instructions in Removing the Stains

19
Eggs stain:
If the stain hardens, scrub and remove stains with a soft cloth. Then rub with
detergent and rinse with cold water.
Grass stain:
Rub stain with detergent. If possible, use bleach. For wool, use alcohol for good
results.
Oil / Fat Stain:
Scrub the stain with detergent and rub it. Then, wash the material with warm water.
Paint :
Use paint thinner to remove the stain. Put on cotton wool. Rub stain with detergent
and rinse with cold water.
Mustard:
Use glycerin and rub material with detergent. If unsuccessful, remove the stain with
alcohol. (Colored and synthetic materials need 2 cups of water and 1 cup of alcohol
liquid).
Burn Stain:
Use bleach if possible. For wool, give oxygen water to the stain and scrub. Rinse
and wash material.
This manual suits for next models
1
Table of contents
Other Modena Washer manuals

Modena
Modena WT 1081 WTM Owner's manual

Modena
Modena Tiziano Series Owner's manual

Modena
Modena WF 730 Owner's manual

Modena
Modena WT 0820 UGWH Owner's manual

Modena
Modena WF 0532 WSR Owner's manual

Modena
Modena WF Series User manual

Modena
Modena WF Series User manual

Modena
Modena WT 1121 WAM Owner's manual

Modena
Modena WF 0652 WSR Owner's manual

Modena
Modena WF 652 User manual