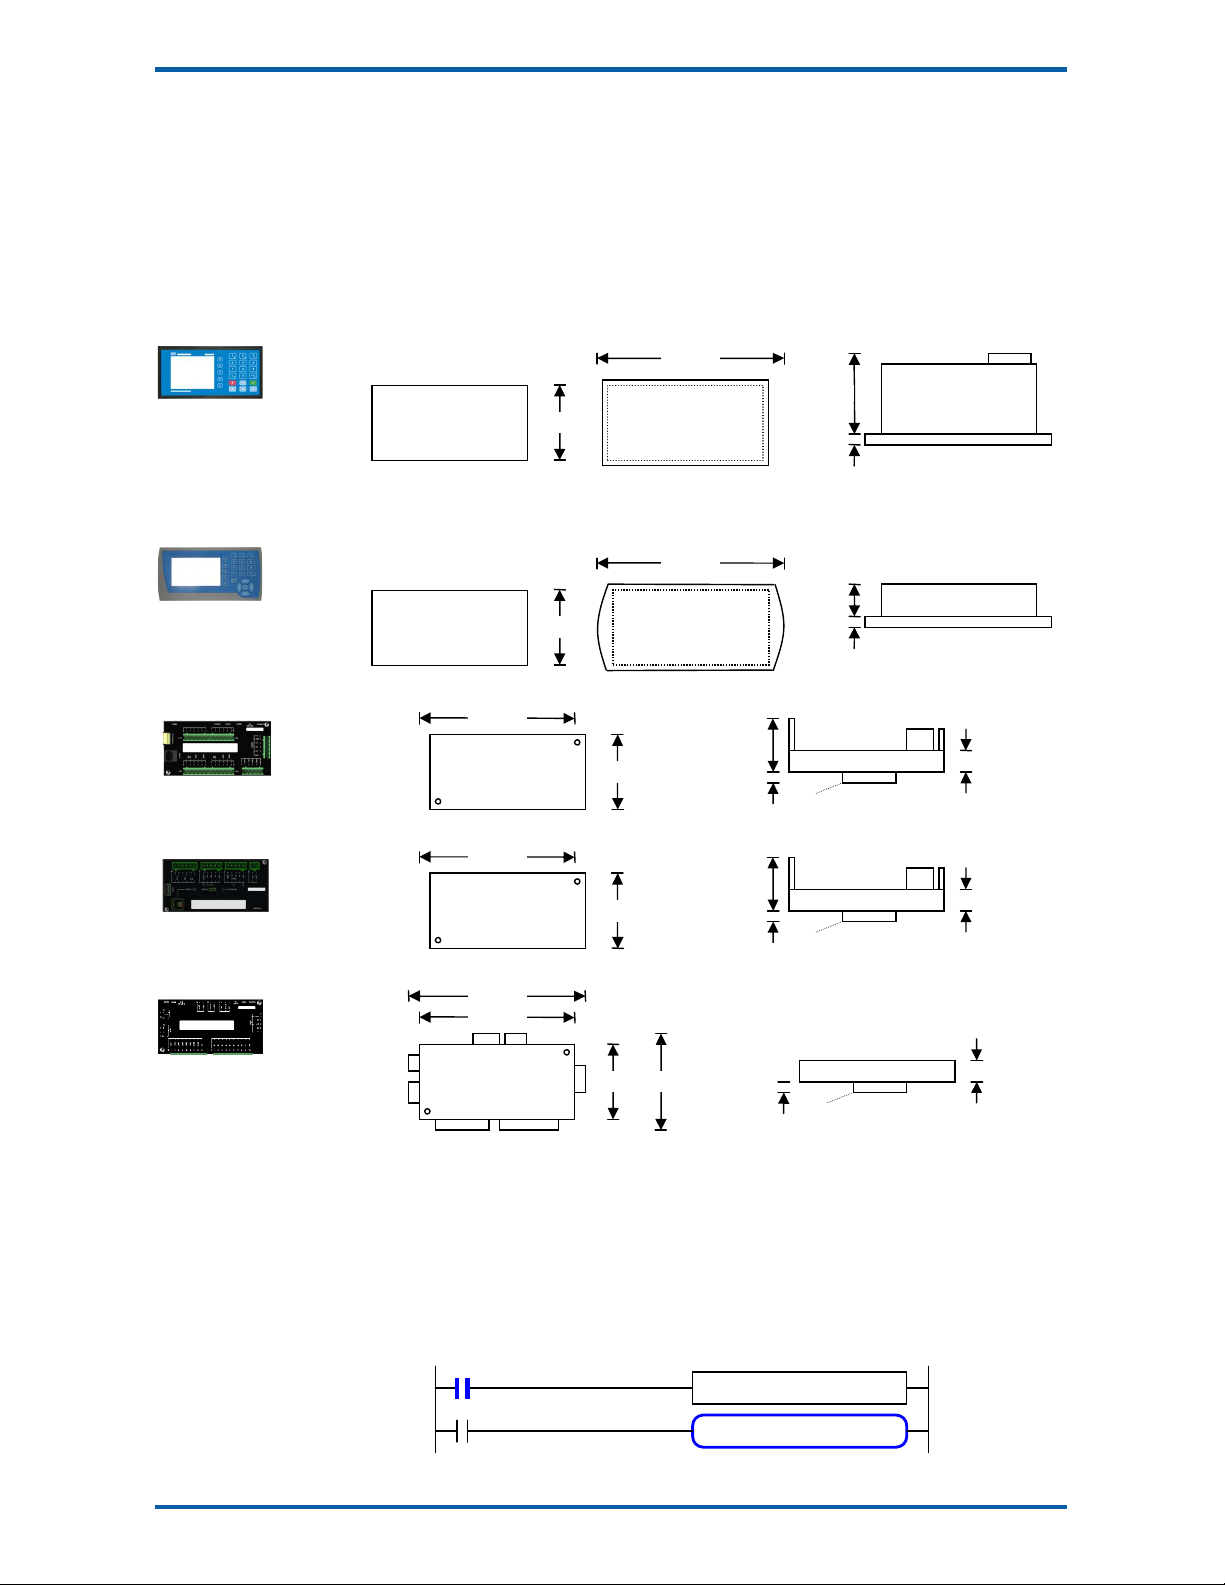
MC INDUSTRIAL GROUP LTD Features
MW95A_IM_ALL_SV6.09f_en 5/61
INTRODUCTION
Features
Basic
Units & Resolution
The units for each variable type (weight etc.) can be selected from a list of metric and imperial units.
The resolution of each variable type can be adjusted, this alters the count by e.g 100kg displayed in
0.2kg increments.
OIML Design
The instrument is designed to OIML standards.
Language Support
Support is available for the following languages: English, Chinese, Korean, German, Spanish, French,
Italian and olish.
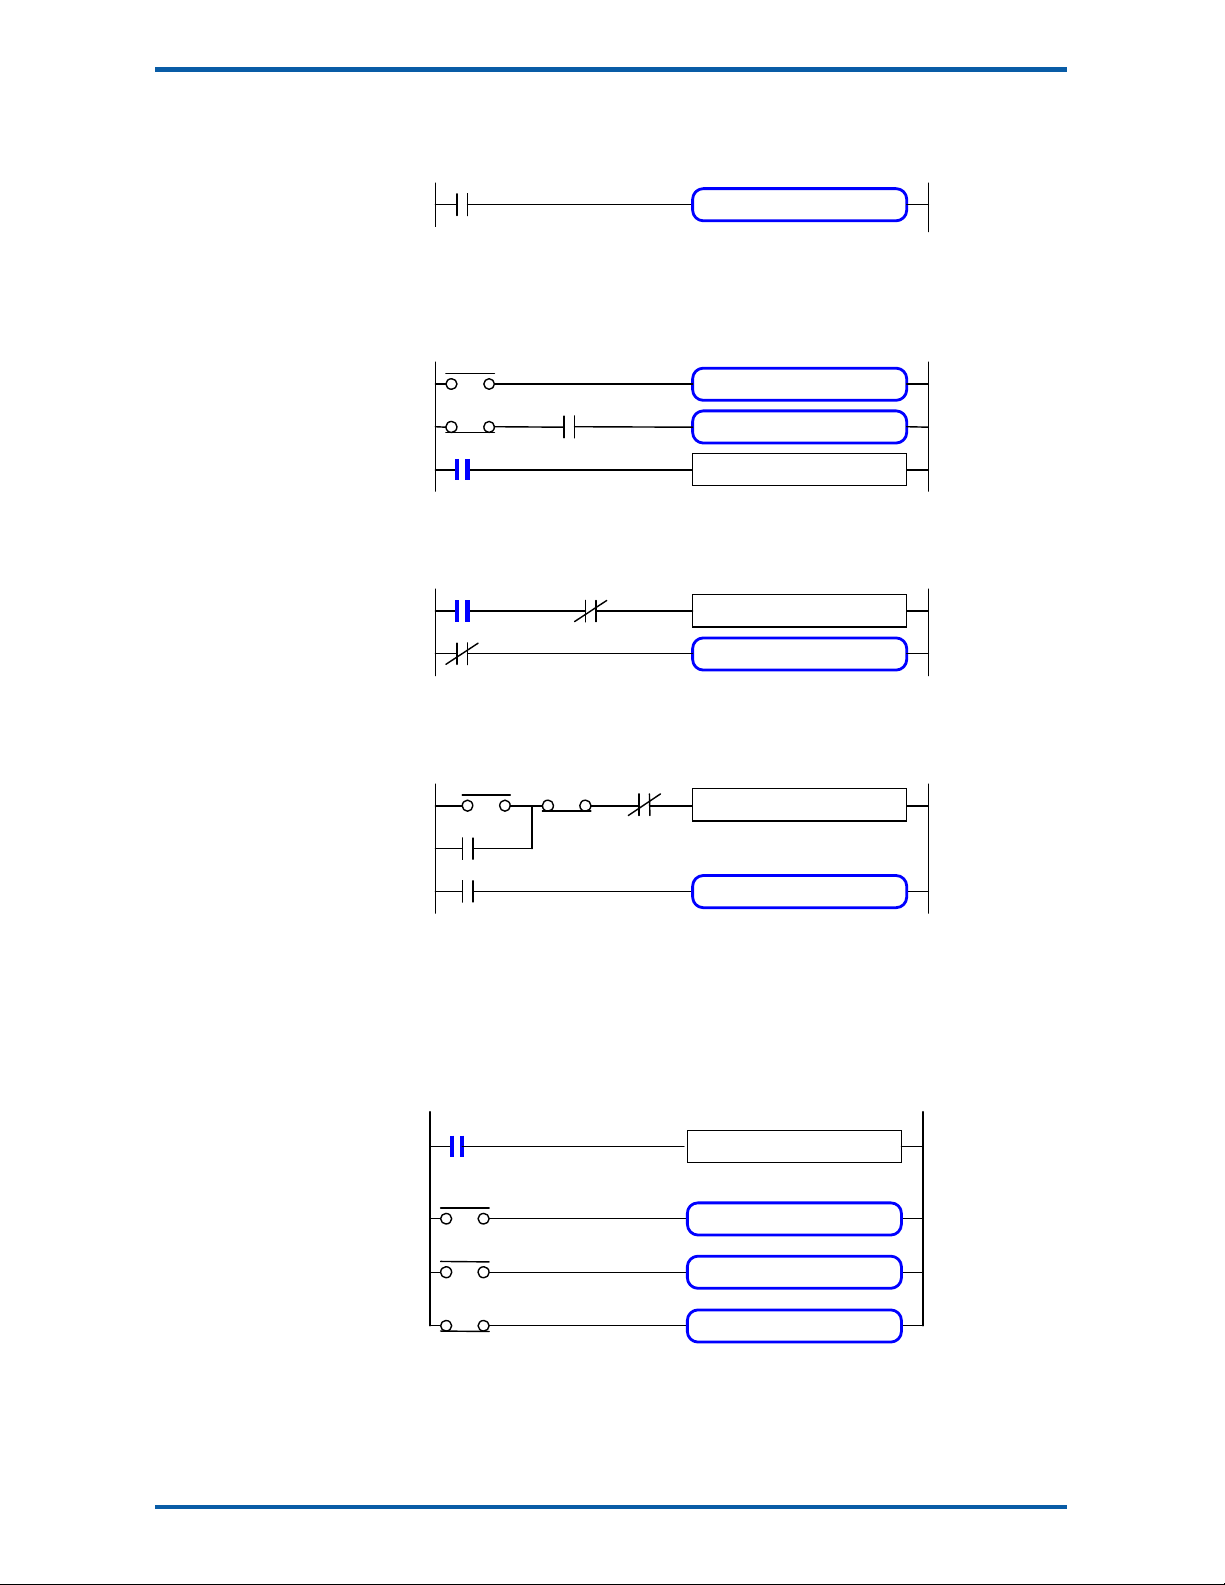
Inputs
Digital Inputs INx
The digital inputs are programmable to a range of function including ‘acquire zero’, ‘print’ etc.
Direct & Dynamic Calibration
Direct calibration uses the loadcell capacity and loadcell sensitivity to calibrate the weight signal. Dy-
namic calibration allows calibration of the weight while the belt is moving knowing the platform weight
(kg) or the belt loading (kg/m). This is useful when calibrating is done using chains.
Corner Adjustment (MT1 only)
The input sensitivity can be individually adjusted for up to 4 loadcells, allowing differences in loadcell
sensitivities to be corrected.
Four Loadcell Inputs (MT1 only)
Separate inputs are available for 4 loadcells allowing the signal of each to be monitored sperately. This
provide an aid for load balancing across loadcells and also for fault finding.
Tacho Input
The tacho input is used to measure the belt speed and belt travel. Basic calibration is done using a ta-
cho constant setting.
The system can be used to calibrate the tacho by measuring the number of pulses as a known length of
belt passes a point. Other belt lengths can be measured in a similar manner.
Zeroing
The weight of the unloaded belt is averaged over one complete belt revolution and the resulting value is
stored as the dynamic zero.
The zeroing can be semi-automated by using an output signal to stop the material feed onto the belt,
waiting until the belt is empty, performing the zero averaging, restarting the feed and waiting until ma-
terial has reached the weigh point before returning to flow control.
Auto zeroing continuously monitors the platform weight. Any small drift in the weight measurement or
material build up on the weigh platform is automatically zeroed out. This ensures that with no product
on the belt, a zero flowrate is recorded.
Signal Filtering
Filtering for the weight can be adjusted to get the optimum compromise between reduction of plant vi-
bration and response speed.
Internal Signals
Limits
The high and low limits have adjustable setpoints which may be programmed to operate on any internal
signal.
Batching
The system can be used to batch out a desired weight by stopping the feeder when the batch weight
has been totalised. A pre-act is available to compensate for overrun.
vent Collection
rocess events are collected for operation with external equipment ( LCs etc.)
Memory Storage
Allows a group of settings to be stored or recalled from memory. This can be used for example to store
settings for different products. There are 20 memory locations with up to 4 settings in each.
Material Total
The processor incorporates a totaliser which totalises the weight of material through the system. The
totaliser can be reset to zero. A pulse output is available to operate external counters. A low flow cutout
ensures that low flows do not cause false counts. The total is retained after a power failure.