How does R01S work?
This model applies Gyro (Gyroscopic) navigation technology, which is able
to program the cleaning path, clean and recharge automatically without
manual intervention. Trio-cleanse works with vacuum sweeping and wet
mopping. The built-in UV-light tube can help to inhibit 99.9% of the most
common surface bacteria*.
* Attestation report of Hong Kong Certification Centre (HKCC): 99.99% of Klebsiella
pneumoniae, Escherichia coli, Staphylococcus aureus and Salmonella typhimurium
were sterilized in 2 seconds with the use of the UV lamp of Trio-cleanse (R01S).
Before Using
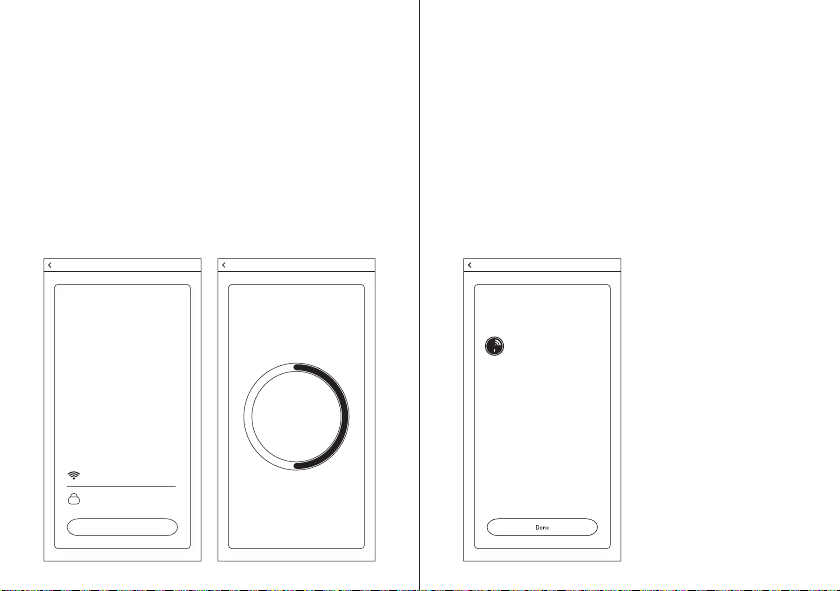
1. 2.4GHz Wi-Fi network is required.
2. Only use the original battery and power adapter of the product for
charging. Using other un-matched adapter may cause electric shock,
fire or product damage.
3. This product can only be used by children aged from 8 years old and
person with reduced physical sensory or mental capabilities or lack
of experience and knowledge if they have been given supervision
or instruction concerning use of the product in a safe way and
understand the hazards involved.
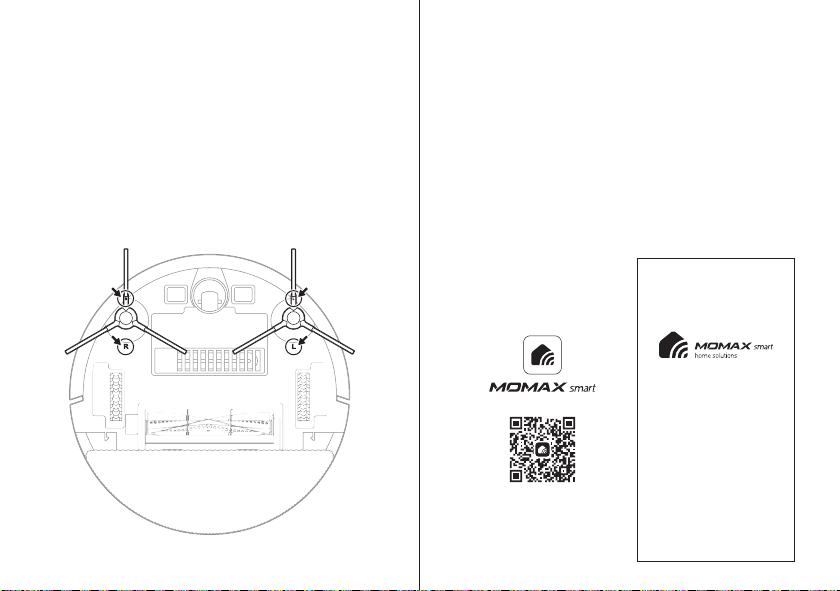
4. Make sure the dustbin, dustbin filter, rolling brush, side brushes, etc.
are properly installed.
5. Do not use this product in wet or moist environment.
6. Collect the floor environment (e.g. remove all the fragile objects,
cords, clothing, loose cables, as well as making sure curtains and
drapes off the floor to avoid any possible accidents).
7. To avoid tripping, inform all the people in the house when this product
is in use.
8. Do not sit on top of this product or attach an object on the top of it.
Beware of children or pets while the product is in operation.
9. Only use the product indoors, do not use it in outdoor.
10. Don’t look directly into the UV light, the radiation can harm your eyes.
Introduction
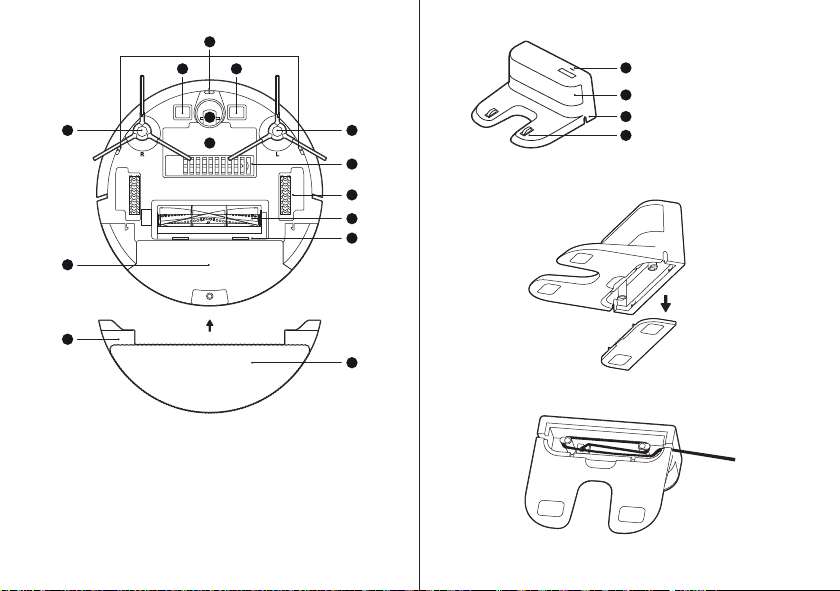
1. Connect the power cord to the charging dock, and tidy up the excess
cord into the cable slot.
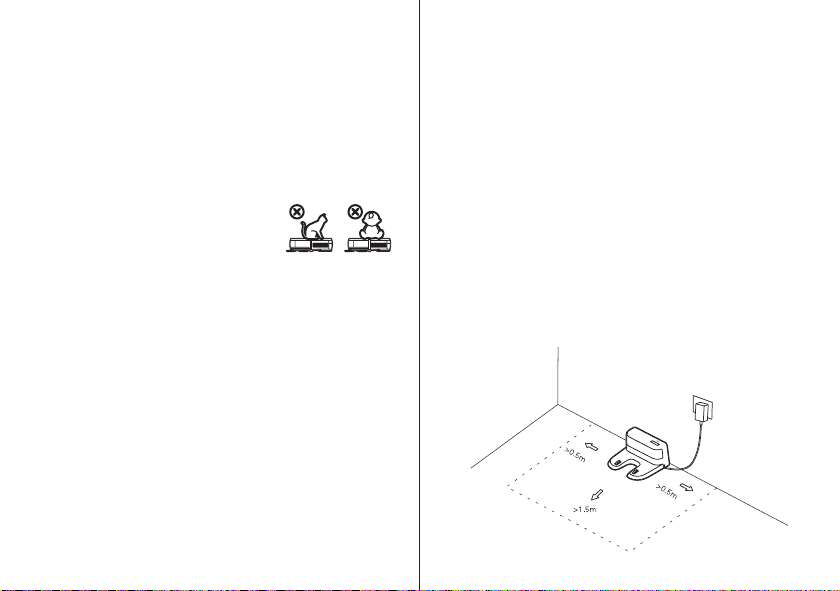
2. Place the charging base against the wall. Then plug the power
adapter firmly into the power outlet. Ensure the power outlet is
easily accessible for disconnecting.
3. The charging indicator light will be ON in green, indicating the
charging dock is connected to the power.
Note:
•Ensure a space of above 0.5m on both sides of the charging base and
a space of above 1.5m in the front.
•If the power cord is placed on the ground, it may be dragged by the
vacuum robot and consequently the charging dock may be powered
off.
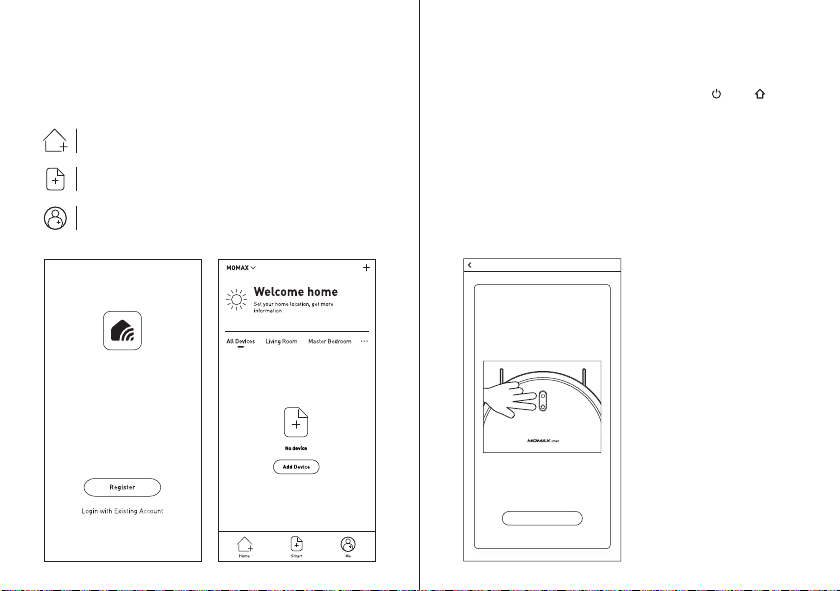
Quick Start Guide
2 3