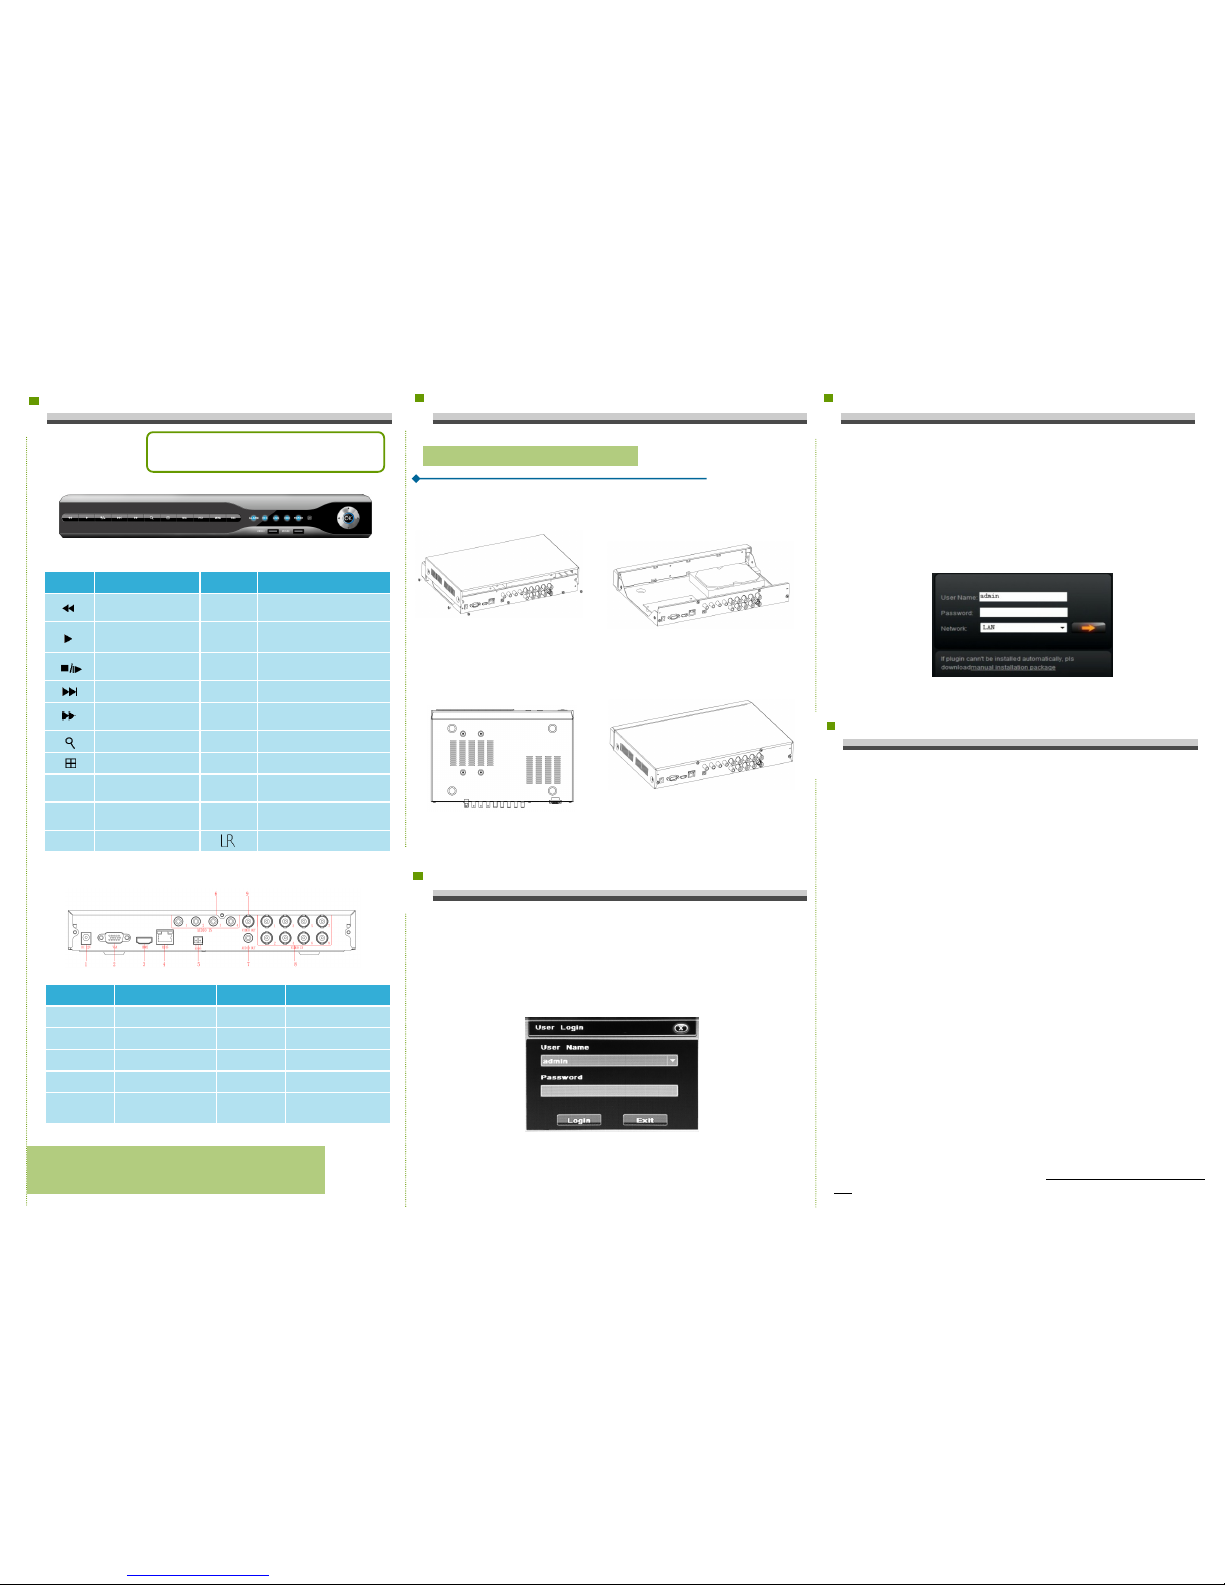
1. Product Appearance Introduction 2. Hard Disk Installation
3.Local System Login
Note:
As for specific methods of operation, please refer to the
disc's instruction manual.
After the normal startup, click the right mouse button and there will be
a login dialogue. Then enters the user name and password in the input
box. In the factory default state, there are two users: admin and guest,
and the password is blank. Admin is the default high-privileged user and
guest is the default low-privileged user, only with privileges of monitoring
and playback, etc.
Name Function Name Function
Increase reverse playback
speed PTZ Enter the PTZ
Press to start playback USB/
MOUSE
USB storage devices and the
mouse
To pause or play the
image frame by frame REC Video
Slow play images ESC Exit the current menu
Rapid display image POWER Steady light when the power
connection works.
Search ALARM Often bright when alarming
Display mode switch REC Video always bright
MENU Enter the main menu LINK Steady or flashing light when the
network connection works.
Navigation Direction and direction of
PTZ control menu HDD Steady light when the HDD works.
OK Confirmation IR receiver for the remote control
Take the following model as an example
Interface Name Interface Function Interface Name Interface Function
1.DC-12V Power input 6.AUDIO IN Audio input interface
2.VGA VGA output interface 7.AUDIO OUT Audio output interface
3.HDMI HDMI output interface 8.VIDEO IN Video input interface
4.RJ45 Ethernet interface 9.VIDEO OUT Video output interface
5.Port RS485 connection
PTZ
1.DVR Top Cover
Note:The appearance of products, including buttons,
interfaces and layout, are for reference only, and the
actual delivered goods shall prevail.
2.DVR Rear Panel
① Loosen the screws on the base
plate. ② Align the screw holes on the hard
disk with screw holes on the base
plate.
③ Turn the device and use screws
to tighten the hard disk to the
bottom.
④ Plug in the hard drive cable and
power cable.
hard disk
4.Web Login
5. Common Problems and Troubleshooting
If the problems you meet are not as follows, please contact the local
customer service center or the customer service headquarter. We would like
to serve you wholeheartedly .
1.When turned on the DVR, it cannot normally boot up.
.Incorrect power input.
.Switch Mode Power Supply (SMPS) is broken.
.The program upgrade in error.
2. DVR will restart automatically a few minutes after startup or fre-
quently crashes.
.Input voltage is unstable or too low.
.The hard disk has bad sector or the hard drive cable is broken .
.Switch Mode Power Supply is under capacity.
.Bad heat dissipation, dusty or poor working condition.
.DVR hardware failure.
3. Single-channel, multi-channel or all videos have no output.
.Please check whether the power cable connected to the camera is loos-
en.
.Please check if the video input or output cables through the DVR rear
panel are ok.
.Directly insert the video source into the display device and see if either of
them is defective.
.Check the screen brightness, if the luminance values are all zero, please
restore default settings.
.The video input signal is too week or no input signal.
4.Web cannot log on.
.Confirm whether the network is connected and check whether the panel
LINK or 100M LED displays properly. Use ping xxx.xxx.xxx.xxx ( the DVR IP)
to check if the network is connected.
.If the ActiveX control is blocked, please manually install the ActiveX con-
trol.
If the plug-ins cannot be loaded, you need to set IE as follows: Tools
—>Internet Options—>Custom Level—>ActiveX controls and plug-ins, to
enable all, and click OK.
Enter the IP address of the recorder in the browser address bar, and
connect. After a successful connection, it will pop up an input box as
shown below.
Enter the user name and password The factory default administrator
user name is admin, no password. After the successful login, please reset
an administrator password in time.