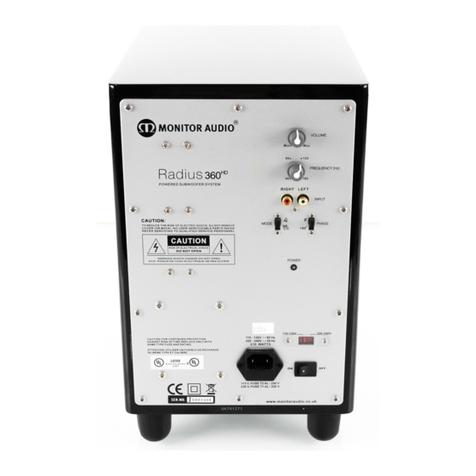
6. Phase Control Switch
The Phase Control is used to synchronise any delay between the BXW-10 and main/satellite
speakers. When the BXW-10 is in phase with the main/ satellite speakers the sound should
be full bodied. Sit in a normal listening position whilst listening to a sound-track with the switch
in different positions. Help from another person may make it easier. When set correctly the
location of the subwoofer should be almost undetectable. Experimentation is advisable in
order to achieve optimum results. However it should be noted that in most cases the phase
control switch should be set to 0 degrees, especially when using a digital AV processor or AV
receiver amplifier.
7. Power Mode Switch with On-Auto-Off Facility
The Power Mode Switch has three positions: ‘On’–‘Auto’–‘Off’. With the switch in the ‘On’
position, the subwoofer is permanently switched on under all conditions. In the ‘Auto’ position
the subwoofer will automatically switch on when an input signal is received and will remain on
for a period of time until no signal is received, the BXW-10 will then switch into standby mode
until a signal is received once more. When the switch is in the ‘Off’ position the subwoofer
will not function.
8. 12 Volt Trigger Input ~ Centre Pin = +12Vdc
For external power control from AV amplifier/ receiver to the BXW-10. Monitor Audio
recommend using this function and a lead is supplied. This 12 volt signal is supplied by the
AV amp/receiver and tells the BXW-10 to turn on from standby mode. This allows a more
accurately controlled auto on/off function, and is far more energy efficient. When using the
12v trigger, the Power Mode Switch (7) can be in any of the three positions, for it to function
correctly.
9. Voltage Selection Switch
Factory set do not adjust
10. IEC Mains Power Connector/ Fuse Location
The BXW-10 is supplied with a two-pin mains input socket for connection to the mains supply.
Use ONLY the appropriate IEC mains lead provided with the product. Also fitted is an external
mains fuse. If a fuse blows during operation a spare fuse is provided within the fuse holder for
replacement. If you wish to change the fuse, you can do this by removing the IEC mains lead
and carefully levering out the original fuse from its holder below the IEC mains input socket
(10a). If the fuse blows again it is advisable to seek help from an authorised service agent. DO
NOT attempt to re-fit a further fuse as this could result in serious damage to the amplifier unit.
11. Mains Power Switch
The Mains Power Switch should be switched to the ‘Off’ position when the BXW-10 will not
be used for extended periods. The switch must be in the ‘On’ position for the subwoofer to
function.
WARNING: Due to the mains switch being located on the rear panel, the apparatus
must be located in the open area with no obstructions to access the mains switch.
12. Warning Information
See warning information contained in the separate Safety Instruction Booklet
monitoraudio.co.uk 7
POSITIONING/INITIAL SET UP
Leave the BXW-10 unplugged from the mains until the installation procedure is
completed.
The BXW-10 should now be sited in the most suitable position, preferably not directly in the corner
of a room as this may cause excessive bass boom. Once a desirable position is achieved it is
important to check if the cables are long enough to reach comfortably without being under tension.
The optimal control settings will depend entirely on your system configuration. For initial trials set
the controls as follows:
Volume Control Should be set to between minimum and 9 o’clock.
Frequency Control Should be set to the approximate frequency depending on
main speakers (refer to the table on page 5), if using the L & R
Line Level Inputs.
Phase Control Should be set to zero degrees.
Power Mode Switch Should be set to ‘on’.
12v Trigger (optional) Do not connect at this stage.
Input connections can be made at this stage before the power is connected to the BXW-10.
Never connect or disconnect the RCA input/ output leads with the BXW-10
connected to the mains.
SET UP
Once the input cable(s) are connected and the controls are set in accordance with the initial set-up
procedure above, the BXW-10 can be connected to the mains power supply and switched on at
the mains power switch. Do not play any music at this stage.
The majority of AV amplifiers have automatic setup systems. If your amp has an auto set up
procedure, run this now with the volume set to around 10 o’clock. This should be enough for the
AV amp to acquire the correct settings.
When the auto set up is complete check that the settings on the AV amp for the sub woofer to
ensure they are correct. The crossover frequency should be roughly the same as in the table on
page 5 and the level should be no more/ less than +/- 3dB. If not we would suggest adjusting
accordingly.
Now play a variety of music/ film excerpts that you are familiar with gradually increasing the volume
to an average listening level. Once you are sure everything is working correctly, change the position
of the Power Mode Switch to the “Auto” position and if being used, connect the 12v Trigger lead.
Bronze BXW-10
6
