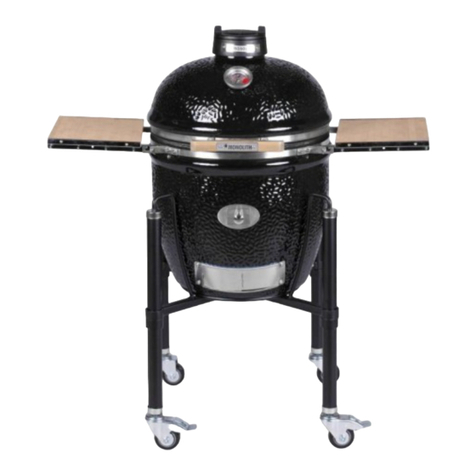
monolith PRO Series 2.0 User manual

EN
PRO
SERIES
2.0 USER
MANUAL

Join our grill community
on Facebook and
Instagram.
“Monolith
Owner‘s Club“
join the club!
Get inspired!
Follow and tag
us on:
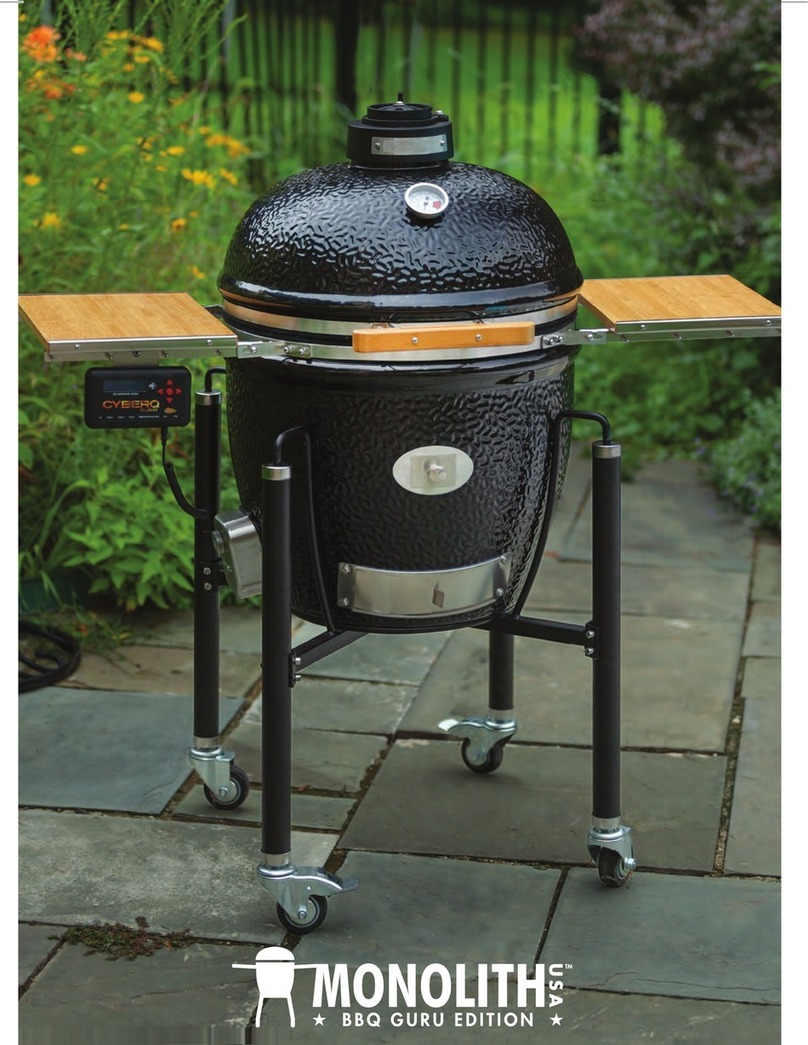
#monolithbbq
Monolith Grill
monolithbbq
Monolith Grill
EN
GRILLING,
SMOKING,
BAKING,
COOKING,
ROASTING.
This manual contains important information about the correct use and handling of the
lighter. Before the use of the lighter it‘s important to read and follow all of the instructions
and warnings written in this manual. Keep this manual for future reference.
We only honour a guarantee if these operating instructions are read completely and kept
with proof of purchase
ATTENTION!

THANK YOU FOR CHOOSING THE MONOLITH!
Congratulations on your new Monolith ceramic grill.
In this user‘s handbook you will nd the most import-
ant information relating to your grill and we wish you
many hours of enjoyment with your new Monolith
ceramic grill. For further information please visit our
web page: www.monolith-grill.eu/uk
Attention: To ensure proper use of this product, please
read this owner’s manual carefully before using, especi-
ally the safety recommendations, and retain for future
reference!
THE MONOLITH IS FREEDOM.
A ceramic grill that delivers on all that it promises.
Grilling, smoking, baking, searing, barbecuing or
roasting. Enjoy all the options, enjoy surprising your
guests, enjoy indulging your palate. Your garden will
become a realm of endless choices.
THE MONOLITH IS DESIGN.
It combines aesthetics with functionality. An object of
art, pleasing to both the eye and the palate.
THE MONOLITH IS TRADITION.
The Kamado has traditionally been used by the
Chinese and Japanese for over 3000 years. In the 70s
the modern ceramic grill started to evolve out of the
Japanese Mushikamado and began to blaze its trail of
success.
© 2020 Monolith Grill GmbH
All contents, photos, texts and graphics are protec-
ted by copyright. They may not be copied, modied,
reproduced or published in whole or in part without
prior written permission. Subject to change without
notice. Subject to modication.
THE COMPLETE OUTDOOR KITCHEN
The Monolith unites the advantages of a classical grill
with those of a stone oven. Barbecue, low temperatu-
re cooking, baking, smoking ... Whichever way you pre-
pare your dishes, the Monolith grill will always enable
you to achieve perfect results. No matter whether you
need very high temperatures to grill the perfect steak
or low temperature to smoke a large amount of meat
for hours – the Monolith is your grill. Used as a stone
oven the Monolith is perfectly suited to baking pizza
or bread. The temperature range is between 80 °C
and 400 °C. Due to its unique eciency the grill needs
very little energy to generate and maintain the desi-
red temperatures. Using 2,5 kg – 3 kg of charcoal, the
Monolith can work in the low temperature range for
up to 24 hours. Because very little oxygen is required,
air movement is extremely low in the grill, so meat re-
mains moist and does not dry out. The meat remains
moist.
If you just want to quickly grill 2 steaks, this is not a
problem. Due to the chimney eect, the charcoal
heats up extremely fast. With the high temperatures
you can grill the steaks and simply close the air regu-
lation vents when nished. The grill and rebox are
very well sealed; the charcoal embers die down within
a short time and can be used for another time so this
limits the waste you get with other barbeques.
Our unique system of supplying wood chips gives the
meat that typical smokey BBQ taste, without having to
raise the lid. The wood chips are placed on a rack and
are pushed through the intended opening directly in
to the re area.
The Monolith is made of extremely heat-resistant
ceramics and high-grade stainless steel. It has two
practical side tables made of solid bamboo. The cart,
like all other parts, is made of high grade materials
and easily supports the weight of the ceramics whilst
giving you the freedom to move your Monolith around
the garden smoothly and safely.
The monolith consists of traditional ceramics mixed
with 20th century materials.
Due to the very good insulation of the heavy ceramics
and the ingenious regulation of the air supply you
can control the temperature in the Monolith, unlike
any other type of grill. The charcoal consumption is
around 25 – 50 % less compared to a customary grill.
The required temperatures are reached very quickly
through the chimney eect so you can cook within 15
minutes of lighting with far less fuel burnt during the
preheating phase.
The outside temperature of the Monolith is much
lower than a steel grill so there is minimal danger of
burn injuries.
Due to the extremely temperature resistant ceramics
and the use of high-quality stainless steel the Mono-
lith is very low-maintenance and can even be used in
winter. It is perfect for slow braised dishes and winter
stews.
Limited lifetime warranty
(see warranty regulations – www.monolith-grill.eu)
TABLE OF CONTENTS
01 Introduction
02 All Advantages at one Glance
03 Monolith Pro-Series 1.0
04 Unpacking
05 Contents // Monolith Classic
06 Setup // Monolith Classic
07 Contents // Monolith Basic
08 Setup // Monolith Basic
09 Contents // Monolith Junior
10 Setup // Monolith Junior
11 Contents // Monolith LeChef
12 Setup // Monolith LeChef
13 Assembling the Monolith including cart
14 Assembling the Monolith excluding cart
15 Monolith BBQ Guru Edition Overview
16 Control Mount Setup and Fan Setup
17 Lighting
18 Smoking // Chip-Feeder-System
19 Grilling Methods
20 Care and Maintenance
22 Safety Tips
23 Warranty & Contact
01 INTRODUCTION 02 ALL ADVANTAGES AT ONE GLANCE

03 MONOLITH OVERVIEW
The ground-breaking Monolith Pro-Series is the
natural evolution of the proven and successful
Monolith Classic and LeChef grills, oering numerous
innovations.
The ingenious Smart Grid System provides ultimate
exibility to create dierent grill zones. You can work
with 5 levels in total, four of which are exible. You
can postition your smart grid ring, half-moon protec-
tor stones, grill grates and drip pans, dependent on
your cooking requirements
04 UNPACKING
The Monolith is packaged to ensure that it arrives
undamaged.
1. Cut the plastic tapes and remove the cardboard lid.
2. models including cart only: Remove the steel legs,
that are fastened in place with cardboard next to the
ceramic unit.
3. The side panels of the carton can now be removed
easily.
4. Remove the cartons containing the accessories lo-
cated next to the ceramic unit. Further components
and accessories are found within the unit and can
now be easily removed.
5. models including cart only: lift the ceramic unit out
of the steel cart. We suggest carrying the Monolith by
the brackets for the side tables.
6. Please recycle the cardboard packaging.
Caution: Due to the risk of breakage please exercise
caution when handling the ceramic components. Avoid
carrying the grill by the hinges or the bamboo handle,
this can lead to damaging the grill! Due to the weight we
recommend the unit be carried by two people. Be sure to
wear gloves to prevent injuries.
Our unique Smart Grid System oers unrivalled func-
tionality. Complete with metal frame and detachable
handle you can lift the entire system (including 2 grill
grates, 2 deector stones and 2 drip trays) in and out
of your Monolith in one clean, simple movement.
PRO-SERIES
SMART GRID SYSTEM
The cutting-edge segmented re box is seated
on a stainless-steel frame featuring an integral
concaved ash compartment & matching
proled shovel.
PRO-SERIES
FIREBOX

Ash shovel
Item No. 207045
THE SETUP:STANDARD ACCESSORIES:
05 CONTENTS // MONOLITH CLASSIC 06 SETUP // MONOLITH CLASSIC
Dual-Disc
Ventilation Cap
Item No. 201059-C
Fire Ring
Item No. 201052-C
Fire Box
Item No. 101053-C
Smart Grid System
Item No. 101011
Cast Iron
Fire Grate
Item No. 201066-C
Charcoal Basket
with Divider
Item No. 201046-C
Bamboo Handle
Item No. 201064-C
Cart (only for models
incl. cart)
Item No. 201041
Smoke Chip
Feed System
Item No. 201009
Grid Lifter
Item No. 206000
Ceramic Feet (only for
models excl. cart)
Item No. 201056
2 Bamboo Side Tables
(only for models incl.
cart) Item No. 201062-C
Thermometer
Item No. 201057-C
User Manual
Item No. 20000-HB
One Bag Metal Fittings
(only for models incl.
cart) Item No. 201083-C
Charcoal Basket with Divider Deflector Stone (halved) & Lift
for Indirect Cooking
Deflector Stones, Drip Pans and Stainless Steel Grid
Set
Setup for Pizza (optional accessory)

07 CONTENTS // MONOLITH BASIC 08 SETUP // MONOLITH BASIC
THE SETUP:STANDARD ACCESSORIES:
Dual-Disc
Ventilation Cap
Item No. 201059-C
Fire Ring
Item No. 201052-C
Fire Box
Item No. 201053-C
Stainless Steel Grid
Item No. 201060-C
Bamboo Handle
Item No. 201064-C
Cart
Item No. 201041
Cast Iron
Fire Grate
Item No. 201066-C
2 Bamboo Side Tables
(only for models incl.
cart) Item No. 201062-C
Thermometer
Item No. 201057-C
User Manual
Item No. 20000-HB
One Bag Metal Fittings
(only for models incl.
cart) Item No. 201083-C
Deflector stone
(2 pieces) & Lift
Item No. 201006
Ash shovel
Item No. 207045

09 CONTENTS // MONOLITH JUNIOR 10 SETUP // MONOLITH JUNIOR
THE SETUP:STANDARD ACCESSORIES:
Dual-Disc
Ventilation Cap
Item No. 201059-J
Fire Ring
Item No. 201052-J
Fire Box
Item No. 201053-J
Heat Protector
Item No. 201054-J
Cast Iron
Fire Grate
Item No. 201066-J
Extension Grid
Item No. 201023
Stainless Steel Grid
Item No. 201060-J
Deflector
Stone & Lift
Item No. 201024
Ash Hook
Item No. 201063
Bamboo Handle
Item No. 201064-J
Cart (only for models
incl. cart)
Item No. 201027
Ceramic Feet (only for
models excl. cart)
Item No. 201056
Smoke Chip Feed
System
Item No. 201026
One Bag Metal Fittings
(only for models incl.
cart) Item No. 201083-J
User Manual
Item No. 20000-HB
Thermometer
Item No. 201057-J
Charcoal Basket (optional accessory) Deflector Stone & Lift for Indirect Cooking
Complete Setup with Stainless Steel
Grill Grate and Extension Grid
Setup for Pizza (optional accessory)

11 CONTENTS // MONOLITH LECHEF 12 SETUP // MONOLITH LECHEF
THE SETUP:STANDARD ACCESSORIES:
Dual-Disc
Ventilation Cap
Item No. 201059-L
Fire Ring
Item No. 201052-L
Fire Box
Item No. 101053-L
Smart Grid System
Item No. 101033
Cast Iron
Fire Grate
Item No. 201066-L
Charcoal Basket
with Divider
Item No. 201046-L
Bamboo Handle
Item No. 201064-L
Cart (only for models
incl. cart)
Item No. 201040
Smoke Chip
Feed System
Item No. 201035
Ceramic Feet (only for
models excl. cart)
Item No. 201056
Grid Lifter
Item No. 206000
2 Bamboo Side Tables
(only for models incl.
cart) Item No. 201062-L
Thermometer
Item No. 201057-L
User Manual
Item No. 20000-HB
One Bag Metal Fittings
(only for models incl.
cart) Item No. 201083-L
Ash shovel
Item No. 207045
Charcoal Basket with Divider Deector Stone (halved) & Lift
for Indirect Cooking
Setup for Pizza (optional accessory)Deector Stones, Drip Pans and Stainless Steel
Grid Set

13 ASSEMBLING THE MONOLITH INCL. CART 14 ASSEMBLING THE MONOLITH EXCL. CART
A. Assemble the cart by placing the stainless steel caps
on the top of the legs then screw the legs to the frame.
To prevent scratches on the metal components, place
a cloth or a piece of paper between frame and legs
before turning. For more user convenience attach the
legs with the lockable castors next to each other.
B. Make sure the castors are locked before placing the
ceramic unit in the cart.
Caution: Place the cart on a at and stable surface. Keep
in mind the heavy weight of the grill. Note that the grill
can reach very high temperatures and should not be
placed in the immediate vicinity of combustible mate-
rials. The grill must not be operated in closed rooms.
C. Lower the ceramic unit into the cart, making sure
the opening (ash compartment) is between the legs
with the lockable castors. We suggest carrying the
Monolith by the brackets for the side tables.
Caution: Due to the risk of breakage please exercise
caution when handling the ceramic components. Avoid
carrying the grill by the hinges or the bamboo handle,
this can lead to damaging the grill! Due to the weight we
recommend the unit be carried by two people. Be sure to
wear gloves to prevent injuries.
D. LeChef only: Loosen the two capped nuts on the
front of the metal bands, attach the handle to the bolt.
Screw the capped nuts back on the studs and tighten
with a wrench.
E. Place the cast iron cap on the top opening of the
ceramic unit.
F. Put the re box inside the Monolith; placing the cut
away section towards the opening of the ash com-
partment. Cleaning your Monolith is easy when the
re box and the ash compartment door opening are
aligned correctly.
G. Place the re ring on top of the re box, making
sure the opening for the wood chips is directly behind
the corresponding opening in the ceramic unit.
H. Place the protector stone on the base of the unit.
The protector stone prevents the base of the grill from
overheating. (not required in Pro Series)
J. First place the Cast Iron Fire Grate inside the Fire-
box and then the Charcoal Basket inside the Firebox,
making sure that the opening for the Smoke Chip Fee-
der System is aligned with the opening in the Firering.
K. Hook the side shelves in the corresponding mounts
on the ceramic unit. Possibly having to adjust the
distance by slightly bending the metal ttings.
Important: Before rst use check that all the screws are
safely and correctly tightened. The screws on the metal
bands around the unit should be tightened regularly.
A. Remove the three ceramic feet from the carton
and place them in a triangular shape on the desired
location (for example the Monolith table). Making sure
that the spacing between the ceramic feet is equal
and has the same diameter as the base of the cera-
mic unit. The at sides of the ceramic feet should face
inwards.
Caution: Only place a at and stable surface. Keep in
mind the heavy weight of the grill. Note that the grill can
reach very high temperatures and should not be placed
in the immediate vicinity of combustible materials. The
grill must not be operated in closed rooms.
B. Lower the ceramic unit on to the three ceramic feet
making sure the ash compartment opening is bet-
ween the front two ceramic feet. Check that the cera-
mic feet are placed an equal distance apart and that
the at sides are facing inwards. We suggest carrying
the Monolith by the hinges and the air vent opening.
C. LeChef only: Loosen the two capped nuts on the
front of the metal bands, attach the handle to the bolt.
Screw the capped nuts back on the studs and tighten
with a wrench.
D. Place the cast iron cap on the top opening of the
ceramic unit.
E. Put the re box inside the Monolith; placing the cut
away section towards the opening of the ash com-
partment. Cleaning your Monolith is easy when the
re box and the ash compartment door opening are
aligned correctly.
F. Place the re ring on top of the re box, making sure
the opening for the wood chips is directly behind the
corresponding opening in the ceramic unit.
G. Place the cast iron charcoal grid on the re box.
The cast iron charcoal grid prevents the base of the
ceramic unit from getting to hot.
H. Place the protector stone on the base of the unit.
The protector stone prevents the base of the grill from
overheating. (not required in Pro Series)
I. First place the Cast Iron Fire Grate inside the Fire-
box and then the Charcoal Basket inside the Firebox,
making sure that the opening for the Smoke Chip Fee-
der System is aligned with the opening in the Firering.
Important: Before rst use check that all the screws are
safely and correctly tightened. The screws on the metal
bands around the unit should be tightened regularly.

15 MONOLITH BBQ GURU EDITION OVERVIEW 16 CONTROL MOUNT SETUP AND
FAN SETUP
Cast Iron Dual-Disc Ventilation Cap
for easy temperature and air ow
control
Sturdy Cart with
Lockable Castors
Unique system for
lling with wood chips
for smoking
Stainless Steel Air Vent
and Ash Collector
The Monolith is made of
High Temperature
Resistant Ceramics
Practical Bamboo
Side Tables
Control Mount Bracket
Guru Temperature
Control Fan Housing
Thermometer
CONTROL MOUNT SETUP
Before using a BBQ Guru temperature control unit
with the Monolith BBQ Guru Edition, the control
mount must be attached to the grill.
A. Align the Monolith control mount in front of the
predrilled hole on the left bamboo side table.
B. Push the control mount screw through the predril-
led hole on the left side table and fasten it tightly with
the nut.
C. On the back of the BBQ Guru temperature control
unit, there are two metal hook pins. Align the pins to
the Monolith control mount and push it through the
predrilled holes.
D. Slide the BBQ Guru temperature control unit down
the control mount. This will lock and secure the device
into place.
FAN SETUP
All Monolith BBQ Guru Editions are equipped with
a BBQ Guru temperature control fan housing. This
feature allows the user to control the amount of air
owing into the grill. Take the spiral fan cord that is
included with the BBQ Guru temperature control unit.
Fully insert one end of the spiral fan cord into the fan
port located on the control. Take the other end of the
spiral fan cord and fully insert it into the side of the
fan housing.
Important note: Important note: When using a BBQ
Guru temperature control unit to maintain cooking tem-
peratures (200 °C or below), turn the fan knob counter-
clockwise (left) to move it into the ON position. Move the
fan knob clockwise (right) to turn it OFF.
Important note: When the BBQ Guru temperature con-
trol unit is NOT in use, ALWAYS make sure the fan dial is
turned to the OFF position. This will prevent heat from
getting in and destroying the fan unit. Important note:
ALWAYS turn the fan housing OFF when cooking over 200
°C. This will prevent damage to the fan housing.

17 IGNITING THE CHARCOAL 18 SMOKING // CHIP-FEEDER-SYSTEM
LOAD
Open the ap of the smoker unit and add smoke
pellets to the smoke feeder cartridge.
INSERT
Guide the smoker cartridge into the Monolith
ceramic grill.
RELEASE
Release the slider “trapdoor” to deposit the smoke
pellets directly into the embers then remove the
smoker cartridge and close the ap.
1.
3.
2.
B. Form a hollow in the centre of the charcoal and
light from the top. Please do not use chemical or li-
quid accelerants, as the fumes can be absorbed by
the ceramic unit and may adversely aect the avour
and quality of the food. We recommend the Mono
Lighter or chemical free re accelerants. Close the lid
and open the air vent and ventilation cap. Due to the
chimney eect the charcoal heats up extremely fast
(approx. 15 minutes).
Caution: Do not use chemical or liquid re accelerants.
C. Once you reached the required temperature, adjus-
ting the air vent and ventilation cap, leaving a gap of
approximately 1 – 2 cm.
Caution: The Grill and its metal components can get very
hot, please wear gloves or use tongs when adjusting the
air vents. By adjusting the air vent and ventilation cap
you can regulate the required temperatures. Opening
both vents will increase airow and oxygen intake, ma-
king the charcoal hotter and the temperature rise. By
closing the vents you reverse the process. Due to the very
good insulation of the heavy ceramics it will take some
time to lower the temperature from the high temperature
range. Therefor we suggest not letting the temperature
rise too high if you are planning on using the Monolith in
the low temperature range.
D. Then place the appropriate accessories according
to the setup for the desired grilling method inside the
grill.
Caution: The Grill and its metal components can get very
hot, please wear gloves or use tongs when placing the
metal grids, pizza stone or deector stone in the grill or
when removing them. Do not place hot components on
inammable or sensitive surfaces. Please exercise cau-
tion when handling the hot components in order to avoid
injuries.
E. By closing both of the air vents, the embers will ex-
tinguish within a short time. The remaining charcoal
can be reused. After cooling down, simply lift the char-
coal basket out of the Monolith by the handles, then
shake o the ashes, or use the ash hook to remove
the ashes within the ceramic re box. Simply top up
the remaining charcoal in the basket.
A. Depending on temperature and application use the
Charcoal Basket. When using low temperatures and
grilling for a long period of time, we recommend using
the Cast Iron Fire Grate only. This enables you to ll up
the Firebox with a larger amount of charcoal allowing
for a longer burning duration and easy temperature
control due to the reduced airow. Fill to the top of
the Firebox with charcoal.
When using medium to high temperatures, we recom-
mend using the Charcoal Basket. The extra airow
enables the charcoal to reach higher temperatures
faster. Fill the Charcoal Basket up till the opening for
the Smoke Chip feeder System.
Ensure that there aren’t any small charcoal pieces at
the bottom of rebox or charcoal basket, these can
obstruct airow. The charcoal baskets for the Mono-
lith Classic and Monolith LeChef can be divided, all-
owing you to use only half the area, thus creating di-
rect and indirect grilling zones.
Caution: Only use high quality, large lump charcoal. We
recommend our Monolith charcoal. Note that the grill can
reach very high temperatures and should not be placed
in the immediate vicinity of combustible materials. The
grill must not be operated in closed rooms. Keep children
and animals away from the hot grill. Please stay close to
the grill during the process of heating up the charcoal,
temperatures in excess of 400 °C can be reached very fast
and may cause damage to the grill components.
This unique system allows you to insert wood chips, chunks or pellets directly over the hot charcoal, without
having to raise the lid! Together with our extensive range of hardwood smoke pellets you will turn your Monolith
ceramic grill into a high quality smoker.

19 GRILLING METHODS 20 CARE AND MAINTENANCE
1. DIRECT GRILLING
Grill like a pro directly over hot co-
als on the included Stainless Steel
Grid or the optional cast iron grill
grate. High heat directly from the
coals gives your food those desi-
red sear marks and true authentic
barbecue avour.
2. INDIRECT GRILLING
Now see all the real advantages of
having a Monolith over any other
piece of cooking equipment. By
placing the Deector Stone over
the hot coals you shield the direct
heat away from your food creating
a perfectly controllable convection
oven. Roast, bake or braise anyt-
hing from whole sh and roasting
joints to cakes and casseroles.
3. BAKING
With a Monolith there is no need
to invest in a separate pizza oven,
now you can easily make authen-
tic Italian thin crust pizzas or even
American deep pan pizzas to im-
press your friends and family. With
Monolith you can easily raise the
temperatures to 400°C and cook
the perfect pizza in minutes. This
setup is also perfect for at breads.
(pizza stone, optional extra)
Monolith products are manufactured from high quality
Materials and so require very little maintenance. For
ideal protection from weather and other inuences, we
recommend using our Monolith covers, available at all
Monolith retailers.
USING FOR THE FIRST TIME
The Monolith can be used directly after assembly and
does not require any further treatment. The Cast Iron
Fire Grate is covered in a protective coating to safe-guard
it against corrosion. This protective coating will burn o
during initial use. Please wait until any odour clears before
placing food on to the grill.
CLEANING THE MONOLITH
Only clean the exterior of the Monolith, cart and side ta-
bles with water and mild cleaning agent. NEVER use water
to clean the inside of your Monolith. The interior can be
cleaned by using high temperatures. Remove all stainless-
steel components before commencing. By completely
opening both vents (make sure there is enough charcoal
in the rebox) raise the temperature to 400°C and leave
for 10 minutes. The heat will burn o all organic residue.
Attention: When opening the lid, please note that there are
more than 400°C at work inside. Open the lid a small gap rst
and wait a moment so that you avoid possible “backre“.
Warning: Do not exceed 400 °C, this could damage the gasket
or individual components within the Monolith. After the Mo-
nolith has cooled down, remove the ashes from the ceramic
components with a soft brush. The grids can be cleaned with
a metal grill brush.
The Cast Iron Grid and Fire Grate can be cleaned with a metal
brush and thinly coated with vegetable oil to protect against
rust.
Attention: Gradually, the light coloured ceramic of the inter-
ior will darken. This is a normal process and is caused through
combustion, smoke and grease. With glazed furnace tiles,
which have to be particularly heat-resistant, the ne cracks
in the glaze occur more frequently. This is particularly desi-
rable with very large tile pieces. This makes the ceramic more
robust against breakage due to temperature uctuations, as
the less exible glaze can “go along“ with the more strongly
expanding ceramic body.
ASHES
After cooling down, simply lift the charcoal basket out of
the Monolith by the handles and shake o the ashes. Use
the ash hook to remove the ashes within the ceramic re
box, if required remove the Cast Iron Fire Grate before
cleaning. You can use the ash hook to scrape out the as-
hes in the ash compartment. We suggest, occasionally, re-
moving all components out of the unit and brushing them
and the inside walls with a soft brush.
CLEANING THE GRILL GRATES
Clean the grates whilst still hot with a metal grill brush,
removing all larger organic materials. The grill grates are
made of stainless steel and are dishwasher safe. Only use
mild cleaning detergents. The exposure to high tempera-
tures can cause discolouration of the steel.
CLEANING THE PIZZA AND DEFLECTOR STONE
The pizza stone and deector stone are both made of
open-pored cordierite ceramic, therefore liquids and fats
can soak or burn into the surface, which can lead to per-
manent discolouration of the material. The discolouration
is harmless and does not constitute defects. To remove
larger organic materials, simply scrape the surface with a
spatula or grill brush. The deector stone may be wrap-
ped in aluminium foil to protect from dripping fat.
MOULD & MILDEW
If your Monolith hasn’t been used for an extended period
of time, moisture can get trapped inside the grill. Mould or
mildew can start to develop on left over organic materials
on the grill grate or on the internal ceramic components.
Scrape away the mould or mildew with a spatula or grill
brush, burn away the rest by raising the temperature to
400°C and leave for 10 minutes. The heat will burn o all
the remaining mould & mildew residue.
If you plan not to use your Monolith for a longer period
of time, remove any charcoal as it will draw even more
moisture into the grill. For ideal protection from the we-
ather, we recommend using our Monolith covers. Open
both the air vent and ventilation cap before placing the
cover over the Monolith, enabling for the air to circu-
late within the Grill and allowing moisture to escape.
METAL BANDS
The metal bands should be checked regularly and tight-
ened if necessary.

21 CARE AND MAINTENANCE 22 SAFETY
GASKET & REPLACEMENT SETS
The gasket material is subject to wear and must be regularly
replaced, depending on the amount of grill use. Avoid da-
maging the gasket with metal brushes or too high tempe-
ratures (in excess of 400 °C). To replace the gasket carefully
remove the old gasket with a spatula, please be careful as
not to damage the ceramic glaze. Any glue residue can be
removed with sandpaper. The gasket replacement band is
self-adhesive. Start at the back of the grill working your way
around, making sure the gasket doesn’t protrude inside the
grill.
STAINLESS STEEL SEALING RING
The new sealing system makes replacement a minor ope-
ration. If, however, after long and intensive use, a change
for cleaning/renewal is necessary, proceed as follows: lift
the clamping straps slightly, do not bend them open and
remove the sealing tape. When inserting the sealing tape,
proceed in reverse order.
PLACE FOR THE MONOLITH
Always choose a hard and level surface. Take the
weight of the MONOLITH into consideration. Do not
place the Monolith directly on or in vicinity of combus-
tible materials. Remember sparks and the hot exhaust
air are also potential re hazards, therefore do not
place under a low patio-roof or canopy. Do not use the
Monolith indoors. Always place it outdoors with ade-
quate air circulation.
OPENING AND CLOSING THE LID HINGE WITH
QUICK FASTENER JUNIOR/ICON
The ceramic lid is held in an open position by me-
ans of tension springs. Do not underestimate the
heavy weight of the lid. Never let the lid drop when
closing, make sure that no body parts or grill tools
are between the unit base and lid. By simply re-
leasing the handle, both the lid and/ or base can be
damaged through the weight and force of the lid.
Replace damaged springs immediately. If you want
to remove the lid, open it completely so that the
springs are relaxed. Now open the clamping screws
on both sides counterclockwise and pull the cover
upwards out of the lower hinge area by the handle.
Caution: Please hold the exhaust air cap rmly, it is only loo-
sely clamped on. Slowly place the cover on a safe surface with
the seal facing downwards.
MOVING THE MONOLITH
Do not attempt to move the Monolith unless it is cool
and does not contain any hot charcoal. When moving,
place both hands on the cart and pull the grill behind
you. Do not push it! The cart is not designed to roll
over uneven surfaces such as lawn, sand or gravel.
For uneven terrain we recommend out Monolith
Buggy.
CHILDREN AND PETS
When using the Monolith, do not leave children and
pets unattended close to the grill.
INDOOR USE
Due to smoke emissions we recommend not using the
Monolith indoors. Always place it outdoors with ade-
quate air circulation.
LOCAL ORDINANCE & REGULATIONS
Observe the local ordinance and regulations before
using the grill.
CAST IRON VENTILATION CAP
Please restrain from looking inside the cast iron ven-
tilation cap. Sparks and the hot exhaust air can cause
injury.
PLACING / REMOVING COMPONENTS
The grill and its metal components can get very hot,
please wear gloves or use tongs when placing the me-
tal grids, pizza stone or deector stone in the grill or
when removing them. Do not place hot components
on inammable or sensitive surfaces. Please exercise
caution when handling the hot components in order
to avoid injuries. Do not try to remove the rebox or
charcoal basket when lled with hot coals.
LIFTING THE GRID
Use the grid lifter when raising the hot grid. Please
where wear gloves to avoid burn injuries.
RISK OF BURN INJURIES
Due to the very good insulation of the heavy ceramics,
there is minimal risk of burn injuries when touching
the outside walls of the Monolith. We still recommend
using precaution and keeping children and pets away
from the grill whilst in use.
FIRE DANGER
Do not leave the grill unattended. Sparks and the hot
exhaust air can cause inammable objects in the vici-
nity to ignite.
BACKDRAFTS
Once lit, the Monolith lid should always be opened
slowly and with extra caution to prevent dangerous
are ups or backdrafts. By only opening the lid about
4-5 cm, oxygen can slowly ll the Monolith, this helps
avoid a backdraft. Should you have a backdraft, imme-
diately close the lid and both air vents. It is always ad-
visable to wear heat resistant gloves, and not to stand
directly in front of the grill.
LIGHTERS
Never use any uid or chemical accelerants, never use
petrol or spirit! Chemical or liquid accelerants, can be
absorbed by the ceramic unit and may adversely aect
the avour and quality of the food.
EXTINGUISHING THE CHARCOAL
By closing both of the air vents, the embers will ex-
tinguish, this will take approximately 10 – 20 minutes.
Never use water to extinguish the charcoal.

23 WARRANTY & CONTACT 24 WARRANTY & CONTACT
We are pleased that you have chosen a monolith pro-
duct. We are convinced of the quality of our products
and therefore oer you the inclusion of a guarantee
agreement with us under the following conditions.
1. CONTENTS OF THE WARRANTY
On all Monolith models and accessories we
grant, the
MONOLITH Grill GmbH
Frida-Schröer-Straße 56
49076 Osnabrück
Germany
E-Mail: [email protected]
Tel.: 0049 541 201 964 0
starting with the certied date of sale, a limited
lifetime guarantee that
- all ceramic components are free from defects in
materials, workmanship and workmanship for the
life of the purchased monolith model.
- All metal components on the monolith are free
from defects in materials, workmanship and work-
manship for a period of ve years.
- Grill tools (Monolith accessories) and the fold-down
side tables are guaranteed to be absolutely free of
material, manufacturing and processing defects for
a period of one year.
- Buggy and teak table are guaranteed to be free
from defects in material, workmanship and nish
for a period of 2 years.
If, during the warranty period, your Monolith pro-
duct is found to be defective in materials, workmans-
hip, or workmanship under proper use, service, and
regular maintenance as specied in our manual, we
will either repair or replace the product under these
terms at our discretion. Your rights under this war-
ranty are limited to the right to subsequent perfor-
mance. Further claims, in particular to any form of
compensation, are excluded from this warranty.
2. TERRITORIAL SCOPE OF THE WARRANTY
Spatially, the warranty is limited to the use of the
product within the territory of the Federal Republic
of Germany / European Union / United Kindgom.
It applies to products that within the aforementio-
ned territory purchased from us or from an autho-
rized dealer.
3. PERSONAL SCOPE OF WARRANTY
PROTECTION
The guarantee is valid for the private rst-time buyer of
the Monolith product. The rst buyer is who bought the
product as a new product from us or from one of our
authorized dealers. You can nd a list of dealers autho-
rized by us at https://www.monolith-grill.eu/service/ha-
endlerverzeichnis/. The warranty claim is personal and
non-transferable. The claim expires if the rst buyer
gives up, loses or transfers the ownership of the Mono-
lith product to a third party. For a commercial use of
our products we do not grant a warranty, but the legal
warranty of 12 months applies.
4. NO RESTRICTION OF YOUR LEGAL RIGHTS
Please note that you are entitled to legally dened
rights from the purchase contract for the monolith
product (§§ 433 . Civil Code). This warranty does not
limit your statutory rights in any way.
5. CLAIMING THE GUARANTEE
a) If it becomes necessary to invoke the warranty, plea-
se contact the dealer from whom you purchased the
product.
b) When registering for warranty claims, you must pro-
vide the original invoice or proof of purchase issued
by the authorized dealer or equivalent. You must also
prepare a written report of defects and send us the
rejected product together with it, properly packed and
free of charge, at your risk.
c) Warranty repairs must be carried out by us or by
authorized dealers or authorized repairers. Repairs
carried out by other companies are not eligible for
reimbursement, as such repairs, as well as any resul-
ting damage to the product, are not covered by this
warranty.
d) If we repair or replace the product, the warranty
applies to the repaired or replaced product within the
remaining time of the original warranty period. An ex-
tension of the warranty period is excluded
e) We reserve the right to charge a processing fee of
€ 50 if, after inspection, it is clear that there is no war-
ranty claim.
6. LIMITATIONS OF THE WARRANTY
a) Not covered by the warranty are:
- The use of the Monolith product for commercial
purposes
- Wear or damage due to normal wear
- Consequences of neglected or faulty maintenance
- consequences of excessive or improper use
- Wear parts (especially seals)
- Consequences of improper storage or cleaning (use
of abrasive or corrosive cleaning agents / tools)
- damage caused by misuse or misuse of the Monolith
product
- consequences of force majeure, vandalism, accident
or similar events
- Consequences of using parts or accessories from
other manufacturers
- consequences of incorrect installation
- Defects or defects in Monolith products not purcha-
sed from us or from an authorized dealer
- transport and travel costs as well as costs incurred by
assembling and dismantling the device;
- any damage not directly caused to the Monolith
product and other consequential defects
- If the Monolith product is operated in a country other
than the one originally developed and produced by
us, any modications to the product must be made
to comply with the technical and / or safety stan-
dards of that other country. Such changes are not
due to material, processing or manufacturing defects
of the product and are expressly excluded from this
warranty.
b) This warranty expires when:
- Changes have been made to the monolith product by
you or by a third party.
- The monolith product is operated despite the
presence of a functional or shortage of use.
7. APPLICABLE LAW
This guarantee is exclusively subject to German law,
excluding the UN Sales Convention.
8. SEVERABILITY CLAUSE
Should individual provisions of these warranty condi-
tions or the contract concluded on their basis be or
become ineective or should the contract contain an
omission, this shall not aect the validity of the remai-
ning provisions. In this case, the invalid provision or
the lling of the omission shall be replaced by an eec-
tive provision which comes as close as possible to the
economic purpose of the contract with due respect for
the mutual interests.
Should you have any questions, warranty claims,
ideas, praise or critique please contact:
MONOLITH Grill GmbH
Frida-Schröer-Straße 56
49076 Osnabrück
Germany
E-Mail: [email protected]
Tel.: 0049 541 201 964 0

NOTIZENNOTIZEN

NOTIZEN NOTIZEN

Table of contents
Other monolith Grill manuals
Popular Grill manuals by other brands

Char-Broil
Char-Broil 463724711 Product guide

KitchenAid
KitchenAid 720-0856V Installation Instructions and Use & Care Guide

GrillSmith
GrillSmith PICNIC TG2021348-GS owner's manual

Wood Stone
Wood Stone CHURRASCO WS-LCHUG-1200-NG Installation and operation manual

Kenmore
Kenmore 259.162190 Assembly and operation

YAKINIKU
YAKINIKU LUXURY OUTDOOR KITCHEN FRAME 80X70CM instruction manual