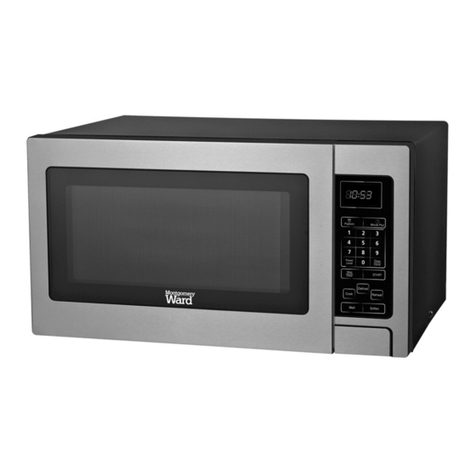
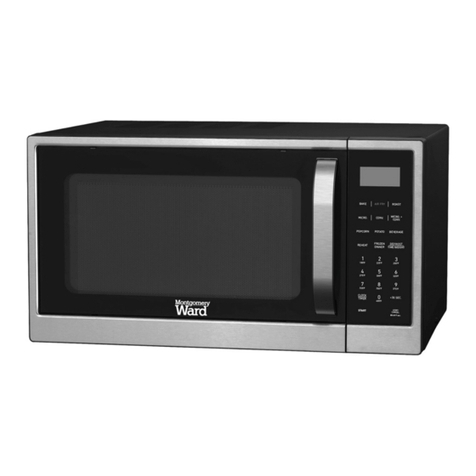
Montgomery Ward 773042 User manual

Instruction Manual
Item: 773042
Wards.com 1•888•557•3848
Montgomery Ward Customer Service
3650 Milwaukee Street, Madison, WI 53714
8:00 am to Midnight, Monday through Friday
Recipes
in back!
Wards.com 1•888•557•3848
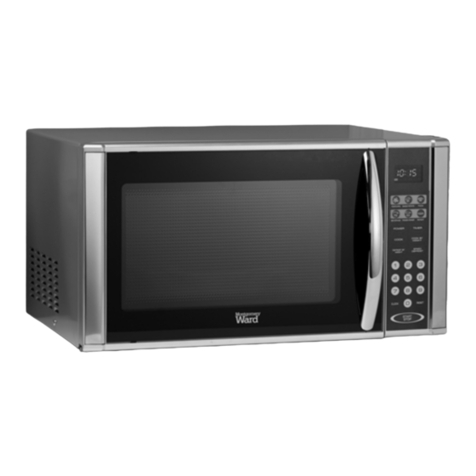
.9 Cu. Ft. Retro Microwave Oven
®
®

Thank you for purchasing your Montgomery Ward
.9 cu. ft. Retro Microwave Oven.
Put through the paces by the experts, we guarantee that it will
perform to the highest standard, time after time, with all the
convenience, easy cleanup and durability you rely on from Wards.
3
Important Safeguards .............. 3–4
Electrical Safety ...............................4
Specications.................................... 4
Parts & Features.......................... 5–6
How to Use...................................7–10
Cleaning & Care................................ 11
Recipes and Notes...................12–19
Return Informaion.........................20
Warranty...............................................21
Table of Contents
21•888•557•3848
Wards.com
Important Safeguards
READ CAREFULLY BEFORE USING AND SAVE THESE INSTRUCTIONS!
• FOR HOUSEHOLD USE ONLY. DO NOT USE THIS APPLIANCE FOR OTHER
THAN ITS INTENDED USE.
• Remove all packaging materials and labels before rst use. Remove any
protective lm found on the microwave oven cabinet surface. Dispose of the
packaging materials via the appropriate recycling system.
• DO NOT remove the wave guide inside the oven cavity.
• Wash all removable parts and wipe down the inside of the oven before rst
use. Wipe up spills with a damp cloth as they occur.
• DO NOT drape the cord over a counter or tabletop, where it can be pulled on
or tripped over.
• We DO NOT recommend using an extension cord with this appliance. However,
if an extension cord is used, the marked electrical rating should be at least as
great as the electrical rating of this appliance.
• CLOSE SUPERVISION IS NECESSARY WHEN USING THIS APPLIANCE NEAR
CHILDREN.
• A re may occur if this appliance is used near ammable materials. DO NOT
overcook food. DO NOT use metal utensils, or Styrofoam in this oven. IF
MATERIALS INSIDE THE OVEN SHOULD IGNITE, KEEP OVEN DOOR CLOSED,
TURN OVEN OFF, AND DISCONNECT THE POWER CORD OR SHUT OFF
POWER AT THE CIRCUIT BREAKER PANEL.
• DO NOT place the oven or its cord on or near a heated surface.
• Use this appliance on a stable, dry, heat-resistant surface.
• DO NOT use this product near water.
• DO NOT use an accessory or attachment not recommended by Montgomery
Ward, as this may cause injury or damage the appliance.
• Keep hands, hair and clothing away from all moving parts.
• Always use oven mitts when handling hot food or appliances.
• DO NOT ATTEMPT TO OPERATE THIS OVEN WITH THE DOOR OPEN. Open-
door operation can result in harmful exposure to microwave energy. DO NOT
TAMPER WITH THE DOOR SAFETY LOCKS. DO NOT ALLOW FOOD OR
CLEANER RESIDUE TO BUILD UP AROUND DOOR AREA.
• Products such as whole eggs in the shell and sealed containers should not be
heated in this oven, as they may explode.
• Liquids can be overheated beyond the boiling point without appearing to be
boiling due to surface tension of the liquid. Visible bubbling or boiling when
the container is removed from the oven is not always present. THIS COULD
RESULT IN VERY HOT LIQUIDS SUDDENLY BOILING OVER WHEN A SPOON
OR OTHER UTENSIL IS INSERTED INTO THE LIQUID.
• DO NOT heat oil or fat in large quantities (like for deep frying) in this
microwave!
(continued on next page)
Thank you
for your
purchase!
®
Parts & Features
Specications
Electrical Safety
41•888•557•3848
Wards.com
45
This appliance is equipped with a 3-prong grounding plug. This is a safety
feature to reduce the risk of electrical shock. Using an extension cord is not
recommended with this appliance. It is recommended that an electrical outlet
serving ONLY this appliance be used. This outlet must be properly installed and
grounded. If you have any questions about the grounding or electrical instructions,
contact a qualied electrician. DO NOT attempt to modify the plug in any way.
Montgomery Ward cannot accept any liability for damage or injury resulting from
failure to observe these safety procedures.
• Pierce foods with heavy skins, such as whole potatoes or whole squash, before
cooking, as they may explode.
• DO NOT cover or block any openings on the appliance. Allow 4"for the back,
8"above and 3"on the sides between the oven and wall or cabinet.
• This oven generates, uses, and can radiate radio frequency energy and may
cause interference to your TV or radio. Try to correct interference by increasing
the separation between the equipment and the oven. Consult an experienced
radio/TV technician for help.
• DO NOT use outdoors.
• NO SERVICEABLE PARTS INSIDE THIS APPLIANCE.
• DO NOT USE AN APPLIANCE WITH A DAMAGED CORD OR PLUG, OR AFTER
THE APPLIANCE MALFUNCTIONS, OR HAS BEEN DAMAGED IN ANY WAY.
• Appliances/tools contain valuable materials that can be recycled. Dispose of
your old appliances/tools using appropriate collection systems in accordance
with federal and local regulations.
Important Safeguards
1. Door Safety Lock System
2. Oven Window
3. Turntable Ring
4. Turntable Shaft
5. Glass Turntable
6. Wave Guide (Mica Plate)
7. Control Panel (diagram page 6)
(continued on next page)
OUTPUT REQUIREMENTS 120V/60Hz/900W
POWER RATING INPUT 120V/60Hz/1350W
CAPACITY .9 cu. ft.
CORD LENGTH 40"
OUTSIDE DIMENSIONS 19”W x 11"H x 15"D
INSIDE DIMENSIONS 13½” W x 8½" H x 12½" D
NET WEIGHT approx. 30 lbs.
MODEL P90D23YL-Q3
3
65
7
1
4
2

Parts & Features (cont.) How to Use
1•888•557•3848
33
3
1•888•557•3848
Wards.com
6 7
AUTO COOK
MENU (page 8)
WEIGHT ADJUST
(pages 7–8)
MULTI STAGE
COOKING
(page 10)
START
CLOCK (page 7)
STOP/CANCEL
(page 7)
DISPLAY SCREEN
shows time, timer,
weight, indicators
for multi stage cooking,
defrost, pre-set and
child lock.
POWER
set power level
(page 9)
PRE-SET
set a delayed
cooking
program (page 9)
MENU/TIME DIAL
turn counterclockwise
to select AUTO COOK
MENU; turn clockwise
to set cooking time.
KITCHEN TIMER
(page 7)
WEIGHT DEFROST
(page 7)
WARNING: Always use oven mitts when handling hot food!
STOP/CANCEL: Stop or reset the oven. Press once to pause or twice to cancel
any function.
CLOCK:
1. Press and hold CLOCK for 3 seconds.
2. Select the 24-hour cycle (military time) or the more common 12-hour cycle on
the display screen by touching CLOCK once or twice.
3. Turn the MENU/TIME DIAL until the correct hour is shown.
4. Press CLOCK.
5. Turn MENU/TIME DIAL until the correct minutes are shown.
6. Press CLOCK to end.
KITCHEN TIMER:
1. Press KITCHEN TIMER once.
2. Turn the MENU/TIME DIAL to select the desired amount of time
(from 10 seconds to 1 hour).
3. Press START.
4. One beep will sound when your time is up.
DEFROST:
1. Place food to be defrosted into the oven.
2. Press WEIGHT DEFROST once.
3. Press WEIGHT ADJUST as needed to show the desired weight on the display
screen (4 oz. – 3 lbs. 15 oz.)
4. Press START.
5. The microwave will stop and beep 3 times during defrosting as a reminder to
turn the food over. When this happens, rearrange food and press START to
resume defrosting.
6. When defrosting time is nished, 4 beeps will sound.

How to Use (cont.)How to Use (cont.)
3 98
79
81•888•557•3848
Wards.com
AUTO COOK MENU: Time and power levels are set.
1. Turn MENU/TIME DIAL counterclockwise to select from the menu.
2. Press WEIGHT ADJUST to select options for weight or number of servings
(see chart below).
3. Press START.
4. When cooking time is nished, 4 beeps will sound.
FOOD OPTIONS
Popcorn 3.5 oz. only
Coffee 1, 2 or 3 cups
Fresh Vegetables 7 oz., 11 oz., 14 oz., 1 lb. 2 oz. or 1 lb. 5 oz.
Potato (rst puncture
with a fork) 1, 2 or 3 potatoes
Pizza 5 oz., 11 oz. or 1 lb.
Auto Reheat 7 oz., 11 oz., 14 oz., 1 lb. 2 oz., 1 lb. 5 oz. or 1 lb. 12 oz.
Bacon 4 oz., 7 oz. or 11 oz.
Seafood 7 oz., 11 oz., 14 oz., 1 lb. 2 oz. or 1 lb. 5 oz.
QUICK START:
1. Press START to quickly set cooking time. Each press adds more time in
30-second increments. When you stop pressing, the oven will begin heating at
full power level.
2. When cooking time is nished, 4 beeps will sound.
Tip: Only use dishes that are marked “microwave safe”. Discontinue
using any dish which becomes very hot when used in a microwave
oven.
POWER AND TIME:
1. Press POWER to select a cooking power level.
POWER COOKING POWER (DISPLAY SCREEN)
Press 1 time 100% (P-HI)
Press 2 times 90% (P-90)
Press 3 times 80% (P-80)
Press 4 times 70% (P-70)
Press 5 times 60% (P-60)
Press 6 times 50% (P-50)
Press 7 times 40% (P-40)
Press 8 times 30% (P-30)
Press 9 times 20% (P-20)
Press 10 times 10% (P-10)
2. Turn MENU/TIME DIAL to set desired cooking time (0–60 minutes).
3. Press START.
4. When cooking time is nished, 4 beeps will sound.
PRE-SET: Set a delayed cooking program.
1. Make sure the clock is set with the current time.
2. Set desired cooking program: Defrost, Power Level/Time, or Auto Cook
Menu (see instructions on pages 7–9), but DO NOT PRESS START.
3. Press PRE-SET.
4. Turn MENU/TIME DIAL to set the delay time hour (1–12 hours).
5. Press PRE-SET.
6. Turn MENU/TIME DIAL to set the delay time minutes (1–59 minutes).
7. Press START.
8. When cooking time is nished, 4 beeps will sound.

1•888•557•3848
Wards.com
10 11
Cleaning & CareHow to Use (cont.)
MULTI STAGE COOKING: Some recipes may require setting different power
levels (3 stages can be set). During multi stage cooking, the display screen will
show the current cooking stage.
1. Stage 1: set a Power Level/Time program, but DO NOT PRESS START.
2. Press MULTI STAGE COOKING.
3. Stage 2: set another Power Level/Time cooking program.
4. Press MULTI STAGE COOKING.
5. Stage 3: set another Power Level/Time cooking program.
6. Press START.
7. One beep will sound when cooking switches from stage to stage. When all
cooking stages are complete, 4 beeps will sound.
CHILD LOCK: When locked, the oven cannot be operated.
1. Press and hold STOP/CANCEL for 3 seconds. One beep will sound and the
child lock indicator light will show on the display screen.
2. To cancel, press and hold STOP/CANCEL for 3 seconds until lock indicator
light on display screen goes off.
AUTO REMINDER: When cooking is done, the oven will beep once every 2
minutes until the oven door is opened or STOP/CANCEL is pressed.
• For even microwave cooking, place the thickest parts of food toward
the outside of the dish.
• Rearrange food halfway through cooking time by turning over and
moving food in the center of the dish to the outside.
• Covering the food prevents splattering and helps food cook more
quickly and evenly.
Tips:
1. Turn off and unplug the microwave oven.
2. Always allow the appliance to cool completely before cleaning.
3. The oven should be cleaned regularly. Failure to maintain the oven in a clean
condition could affect the life of the appliance and/or result in a hazardous
situation (health hazard or re hazard).
4. When food splatters or spilled liquids adhere to oven walls, wipe with a damp
cloth. A mild detergent may be used if the oven gets very dirty. DO NOT use
abrasive cleaners, brushes or pads, as these items may damage the interior.
5. It is important to keep the wave guide clean. Excessive buildup of splattered
food could prevent the microwaves from passing through to cook/heat food.
DO NOT REMOVE THE WAVE GUIDE.
6. Wash the glass turntable and turntable ring in mild, soapy water or in a
dishwasher (ring on top rack only).
7. The exterior surfaces of the oven should be cleaned with a damp cloth. To
prevent damage to the operating parts inside the oven, water should not be
allowed to seep into the ventilation openings.
8. Wipe the window on both sides with a damp cloth to remove any spills or
splatters.
9. Clean the control panel with a soft, damp cloth (leave the oven door open to
prevent accidentally turning on the oven).
10. DO NOT immerse any electrical appliance, cord or plug into water.

11
Recipes Recipes
13
12
21
1•888•557•3848
Wards.com
Cauliower Salad
1 head cauliower 1 tsp. olive oil
2 tsp. lemon zest 2 tsp. Dijon mustard
6 green onions, sliced 3 Tbsp. apple cider vinegar
½cup plain yogurt 2 tsp. lemon juice
5 Tbsp. honey salt & pepper, to taste
1. Cut the cauliower into bitesize pieces and steam in a covered dish for 5–7
minutes, until tender (but not mushy). Let cool.
2. Toss the cauliower with the lemon zest and onions in a bowl.
3. In a separate bowl, make the dressing by whisking together the remaining
ingredients until creamy and well blended.
4. Pour the dressing over the cauliower and serve.
Serves 4
Twice Baked Potatoes
4 medium sized baking potatoes ¼tsp. garlic powder
3–4 green onions, sliced 2–3 Tbsp. cheddar cheese, grated
2 Tbsp. butter 2–3 Tbsp. Parmesan cheese, grated
½cup milk, heated pepper
½tsp. salt (or more to taste) paprika
1. Poke each potato several times with a fork and bake per microwave instructions.
Let cooked potatoes cool until they can be handled comfortably.
2. Cut potatoes in half, lengthwise. Taking special care to keep the potato skins
intact, scoop out the cooked potato and put it in a large mixing bowl.
3. Mash the potatoes and add the onions, butter, milk, salt and garlic powder. Whip
potatoes until smooth (use a mixer if you have one to make this easier).
4. Spoon the potato mixture back into the potato skins and arrange on a
microwave-safe plate. Cook on HIGH for 2 minutes.
5. Sprinkle the potatoes with both cheeses. Heat again on HIGH for another 2
minutes or until cheese is melted.
6. Sprinkle the potatoes with pepper and paprika, to taste.
7. Serve with sour cream, bacon bits or your favorite toppings.
Serves 6–8
Meatloaf for One
1 slice of bread, chopped 2 Tbsp. onion, minced
1 egg salt & pepper
¼lb. lean ground beef ketchup
1. Mix the bread, egg, beef and onion in a medium mixing bowl. Add salt
& pepper, to taste.
2. Press the mixture into a microwave-safe bowl. Top with a thin layer of ketchup
and cook at 70% for 6–7 minutes.
Serves 1
Pork Ribs
2–3 lbs. pork ribs 1 can (10–15 oz.) tomato sauce
1 large onion, minced 2–3 Tbsp. hot sauce
2 Tbsp. brown sugar ½tsp. salt
2 Tbsp. cider vinegar ¼tsp. pepper
1 tsp. prepared mustard
1. Cut ribs to t your microwave-safe dish with cover.
2. Mix remaining ingredients in a medium bowl.
3. Dip ribs in sauce to fully coat and put ribs in the microwave-safe dish. Pour
remaining sauce over the ribs.
4. Cover and cook on 50% power for 15 minutes.
5. Turn rib pieces. Cover and cook on 50% power for another 15 minutes.
6. When done, meat should be tender and reach internal temperature of 170°. (If
additional cooking time is needed, do so in 5-minute increments.)
7. Add more salt and pepper to taste.
Serves 2

1•888•557•3848
Wards.com 15
14
Recipes
Recipes
Italian Chicken Breasts
½cup seasoned bread crumbs 2 chicken breasts, skinned
¼cup Parmesan cheese, grated 1 cup pasta sauce
1 egg 2 oz. mozzarella cheese, grated
1. Mix the bread crumbs and Parmesan in a shallow bowl.
2. Beat the egg in another shallow bowl.
3. Dip the chicken in the egg, then roll in the bread crumb mixture to coat.
4. Place the chicken in a microwave-safe dish with cover.
5. Cook at full power for 5 minutes. Turn the chicken and add the sauce.
6. Cover and cook another 4 minutes at full power.
7. Add the mozzarella on top of the chicken and sauce. Cover and cook 1 more
minute.
8. Let stand, covered, about 3 minutes. Chicken should reach internal temperature
of 165° F when done.
Serves 2
Apple Crisp
1 can (24 oz.) apple pie lling 2 Tbsp. brown sugar
¼cup Bisquick® 3 Tbsp. butter, softened
¼cup quick oats vanilla ice cream
½tsp.cinnamon caramel syrup topping
1. Split the apple pie lling evenly in 4 small microwave-safe bowls or cups,
2. In a small mixing bowl, add the Bisquick®, oats, cinnamon, brown sugar
and butter. Stir/mash with a fork until crumbly.
3. Sprinkle the crumbly topping over the apple pie lling (put even amounts in
each bowl or cup).
4. Loosely cover each bowl or cup with a paper towel or wax paper. Place 1 or
2 in the microwave and cook on HIGH 4 minutes, or until heated through.
5. Let rest, uncovered, for 5 minutes, then serve with vanilla ice cream and
caramel syrup.
Serves 4
Chocolate Squares Snack Mix
9 cups rice squares cereal ¼cup butter
1 cup semisweet chocolate chips 1½cups powdered sugar
½cup creamy peanut butter 4½cups salted peanuts
1. Divide the cereal into 2 large bowls. Set aside.
2. Melt the chocolate chips, peanut butter and butter in a microwave-safe bowl
on high for 1 minute. Stir and microwave in 30 second intervals until mixture is
smooth when stirred.
3. Pour half of the chocolate mixture over one of the bowls of cereal. Stir to
ensure each piece of cereal is coated. Repeat with the second bowl of cereal.
4. Pour all of the cereal into a large ziplock bag. Add powdered sugar and shake
until sugar is evenly distributed. Pour all out on a cookie pan to dry.
5. When cereal is crispy and dried, mix in the peanuts and serve.
Makes about 14 cups
Mac & Cheese for One
½cup elbow macaroni ½cup cheddar cheese, grated
½cup water 2 tsp. milk
1. Combine the macaroni and water in a microwave safe bowl. Cook on HIGH 6
minutes, stopping to stir every 2 minutes.
2. Add the shredded cheese and microwave on HIGH 45 seconds. Stir in the milk
until smooth and serve.
Serves 1

1•888•557•3848
Wards.com
15 16
RecipesRecipes
17
Lemon Bars
Crust: Filling:
1 cup our 1 cup sugar
3 Tbsp. powdered sugar zest of 2 lemons
6 Tbsp. butter, melted 3 eggs, at room temperature
zest of 1 lemon juice from zested lemons (about ⅓cup)
1 Tbsp. our
½tsp. baking powder
¼tsp. salt
powdered sugar
1. Spray a 9" square or round microwave-safe pan with cooking spray.
2. In a small bowl, mix the crust ingredients with a fork. When blended, press the
crust into the bottom of your pan (use your ngers or a spatula).
3. Microwave crust at 80% power for 3 minutes. The crust should be rm, but if it
is not, add another 30 seconds at 80% power. Set crust aside.
4. Using a mixer, beat together the rst 4 ingredients for the lling on low-
medium speed.
5. Add the our, baking powder and salt, and beat on medium speed for 2–3
minutes until smooth.
6. Pour the lling over the crust and cook in the microwave oven at 80% power for
4–5 minutes. The center should be set, not runny.
7. Cover and refrigerate for at least 4 hours. Dust with powdered sugar before
serving.
Makes 8–9 bars
Quick and Easy Microwave Fudge
2 packs (8 squares each) semisweet chocolate ¼tsp. salt
1 can (14 oz.) sweetened condensed milk 1 cup walnuts, chopped
2 tsp. vanilla extract butter
1. Place half the chocolate and half the milk in a microwave-safe bowl. Heat on
HIGH for 1 minute. Stir. Heat on HIGH for another minute. Repeat with second
half of chocolate and milk.
2. Combine and stir chocolate mixture until completely smooth.
3. Mix in vanilla, salt and walnuts. When blended well, pour into a cake pan or
cookie sheet that has been lightly greased with butter.
4. Refrigerate until rm (about 2 hours), then cut and serve.
Makes 30–40 pieces
Easy Old-Fashioned Peanut Brittle
1 Tbsp. butter 1 tsp. vanilla
1 cup sugar 1 cup cocktail peanuts
½cup light corn syrup 1 tsp. baking soda
1. Put a piece of parchment paper (about 10"x 13") onto a cookie pan. Lightly
rub the parchment paper with butter (you’ll use just a little of the butter).
2. Combine the sugar and syrup in a microwave-safe bowl. Stir well and cook on
HIGH for 5 minutes.
3. Carefully add the remaining butter, vanilla and peanuts to the bowl and stir.
Cook on HIGH 1½minutes.
4. Remove the bowl from the oven with an oven mitt and quickly stir in the
baking soda. Pour the mixture over the prepared parchment paper. Spread
into a rectangle with a spatula.
5. Cool for 1 hour, then break into pieces for serving.
Makes about 2 cups

1•888•557•3848
Wards.com
18 19
Notes Notes

1•888•557•3848
Wards.com
12 13
If any item, for any reason, does not meet your expectations, just
return it to us. We’ll gladly either:
• Refund your merchandise amount
• Credit your account
• Send a replacement
You can return any unused item in its original packaging within 60
days of its receipt for a full refund of the purchase price (excluding
shipping and handling charges).
Please send returns to:
Montgomery Ward, Inc.
Attn: Customer Returns
2000 Harrison Suite 100
Clinton, IA 52732-6676
When returning an item:
• Use the original packaging and pack it securely.
• Please adequately insure your item in case you need to
make a claim with the carrier you choose for returning your
item.
• Include your order number and reason for return.
• We recommend keeping the receipt for 4 weeks.
Montgomery Ward, Inc. warrants this product
to be free from defects in material and workmanship
for one year from provable date of purchase.
Within this warranty period, Montgomery Ward will repair
or
replace, at its option, defective parts of this
product at no charge, provided the product is returned,
freight prepaid with proof of purchase to
Montgomery Ward.
Allow 2–4 weeks for return shipping.
This warranty does not cover improper installation, misuse,
abuse or neglect on part of the owner. Warranty is also
invalid in any case that the product is taken apart or
serviced by an unauthorized service station.
This warranty gives you specic legal rights and they may
vary from state to state.
THE FOREGOING WARRANTIES ARE IN LIEU OF ALL
OTHER WARRANTIES AND CONDITIONS,
EXPRESS OR IMPLIED, INCLUDING
BUT NOT LIMITED TO THOSE OF MERCHANTIBILITY
OR FITNESS FOR A PARTICULAR PURPOSE.
1 Year Limited Warranty
Montgomery Ward Customer Service
8:00 am to Midnight CST, Monday through Friday
Wards.com 1•888•557•3848
Returns ®
19 21
20 Wards.com

1514
Table of contents
Other Montgomery Ward Microwave Oven manuals

Montgomery Ward
Montgomery Ward P100N30AL-ZF User manual

Montgomery Ward
Montgomery Ward 710089 User manual

Montgomery Ward
Montgomery Ward 743771 User manual

Montgomery Ward
Montgomery Ward FC102R_MW User manual

Montgomery Ward
Montgomery Ward MW1205-MW User manual

Montgomery Ward
Montgomery Ward MW1139-M User manual

Montgomery Ward
Montgomery Ward 765294 User manual

Montgomery Ward
Montgomery Ward FC960S User manual

Montgomery Ward
Montgomery Ward 785512 User manual

Montgomery Ward
Montgomery Ward 761509 User manual