10 11
OPERATING INSTRUCTIONS OPERATING INSTRUCTIONS
• In this mode, the cooker will automatically switch off if there is no selected function after
10 seconds.
• After switching on, press the relevant function button(s) to select the desired cooking
function.
3. Switch Off
• During operation or when switching on, press “On/Off Button”. The cooker will cease
operation and enters power-on mode.
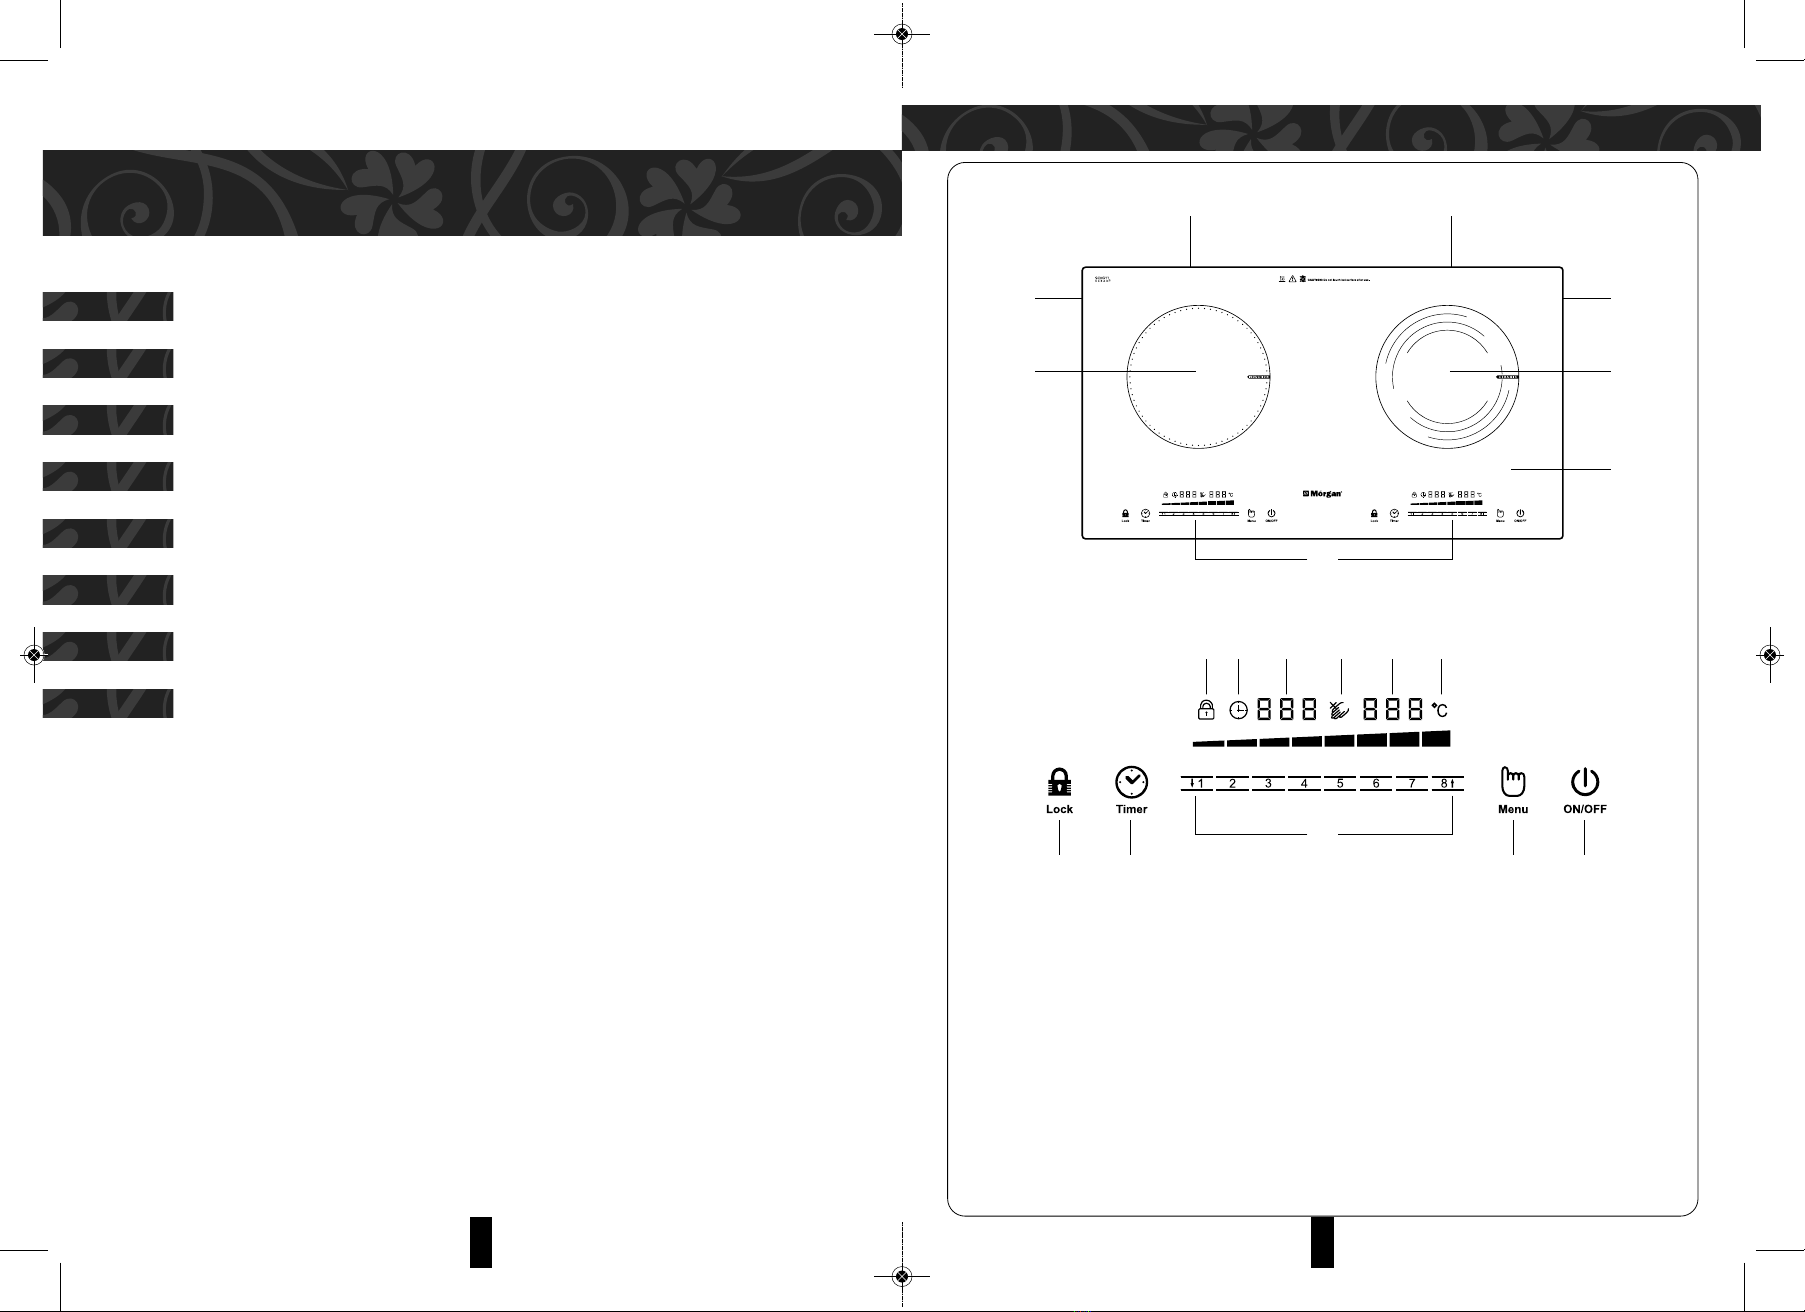
4. Timer
• Time ranges from 1 minute to 480 minutes.
• During operation, press “Timer Button” once, the left end of LED display screen will
show “0”, “Timer LED” will be consistently illuminated. Slide the slide zone or just press
the left end or the right end of the slide zone to decrease or increase the timer. It will be
automatically confirmed in 5 seconds after setting the timer.
• When the left end of LED display screen shows “0”, press “Timer Button” again. Timer
function will automatically be cancelled if there is no selection in 5 seconds.
• In timer mode, press “Timer Button” again to cancel the timer function.
5. Power Heating Function
• When in switch on or other cooking modes, press “Menu Button” to select either single
or double cooking circle power heating function. The right end of the LED display screen
will show the default heating power of “5”.
• Slide the slide zone or just press the left end or the right end of the slide zone to
decrease or increase the power.
6. Selecting Single /Double Cooking Circles
• During operation or other cooking modes, press “Menu Button” to choose single or
double cooking circle power.
• When you choose single circle power, the right end of the LED display screen will show
“1” (Single Circle Power) and “5” (Power 5)
• When you choose double circle power, the right end of the LED display screen will show
“2” (Double Circle Power) and “5” (Power 5)
• Slide the slide zone or just press “Decrease Button” or “Increase Button” to decrease or
increase the power.
7. Lock
• Press and hold the "Lock Button” for 2 seconds. The “Lock LED” will illuminate
consistently and the cooker enters lock mode. During this mode, it will lock the control
panel except the “On/Off Button”.
• In “Lock” mode, press and hold “On/Off Button” to turn off the appliance, the “Lock LED”
will be kept consistently on. Press and hold “Lock Button” for 2 seconds again to unlock
the panel to turn on the cooker.
• In “Lock” mode, press and hold “Lock Button” for 2 seconds again, “Lock LED” will
disappear, and the control panel is unlocked.
8. Energy Sharing
• Energy sharing exits between the induction cooker and the ceramic cooker. The one you
operate will be the one in top priority.
• When the ceramic cooker is operating, it will send a signal to the induction cooker to
start the fan and accelerate the heat dissipation inside the cooker.
• The total power of the induction cooker and the ceramic cooker shall be kept within the
3000W range (including 3000W).
• When the ceramic cooker is operating, it will send a signal to the induction cooker to
ascertain the total power. If power exceeds 3000W, the induction cooker will lower the
power automatically.
9. Continuous Fan Operation
• The fan will keep operating for 2 to 5 minutes for optimal heat dissipation after cooking
is completed and will stop automatically when the glass surface temperature falls below
50°C.
10. Automatically Power Off When No Operation for 2 Hours
• In operating mode, the cooker will automatically switch off if without any operation after
2 hours (excludes timer mode).
CERAMIC COOKER
1. Power On
• When powered on, the buzzer will alert, the LED display screen illuminates once and
dims. The cooker is now in power-on mode.
2. Switch On
• After power on, press “On/ Off Button”, the right end of LED display screen will show
“O ”. The cooker is now ready for operation.
MBH-IC13(IM)171017.qxp_Layou 1 11/8/17 3:52 PM Page 6