44
BEFORE FIRST USE
Before using the appliance for
the first time, fill with water, boil,
and pour away.
OPERATING THE
APPLIANCE
1Wherever possible, fill through
the spout, as this helps to free
the filter · from limescale
build-up.
• Your kettle has a viewing
window ‡, so you can easily
see the amount of water in the
kettle.
• Ensure that you put the
minimum requirement of water
in the kettle, 1 cup 25cls.
• Boil only as much water as you
need, as this saves electricity.
2Place the appliance on the base
unit fi, ensuring the appliance
locates onto the 360° connector
›.
• The 360° connector allows the
appliance to be located at any
position - ideal for left and right
handed users and convenient
positioning on a worktop.
3Plug in and switch on at the wall
socket.
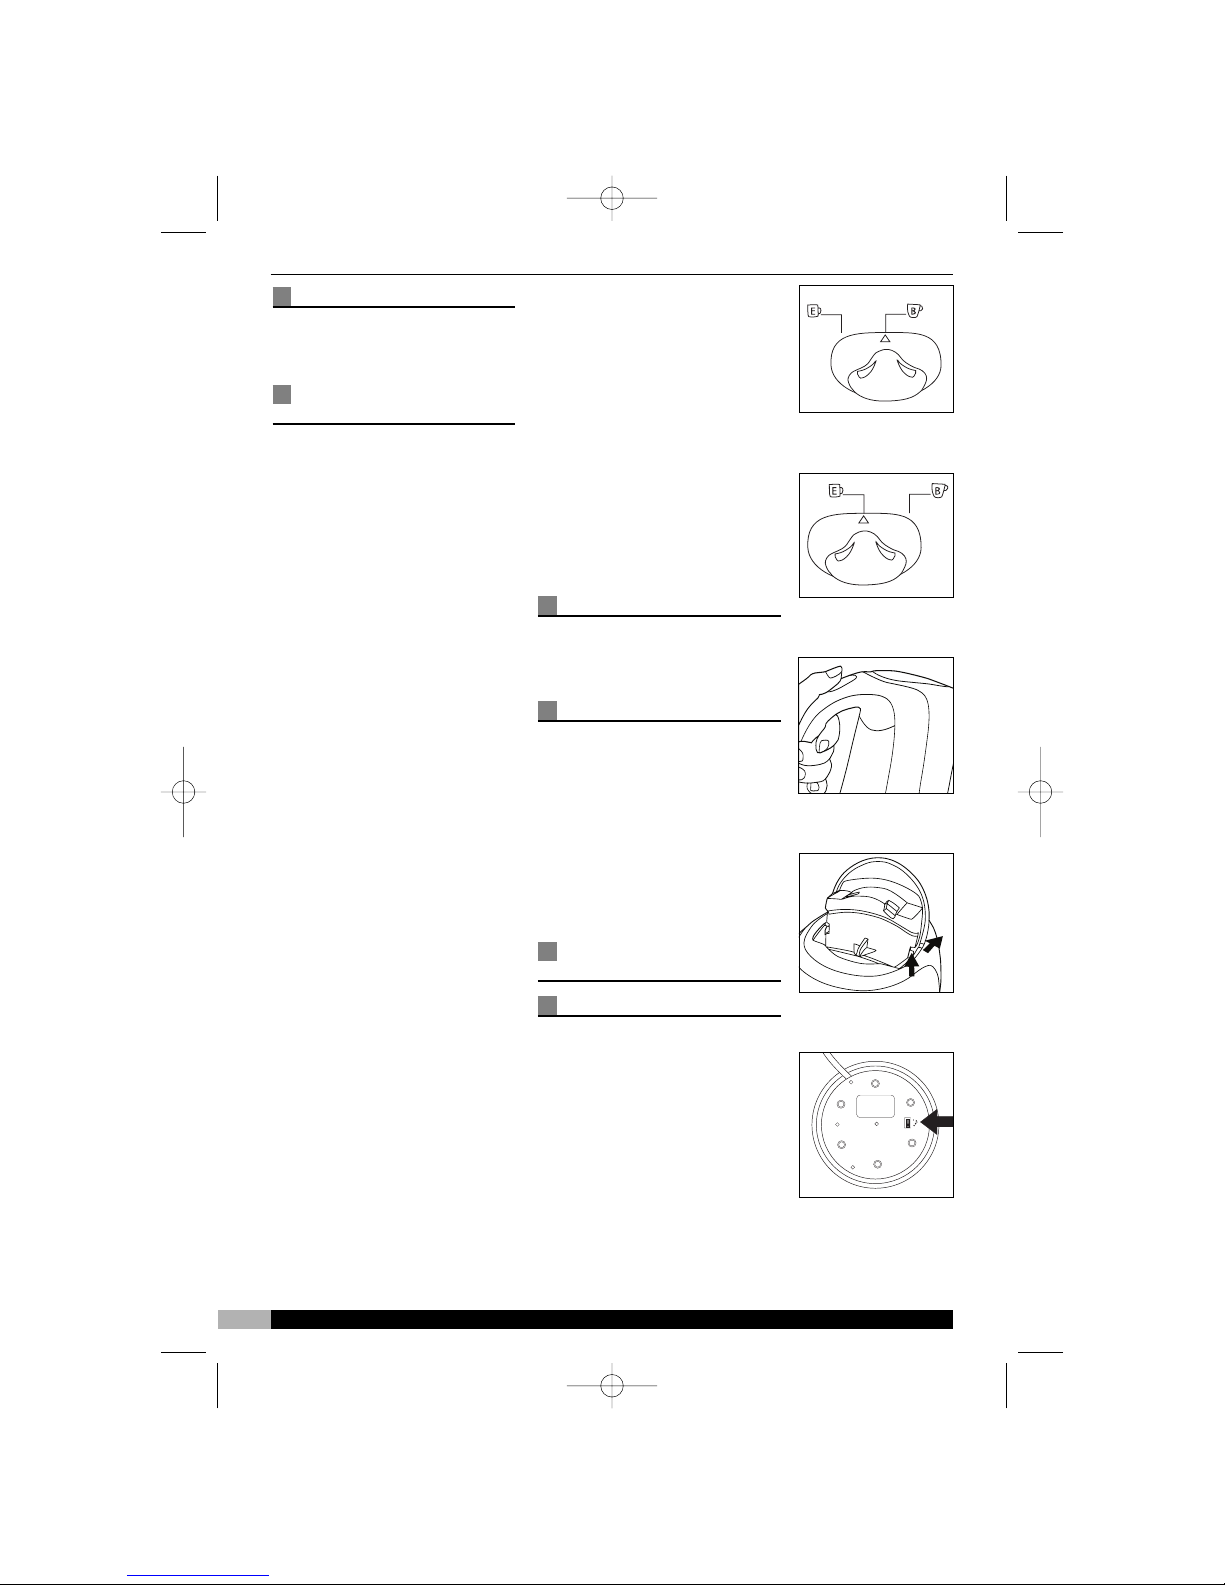
4Switch the appliance on:
• Boil A
Ensure the on/off switch ¤is to
the right and press down. The
switch will illuminate green. The
water gauge will illuminate blue.
The appliance will switch off
when it is boiled. This setting is
ideal for boiling water for making
tea or water used for cooking.
•Eco setting B
Ensure the on/off switch is over
to the left and press down. The
switch will illuminate red. The
water level gauge will illuminate
blue. The kettle will switch off
when the water has reached
approximately 85°. Perfect for
making coffee and herbal teas.
5Lift the appliance from the base
unit by the handle, ensuring you
hold the appliance level.
• To re-heat, switch to ON again.
If the appliance has just
switched off, wait a minute or so
before switching it back on
again.
• If you do not put in enough
water, or switch on the
appliance when it is empty, the
safety cut-out will switch off the
power automatically. If this
happens, refill and wait a few
minutes for the element ‹ to
cool, then use as normal.
LID RELEASE C
• To open, press the lid release
button ⁄ down and the lid ‚
will open.
FILTER REMOVAL D
1Open the lid.
2Remove the lid by lifting it
upwards slightly and then away
from you off the hooks.
3Replace the lid as removing but
in reverse, and close.
WARNING: Make sure that
the lid is put in correctly,
otherwise it will not close.
ADDITIONAL
FEATURES
Whistle feature E
• There is a switch „on the
cordless base of the product
that can switch the whistle on
and off as desired.
A
B
C
D
E
UUKKHHeellpplliinnee0088444488771100995544RReeppllaacceemmeennttPPaarrttss0088444488773300772200IIrreellaannddHHeellpplliinnee11880000440099111199