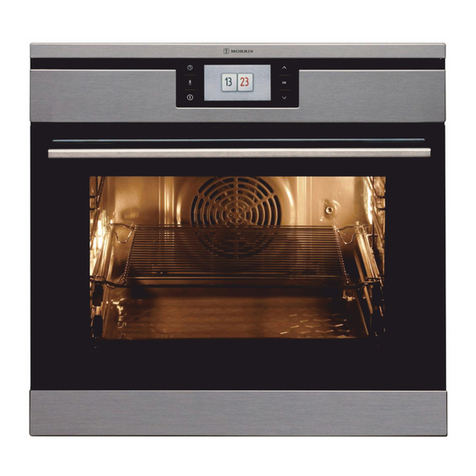
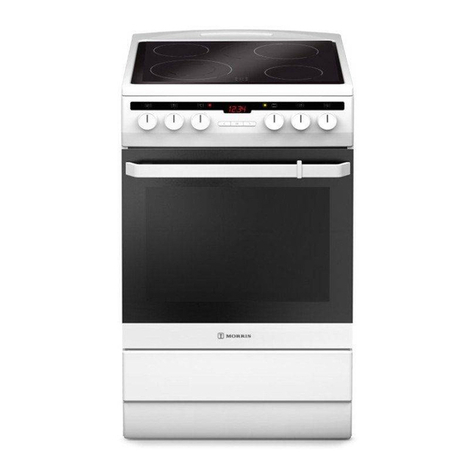
Morris MOF-64510 User manual

MOF-64510
(EN) INSTRUCTION MANUAL
IOAK-2039 / 8051452
(10.2013./1)

2
DEAR CUSTOMER,
The oven is exceptionally easy to use and extremely efcient. After reading the instruction
manual, operating the oven will be easy.
Before being packaged and leaving the manufacturer, the oven was thoroughly checked with
regard to safety and functionality.
Before using the appliance, please read the instruction manual carefully.
By following these instructions carefully you will be able to avoid any problems in using the
appliance.
It is important to keep the instruction manual and store it in a safe place so that it can be
consulted at any time.
It is necessary to follow the instructions in the manual carefully in order to avoid possible
accidents.
Caution!
Do not use the oven until you have read this instruction manual.
The oven is intended for household use only.
The manufacturer reserves the right to introduce changes which do not affect the
operation of the appliance.

3
TABLE OF CONTENTS
Safety instructions ............................................................................................................. 4
Description of the appliance ............................................................................................. 8
Installation......................................................................................................................... 10
Operation........................................................................................................................... 12
Baking in the oven – practical hints ............................................................................... 32
Cleaning and maintenance.............................................................................................. 34
Technical data................................................................................................................... 40

4
SAFETY INSTRUCTIONS
Warning: The appliance and its accessible parts
become hot during use. Care should be taken to
avoid touching heating elements. Children less than 8
years of age shall be kept away unless continuously
supervised.
This appliance can be used by children aged from 8
years and above and persons with reduced physical,
sensory or mental capabilities or lack of experience
and knowledge if they have been given supervision or
instruction concerning use of the appliance in a safe
way and understand the hazards involved. Children
shall not play with the appliance. Cleaning and user
maintenance shall not be made by children without
supervision.
During use the appliance becomes hot. Care should
be taken to avoid touching heating elements inside
the oven.
Accessible parts may become hot during use. Young
children should be kept away.
Warning: Do not use harsh abrasive cleaners or
sharp metal scrapers to clean the oven door glass
since they can scratch the surface, which may result
in shattering of the glass.

5
SAFETY INSTRUCTIONS
● Ensurethatsmallitemsofhouseholdequipment,includingconnectionleads,do
nottouchthehotovenastheinsulationmaterialofthisequipmentisusuallynot
resistant to high temperatures.
● Donotleavetheovenunattendedwhenfrying.Oilsandfatsmaycatchredue
to overheating or boiling over.
● Donotputpansweighingover15kgontheopeneddooroftheoven.
● Donotuseharshcleaningagentsorsharpmetalobjectstocleanthedoorasthey
can scratch the surface, which could then result in the glass cracking.
● Donotusetheovenintheeventofatechnicalfault.Anyfaultsmustbexedby
anappropriatelyqualiedandauthorisedperson.
● Intheeventofanyincidentcausedbyatechnicalfault,disconnectthepowerand
report the fault to the service centre to be repaired.
● Therulesandprovisionscontainedinthisinstructionmanualshouldbestrictly
observed. Do not allow anybody who is not familiar with the contents of this instruc-
tion manual to operate the oven.
● Theappliancehasbeendesignedonlyforcooking.Anyotheruse(forexample
forheating)doesnotcomplywithitsoperatingproleandmaycausedanger.
Warning:Ensurethattheapplianceisswitchedoff
before replacing the lamp to avoid the possibillity of
electric shock.
Use only original temperature probe supplied with
the appliance.
You should not use steam cleaning devices to clean
the appliance.

6
Using energy in a respon-
sible way not only saves
money but also helps the
environment. So let’s save
energy! And this is how you
can do it:
Do not uncover the pan too often
(a watched pot never boils!).
Do not open the oven door unnecessarily
often.
Only use the oven when cooking larger
dishes.
Meat of up to 1 kg can be prepared more
economically in a pan on the cooker hob.
Make use of residual heat from the
oven.
If the cooking time is greater than 40 minutes
switch off the oven 10 minutes before the
end time.
Important! When using the timer,
set appropriately shorter cooking
times according to the dish being
prepared.
Make sure the oven door is properly
closed.
Heat can leak through spillages on the door
seals. Clean up any spillages immediately.
Do not install the cooker in the direct
vicinity of refrigerators/freezers.
Otherwise energy consumption increases
unnecessarily.
HOW TO SAVE ENERGY

7
During transportation, protec-
tive packaging was used to
protect the appliance against
any damage. After unpack-
ing, please dispose of all
elements of packaging in a
way that will not cause dam-
age to the environment.
All materials used for packaging the appli-
ance are environmentally friendly; they are
100% recyclable and are marked with the
appropriate symbol.
Caution! During unpacking, the packag-
ing materials (polythene bags, polystyrene
pieces, etc.) should be kept out of reach of
children.
UNPACKING DISPOSAL OF THE APPLIANCE
Old appliances should not sim-
ply be disposed of with normal
household waste, but should
be delivered to a collection and
recycling centre for electric and
electronicequipment.Asymbol
shown on the product, the
instruction manual or the packaging shows
that it is suitable for recycling.
Materials used inside the appliance are
recyclable and are labelled with information
concerning this. By recycling materials or
other parts from used devices you are making
asignicantcontributiontotheprotectionof
our environment.
Information on appropriate disposal centres
for used devices can be provided by your
local authority.

8
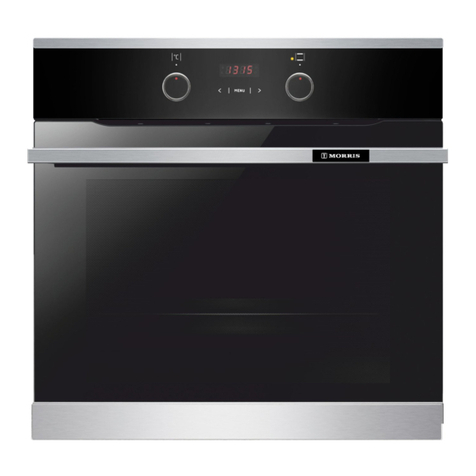
DESCRIPTION OF THE APPLIANCE
Oven door
handle
Electronic
programmer
Setting selection sensor eld
Conrmation sensor led
Time setting sensor eld
Stand by / menu sensor eld
Temperature selection sensor
eld

9
*optional
SPECIFICATIONS OF THE APPLIANCE
Baking tray* Grill grate
(drying rack)
Roasting tray*
Oventtings:
Sideracks
Fork and rotisserie frame*

10
Installing the oven
The kitchen area should be dry and aired
andequippedwithefcientventillation.
When installing the oven, easy access to
all control elements should be ensured.
This is a Y–type design built–in oven,
which means that its back wall and one
side wall can be placed next to a high
piece of furniture or a wall. Coating or
veneerusedonttedfurnituremustbe
applied with a heat–resistant adhesive
(100°C). This prevents surface deforma-
tion or detachment of the coating.
Hoods should be installed according to
the manufacturer’s instructions.
Make an opening with the dimensions
given in the diagram for the oven to be
tted.
Make sure the mains plug is disconnected
and then connect the oven to the mains
supply.
Insert the oven completely into the open-
ing without allowing the four screws in the
places shown in the diagram to fall out.
INSTALLATION

11
INSTALLATION
The oven is manufactured to work with
a one-phase alternating current (230V
1N~50 Hz) and is equipped with a 3
x 1,5 mm2connection lead of 1.5 mm
length with a plug including a protection
contact.
A connection socket for electricity supply
should be equipped with a protection
pin and may not be located above the
cooker. After the cooker is positioned, it is
necessary to make the connection socket
accessible to the user.
Before connecting the oven to the socket,
check if:
- the fuse and electricity supply are able to
withstand the cooker load,
-theelectricitysupplyisequippedwithan
efcaciousgroundsystemwhichmeets
therequirementsofcurrentstandards
and provisions,
- the plug is within easy reach.
Electrical connection
Important!
Ifthexedpowersupplycableisdamaged,
it should be replaced at the manufacturer
or at an authorized servicing outlet, or by a
qualiedpersontoavoiddanger.

12
OPERATION
Before using the appliance for
the rst time
●Remove packaging, clean the interior of
the oven,
● Takeoutandwashtheoventtingswith
warmwaterandalittlewashing-upliquid,
●Switch on the ventilation in the room or
open a window,
●Heat up the oven (to a temperature of
250°C for approximately 30 minutes),
remove any stains and wash the interior
carefully. (see section: Electronic pro-
grammer operation and oven control)
Important!
To clean the oven, only use a cloth
well wrung out with warm water to
which a little washing-up liquid has
been added.
Important!
Ovenisequippedwithaprogrammer
with display controlled by six sensor
eldslocatedsymmetricallyonboth
sides of the display. To activate each
sensoreld,touchtheglassabove
the sensor (indicated by a pictogram).
An acoustic signal will be heard,
which was selected in the menu.
(Seesection:Electronicprogrammer
operation and oven control.)
Sensor eld surfaces must be kept
clean.

13
OPERATION
Function symbols
Electronic programmer operation and
oven control
- time setting sensor
-eld
- temperature
-selectionsensoreld
-standby/menusensoreld
-settingselectionsensoreld
- power cut-off
-temperatureadjustment
- end time
- cook time
- Child Lock
Sensor eld functions

14
OPERATION
Switching on the appliance and selecting
language.
After connecting the appliance to the mains,
electronic programmer starts in menu: setup
/ language.
Using the sensor fields search the
contents of the language menu. Touch
sensoreldtoselectthehighlightedlangu-
age in which you want the messages to be
displayed.
When mains power is cut and restored (loss
of power), electronic programmer automa-
tically goes into standby and immediately
displays the current time.
Set current time.
Oncelanguageisselected,conrmthetime
displayed on the display using the sen-
soreldorchangeitusingthe sensor
elds.
Time can be set in the range from 0:00 to
23:59 for 24-hour clock system or from 0:00
to 12:00 for the 12-hour clock system.
When current time is set, electronic program-
mer goes into standby mode in which the
display shows the current time only.
To activate the appliance from standby and
set current time, touch the sensoreld.
When menu is displayed, select “setup” using
the sensoreldsandconrmbytouch-
ing . Upon accessing the “time” menu using
the sensorelds,select“currenttime”
andconrmbytouching .
Important!
To exit to submenu at any time simul-
taneously touch and sensor
elds.

15
OPERATION
Menu \ Setup
Touch sensoreldtoenterthemenu.Use
sensoreldstoselectthe“setup”menu
andconrmtheselectionbytouching .
The following setup menu items are avail-
able:
- language,
- time
- lighting,
- sound,
- themes,
- brightness,
- service,
- factory settings,
- exit.
Menu
Touch . to activate the appliance from
standby. Use sensoreldstonavigate
the menu.
The following main menu items are avail-
able:
- setup,
- heating functions,
- preset programmes,
- user programmes,
- cleaning,
- exit.
Touch sensor eld to select any menu
item.
If no changes are made within 60 seconds,
the appliance enters standby mode. To im-
mediately exit from the menu and switch the
appliance to standby mode, select the exit
icon and touch .toconrm.Toimmediately
exit from the menu and switch the appliance
to standby mode simultaneously touch
sensoreldand .
Use .sensoreldstonavigatethemenu.
Touch to select the chosen item.
To exit from the setup menu, select exit and
touch toconrm.Toimmediatelyexitfrom
the setup menu and switch the appliance to
standby mode simultaneously touch
sensoreldand .
Menu \ Setup \ Language
Selecttherequiredlanguageusingthe
sensoreldsandconrmselectionbytouch-
ing .
The following language menu items are
available:
- Deutsch,
-English,
- Polski,
-Пopyccки,
-Česky,
- Srbski,
- Lietuviškai,
-Eesti,
- Latviski,
- Français,
-Español,
- Türkçe,
- Svenska,
- Norsk,
- Suomi,
- Dansk,
- Italiano,
-Exit,

16
OPERATION
For details on how to select language, please
refer to section Switching on the appliance
and selecting language.
To exit from the language menu to setup
menu, select exit using the navigation
sensoreldsandtouch toconrm.
To immediately exit from the language menu
to setup menu and then to main menu touch
sensoreldand .
Menu \ Setup \ Time
Select the time menu using the sensor
eldsandconrmselectionbytouching
The following time menu items are avail-
able:
- current time,
- kitchen timer,
- clock type,
- time format,
- exit.
Usethenavigationsensorelds to se-
lect one of the menu items above and touch
sensoreldtoconrm.
Menu \ Setup \ Time \ Current Time
For details on how to set current time, please
refer to section Setting current time.
Setting cook time (for a heating func-
tion)
Once heating function is selected, touch
sensoreld.When ,startstoashonthe
display, near box 1 displaying the tempera-
ture,box2willappeardisplayingCOOKTIME
and the time display shows “0:00”.
The display before setting cook time or cook
time and end time - box 2 is in active.
The display showing cook time for cook time
and end time - box 2 is active
If no change in setting is made within 5
seconds the display will show target and cur-
rent temperature, box 2 will be deactivated
and .
symbolwillstopashing.
Touch navigationsensor eldstoset
cook time in 1 minute steps. Cook time is
stored after 5 seconds or after touching
sensoreld.

17
OPERATION
COOKTIMEchangestoENDTIMEinbox
2.Enteredcooktime,forexample0:30,
changes to the actual end time, while the
remaining time is displayed on the red bar
below the actual end time .
symbol is displayed continuously. Once
cook time has elapsed, an acoustic signal
is sounded (2 beeps / pause / 2 beeps). The
sequenceisrepeatedevery3secondsfor
about a minute, symbolisashing.
Touch to acknowledge and mute the
acoustic signal. After this, the appliance
switches to standby mode.
Important. Once the cook time has elapsed
you can extend it. Touch instead of
and set the additional time using navigation
sensorelds.
.Setting Cook Time and End Time (for a
heating function)
For details on how to set Cook Time, please
refer to the preceding paragraph.
Setting End Time.
When is displayed continuously, touch
sensoreldagain.While symbol continues
to be displayed, ,symbolsstartsashing
andEndTimeisshownonthedisplay.
If no change in setting is made within 5 sec-
onds, the appliance will return to previous
settings of cook time and the selected heating
function. Touch navigationsensorelds
to set cook time in 1 minute steps.
Cook time is stored after 5 seconds or after
touching sensoreld.
COOKTIMEchangestoSTARTTIMEinbox
2.Enteredcooktimechangestotheactual
start time, while the time remaining to start
time is displayed on the red bar below the
actual start time , symbol is displayed con-
tinuously, while symbol is extinguished.If
no changes are made within 60 seconds, the
appliance enters standby mode. When any
sensoreldistouched,theapplianceisacti-
vated and the display shows last settings.
Appliance operation in selected mode
When the current time is reaches start time,
the appliance will start the selected heating
function.STARTTIMEchangestoENDTIME
in box 2. The display shows end time and the
time remaining to end time is displayed on
the red bar below the actual end time. When
cook time countdown begins the , symbol
is extinguished and symbol illuminates.

18
OPERATION
Once cook time has elapsed, an acoustic
signal is sounded (4 beeps / pause / 4 beeps).
Thesequenceisrepeatedevery3seconds
for about a minute symbolisashing.
Touch to acknowledge and mute the
acoustic signal. The appliance switches to
standby mode.
Menu \ Setup \ Time \ Timer
Afterconrmingtheselectionofkitchentimer
with the appliance displays the time in the
format: 00:00.
If no changes are made within 5 seconds, the
appliance enters standby mode.
Touchnavigationsensoreldstosetkitchen
timer time in 1 minute steps. Counting down
starts after 5 seconds or after touching
sensoreld.
Touch the . sensor eld to change the
kitchen timer setting during countdown.
Once set time has elapsed, an acoustic sig-
nal is sounded (2 beeps / pause / 2 beeps).
Thesequenceisrepeatedand00:00is
displayed.
Touch to acknowledge and mute the
acoustic signal. After this, the appliance
switches to standby mode.
Menu \ Setup \ Time \ Clock type
Select clock type menu and touch The
following items will be available:
- Standard
- digital,
- analogue
Select the clock type using the sensor
eldsandconrmselectionbytouching .
The selection is stored by the appliance and
upper level menu is automatically displayed.
The selected clock will now appear in the
upper right corner of the display and during
standby.
Menu \ Setup \ Time \ Time Format
Select Time Format menu and touch The
following items will be available
- 24h,
- AM / PM.
Select the time format using the sen-
soreldsandconrmselectionbytouching
. The selection is stored by the appliance
and upper level menu is automatically dis-
played.
This option is only available for a standard
and digital clock.

19
OPERATION
Menu \ Setup \ Lighting
Select Lighting menu and touch , The fol-
lowing items will be available:
- continuous,
- intermittent.
Select the oven chamber lighting option using
the sensoreldsandconrmselection
by touching . The selection is stored by the
appliance and upper level menu is automati-
cally displayed.
Continuous
When continuous lighting is selected, light
will be on continuously during a programme
(heating function) or when oven door is
opened.
Intermittent
When intermittent lighting is selected, light
will be on for 30 seconds from starting a
programme (heating function) and then light
isturnedoff.Touchanysensoreldtoturn
the light back on during oven operation. Light
will be turned off again after 30 seconds of
touchingthesensoreld.Whenovendoor
is opened, light is turned on for as long as
the oven door is open, but no longer than 10
minutes, after which the light is turned off.
Menu \ Setup \ Sound
Select Sound menu and touch , The fol-
lowing items will be available:
- Tone_1
- Tone_2
- Tone_3
- silent (this applies to keys, not the alarm)
Select the sound option using the sen-
soreldsandconrmselectionbytouching
.
The selection is stored by the appliance
and upper level menu is automatically dis-
played.
Menu \ Setup \ Themes
Select Themes menu and touch , The fol-
lowing items will be available:
- Theme_1
- Theme_2
- Theme_3
Select the theme option using the sen-
soreldsandconrmselectionbytouching
.
The selection is stored by the appliance
and upper level menu is automatically dis-
played.

20
OPERATION
Menu \ Setup \ Brightness
Select Brightness menu and touch , The
following screen will be displayed:
Touch navigationsensoreldstoadjust
display brightness within 0-100% range in 1%
steps. Touch to store the selected display
brightness level. The selection is stored by
the appliance and upper level menu is auto-
matically displayed.
Menu \ Setup \ Service
Select Service menu and touch , The fol-
lowing screen will be displayed:
If the appliance detects an error, its code will
be displayed as shown above.
IfE1errorisdetectedbytheappliance,meat
temperature probe can’t be used. If an at-
tempt is made to select a programme where
the meat probe is used, the appliance will
displayservicescreenshowingE1errorand
its brief description. You can continue to use
theapplianceontheprogramsdonotrequire
meat probe. Touch to acknowledge service
screen and go to main menu.
Ifnosensoreldistouchedwithin10seconds
whenE1errorservicescreenisdisplayed,the
appliance will automatically go into standby.
Menu \ Setup \ Factory Settings
Select Factory Settings menu and touch ,
The following screen will be displayed:
Touch navigationsensoreldstoselect
whether to restore the factory settings or
leave the current settings. To keep current
settings,select“No”andconrmbytouching
sensoreld.Theappliancegoestoupper
menu level.
To restore factory settings select “Yes” and
conrmbytouching sensoreld.Thefac-
tory settings will be restored.
Table of contents
Other Morris Oven manuals

Morris
Morris MOF-64515 User manual

Morris
Morris MEO4820C User manual

Morris
Morris MOF-64545 User manual

Morris
Morris MKV-64330 User manual

Morris
Morris MOF-64530 User manual

Morris
Morris MKV-64311 User manual

Morris
Morris MOF-64546 User manual

Morris
Morris MOF-64550 User manual

Morris
Morris MOF-64591 User manual

Morris
Morris MOF-64521 User manual
Popular Oven manuals by other brands

Alfa Network
Alfa Network QUICK 2 user manual

Electrolux
Electrolux LW 20 GN 2/1-GAAS Specification sheet

ZANKER
ZANKER KOP37902XK user manual

DeDietrich
DeDietrich DOP8360 Series user guide

Hotpoint
Hotpoint GA2 124 IX HA Health & Safety and Installation guide

Miele
Miele DGC 6660 Operating and installation instructions