Movisens Move II User manual

User Manual
Move II
Physical Activity Sensor

Imprint
Version: 11/10/2013
movisens GmbH
Fritz-Erler-Straße 1-3
76133 Karlsr he
Telefon: +49 721 381344-0
Telefax: +49 721 381344-90
Internet: www.movisens.com
E-Mail: s pport@movisens.com
© Copyright: movisens GmbH

Contents
1 Welcome! ............................................................................................................. 1
2 Scope of application ........................................................................................ 3
3 Instr ctions for se .......................................................................................... 5
4 Scope of delivery and accessories .............................................................. 7
4.1
Scope of delivery ...................................................................................................... 7
4.2
Accessories ................................................................................................................. 8
5 Description of the sensor .............................................................................. 9
6 Software Installation ..................................................................................... 11
6.1
System Req irements ...........................................................................................11
6.2
Installing the software ..........................................................................................11
6.3
Updating the software ..........................................................................................12
6.4
Uninstalling the Software ....................................................................................12
7 Handling ............................................................................................................ 13
7.1
Charging the Sensor ..............................................................................................13
7.2
Preparing a meas rement ...................................................................................13
7.3
Starting a meas rement.......................................................................................14
7.4
Attaching the Sensor to the test person .........................................................16
7.5
Stopping a meas rement ....................................................................................17
7.6
Storing meas rement data .................................................................................17
7.7
Viewing meas rement data ................................................................................19
8 Maintenance and proper disposal ........................................................... 21
8.1
Maintenance ............................................................................................................21
8.2
Cleaning instr ctions ............................................................................................21
8.3
Cleaning of wrist bands ........................................................................................21
8.4
Proper disposal .......................................................................................................22
9 Technical Data ................................................................................................. 23

10 Legal Notes ....................................................................................................... 25
10.1
Copyright ..................................................................................................................25
10.2
Disclaimer .................................................................................................................25
10.3
Trademarks ...............................................................................................................25

1
1
1Welcome!
Dear c stomer,
Thank yo for choosing the physical activity Sensor Move II from
movisens. With this sensor, yo get the newest technology for
mobile monitoring of physical activity in everyday life.
Please read this man al completely and thoro ghly before bringing
the meas rement system into service! In his man al yo will find all
Information relevant to the se and maintenance of the
meas rement system as well as for solving problems.
If yo have any f rther q estions, don’t hesitate to call s. It is o r
pleas re to help yo :
Phone: +49 721 381344-0


3
2
2Scope of application
Move II is a scientific research instr ment to capt re the physical
activity of a person and other secondary parameters. Move II is
designed and tailored for the se in research applications.
The physical activity sensor Move II is not a medical device!
The meas rement of physical activity of person is based on the
acq isition of acceleration in three dimensions, atmospheric air
press re. In addition the ambient temperat re is acq ired.
The config ration of the sensor is done from PC by means of the
software incl ded in this package.
Move II allows the meas rement and in conj nction with movisens
DataAnalyzer the analysis of the following parameters:
Acceleration in three dimensions
Atmospheric Air Press re
Temperat re
Movement Acceleration
Step Co nt
Activity Classes
Body Position
Energy Expendit re
Tipp:
On demand, other parameters can be
calc lated from raw data by movisens.


5
Instructions for use
!
!!
!Move II is not a medical device.
!
!!
!Only se Move II only for the designated applications.
!
!!
!Never open Move II.
!
!!
!The battery of Move II may only be changed by the
man fact rer.
!
!!
!Move II is not waterproof. Don’t se the sensor in wet
environments.
!
!!
!Only se the Move II nder the specified conditions.
!
!!
!To charge the battery of Move II, only se USB standard
compatible devices.
!
!!
!If Move II is sed with wrist or chest straps, these have to
be cleaned reg larly.
!
!!
!If any problems occ r by wearing the sensor (e.g.
press re marks, skin irritations or other discomfort), stop
sing it immediately.


7
4
4Scope of delivery and
accessories
In this chapter, yo learn which parts are within the scope of delivery
and what accessories are available.
All of these parts can be reordered. Please consider the order
n mbers in the following paragraph.
To be able to do meas rements a comp ter is needed in addition to
the scope of delivery.
4.1 Scope of delivery
The sensor Move II is available in two variants:
Article Order No.
Move II Clip
3D-Aktivitätssensor with clip for
wearing at the hip,
Mirco USB Cable,
USB Flash Drive with
SensorManager Software
10100
Move II Wrist
3D-Aktivitätssensor with wristband
for wearing at the wrist
Mirco USB Cable,
USB Flash Drive with
SensorManager Software
10108

8
4.2 Accessories
The following accessories can be ordered optionally:
Artikel
Artikel
-
Nr.
Wrist band TBD
Micro USB Cable 30102
USB H b, 7 Ports 30101
Micro USB Charger for 110-240V 30100
9
5
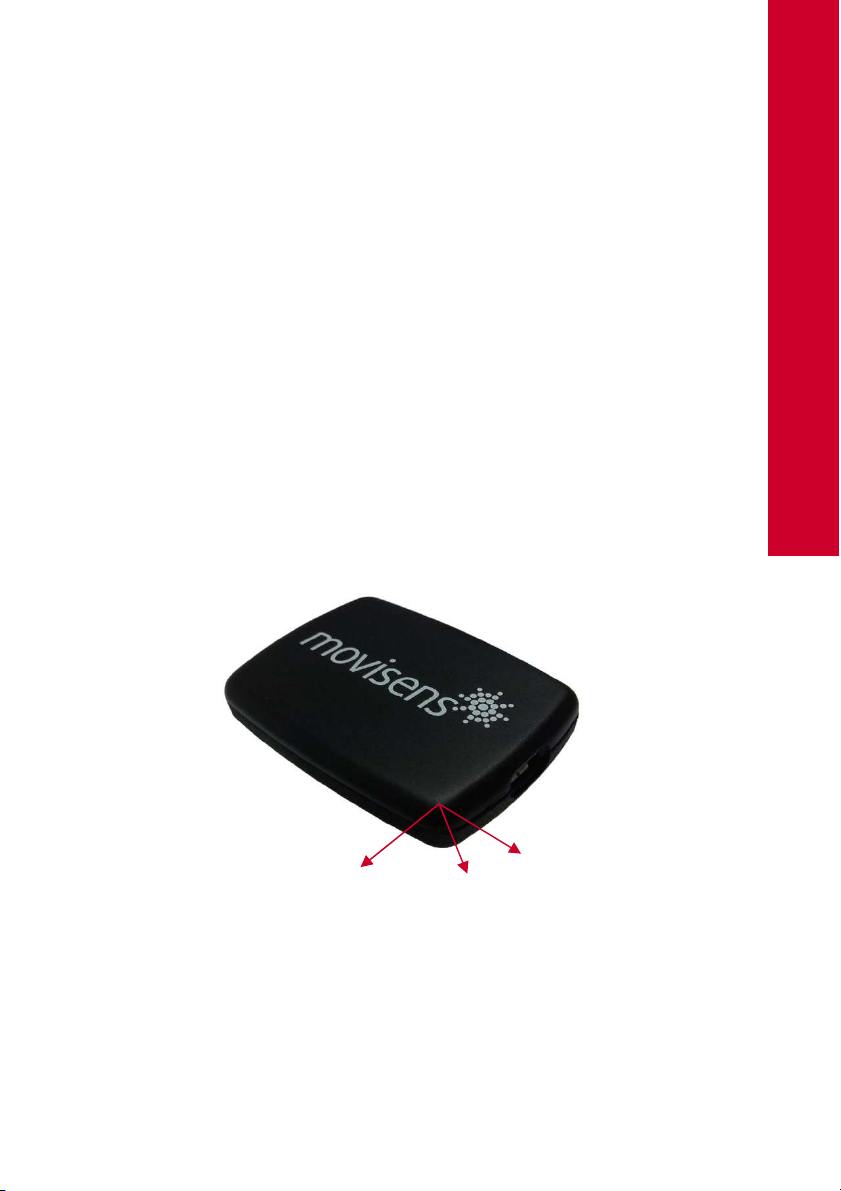
5Description of the sensor
Move II can either be worn
with a clip at the right hip (Move II Clip)
with a wrist strap on the wrist of the non-dominant hand
(Move II Wrist)
The preferred position for energy expendit re meas rements is the
hip.
Move II is eq ipped with a Micro USB port, located at the right side
of the sensor. Config ration of the sensor, charging of the battery
and data transfer is done via this USB port.
The axes of the integrated acceleration sensor are defined as
described in the following fig re (USB Port on the right side):
X
Z
Y

10
The Move II sensor is eq ipped with a m lti-colored LED to show the
stat s of the sensor:
Stat s-LED Meaning
Flashing red (once per
second) The sensor is active and records data
Flashing red slowly
(every two seconds) Delayed recording active
Flashing green The sensor is connected to a PC or a
charger. The battery is f lly charged.
Flashing bl e
The sensor is connected to a PC or a
charger. The battery is act ally being
charged.
Flashing bl e fast
(three times per
second)
The battery is flat, sensor will t rn off soon.
Flashing Red fast
(three times per
second)
An error occ rred. Please contact the
man fact rer.
No LED active The sensor is inactive.
Combinations of red and green blinking as well as red and bl e
blinking are possible with the appropriate combination of the above
described meanings.

11
6
6Software Installation
This chapter describes how to install and ninstall the software and
how to pdate it. Beside this, the system req irements are defined.
6.1 System Req irements
Before installing the software, please check if the following system
req irements are f lfilled.
PC with Windows XP or higher
Administrator rights d ring installation
A minim m of 300 MB free space on hard disc
The delivered software consists of two programs:
SensorManager: Program to config re the sensor, to start a
meas rement and to download the data from the sensor.
UnisensViewer: Program to view the stored data
6.2 Installing the software
Please ens re that yo r PC f lfills the req irements described above.
Step 1: Pl g the USB drive into the USB port of yo r PC. The content
of the medi m will be shown.
!
!!
!If the window does not open a tomatically, select the
appropriate drive from the window “My comp ter”

12
Step 2: Do ble click the file
“movisens_SensorManager_Set p_F ll.exe“
The Installation r ns a tomatically in the backgro nd. After
s ccessf ll installation, shortc ts are created in the Windows
Start Men nder the entry “movisens SensorManager”
Step : Do ble click the file “UnisensViewer_Set p_F ll.exe“
The Installation r ns a tomatically in the backgro nd. After
s ccessf ll installation, a shortc t “UnisensViewer” is created in
the Windows Start Men .
6.3 Updating the software
Yo need an internet connection to make an pdate. Select
Windows Start Men movisens SensorManager Updater
and respectively Windows Start Men UnisensViewer
Updater. If a new version is available, it will be downloaded
and installed a tomatically.
6.4 Uninstalling the Software
The software can be ninstalled sing the Windows Control Panel.
13
7
7Handling
This chapter describes how to prepare a meas rement and how to
attach the sensor to a test person. F rthermore yo get information
to save, delete and analyze data from the sensor.
7.1 Charging the Sensor
Step 1: Connect the Sensor to a USB port (USB port of yo r
comp ter or another port that conforms to USB standard like USB
h b or USB charger).
After connecting the sensor to a USB port, the charging process
starts immediately. D ring charging, the stat s LED is blinking
bl e. If the sensor is f lly charged, the LED is blinking green.
7.2 Preparing a meas rement
Before cond cting a meas rement please make s re yo installed
the software as described in chapter 6.1.
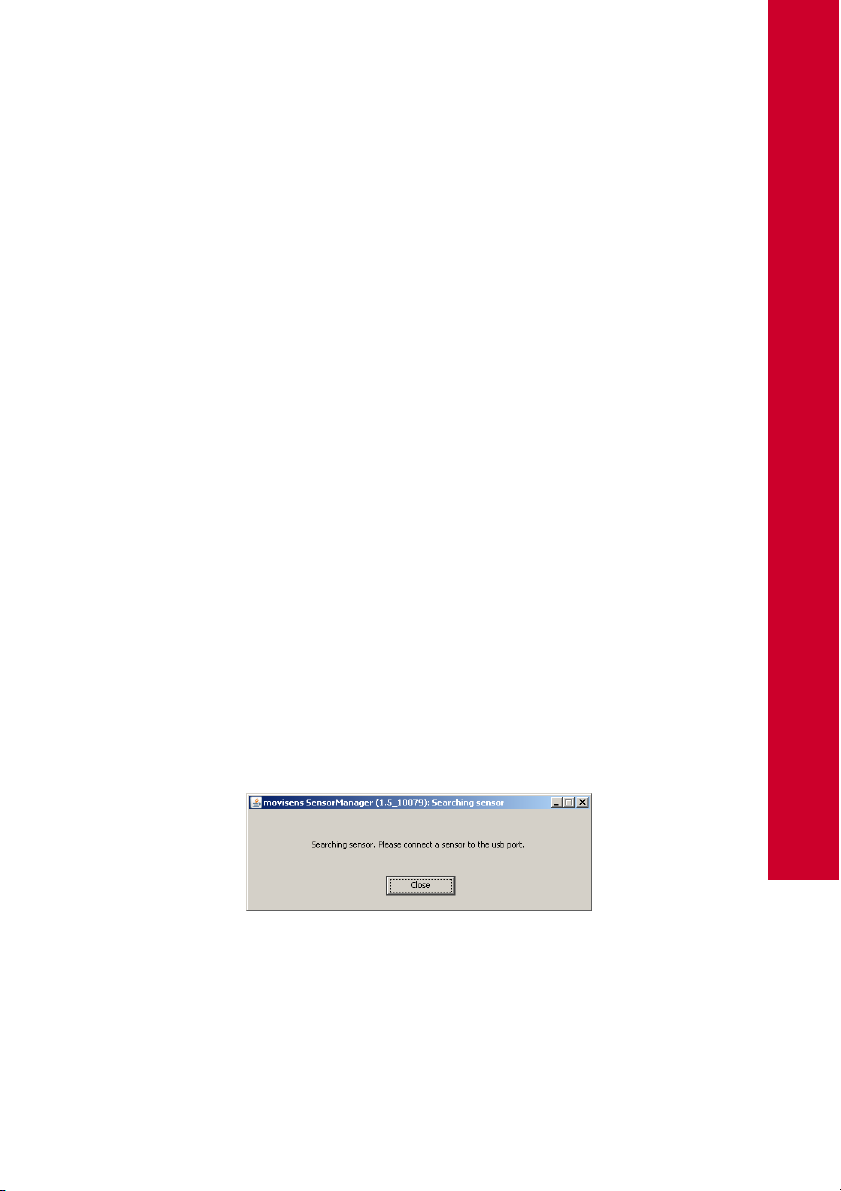
Step 1: Start the movisens SensorManager by selecting Windows
Startmen movisens SensorManager SensorManager
SensorManager is now searching for available sensors.
Step 2: Connect the Move II sensor with yo r PC sing.
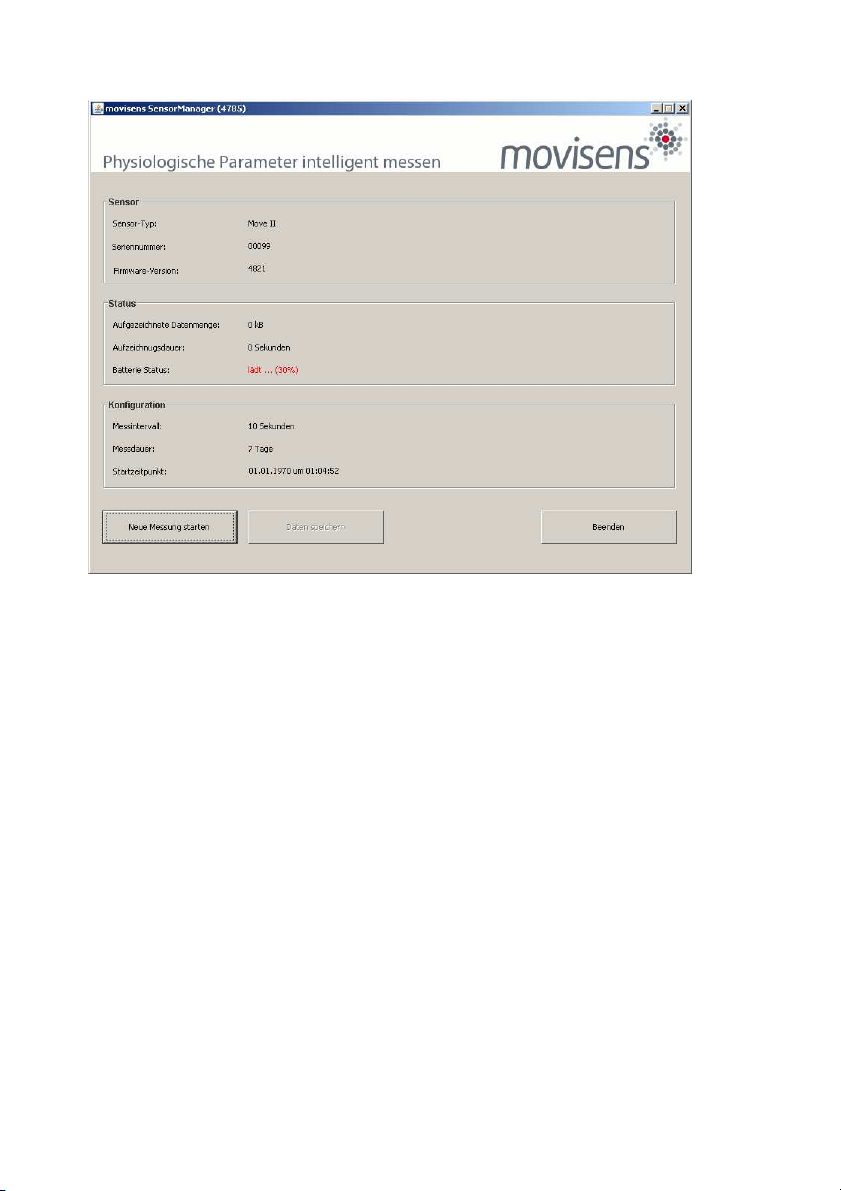
The software will a tomatically detect the device and open the
following window:
14
This application shows information abo t sensor hardware, sensor
state and sensor config ration.
Before yo start a meas rement please check the charging stat s of
the battery. The maxim m meas rement d ration can only be
reached when the battery is f lly charged.
7.3 Starting a meas rement
To start a meas rement do the following steps:
Step 1: In the sensor manager software click on the „Start
Recording“ b tton in the lower left of the window.
Yo can see the following window:

15
7
Step 2: Please s pply the following information into the text fields:
Meas rement d ration: The maxim m meas rement
d ration depends on the man fact rer config ration of yo r
sensor.
Start time: Yo can start the meas rement immediately or
delayed at a specific time. If yo want to start yo r
meas rement delayed please specify date and time. The
given time sho ld not be more than 2 days from now.
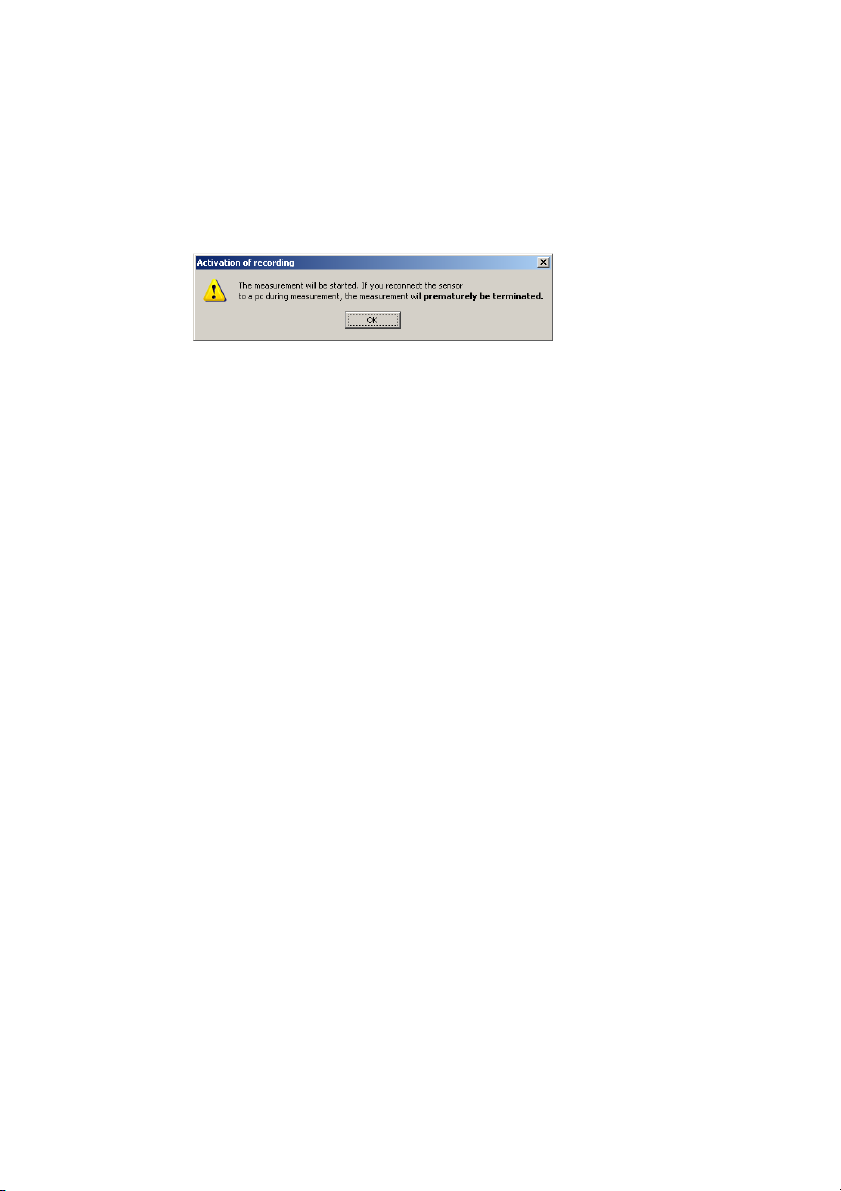
Step : Start the meas rement by clicking the „Start“ b tton.
Yo will see the following window:
Step 4: Please follow the instr ctions and remove the sensor from
the cradle.
The stat s LED will flash red once per second as soon as the
meas rement has started and data will be recorded. If a delayed
start was config red the LED flashes red every two seconds ntil
the meas rement starts.
16
At the end of the meas rement the LED stops flashing.
!
!!
!If yo reconnect the sensor after starting a meas rement
again with a PC, the meas rement will be stopped
premat rely.
!
!!
!If yo connect the sensor to an USB charger, the
meas rement won’t be stopped. That means yo can
extend the meas rement d ration by intermediately
charging the sensor d ring a meas rement.
7.4 Attaching the Sensor to the test
person
Depending on yo r sensor variant attach the sensor to one of the
following locations:
Use the Clip to attach the sensor to the right side hip. The
clip can be sed with belts or directly on other garments.
The movisens logo sho ld face directly to the right.
Use the wrist band to attach the sensor to the non-dominant
hand of the test person. At this position only simple
parameters like Movement Acceleration can be meas red.
This manual suits for next models
2
Table of contents
Other Movisens Accessories manuals


Popular Accessories manuals by other brands


Thermo Scientific
Thermo Scientific 60-12 Operating and service manual

National Instruments
National Instruments PXIe-4844 manual

Saunders
Saunders M-VUE Installation, operation and maintenance

Sonotec
Sonotec SONAPHONE BS30 manual

PCB Piezotronics
PCB Piezotronics IMI SENSORS 640B61 Installation and operating manual

Maxim Integrated
Maxim Integrated MAXREFDES131 manual


