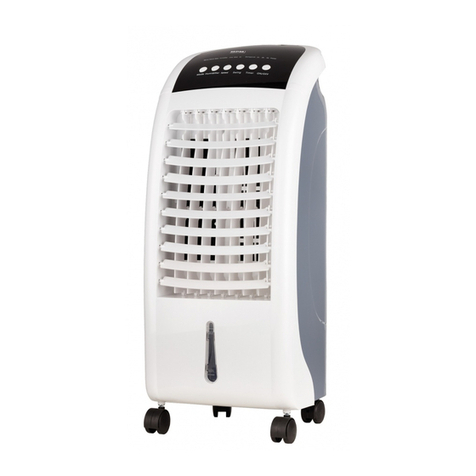
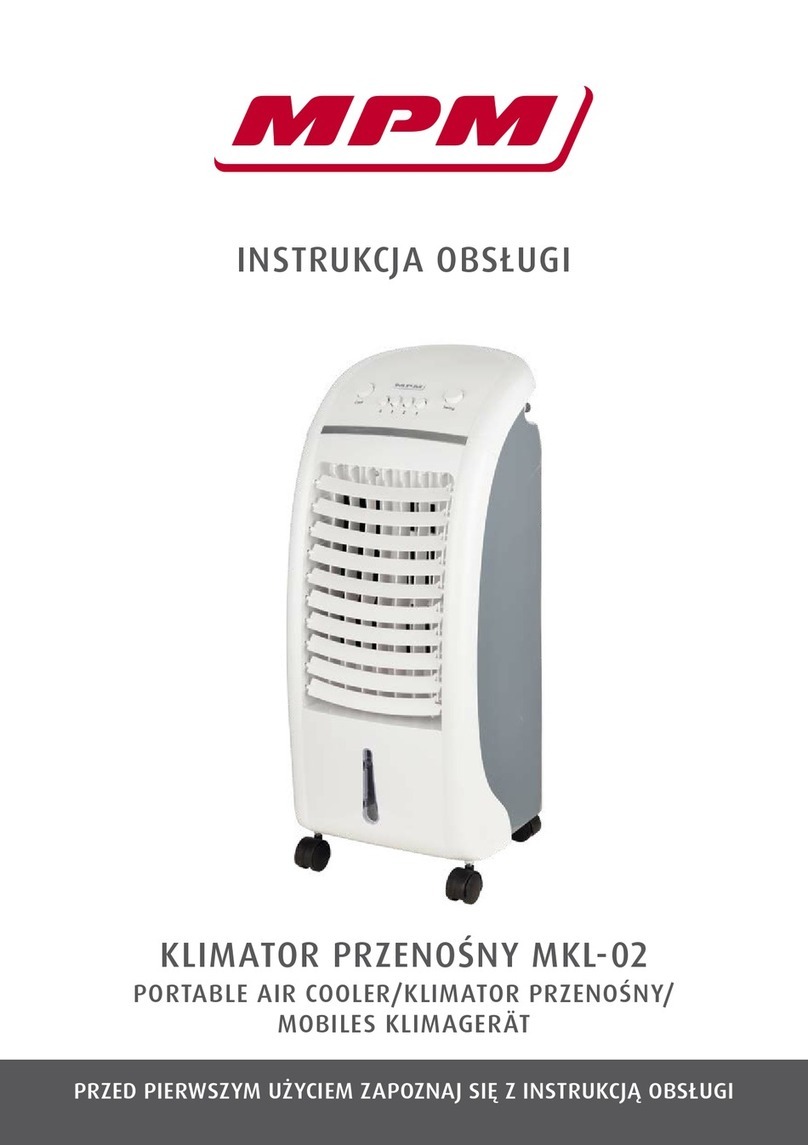
MPM MKL-01 User manual

PRZED PIERWSZYM UŻYCIEM ZAPOZNAJ SIĘ ZINSTRUKCJĄ OBSŁUGI
INSTRUKCJA OBSŁUGI
KLIMATOR PRZENOŚNY MKL-01
PORTABLE AIR COOLER/MOBILES KLIMAGERÄT

INSTRUKCJA OBSŁUGI.......................................................................... 3
USER MANUAL .................................................................................. 10
BEDIENUNGSANLEITUNG....................................................................17
GB
DE
PL

3
PL
Dziękujemy za wybór wysokiej jakości klimatora firmy MPM. Prosimy o dokładne przeczytanie ni-
niejszej instrukcji przed rozpoczęciem użytkowania urządzenia, a także zachowanie jej na przy-
szłość.
WSKAZÓWKI BEZPIECZEŃSTWA
Zurządzenia korzystać można tylko wwarunkach domo-
wych iwsposób przedstawiony wponiższych zasadach.
Nie używaj urządzenia dla innych celów.
Nie korzystaj zurządzenia na zewnątrz budynków izawsze
umieszczaj je wsuchym otoczeniu.
Od czasu do czasu sprawdzaj stan kabla. Nie używaj ka-
bla zasilającego, wtyczki lub całego urządzenia, jeżeli są
uszkodzone. Nie korzystaj zurządzenia podłączonego do
przedłużacza, chyba że dany przedłużacz został sprawdzony
iprzetestowany przez wykwalifikowanego elektryka lub
dostawcę części elektrycznych.
Nie ustawiaj urządzenie wpobliżu źródeł ciepła iwmiejscach
bezpośredniego nasłonecznienia.
Zawsze wyłączaj urządzenie przed odłączeniem go od
źródła zasilania.
Odłącz urządzenie od źródła zasilania przed rozpoczęciem
czyszczenia, wymianą części lub jeżeli zniego nie korzystasz.
Czyść urządzenie zgodnie zinstrukcją obsługi.
Upewnij się, czy napięcie znamionowe na tabliczce znamio-
nowej urządzenia odpowiada napięciu sieci elektrycznej.
Jakikolwiek błąd wpodłączeniu urządzenia unieważnia
gwarancję.

4
PL
Nie używaj uszkodzonego urządzenia, również wtedy, gdy
uszkodzony jest przewód sieciowy lub wtyczka – wtakim
wypadku oddaj urządzenie do naprawy wautoryzowanym
punkcie serwisowym.
Niniejszy sprzęt może być użytkowany przez dzieci wwieku
co najmniej 8 lat iprzez osoby oobniżonych możliwościach
fizycznych, umysłowych iosoby obraku doświadczenia
iznajomości sprzętu, jeżeli zapewniony zostanie nadzór lub
instruktaż odnośnie do użytkowania sprzętu wbezpieczny
sposób, tak aby związane ztym zagrożenia były zrozumiałe.
Dzieci bez nadzoru nie powinny wykonywać czyszczenia
ikonserwacji sprzętu.
Przechowuj urządzenie ijego przewód wmiejscu niedo-
stępnym dla dzieci poniżej 8 lat.
Należy zwracać uwagę na dzieci, aby nie bawiły się sprzę-
tem/urządzeniem.
Nie wyłączać urządzenia poprzez wyjęcie wtyczki.
Jeżeli urządzenie jest włączone nie pozostawiaj go bez nad-
zoru. Wyłącz urządzenie, nawet jeżeli będzie pozostawione
bez nadzoru tylko na chwilę.
Nie wykorzystuj kabla zasilającego do przesuwania lub
odłączania urządzenia od źródła zasilania.
Wżadnym wypadku nie zanurzaj urządzenia wwodzie lub
innym płynie.
Trzymaj urządzenie zdala od plam wody lub oleju.
Nie montować inie eksploatować klimatora włazience lub
innych wilgotnych pomieszczeniach, wpobliżu wanien czy
pryszniców.

5
PL
Dbaj oczystość urządzenia zgodnie zinstrukcjami dotyczą-
cymi czyszczenia.
Nie wkładaj żadnych ostrych metalowych obiektów, ani
palców wkratki, przez które wydostaje się powietrze.
Nie naprawiaj urządzenia własnoręcznie. Wszystkie inter-
wencje przeprowadzane przez niewykwalifikowane osoby
mogą być niebezpieczne. Również wszystkie naprawy kabla
zasilającego muszą być przeprowadzane przez wykwalifi-
kowanego elektryka.
Nigdy nie używaj części niepochodzących od dostawcy.
Użycie ich może być niebezpieczne ispowodować uszko-
dzenia urządzenia.
Poziom wody wzbiorniku nigdy nie powinien przekraczać
na skali wartości „MAX”. Podczas nawilżania poziom zbiornika
wody powinien wskazywać wartość „MIN”.
Po napełnieniu zbiornika wodą iuruchomieniu urządzenia,
klimator nie powinien być przechylany lub potrącany. Jeśli
zajdzie potrzeba przeniesienia urządzenia winne miejsce,
należy powoli popchnąć go, trzymając za boki obudowy,
aby uniknąć przelania wody zgromadzonej wzbiorniku.
Dla bezpieczeństwa dzieci proszę nie zostawiać swobodnie
dostępnych części opakowania (torby plastikowe, kartony,
styropian itp.).
OSTRZEŻENIE! Nie pozwalaj dzieciom bawić się folią.
Niebezpieczeństwo uduszenia!

6
PL
SZCZEGÓLNE ZALECENIA:
Zainstaluj urządzenie na powierzchni płaskiej, wolnej od innych przedmiotów. Jednostka musi
znajdować się przynajmniej 50 cm od ściany.
Po instalacji urządzenia wtyczka zasilająca musi być łatwo dostępna.
Zawsze ustawiaj klimator w pozycji pionowej, aby nie wylewała się woda.
Nie zasłaniaj otworów wlotowych i wylotowych powietrza.
Nigdy nie używaj sprayów (środków owadobójczych, farb) lub innych produktów łatwopalnych
w pobliżu urządzenia, gdyż może to spowodować deformację obudowy. Uszkodzeniu mogą
ulec również części elektroniki jednostki.
Nie obsługiwać klimatora ani wtyczki mokrymi rękami.
ŹRÓDŁA ZASILANIA:
Wtyczka zasilająca musi być dobrze podłączona i nieuszkodzona.
Nigdy nie podłączaj urządzenia do źródła zasilania przy pomocy rozgałęziacza.
Podłącz najpierw urządzenie do źródła zasilania, a następnie włącz je naciskając przycisk „0”.
JEŻELI NIE BĘDĄ STOSOWANE POWYŻSZE ZASADY BEZPIECZEŃSTWA, PRODUCENT NIE BĘDZIE ODPOWIADAŁ ZA
ŻADNE USZKODZENIA URZĄDZENIA.
PRZECHOWUJ NINIEJSZĄ INSTRUKCJĘ OBSŁUGI NA PRZYSZŁOŚC W BEZPIECZNYM MIEJSCU.
OPIS PRODUKTU
„0”
pionowa żaluzja
pozioma żaluzja
Funkcjaoscylacjipowietrza
Funkcja nawilżania powietrza
Wilgotnyfiltr chłodzący wodny
Filtr wodny
Korekspustowy
Zbiornik wodny
Wkład chłodniczy
Obrotowe kółka
Wskaźnikpoziomuwody
Uchwyt
„0” Regulacja
prędkości
nawiewu

7
PL
FUNKCJE
1. Zasada chłodzenia poprzez nawilżanie: powietrze, zasysane z pomieszczenia przechodząc
przez ekran nawilżony zimną wodą (można również zastosować pojemnik na lód), wydostaje
się na zewnątrz urządzenia chłodniejsze i nawilżone.
2. Regulowana prędkość:
– niska,
– średnia,
– wysoka
3. Funkcja nawilżania: urządzenie przejmując zimno od kryształów lodu chłodzi i nawilża obni-
żając temperaturę powietrza wentylacyjnego.
4. Funkcja Swing: po włączeniu funkcji oscylacji powietrza, pionowe żaluzje poruszają się, po-
wodując zmianę kierunku nawiewu od lewej do prawej strony. Zmieniając ręcznie kąt na-
chylenia żaluzji poziomych można dodatkowo zmienić kierunek nadmuchu z góry do dołu.
5. Wyjmowany filtr powietrza i wkład chłodzący: łatwe do czyszczenia, używając miękkiej
szczotki i detergentu.
INSTALACJA
1. Otworzyć opakowanie i wyjąć urządzenie.
2. Napełnianie zbiornika wodą
– wysunąć zbiornik na wodę – z tyłu urządzenia
–
wlać czystą wodę do zbiornika na poziomie nie mniej niż MIN, ale nie więcej niż poziom MAX.
– dla uzyskania efektu chłodzenia można użyć wkładów chłodniczych lub lód.
UWAGA! Napełnij zbiornik na wodę bezpośrednio przed użyciem klimatora.
UWAGA! Odłączyć zasilanie, gdy wlewamy wodę do zbiornika.
INSTRUKCJE UŻYTKOWANIA
1. Prędkość: nacisnąć przycisk 1-2-3 włączający urządzenie, aby uruchomić klimator; zmiana
prędkości po naciśnięciu kolejnych przycisków w następujący sposób: lub 1-2-3.
2. Przycisk Swing: naciśnij ten przycisk, aby włączyć poziomy nawiew powietrza. Ponowne na-
ciśnięcie przycisku anuluje tę funkcję
Zmieniając ręcznie kąt nachylenia żaluzji poziomych można dodatkowo zmienić kierunek
nadmuchu z góry do dołu.
3. Przycisk nawilżania: nacisnąć ten przycisk, aby uruchomić funkcję. Jeśli użyjesz wkładów
chłodniczych, temperatura powietrza w najbliższym otoczeniu urządzenia zostanie obniżo-
na o ca 3 °C po kilku minutach. Ponowne naciśnięcie przycisku wyłączy te funkcje.
4. W celu wyłączenia klimatora należy nacisnąć przycisk „0”
Wkłady chłodnicze należy trzymać z dala od dzieci, aby uniknąć ich spożycia.
UWAGA! Jeżeli przerwa w używaniu klimatora będzie dłuższa niż 2 dni, to opróżnij zbiornik na wodę, po
uprzednim odłączeniu urządzenia z sieci.

8
PL
STOSOWANIE WKŁADÓW CHŁODNICZYCH ICE BOX
Wkłady chłodnicze posiadają szczególną cechę utrzymywania zimna. Niska temperatura
zbiornika schładza wodę. Powietrze wydmuchiwane ma niższą temperaturę. Dzięki temu
może nastąpić obniżenie temperatury w pomieszczeniu.
a. Dodać wodę do pojemnika w takiej ilości, aby po umieszczeniu w niej schłodzonych
ICE BOX’ów poziom wody nie przekroczył wartości „8” na podziałce zbiornika.
b. Umieścić w zbiorniku urządzenia kostki lodu.
c. ICE BOX – 2 szt, można używać naprzemienne, uprzednio je napełniając (jeśli są puste).
d. Woda w raz napełnionych wkładach ICE BOX nie powinna być wymieniana ponieważ
wkład straci swoje właściwości chłodnicze.
CZYSZCZENIE IKONSERWACJA
UWAGA! Przed przystąpieniem do czyszczenia należy wyłączyć urządzenie a przewód zasilający wyjąć z gniazd-
ka.
UWAGA! Temperatura wody używanej w procesie mycia nie powinna przekraczać 45°C.
1. Czyszczenie osłony filtra powietrza
Odłączyć wtyczkę zasilania, pociągnąć osłonę filtra powietrza do góry, wyjąć go z urzą-
dzenia i wyczyścić neutralnym detergentem i szmatką. Następnie oczyścić go czystą wodą
i ponownie zainstalować na urządzeniu. Czyszczenie osłony filtra powietrza wykonuj nie
rzadziej niż co miesiąc.
2. Czyszczenie filtra powietrza
Odłączyć wtyczkę zasilania, zdjąć osłonę filtra powietrza, a następnie wyjąć go z obudowy.
Filtr należy umyć wodą z delikatnym detergentem przy użyciu miękkiej szmatki. Ponownie
zainstalować na urządzeniu. Procedurę czyszczenia wykonuj nie rzadziej niż co miesiąc.
UWAGA! W zależności od warunków atmosferycznych, częstotliwości używania urządzenia, procedurę czysz-
czenia filtra powietrza należy przeprowadzać częściej nawet raz w tygodniu.
3. Czyszczenie zbiornika na wodę
Odłączyć wtyczkę zasilania, wyciągnąć 1/2 zbiornika, wyjąć filtr wodny i używając miękkiej
szczotki oczyścić. Przetrzeć wnętrze zbiornika za pomocą neutralnego detergentu i mięk-
kiej szmatką. Okresowo należy przeprowadzać odkamienianie zbiornika wodnego. Polega
to na zalaniu zbiornika wodnego środkiem odkamieniającym (wodny roztwór octu lub
kwasu cytrynowego) a następnie kilkukrotnym wypłukaniu go czystą wodą.
UWAGA! W zależności od warunków atmosferycznych, częstotliwości używania urządzenia, procedurę czysz-
czenia zbiornika na wodę należy przeprowadzać częściej nawet raz w tygodniu.
UWAGA! Jeśli chcesz wyczyścić zbiornik całkowicie, należy odkręcić śrubę pod podstawą, należy również
odkręcić śrubę z pompą wody w zbiorniku.
4. Czyszczenie urządzenia
Klimator należy umyć miękką szmatką z dodatkiem środka czyszczącego, a następnie wy-
trzeć do sucha.

9
PL
WYKRYWANIE I USUWANIE USTEREK
Problem Przyczyna Porada
Klimatyzator nie
działa Brak zasilania. Podłączyć przewód zasilający i upewnić się, że łączy dobrze
Złe efekty chłodzenia
Siatka filtra jest zabrudzona. Wyjąć i oczyścić osłonę filtra powietrza
Wlot lub wylot powietrza jest
zablokowany. Usunąć blokadę.
PRAWIDŁOWE USUWANIE PRODUKTU (zużyty sprzęt elektryczny ielektroniczny)
Oznaczenie umieszczane na produkcie wskazuje, że produktu po upływie okresu użytkowania nie należy
usuwać z innymi odpadami pochodzącymi z gospodarstw domowych. Aby uniknąć szkodliwego wpływu
na środowisko naturalne i zdrowie ludzi wskutek niekontrolowanego usuwania odpadów, zużyte
urządzenie należy dostarczyć do punktu odbioru zużytego sprzętu AGD lub zgłosić jego odbiór z domu.
W celu uzyskania szczegółowych informacji na temat miejsca i sposobu bezpiecznego usuwania odpadów
elektrycznych i elektronicznych użytkownik powinien skontaktować się z punktem sprzedaży detalicznej, lub z lokalnym
Wydziałem Ochrony Środowiska. Produktu nie należy usuwać razem z innymi odpadami komunalnymi.
Polska
Karta produktu
MPM AGD S.A.
MODEL: MKL-01
Opis Symbol Wartość Jednostka
Maksymalne natężenie przepływu
wentylatora
[F] 10.43 m3/min
Moc wentylatora [P] 60 W
Wartość eksploatacyjna [SV] 0.185 (m3/min)/W
Pobór mocy w trybie czuwania [PSB] 0 W
Poziom mocy akustycznej
wentylatora
[LWA]60 dB(A)
Maksymalna prędkość powietrza [c] 2.41 m/s
Norma dla pomiaru wartości
eksploatacyjnej
PN-EN 50564:2011,
PN-EN 6074-1:2010,
PN-EN 6074-2-7:2002
Dodatkowych informacji udzielają MPM AGD S.A.
ul. Brzozowa 3
Milanówek 05-822
tel. (22) 380-52-00

10
GB
Thank you for choosing high quality air cooler by MPM. Please read this manual carefully before
operating the equipment and retain it for future reference.
SAFETY TIPS
This unit is designed for home use only and only as intended.
Do not use the unit for any other purposes.
Do not use outdoors and always place in a dry environment.
Check the condition of the cable from time to time. Do not
use the unit if the power cord, plug or the device are dam-
aged. Do not use an extension cable with the unit unless the
extension cable has been checked and tested by a qualified
electrician or a supplier of electrical parts.
Do not place the unit near heat sources and in direct sunlight.
Always switch off the unit before unplugging.
Unplug the unit from power source before cleaning, com-
ponent replacement or before a longer period of inactivity.
Clean the unit as instructed in the manual.
Make sure that the voltage rating on the name plate match-
es the mains’ voltage. Incorrect connection will void the
warranty.
Do not use the appliance when damaged and/or its power
cord or plug is damaged; have an Authorised Service repair
it for you.
This product may only be operated by children aged
8ormore, by mentally and/or physically deficient persons,
and by persons without knowledge of or experience in op-

11
GB
erating this appliance provided that they are supervised and/
or have been instructed in its safe operation, and as aresult
have clear understanding of all related risks. Children without
supervision must never clean or care for this appliance.
Store the device and its cable in a place inaccessible to
children below 8.
Keep in mind that children must never play with this appli-
ance.
Do not pull by the plug to switch off the unit.
Do not leave active cooler without supervision. Switch off
the unit even when you are leaving it unsupervised only
for a moment.
Do not pull by the power cable to move the unit and do not
pull by the cable to disconnect from power source.
Do not submerge the unit in water or other liquids!
Keep the unit away from water or oil stains.
Do not install and do not operate the air cooler in the bath-
room or other wet rooms, near bathtubs or showers.
Keep the unit clean machine following the instructions given
in the manual.
Do not put any sharp metallic objects or fingers into the air
flowing grid.
Do not try to repair the unit on your own. Any interventions
by unqualified persons may lead to dangerous situations.
Also, any repairs on the power cable must be carried out
only by qualified electricians.

12
GB
Never use components not supplied by the manufacturer.
Using such components may be dangerous and result in
damage to the unit.
Water level in the tank should never exceed the MAX label
on the scale. During operation as humidifier the water level
in the tank should be at MIN.
After filling the water tank and powering on, the cooler must
not be tilted or hit. If you need to move the unit to another
location, slowly push it while holding on the sides to avoid
spilling water from the tank.
In order to ensure your children‘s safety, please keep all pack
-
aging (plastic bags, boxes, polystyrene etc.) out of their reach.
WARNING! Do not allow small children to play with
the foil as there is a danger of suffocation!

13
GB
SPECIAL RECOMMENDATIONS:
Install the unit on a flat surface free from any objects. The unit must be placed approx. 50 cm
from the wall.
The power cable plug must be easily accessible after installation of the cooler.
Always place the unit upright to avoid water spillage.
Do not cover air inlets and outlets.
Never use spray agents, such as insecticides, paints or other flammable products near the
unit as such products might lead to deformation of the housing. This also applies electronic
components inside the housing.
Do not operate the unit or do not touch the power plug with wet hands.
POWER SOURCE:
The power plug must be connected correctly and undamaged.
Do not connect the unit to a power source using an extension cable.
First, connect the device to the power source and then switch it on by pressing “0” switch.
IF THE ABOVE SAFETY RULES ARE NOT ADHERED TO, THE MANUFACTURE WILL NOT ACCEPT ANY LIABILITY FOR
ANY DAMAGE TO THE UNIT.
KEEP THIS MANUAL IN A SAFE LOCATION FOR FUTURE REFERENCE.
PRODUCT DESCRIPTION
“0”
vertical louvre
horizontal louvre
Oscillation function
Air humidifying function
Humid, cooling water filter
Water filter
Drain plug
Water tank
Cooling pack
Castors
Water level indicator
Handle
“0” Air draught
speed control

14
GB
FEATURES
1. Cooling by humidifying: the air from the room is taken in and passes through a cool water
spray curtain (also an ice cube tray can be used), and then is output as cooled and moistened
air.
2. Adjustable speed:
– Low
– Medium
– High
3. Humidifying function: the unit takes cool from the ice cubes and uses it to cool down and
lower the temperature of the ventilation air.
4. Swing function: after switching on the air oscillation function, the vertical louvres start mov-
ing and cause change in the direction of draught from left to right. You can also manually
change the angle of the horizontal louvres to change the draught direction from top to bot-
tom.
5. Removable air filter and cooling insert are easy to clean with a soft brush and some deter-
gent.
INSTALLATION
1. Open the box and take out the unit
2. Fill the tank with water.
– Slide out the water tank at the back of the unit.
– Pour clean water to the tank at least to the MIN mark; do not exceed the MAX level.
– For extra cooling effect, you can use cooling inserts or ice.
CAUTION FILL THE WATER TANK DIRECTLY BEFORE USING THE COOLER.
CAUTION UNPLUG THE UNIT FROM THE MAINS BEFORE FILLING THE TANK WITH WATER.
INSTRUCTIONS FOR USE
1. Speed adjustment: press 1-2-3 button to start the cooler and then change the speed of oper-
ation by pressing the buttons in the following order: or 1-2-3.
2. Swing button: press to start horizontal air output. Press again to cancel this function.
You can also manually change the angle of the horizontal louvres to change the draught
direction from top to bottom.
3. Humidification button: press to start the humidification function. If you are using cooling
packs, the air temperature in the vicinity of the unit will drop by approx. 3°C after a few min-
utes. Press this button again to cancel this function.
4. Press 0 to switch off the air cooler.
Keep the cooling packs away from children to avoid their consumption.
CAUTION IF YOU ARE PLANNING A UNIT STOPPAGE LONGER THAN 2 DAYS, UNPLUG THE POWER CABLE AND EMP
TY THE WATER TANK.

15
GB
USING ICE BOX COOLING PACKS
The cooling packs keep cool. The low temperature in the tank is used for cooling the water.
The output air temperature is lower. And that lowers the temperature in the room
a. Add water to the tank at the quantity to reach mark 8 after placing the ICE BOXes inside
the tank.
b. Put ice cubes in the tank.
c. The unit is supplied with 2 ICE BOXes which can be used alternately, after filling with wa-
ter, if empty.
d. Do not replace the water in the ICE BOXes if they are filled because the cooling pack may
lose its cooling properties.
CLEANING AND MAINTENANCE
CAUTION BEFORE CLEANING, SWITCH OFF THE UNIT AND UNPLUG THE POWER CABLE.
CAUTION DO NOT USE WATER AT TEMPERATURE EXCEEDING 45°C FOR WASHING.
1. Cleaning the air filter’s cover
Disconnect the power supply plug, pull the air filter cover upwards, take it out and clean
using a neutral detergent and cloth. Then clean it with clear water and reinstall on the
cooler. Clean the filter’s cover at least once a month.
2. Cleaning the air filter
Disconnect the power supply plug, remove the air filter’s cover and the remove the filter
from the unit. Wash the filter using mild detergent and a soft cloth. Reinstall the filter in the
unit. Clean the filter at least once a month.
CAUTION DEPENDING ON THE WEATHER CONDITIONS, FREQUENCY OF USE, ETC., IT MAY BE REQUIRED TO CLEAN
THE AIR FILTER MORE OFTEN, EVEN ONCE A WEEK.
3. Water tank cleaning
Disconnect the power supply plug, drain 1/2 of the tank, remove the water filter and clean
using a soft brush. Wipe the inside of the tank with a soft cloth and a neutral detergent.
Periodically, remove calcium from the tank To do that, put calcium removing agent into the
tank and then repeatedly flush with clean water; use vinegar or citric acid with water as a
calcium remover.
CAUTION DEPENDING ON THE WEATHER CONDITIONS, FREQUENCY OF USE, ETC., IT MAY BE REQUIRED TO CLEAN
THE WATER TANK MORE OFTEN, EVEN ONCE A WEEK.
CAUTION TO PERFORM COMPLETE CLEANING OF THE TANK, UNSCREW COMPLETELY THE BOLT UNDER THE
BASE, REMOVE THE BOLT HOLDING THE WATER PUMP IN THE TANK.
4. Cleaning the unit
Clean the air cooler with a soft cloth with a cleaning agent and then wipe it dry.

16
GB
TROUBLESHOOTING
Problem Cause Solution
The cooler does not
work No power. Connect the power cable and make sure it works correctly.
Poor cooling effect
Filter grid is dirty. Remove and clean the air filter cover.
Air inlet or outlet is blocked. Remove the block.
Technical Data Sheet
MPM AGD S.A.
MODEL: MKL-01
Description Symbol Value Unit
Maximum flow rate of the fan [F] 10.43 m3/Min
Fan power [P] 60 W
Operating value [SV] 0.185 (m3/min)/W
Power consumption in standby mode [PSB] 0 W
Fan's sound power level [LWA]60 dB(A)
Maximum air speed [c] 2.41 m/s
Standards used for measuring the
operational values
PN-EN 50564:2011,
PN-EN 6074-1:2010,
PN-EN 6074-2-7:2002
To get additional information, contact MPM AGD S.A.
ul. Brzozowa 3
05-822 Milanówek
tel (22) 380-52-00
PROPER DISPOSAL OF THE PRODUCT (waste electrical and electronic equipment)
Poland This symbol on the product indicates that the product, after its lifetime, should not be disposed with other
household wastes. To avoid harmful influence on the environment and human health due to uncontrolled
waste disposal, dispose the waste device to the service point of waste household appliances or report
collecting it from home. In order to obtain detailed information about the location and how to dispose the
waste electrical and electronic equipment in a safe way, contact your retailer or local Department of Environmental
Protection. Do not dispose the device with other municipal waste.

17
DE
Vielen Dank für den Kauf des hochwertigen Klimageräts der Firma MPM. Vor Inbetriebnahme des
Gerätes lesen Sie bitte diese Bedienungsanleitung sorgfältig durch und bewahren sie für künftigen
Gebrauch auf.
SICHERHEITSHINWEISE
Das Gerät darf ausschließlich zu Hause, auf eine nachfolgend
dargestellte Art und Weise verwendet werden. Das Gerät
darf zu keinen anderen Zwecken gebraucht werden.
Gerät nicht im Außenbereich verwenden und stets in tro-
ckener Umgebung aufstellen.
Von Zeit zu Zeit Kabelzustand prüfen. Stromversorgungs-
kabel, Stecker oder das ganze Gerät nicht verwendet, wenn
diese beschädigt sind. Gerät nicht verwenden, wenn es an
ein Verlängerungskabel angeschlossen ist, es sei denn, das
Verlängerungskabel wurde von einem Elektrofachmann
oder Lieferanten elektrischer Bauteile geprüft und getestet.
Gerät nicht in der Nähe von Wärmequellen und an Stellen
direkter Sonneneinstrahlung aufstellen.
Bevor das Gerät von der Stromversorgung getrennt wird,
sollte es stets abgeschaltet werden.
Vor Reinigung, Teilaustausch oder Nichtverwendung Gerät
von der Stromversorgung trennen.
Gerät nach Bedienungsanleitung reinigen.
Sicherstellen, dass die auf dem Typenschild des Gerätes
genannte Nennspannung mit den Parametern der Strom-
versorgungsnetzes übereinstimmt. Durch Anschlussfehler
erlöschen die Garantieansprüche.

18
DE
Das Gerät darf nicht benutzt werden, falls das Gerät selbst,
das Kabel oder der Netzstecker beschädigt sind. In diesem
Fall muss das Gerät in einer autorisierten Fachwerkstatt
repariert werden.
Das Gerät kann von Kindern über 8 Jahren und von Personen
mit reduzierten physischen und mentalen Fähigkeiten oder
Mangel an Erfahrung und Wissen benutzt werden, wenn
sie beaufsichtigt oder bezüglich des sicheren Gebrauchs des
Gerätes unterwiesen wurden und die daraus resultierenden
Gefahren verstanden haben. Das Gerät darf von Kindern
ohne Aufsicht weder gereinigt noch gewartet werden.
Das Gerät und das Anschlusskabel dürfen nicht in die Reich-
weite von Kindern unter 8 Jahren gelangen.
Kinder dürfen nicht mit der Ausrüstung/dem Gerät spielen.
Gerät nicht durch Trennen des Steckers von der Stromver-
sorgungsanlage trennen.
Gerät nicht unbeaufsichtigt in Betrieb lassen. Gerät abschalten,
auch wenn es nur kurz unbeaufsichtigt in Betrieb sein sollte.
Beim Verschieben oder Trennen des Gerätes von der Strom-
versorgung nicht am Kabel zerren.
Das Gerät keinesfalls im Wasser oder anderen Flüssigkeiten
eintauchen.
Gerät von Wasser- oder Ölflecken fernhalten.
Klimagerät nicht in Badezimmern oder anderen Feuchträu-
men, in der Nähe von Badewannen oder Duschen anbringen
und betreiben.

19
DE
Gerät gemäß Reinigungsanweisung instand halten.
In die Luftauslassgitter keine scharfen Metallgegenstände
oder Finger stecken.
Gerät nicht eigenständig instand setzen. Alle nicht fachlich
durchgeführten Eingriffe können gefährlich sein. Alle In-
standsetzungen am Stromversorgungskabel müssen von
einem Elektrofachmann vorgenommen werden.
Keine nicht vom Lieferanten stammenden Teile verwenden.
Ihre Verwendung kann gefährlich sein und Beschädigungen
am Gerät verursachen.
Der Wasserspiegel im Behälter sollte den Höchstwert „MAX”
in der Skala niemals überschreiten. Beim Befeuchten sollte
der Wasserspiegel im Behälter den Wert „MIN” anzeigen.
Nach Befüllen des Behälters mit Wasser und Inbetriebnahme,
das Gerät weder kippen noch anstoßen. Sollte das Gerät an
eine andere Stelle umgestellt werden, Gerät langsam nach
vorne verschieben, dabei an den Gehäuseseiten festhalten,
sodass das Wasser im Behälter nicht verschüttet wird.
Aus Sicherheitsgründen sind lose Verpackungsteile (Kunst-
stoffbeutel, Kartons, Styropor etc.) von Kindern fern zu halten.
WARNUNG! Kinder nicht mit Folie spielen lassen.
Erstickungsgefahr!

20
DE
BESONDERE HINWEISE:
Gerät auf ebenem, von anderen Gegenständen freiem Untergrund aufstellen. Das Modul muss
in einem Abstand von mind. 50 cm von der Wand aufgestellt werden.
Nachdem das Gerät installiert wurde, muss freier Zugang zum Stecker gewährleistet werden.
Das Klimagerät stets vertikal aufstellen, sodass kein Wasser aus dem Gerät verschüttet wird.
Lufteintritts- und Luftaustrittsöffnungen nicht verdecken.
In der Nähe des Gerätes kein Spray (Insektizide, Farben) oder andere leicht brennbaren Produkte
verwenden, da ansonsten das Gehäuse sich verformen kann. Ferner könnten auch andere Teile
der Modulelektronik beschädigt werden.
Weder das Gerät noch den Stecker mit nassen Händen bedienen.
VERSORGUNGSQUELLEN:
Der Versorgungsstecker muss gut angeschlossen und nicht beschädigt sein.
Gerät niemals mithilfe von einem Verteiler an die Stromversorgung anschließen.
Gerät zuerst an der Stromversorgung anschließen, anschließend mit der Taste „0” betätigen.
BEI NICHTEINHALTUNG OBIGER SICHERHEITSHINWEISE HAFTET DER HERSTELLER FÜR KEINE BESCHÄDIGUNGEN
AM GERÄT.
DIESE BEDIENUNGSANLEITUNG AN SICHERER STELLE FÜR KÜNFTIGEN GEBRAUCH AUFBEWAHREN.
PRODUKTBESCHREIBUNG
„0”
Vertikale Jalousie
Horizontale Jalousie
Oszillierfunktion
Befeuchterfunktion
Feuchter, abkühlender Wasserfilter
Wasserfilter
Ablassschraube
Wasserbehälter
Kühleinsatz
Drehbare Räder
Wasserstandsanzeige
Griff
„0” Drehgeschwin-
digkeitsein-
stellung
Table of contents
Languages:
Other MPM Air Conditioner manuals
Popular Air Conditioner manuals by other brands

Mitsubishi Electric
Mitsubishi Electric Mr.SLIM MS24WN Service manual

Snap-On
Snap-On POLARTEK EEAC330B manual

Sanyo
Sanyo SAP-CMRV1923GJH Technical & service manual

Daikin
Daikin Super Multi Plus E-Series CTXG50EV1BW user manual

Whynter
Whynter ARC-12SDH instruction manual

Seifert
Seifert 87622082USL user manual

GE
GE AGE07 Owner's manual and installation instructions

PR KLIMA
PR KLIMA GPC10AL operating instructions

Panasonic
Panasonic CU-E9GFE-2 operating instructions

Samsung
Samsung AR18NSWSPWKXCV Service manual

Trane
Trane Packaged TerminalAir Conditioners & Heat... Installation operation & maintenance

Panasonic
Panasonic CS-MKE7NKU Technical & service manual