manuals.online logo
Brands
  1. Home
  2. •
  3. Brands
  4. •
  5. MSI
  6. •
  7. Laptop
  8. •
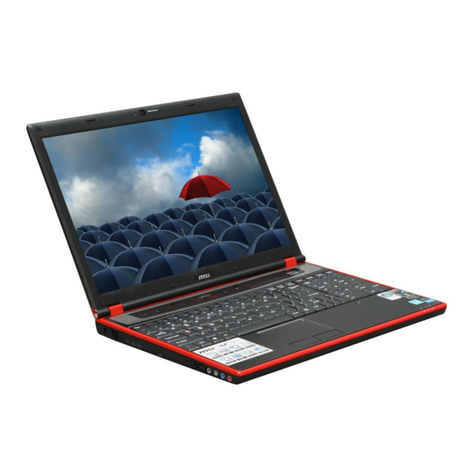
  9. MSI MS-IO36 User manual

MSI MS-IO36 User manual

Installation Guide
Copyright © 2006 MSI Computer Corp.
Overview:
MS-1036 is shipped out as a bare bone. Some of the components are equipped while some are not. This
installation guide provides you with the information of notebook hardware setup. Before assembling your
Notebook, please prepare the installation tools and appropriate items. If you are not clear about the
items, please contact your dealer for more information.
Package check list:
Optional Hardware Devices:
HDD, Mini PCI WLAN card, CPU, Memory
Before installing Devices in Notebook
• The peripheral devices contained herein depend on your actual system configuration.
• Third-party trademarks and names are the properties of their respective owners.
• The information contained herein is relevant to software and hardware references only and in
accordance with actual system configuration. All information is subject to change without notice.
Warning!
• Ensure power is turned off and Notebook Battery is removed before installing any hardware
devices.
• Use a grounded wrist strap before handling any computer components such as CPU, Memory,
HDD, mini-PCI Card, etc.
• Place components (CPU, Memory, HDD, mini-PCI Card, etc) on a grounded antistatic pad or on
the foam bed that came with the components whenever the components are separated from the
Notebook.
• If there are any difficulties installing hardware devices, please contact your dealer for further
information.
Open View
1. Cover latch
2. Display Panel
3. Quick Launch Buttons and Power button
4. Status LEDs
5. Keyboard
6. Touchpad
7. Stereo Speakers
8. Web Cam
Bottom View
1. CPU Compartment
2. Mini PCI Drive Compartment
3. Memory Compartment
4. Hard Disk Drive Compartment
5. Battery Unlock Button
6. Battery Pack
Rear View
Right view Left view
Open View
Step 1: Installing CPU
1-1 Lift the metal lever up until it can go no further.
1-2 a.b. Locate the golden cut edge on the CPU’s lower left-hand corner. Then insert the CPU into the
Socket
!!!The CPU will only fit in the correct orientation!!!
1-3 a.b. Adjust the CPU socket raising the lever. Make sure the CPU is properly installed. Then press the
CPU evenly by hand and lower the lever to lock the CPU in place.
!!! Please make sure the golden cut edge location is aligned with the notch of the CPU socket. If
the CPU does not align with the CPU socket, it will damage the CPU!!!
Step 2: Installing CPU Heat Sink and Fan
2-1 Use the Heat Sink and Fan that is provided.
2-2a.b. Plug the CPU fan connector before positioning the fan.
!!! Connect the wires correctly. There is only one way to connect. DO NOT force in. !!!
!!! Warning: failure to connect the fan may cause damage to the CPU or the notebook!!!
2-3 Slide the CPU Heat Sink and Fan over the CPU.
!!! Be sure that there are no wires underneath the Heat Sink. !!!
2-3a.b.c. Align the three screws with the screw holes next to the CPU. May need to slide the Heat Sink to
the side to align. Tighten the three screws in 1-3-2 order.
!!! Improper connection of the CPU heat sink will damage the notebook and CPU!!!
Step 3: Installing Notebook Memory
3-1a.b. Align the memory module to the DIMM socket 1.
!!! Memory module can only fit in one direction due to the keyed notch. Wrong orientation will
cause improper installation and may damage the memory modules or DIMM sockets!!!
3-2 Push down the memory module gently until the metal-locking levers aside from the DIMM socket 1 is
fastened.
3-3 If you have more than one memory module, please repeat steps 3-1 and 3-2.
!!! Memory module can only fit in one direction due to the keyed notch. Wrong orientation will
cause improper installation and may damage the memory modules or DIMM sockets!!!
Step 4: Installing Mini PCI WLAN Card
4-1a.b. Align the Mini PCI Card to the Mini PCI socket.
4-2 Adjust the attached antennas and push down the Mini PCI Card gently until the metal-locking levers
aside from the Mini PCI socket is fastened.
!!! Mini PCI Card can only fit in one direction due to the keyed notch. Wrong orientation will cause
improper installation and may damage the Mini PCI card or Mini PCI socket!!!
4-3a.b. Connect the Black wire to the Main Connector.
4-4a.b. After connecting the black wire, connect the Gray wire to the AUX connector.
4-5a.b. After connecting both the black wire and gray wire, connect the short black wire to the Bluetooth
connector.
4-5a.b.c.d.e. After installing the CPU, Memory, and Mini PCI Card, gently slide the cover until it locks into
position. Lock down the cover by applying 4 screws.
Step 5: Installing Notebook Hard Drive (HDD)
5-1a.b. Please use the given HDD shielding tray.
!!! Hard Drive may not be included !!!
5-2a.b. Insert the HDD into the given HDD shielding tray.
!!! Make sure that the screw holes to attach HDD to Notebook are on the opposite side of the HDD
Pins!!!
!!! Improper alignment will cause damage to the HDD and the Notebook!!!
5-3a.b.c.d. After inserting the shield over the HDD, fasten with the screws that are provided.
5-4 After installing the shield, slide the HDD into the HDD bay. Gently push the HDD towards the side
until HDD can go no further.
!!! Be sure to have HDD Plastic puller face up!!!
5-5a.b. Push HDD down into the HDD Bay. Tighten the two screws that are provides to secure the HDD
in place.
!!! Failure to apply 2 screws may cause HDD assembly to fall off in Notebook HDD area and will
damage the HDD and Notebook!!!
5-6 a.b.c. After installing the HDD, slide the cover then gently press down. Lock down the cover by
applying 2 screws.
Step 6: Installing the Battery
6-1a.b.c. Align battery to the battery slot and push down the battery gently.
Hint: If you wish to remove the battery, make sure the battery locking mechanism is in “Unlock”
position.
Step 7: Final Check
7-1 Check all steps and make sure to fasten all the components and screws before powering on your
Notebook.
!!! Improper installation of any device(s) and loosen screws may damage the Notebook after
powering on the notebook!!!
Hint: If you are unable to power on your notebook after following the above procedure, or if there
are any other issues, please contact your local retailer or national distributor for help.
Step 8: Entering BIOS
Before powering on the Notebook, plug in Notebook power adapter into the Notebook. After pressing the
power button, press <Del> immediately which will take you to the BIOS CMOS Setup Screen.
8-1 Adjust proper TIME by pressing <Enter>. Use <+> or <-> to configure System time.
8-2 Under “BOOT” menu in the BIOS Setup Utility, press <Enter> to select the first boot device. Have
the first boot device as “CD/DVD.”
8-3 Insert a Bootable OS CD into the OSD tray.
8-4 To save/exit the BIOS Setup Screen, go under the “Exit” menu press <Enter> under “Save Changes
and Exit.” Press <Enter> under the window that pops up to save/exit.
8-5 After seeing the Intel Logo, immediately press “Enter” in order to install OS and follow the given
setup messages.
8-6 After installing OS, insert the given Driver CD to install the appropriate drivers in order.
Hint: If you have any questions related to the BIOS Setup procedure or if there are any other
issues, please contact your local retailers or national distributors for further support.

Other MSI Laptop manuals

MSI GX630 - 001US - Athlon X2 2 GHz User manual

MSI

MSI GX630 - 001US - Athlon X2 2 GHz User manual

MSI GE66 Raider 10SGS-290IT User manual

MSI

MSI GE66 Raider 10SGS-290IT User manual

MSI Prestige 15 A10SC-034BE User manual

MSI

MSI Prestige 15 A10SC-034BE User manual

MSI CX720 User manual

MSI

MSI CX720 User manual

MSI GE78HX User manual

MSI

MSI GE78HX User manual

MSI MS-171F - Whitebook - 17 User manual

MSI

MSI MS-171F - Whitebook - 17 User manual

MSI MS-N0E1 Installation instructions

MSI

MSI MS-N0E1 Installation instructions

MSI 9SE-249UK User manual

MSI

MSI 9SE-249UK User manual

MSI VR602 User manual

MSI

MSI VR602 User manual

MSI MegaBook G52-B1032X1 User manual

MSI

MSI MegaBook G52-B1032X1 User manual

MSI A5EFK-076IT User manual

MSI

MSI A5EFK-076IT User manual

MSI PR210 - Megabook - Athlon 64 X2 1.7 GHz User manual

MSI

MSI PR210 - Megabook - Athlon 64 X2 1.7 GHz User manual

MSI GF66 User manual

MSI

MSI GF66 User manual

MSI VR620 User manual

MSI

MSI VR620 User manual

MSI MS-1722 - Whitebook ID1 - 17 User manual

MSI

MSI MS-1722 - Whitebook ID1 - 17 User manual

MSI X370 GAMING PRO CARBON User manual

MSI

MSI X370 GAMING PRO CARBON User manual

MSI GF65 Thin User manual

MSI

MSI GF65 Thin User manual

MSI U160MX User manual

MSI

MSI U160MX User manual

MSI Gaming Raider GE77HX User manual

MSI

MSI Gaming Raider GE77HX User manual

MSI GE68HX User manual

MSI

MSI GE68HX User manual

MSI CreatorPro M15 User manual

MSI

MSI CreatorPro M15 User manual

MSI A9SD-034IT User manual

MSI

MSI A9SD-034IT User manual

MSI EX630 User manual

MSI

MSI EX630 User manual

MSI GX660R User manual

MSI

MSI GX660R User manual

Popular Laptop manuals by other brands

HP Pavilion CRVSA-02T1-75 reference guide

HP

HP Pavilion CRVSA-02T1-75 reference guide

Dell Inspiron 14 3437 Specifications

Dell

Dell Inspiron 14 3437 Specifications

Toshiba Portege 7200CT user manual

Toshiba

Toshiba Portege 7200CT user manual

Lenovo ThinkPad L14 Gen 1 user guide

Lenovo

Lenovo ThinkPad L14 Gen 1 user guide

Toshiba P755D-S5384 Specifications

Toshiba

Toshiba P755D-S5384 Specifications

HP ENVY *360 15M Maintenance and service guide

HP

HP ENVY *360 15M Maintenance and service guide

Sony PCG-R505TE Primary Specifications

Sony

Sony PCG-R505TE Primary Specifications

Panasonic CF-30CTQAZ1 TOUGHBOOK Service manual

Panasonic

Panasonic CF-30CTQAZ1 TOUGHBOOK Service manual

Sony VAIO VGN-NR180E Specification sheet

Sony

Sony VAIO VGN-NR180E Specification sheet

Lenovo THINKPAD X30 Podręcznik konfigurowania

Lenovo

Lenovo THINKPAD X30 Podręcznik konfigurowania

Lenovo ThinkPad T400 Setup poster

Lenovo

Lenovo ThinkPad T400 Setup poster

Lenovo IdeaPad Flex 5i Chromebook Plus Hardware Maintenance Manual

Lenovo

Lenovo IdeaPad Flex 5i Chromebook Plus Hardware Maintenance Manual

Sony VAIO VPCEE3WFX/BJ Specification sheet

Sony

Sony VAIO VPCEE3WFX/BJ Specification sheet

Sharp Actius PC-MV10 Quick setup guide

Sharp

Sharp Actius PC-MV10 Quick setup guide

Lenovo 20UES2VU00 user guide

Lenovo

Lenovo 20UES2VU00 user guide

HP Pavilion XT236 Quick setup guide

HP

HP Pavilion XT236 Quick setup guide

Lenovo ThinkPad T61 Setup guide

Lenovo

Lenovo ThinkPad T61 Setup guide

Acer ASPIRE M5-582PT user manual

Acer

Acer ASPIRE M5-582PT user manual

manuals.online logo
manuals.online logoBrands
  • About & Mission
  • Contact us
  • Privacy Policy
  • Terms and Conditions

Copyright 2025 Manuals.Online. All Rights Reserved.