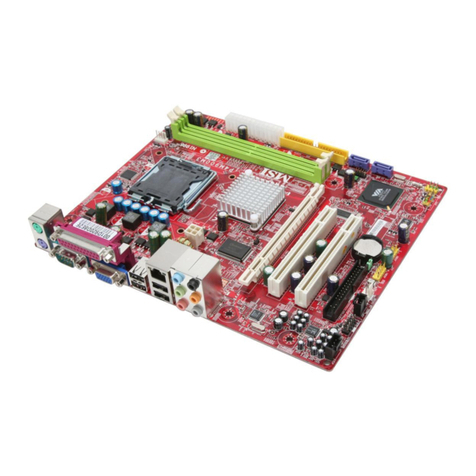
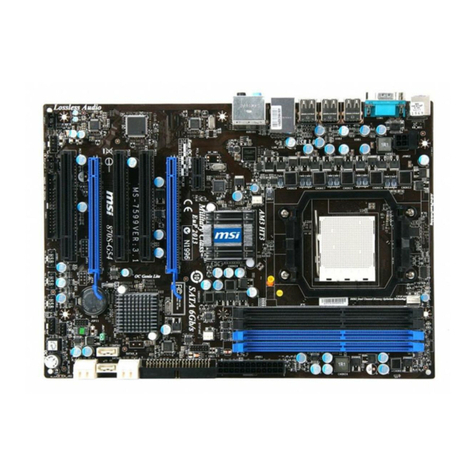
MSI MS-7298 User manual

i
FCC-BRadio FrequencyInterferenceStatement
Thisequipmenthasbeen tested and found tocomplywiththe limitsforaclass Bdigitaldevice,pursuant
topart15 ofthe FCC rules.Theselimitsaredesigned toprovide reasonableprotection againstharmful
interferenceinaresidentialinstallation. Thisequipmentgenerates,usesand can radiateradiofrequency
energyand,ifnotinstalled and used inaccordancewiththe instruction manual,maycauseharmful
interferencetoradiocommunications.However,thereis no guarantee thatinterferencewill occurina
particularinstallation.Ifthis equipmentdoescauseharmfulinterferencetoradioortelevision reception,
whichcan be determined byturning theequipment offand on, theuseris encouraged totrytocorrect the
interferencebyoneormoreof the measureslisted below.
4Reorient orrelocatethe receiving antenna.
4Increasetheseparation between the equipment andreceiver.
4Connecttheequipmentintoan outletonacircuitdifferentfromthattowhichthe receiveris
connected.
4Consult the dealeroran experienced radio/ television technician forhelp.
Notice1
The changesormodificationsnot expresslyapprovedbythe partyresponsibleforcompliancecouldvoid
the user sauthoritytooperatethe equipment.
Notice2
Shielded interfacecablesand A.C. powercord, if any, must be used inordertocomplywiththe emission
limits.
VOIRLANOTICEDNSTALLATIONAVANTDERACCORDERAU RESEAU.
Micro-StarInternational
MS-7298
This devicecomplieswithPart 15 of the FCC Rules. Operation is subject tothe following twoconditions:
(1)this devicemaynot causeharmfulinterference, and
(2)this devicemustacceptanyinterferencereceived,including interferencethatmaycauseundesired
operation
G52-72981X1

ii
CopyrightNotice
The materialinthisdocument is the intellectualpropertyofMICRO-STARINTERNATIONAL. Wetake
everycareinthepreparation of this document, but no guaranteeis givenastothe correctness of its
contents. Ourproductsareundercontinualimprovement and wereservethe right tomakechanges
without notice.
Trademarks
All trademarksarethe propertiesof theirrespectiveowners.
AMD, Athlon™Athlon™XP,Thoroughbred™andDuron™areregistered trademarksofAMDCorporation.
Intel®and Pentium®areregistered trademarksof IntelCorporation.
PS/2and OS®2areregistered trademarksofInternationalBusiness MachinesCorporation.
Microsoft®is aregistered trademarkofMicrosoft Corporation.Windows®98/2000/NT/XPareregistered
trademarksofMicrosoft Corporation.
NVIDIA,the NVIDIAlogo, DualNet, and nForceareregistered trademarksortrademarksof NVIDIA
Corporation inthe United Statesand/orothercountries.
Netware®is aregistered trademarkof Novell, Inc.
Award®is aregistered trademarkofPhoenixTechnologiesLtd.
AMI®is aregistered trademarkofAmerican MegatrendsInc.
Kensington andMicroSaverareregistered trademarksof the KensingtonTechnologyGroup.
PCMCIAandCardBusareregistered trademarksof the PersonalComputerMemoryCardInternational
Association.
Revision History
Revision Revision HistoryDate
V1.0First releaseforPCB1.XJune 2006

iii
SafetyInstructions
1.Alwaysread thesafetyinstructionscarefully.
2.Keep this UserManualforfuturereference.
3.Keep this equipment awayfromhumidity.
4.Laythis equipment on areliableflat surfacebeforesetting it up.
5.The openingson the enclosureareforairconvection henceprotectsthe equipment fromoverheating.
Donot coverthe openings.
6.Makesurethe voltage of thepowersourceandadjust properly110/220Vbeforeconnecting the
equipment tothe powerinlet.
7.Placethe powercordsuchawaythat peoplecan not step on it. Donot placeanything overthe power
cord.
8.AlwaysUnplug thePowerCordbeforeinserting anyadd-on cardormodule.
9.All cautionsand warningson the equipment shouldbe noted.
10.Neverpouranyliquidintothe opening that coulddamage orcauseelectricalshock.
11.Ifanyof the following situationsarises, get the equipment checkedbyaservicepersonnel:
-The powercordorplug is damaged.
-Liquidhaspenetrated intothe equipment.
-The equipment hasbeen exposed tomoisture.
-The equipment doesnot workwell oryou can not get it workaccording toUserManual.
-The equipment hasdropped and damaged.
-The equipment hasobvioussign of breakage.
12.Donot leavethis equipment inan environment unconditioned, storagetemperatureabove60°C
(140°F), it maydamage theequipment.
CAUTION:Dangerofexplosionifbatteryisincorrectlyreplaced.Replaceonlywiththe
sameorequivalenttyperecommended bythemanufacturer.

iv
WEEE Statement
English
Toprotect the globalenvironment and asan environmentalist, MSImust remindyou that...
Underthe EuropeanUnion ("EU")DirectiveonWasteElectricaland Electronic Equipment, Directive
2002/96/EC, whichtakeseffectonAugust13,2005,productsof"electricaland electronic equipment"
cannot be discarded asmunicipalwasteanymoreand manufacturersof coveredelectronic equipment will
be obligatedtotakebacksuchproductsattheendoftheirusefullife.MSIwill complywiththeproduct
takebackrequirementsatthe end oflifeofMSI-branded productsthataresoldintothe EU. You can
returntheseproductstolocalcollection points.
Deutsch
Hinweis von MSIzurErhaltungundSchutzunsererUmwelt
Gemäß derRichtlinie2002/96/EG überElektro-undElektronik-Altgerätedürfen Elektro-und
Elektronik-Altgerätenichtmehrals kommunaleAbfälleentsorgtwerden.MSIhateuropaweit
verschiedene Sammel-und Recyclingunternehmen beauftragt, dieindieEuropäische Union inVerkehr
gebrachten Produkte,amEnde seinesLebenszykluszurückzunehmen.Bitteentsorgen Siedieses
Produkt zumgegebenen Zeitpunkt ausschliesslichan einerlokalen AltgerätesammelstelleinIhrerNähe.
Fran ais
Entantqu écologisteet afinde protégerl environnement, MSI tient àrappelerceci...
Ausujetde ladirectiveeuropéenne (EU)relativeauxdéchetsdes équipement électriqueset
électroniques,directive2002/96/EC, prenanteffetle13 août2005,quelesproduits électriqueset
électroniquesne peuvent êtredéposésdanslesdéchargesou toutsimplementmis àlapoubelle.Les
fabricantsde ces équipementsseront obligésde récupérercertainsproduitsenfinde vie.MSIprendraen
comptecetteexigencerelativeau retourdesproduitsen finde vieau seinde lacommunautéeuropéenne.
Parconséquentvouspouvezretournerlocalement cesmatériels danslespointsde collecte.
Русский
Компания MSI предпринимает активные действия по защите окружающей среды, поэтому
напоминаем вам, что....
Всоответствии сдирективой Европейского Союза (ЕС) по предотвращению загрязнения
окружающей среды использованным электрическим иэлектронным оборудованием (директива
WEEE 2002/96/EC), вступающей всилу 13 августа 2005 года, изделия, относящиеся к
электрическому иэлектронному оборудованию, не могут рассматриваться как бытовой мусор,
поэтому производители вышеперечисленного электронного оборудования обязаны принимать его
для переработки по окончании срока службы.MSI обязуется соблюдать требования по приему
продукции, проданной под маркой MSI на территории EC, впереработку по окончании срока
службы. Вы можете вернуть эти изделия вспециализированные пункты приема.
Español
MSIcomoempresacomprometida con laproteccióndelmedioambiente, recomienda:
Bajoladirectiva2002/96/ECde laUniónEuropea en materiade desechosy/o equiposelectrónicos,con
fecha de rigordesdeel13de agostode2005,losproductosclasificadoscomo"eléctricosyequipos
electrónicos"no puedenserdepositadosen loscontenedoreshabitualesde sumunicipio, losfabricantes
de equiposelectrónicos,estánobligadosa hacersecargo de dichosproductosaltermino de superíodo
de vida.MSIestarácomprometido con lostérminosde recogida de susproductosvendidosen laUnión
Europea alfinalde superiodo de vida.Usted debe depositarestosproductosen elpuntolimpio
establecido porelayuntamientode sulocalidad oentregarauna empresaautorizada paralarecogida de
estosresiduos.
Nederlands
Omhet milieu tebeschermen, wil MSIueraan herinneren dat….
Derichtlijnvan deEuropeseUnie(EU)metbetrekking totVervuiling van Electrische en Electronische
producten (2002/96/EC),dieop 13Augustus2005 inzalgaan kunnen niet meerbeschouwdworden als
vervuiling.
Fabrikanten van dit soort producten worden verplicht omproducten retourtenemen aan het eind vanhun
levenscyclus.MSIzalovereenkomstigde richtlijnhandelen voorde producten diede merknaamMSI
dragen enverkochtzijninde EU. Dezegoederen kunnengeretourneerdwordenop lokale
inzamelingspunten.
v
Srpski
Dabizaštitili prirodnu sredinu, ikaopreduzećekojevodiračuna ookoliniiprirodnojsredini, MSImorada
vaspodestida…
PoDirektiviEvropskeunije("EU")oodbačenojekektronskojielektričnojopremi,Direktiva2002/96/EC,
kojastupa na snagu od 13. Avgusta2005, proizvodikoji spadajupod "elektronskuielektričnu opremu"ne
mogu višebitiodbačenikaoobičan otpadiproizvođačioveopremebićeprinuđenida uzmunatragove
proizvodena krajunjihovog uobičajenog vekatrajanja.MSI ćepoštovatizahtevopreuzimanjuovakvih
proizvodakojimajeistekao vektrajanja,koji imajuMSIoznakuikoji suprodatiuEU. Oveproizvode
možetevratitina lokalnimmestimazaprikupljanje.
Polski
Abychronićnasze środowiskonaturalne orazjakofirmadbającaoekologię,MSIprzypomina, że...
ZgodniezDyrektywąUnii Europejskiej("UE")dotyczącąodpadówproduktówelektrycznychi
elektronicznych(Dyrektywa2002/96/EC),którawchodziw życie13 sierpnia2005,tzw. “produktyoraz
wyposażenieelektryczne ielektroniczne "niemogąbyćtraktowane jako śmiecikomunalne,takwięc
producenci tychproduktówbędązobowiązanido odbieraniaichwmomenciegdyproduktjest
wycofywanyzużycia.MSIwypełniwymaganiaUE,przyjmującprodukty(sprzedawane na terenieUnii
Europejskiej)wycofywane zużycia.ProduktyMSIbędziemożna zwracaćwwyznaczonychpunktach
zbiorczych.
TÜRKÇE
Çevreci özelliğiylebilinen MSIdünyada çevreyikorumakiçinhatırlatır:
AvrupaBirliği(AB)Kararnamesi ElektrikveElektronik MalzemeAtığı,2002/96/ECKararnamesi altında 13
Ağustos2005 tarihinden itibaren geçerli olmak üzere,elektrikli veelektronikmalzemelerdiğeratıklargibi
çöpe atılamayacakvebu elektonikcihazların üreticileri,cihazlarınkullanımsüreleribittikten sonra ürünleri
geritoplamaklayükümlüolacaktır.Avrupa Birliğine satılan MSImarkalıürünlerinkullanımsüreleri
bittiğinde MSI ürünleringerialınmasıisteğiileişbirliğiiçerisinde olacaktır. Ürünleriniziyereltoplama
noktalarına bırakabilirsiniz.
ČESKY
Záleží námna ochraněživotního prostředí-společnost MSI upozorňuje...
PodlesměrniceEvropskéunie("EU")olikvidaci elektrickýchaelektronických výrobk 2002/96/EC platné
od 13.srpna2005jezakázánolikvidovat"elektrickéaelektronickévýrobky"vběžnémkomunálním
odpaduavýrobci elektronickýchvýrobk ,nakterésetatosměrnicevztahuje,budoupovinniodebírat
takovévýrobkyzpětpo skončeníjejich životnosti.SpolečnostMSIsplnípožadavkyna odebírání
výrobk značkyMSI,prodávanýchvzemíchEU, po skončeníjejich životnosti.Tytovýrobkym žete
odevzdatvmístníchsběrnách.
MAGYAR
Annak érdekében,hogykörnyezetünketmegvédjük,illetvekörnyezetvédőkéntfellépveazMSI
emlékezteti Önt, hogy...
AzEurópaiUnió(„EU")2005.augusztus13-ánhatályba lépő,azelektromos éselektronikus
berendezésekhulladékairólszóló2002/96/EK irányelveszerintazelektromos éselektronikus
berendezésektöbbénemkezelhetőeklakosságihulladékként, ésazilyen elektronikusberendezések
gyártóikötelesséválnakazilyentermékekvisszavételéreazokhasznos élettartamavégén.AzMSI
betartjaatermékvisszavétellelkapcsolatoskövetelményeketazMSImárkanévalatt azEU-nbelül
értékesített termékekesetében,azok élettartamánakvégén.Azilyentermékeketalegközelebbi
gyűjtőhelyreviheti.
Italiano
Perproteggerel ambiente,MSI, da sempreamicadellanatura, tiricorda che….
InbaseallaDirettivadellUnione Europea(EU)sulloSmaltimentodeiMaterialiElettricied Elettronici,
Direttiva2002/96/ECinvigoredal13Agosto2005,prodottiappartenentiallacategoriadeiMateriali
Elettrici ed Elettronicinon possono piùessereeliminaticomerifiutimunicipali:iproduttorididettimateriali
saranno obbligatiaritirareogniprodottoallafine delsuo ciclodivita.MSIsi adegueràataleDirettiva
ritirando tuttiiprodottimarchiatiMSIche sono stativendutiallinterno dellUnione Europeaallafine del
lorociclodivita. Èpossibileportareiprodottinelpiùvicino puntodiraccolta.

vi
TableofContent
English....................................................................1
Fran ais..................................................................13
Deutsch...................................................................25
Русском ..................................................................39
体中文...................................................................53
體中文...................................................................65
日本語 ......................................................................77

1
Introduction
Thankyouforchoosing K9NGNeo-VSeries(MS-7298 v1.0)ATXmainboard.TheK9NGNeo-V
Seriesisbased on NVIDIA®C51G&NVIDIA®MCP51Gchipsetsforoptimal systemefficiency.
Designed tofittheadvancedAMD®Sempron /Athlon 64/UnderAthlon 64 FXprocessorsfor
SocketAM2,theK9NGNeo-VSeriesdeliversahighperformanceandprofessional desktop
platformsolution.
Layout

2
Specifications
CPU
lSupportsSocketAM2forAMDSempron/Athlon64/ UnderAthlon 64FXprocessor
(Forthelatest information aboutCPU,pleasevisit:
http://www.msi.com.tw/program/products/mainboard/mbd/pro_mbd_cpu_support.php)
Chipset
lNorthbridge:NVIDIA®C51G
lSouthbridge: NVIDIA®MCP51G
Main Memory
lDual channel memoryarchitecture(DIMM1mustbefirstinstalled)
l2x240-pinslots, support DDRII 667/800memorymodules.
(Fortheupdatedsupportingmemorymodules,pleasevisit:
http://www.msi.com.tw/program/products/mainboard/mbd/pro_mbd_trp_list.php)
Slots
lOnePCI Express x16Slot
lOnePCI Express x1Slot
lThreePCI Slots
On-BoardPeripherals
lExternal
-1xPS/2mouseconnector
-1xPS/2keyboardconnector
-1xParallel port
-1xCOMport
-1xVGAport
-4xUSBconnectors
-1xRJ-45connector
-1xAudiojack
lInternal
-2xFront Panelpinheaders
-2xFront USBpinheaders(4ports)
-1xCOMpinheader
-1xCPUFan connector
-1xSystemFan connector
-1xClearCMOSconnector
-1xChassisIntrusion Switchconnector
-1xFrontAudiopinheader
-2xIDE(ATA133)connectors
-1xFloppyconnector
-1xCD-inconnector
-2xSATAconnectors
-2xPowerconnectors

3
Audio
lAC97linkcontrollerintegratedinNVIDIA®MCP51Gchipset.
l6-channelaudiocodecRealtekALC658.
l6-channelaudiocodecRealtekALC655 (Option)
-CompliancewithAC97v2.3Spec.
-MeetPC2001 audioperformancerequirement.
On-Board LAN
lRealtek®RTL8201CL
-IntegratedFast EthernetMACandPHYinonechip.
-Supports10Mb/s,100Mb/s.
-CompliancewithPCI 2.2.
-SupportsACPIPowerManagement.
BIOS
lAMIWinbond FlashROM
Dimension
lATXFormFactor:30.5cm(W)x20cm(D)
Mounting
l6mountingholes

4
Goldarrow
Correct CPU
placement
Rear Panel
The rearpanelprovidesthefollowing connectors:
HardwareSetup
Thischaptertellsyou howtoinstalltheCPU,memorymodules,andexpansioncards,aswellas
howtosetupthejumperson themainboard.It alsoprovidestheinstructionson connecting the
peripheraldevices,suchasthemouse, keyboard,etc.Whiledoingtheinstallation,becarefulin
holdingthecomponentsandfollowtheinstallation procedures.
(Forthelatest information aboutCPU,pleasevisit:
http://www.msi.com.tw/program/products/mainboard/mbd/pro_mbd_cpu_support.php)
Central ProcessingUnit: CPU
The mainboardsupportsAMD®Sempron /Athlon 64/UnderAthlon64 FXprocessors.The
mainboardusesaCPUsocket calledSocketAM2940-pinforeasyCPUinstallation.
CPUInstallationProceduresforSocketAM2
1.Pleaseturnoffthepowerand unplug thepowercordbefore
installing theCPU.
2.Pulltheleversidewaysawayfromthesocket. Makesuretoraise
theleverup toa90-degree angle.
3.LookforthegoldarrowoftheCPU.Thegold arrowshouldpoint as
showninthepicture.TheCPUcan onlyfit inthecorrectorientation.
4.IftheCPUiscorrectlyinstalled, thepinsshouldbecompletelyembedded intothesocketand
can notbeseen.Pleasenotethatanyviolation ofthecorrectinstallation proceduresmay
causepermanent damagestoyourmainboard.
5.Press theCPUdownfirmlyintothesocketandclosethelever.AstheCPUislikelytomove
whiletheleverisbeingclosed,alwaysclosetheleverwithyourfingerspressingtightlyon top
oftheCPUtomakesuretheCPUisproperlyandcompletelyembedded intothesocket.
MSI RemindsYou...
Overheating
Overheatingwillseriouslydamage the CPUandsystem; always makesurethe cooling fancan
workproperlytoprotecttheCPUfromoverheating.
ReplacingtheCPU
Whilereplacingthe CPU,always turnoff the ATXpowersupplyorunplugthepowersupply
powercordfromgroundedoutlet first toensurethesafetyof CPU.

5
Overclocking
Thismotherboardisdesignedtosupportoverclocking.However,pleasemakesureyour
componentsareable totoleratesuchabnormalsetting, whiledoingoverclocking. Anyattemptto
operatebeyond productspecificationsisnotrecommended. Wedo notguaranteethe
damagesorrisks causedbyinadequateoperation orbeyond productspecifications.
CPUandCooler Installation
WhenyouareinstallingtheCPU, makesuretheCPUhasacoolerattached onthetop toprevent
overheating.Ifyoudonothavethecooler,contactyourdealertopurchaseandinstallthem
beforeturning on thecomputer.Meanwhile,donotforgettoapplysomesilicon heattransfer
compoundon CPUbeforeinstallingthecoolerforbetterheatdispersion.
Followthestepsbelowtoinstall theCPU&coolercorrectly.Wronginstallation will causethe
damageof yourCPU&mainboard.
1.Positionthecoolingsetontotheretention mechanism.
Hookoneendofthecliptohookfirst.
2.Then press downtheotherend oftheclip tofasten the
coolingsetonthetop oftheretentionmechanism.
LocatetheFixLeverandlift upit.
3.Fasten downthelever.
4.AttachtheCPUfancabletotheCPUfanconnectoron
themainboard.
MSI RemindsYou...
1. Confirmif yourCPUcoolerisfirmlyinstalledbeforeturningonyoursystem.
2. Check the information inPCHealthStatusof H/WMonitorinBIOSfortheCPUtemperature.
3. Pleasenotethatthemating/unmatingdurabilityoftheCPUis20 cycles. Thereforewesuggest
you do not plug/unplugtheCPUtoo often.

6
Notch
Volt
Memory
Themainboardprovidestwo240-pin unbuffered DDR II 667/800DIMMslots,and supportsthe
memorysizeup to2GB.Tooperateproperly,atleastonememorymodulemustbeinstalled.
Installat leastonememorymoduleon theslots. Memorymodulescan beinstalled on theslotsin
anyorder.You can install eithersingle-ordouble-sided modulestomeet yourownneeds.
Installing DDRII Modules
The memorymodulehasonlyoneNotchonthecenterofmodule.Thememorymodulewillonly
fit in therightorientation.
1.InsertthememorymoduleverticallyintotheDIMMslot.Then pushitinuntilthegoldenfinger
on thememorymoduleisdeeplyinsertedintheDIMMslot.
2.The plasticclipat eachsideoftheDIMMslot willautomaticallyclose.
ATX24-PinPower Connector:ATX1
ThisconnectorallowsyoutoconnectanATX24-pinpowersupply.To
connecttheATX24-pinpowersupply,makesuretheplugofthepower
supplyisinserted intheproperorientationandthepinsarealigned.
Then pushdownthepowersupplyfirmlyintotheconnector.
Youmayusethe20-pin ATXpowersupplyasyoulike.Ifyou dliketo
usethe20-pin ATXpowersupply,pleaseplugyourpowersupplyalong
withpin1&pin13. Thereisalsoafoolproof designonpin11,12,23 &
24 toavoidwronginstallation.
ATX12VPower Connector:PWRCONN1
This12Vpowerconnectorisused toprovidepowertotheCPU.
FloppyDisk DriveConnector:FDD1
The mainboardprovidesastandardfloppydiskdriveconnectorthatsupports360K,
720K,1.2M,1.44Mand2.88Mfloppydisktypes.
IDEConnector:IDE1/IDE2
The mainboardhasdual UltraDMA33/66/100/133controllerthatprovidesPIOmode
0~4,BusMaster,andUltraDMA33/66/100/133function.You canconnectuptofour
harddiskdrives, CD-ROM,120MBFloppyand otherdevices.
The first harddriveshouldalwaysbeconnected toIDE1. IDE1can connectaMasterand
aSlavedrive.Youmust configuresecondharddrivetoSlavemodebysetting thejumper
accordingly.
1
3
4
2
GND
12V
GND
12V
1
12
24
13
+3.3V
+3.3V
-12V
+3.3V
GND GND
PS-ON#
+5V
GND GND
GND +5V
GND GND
Res
PWR OK
+5V 5VSB
+5V +12V
+5V +12V
GND NC

7
ControlControl
SENSOR
+12V
GND
GND
+12V
NC
CPU_FAN
SYS_FAN
(2)AUD_GND
AUD_VCC
AUD_RET_R
Key
AUD_RET_L(10)
(1)AUD_MIC
AUD_MIC_BIAS
AUD_FPOUT_R
HP_ON
AUD_FPOUT_L(9)
JFP1
Power
LED
HDD
LED
Reset
Switch
Power
Switch
1
9
2
10
MSI RemindsYou...
If youinstall twoharddisks ononecable, youmust configuretheseconddrivetoSlavemode by
setting itsjumper. Refertotheharddisk documentation suppliedbyharddisk vendorsforjumper
setting instructions.
SerialATAConnectors:SATA1/ SATA2
The mainboardprovidestwohigh-speedSerialATAinterfaceports.Theseportssupport
SerialATAdataratesof150MB/sandarefullycompliantwithSerialATA1.0
specification. EachSerialATAconnectorcanconnectto1harddiskdevice.
MSI RemindsYou...
Pleasedonotfold theserialATAcableina90-degreeangle,whichwill causetheloss ofdata
duringtransmission.
CD-In Connector:JCD1
The connectorisforCD-ROMaudioconnector.
ChassisIntrusionSwitch Connector:JCI1
Thisconnectorisconnected toa2-pinchassisswitch.JCI1iscompliantwith
Intel®FrontPanel I/OConnectivityDesignGuide.
FanPower Connectors:CPU_FAN/SYS_FAN(optional)
The 4-pinCPU_FAN(processorfan),3-pinSYS_FAN
(systemfan)supportsystemcoolingfan with+12V.
CPUFANcan support three-orfour-pin headconnector.
Whenconnecting thewiretotheconnectors,alwaystake
notethatthered wireisthepositiveandshouldbeconnected tothe+12V,theblackwireis
Groundandshouldbeconnected toGND.IfthemainboardhasaSystemHardwareMonitor
chipseton-board,youmust useaspeciallydesigned fanwithspeedsensortotakeadvantageof
theCPUfan control.
MSI RemindsYou...
Always consultthevendorsfortheproperCPUcoolingfan.
FrontPanel Connectors:JFP1/JFP2
The mainboardprovidestwofrontpanel connectorsfor
electrical connectiontothefrontpanelswitchesandLEDs. JFP1
iscompliant withIntel®Front Panel I/OConnectivityDesign Guide.
FrontPanelAudio Connector:JAUD1
The frontpanel audioconnectorallowsyouto
connecttothefrontpanel audioandiscompliant
withIntel®FrontPanel I/OConnectivityDesign
Guide.
L
R
GND
GND
CINTRU
1
2
1
7
JFP2
Power
LED
Speaker
1
7
2
8

8
(2)VCC
USB1- GND
GND
USB0-
USB0+
USB1+
USB0C(10)
(1)VCC Key(9)
3
3
3
1
1
1
2
2
2
KeepData
ClearData
MSI RemindsYou...
If youdonotwanttoconnecttothefrontaudio header,pins5&6,9&10have
tobe jumperedin ordertohavesignaloutputdirectedtotherearaudioports.
Otherwise,theLine-Out connectorontheback panelwill not function.
FrontUSBConnector:JUSB1/ JUSB2
The mainboardprovidestwostandardUSB2.0pinheaders
JUSB1&JUSB2.USB2.0technologyincreasesdatatransfer
rateup toamaximumthroughputof480Mbps,whichis40
timesfasterthanUSB 1.1,andisidealforconnecting
high-speedUSBinterfaceperipheralssuchasUSBHDD,
digital cameras,MP3players, printers,modemsand thelike.
MSI RemindsYou...
Pleasenotethatthe pinsofVCC &GND mustbeconnectedcorrectlyoritmaycausesome
damage.
Serial PortConnector:JCOM1
The mainboardoffersone9-pin maleDINconnector(ontherearpanel),and
oneoptional serial portJCOM1.Bothare16550Ahigh speed communication
portsthatsend/receive16bytesFIFOs.Youcanattachaserial mouseorotherserial device
directlytothem.
PIN
SIGNAL
DESCRIPTION PIN
SIGNAL
DESCRIPTION
1
3
5
7
9
DCD
SOUT
GND
RTS
RI
DataCarryDetect
ReceiveDataTransmit
Data
Request ToSendRing
Indicate
2
4
6
8
10
SIN
DTR
DSR
CTS
X
Serial inorreceivedata
Serial outortransmitdata
DataSet Ready
ClearToSend
X
Clear CMOSJumper:JBAT2
ThereisaCMOSRAMonboardthathasapowersupply
fromexternal batterytokeep thedataofsystem
configuration.WiththeCMOSRAM,thesystemcan
automaticallybootOSeverytimeitisturned on.Ifyou wanttoclearthesystemconfiguration,
usetheJBAT2(ClearCMOSJumper) tocleardata.Followtheinstructionsintheimagetoclear
thedata.
MSI RemindsYou...
Youcan clearCMOSbyshorting2-3pin whilethe systemisoff.Thenreturnto1-2pin position.
Avoid clearingtheCMOSwhilethesystemison, whichwill damagethe mainboard.

9
PCI Express Slots
The PCIExpress slot,asa
high-bandwidth,lowpincount,serial,
interconnecttechnology;supportIntel
highestperformancedesktopplatforms
utilizingtheIntelPentium4processor
withHTTechnologywiththeseplatform
benefits.You can inserttheexpansion
cardstomeetyourneeds.When addingorremovingexpansioncards,makesurethatyou
unplug thepowersupplyfirst. PCIExpress architectureprovidesahighperformanceI/O
infrastructureforDesktop Platformswithtransferratesstartingat2.5Gigatransferspersecond
overaPCIExpress x1laneforGigabitEthernet,TVTuners,1394controllers,andgeneral
purposeI/O.Also,desktopplatformswithPCIExpress Architecturewillbedesigned todeliver
highestperformanceinvideo,graphics,multimediaandothersophisticatedapplications.
Moreover,PCIExpressarchitectureprovidesahighperformancegraphics infrastructurefor
DesktopPlatformsdoublingthecapabilityofexistingAGP8xdesignswithtransferratesof4.0
GB/soveraPCIExpress x16 laneforgraphics controllers,while PCIExpress x1supports
transferrateof 250MB/s.
PCI (PeripheralComponentInterconnect) Slots
ThePCIslotsallowyou toinserttheexpansion cardsto
meetyourneeds. Whenaddingorremovingexpansion
cards,makesurethatyouunplug thepowersupplyfirst. Meanwhile, read thedocumentation for
theexpansioncardtomakeanynecessaryhardwareorsoftwaresettingsfortheexpansioncard,
suchasjumpers, switchesorBIOSconfiguration.
PCI InterruptRequestRouting
TheIRQ,abbreviation ofinterruptrequestlineandpronounced I-R-Q,arehardwarelinesover
whichdevicescansendinterruptsignalstothemicroprocessor.ThePCIIRQpinsaretypically
connected tothePCIbusINTA#~INT D#pinsasfollows:
Order1 Order2 Order3 Order4
PCI Slot 1
INTA# INT B# INT C# INT D#
PCI Slot 2
INT B# INT C# INT D# INTA#
PCI Slot 3
INT C# INT D# INTA# INT B#
PCI Express X16Slot
PCI Express X1Slot

10
BIOSSetup
Poweronthecomputerandthesystemwillstart POST(PowerOnSelfTest)process. Whenthe
messagebelowappearson thescreen,press <DEL>keytoenterSetup.
DEL:Setup
Ifthemessagedisappearsbeforeyourespondandyoustill wishtoenterSetup,restartthe
systembyturning it OFF andOnorpressingtheRESETbutton.You mayalsorestart thesystem
bysimultaneouslypressing<Ctrl>,<Alt>, and <Delete> keys.
MainPage
Standard CMOSFeatures
Usethismenuforbasicsystemconfigurations, suchastime, dateetc.
Advanced BIOSFeatures
UsethismenutosetuptheitemsofAwardspecial enhancedfeatures.
AdvancedChipsetFeatures
Usethismenutochangethevaluesinthechipsetregistersandoptimizeyoursystem
performance.
IntegratedPeripherals
Usethismenutospecifyyoursettingsforintegrated peripherals.
PowerManagementSetup
Usethismenutospecifyyoursettingsforpowermanagement.
PNP/PCIConfiguration
Thisentryappearsif yoursystemsupportsPnP/PCI.
H/W Monitor
Thisentryshowsinformation of yourCPU, fan andoverall systemstatus.

11
Cell Menu
UsethismenutospecifyyoursettingsforCPU/AGPfrequency/voltagecontrol andoverclocking.
LoadOptimizedDefaults
UsethismenutoloadfactorydefaultsettingsintotheBIOSforstablesystemperformance
operations.
BIOSSettingPassword
Usethismenutoset password.
Save&ExitSetup
SavechangestoCMOSandexit setup.
ExitWithoutSaving
Abandonall changesand exitsetup.
Cell Menu
CurrentCPUClock,CurrentMemorySpeed
Thesetwoitemsshowthecurrentclocksof CPU&DDR memoryfrequency.Read-only.
AdjustCPUFSBFrequency
Thissettingallowsyoutoselect theclock frequencyofCPUFSB.
CPUSpreadSpectrum
ThissettingisusedtoenableordisabletheCPUSpreadSpectrumfeature.Whenoverclocking
theCPU,alwayssetitto[Disabled].
PCIESpreadSpectrum
ThissettingisusedtoenableordisablethePCIESpread Spectrumfeature.
Cool’n’Quiet
ThisfeatureisespeciallydesignedforAMDprocessor,whichprovidesaCPUtemperature

12
detecting function topreventyourCPU sfromoverheadingduetotheheavyworkingloading.
AdjustDDRVoltage
AdjustingtheDDRvoltagecanincreasetheDDRspeed.Anychangesmadetothissetting
maycauseastabilityissue,sochangingtheDDRvoltageforlong-termpurposeisNOT
recommended.
Load Optimized Defaults
Youcanloadthedefaultvaluesprovided bythemainboardmanufacturerforthestable
performance.

13
Introduction
Félicitation vousvenezdacheterlessériesK9NGNeo-V(MS-7298v1.0)ATX,unecartemère
excellentedeMSI.lessériesK9NGNeo-VsontbaséessurleschipsetsNVIDIA®C51G&
NVIDIA®MCP51Gpourobtenirunsystèmeperformant.Destinéauxprocesseursavancés
AMD®Sempron /Athlon64 / UnderAthlon64FXpourleSocket AM2.LessériesK9NGNeo-V
offrentdehautesperforrmancestantauxparticuliersqu auxprofessionnels.
Layout

14
Spécificités
CPU
lSupportelesprcesseursSocketAM2pourAMDSempron/Athlon 64/UnderAthlon 64FX
(Pourplusdinformations,veuillezvisiter:
http://www.msi.com.tw/program/products/mainboard/mbd/pro_mbd_cpu_support.php)
Chipset
lPont Nord:NVIDIA®C51G
lPont Sud:NVIDIA®MCP51G
MémoirePrincipale
lArchitecturedemémoireavecanal double(DIMM1doitdabord êtreinstallé)
lSlots2x240-pin, supportelesmodulesdemémoireDDRII667/800.
(Pourunemise àjoursurlesmodèlesdemémoiressupportés,veuillezvisiter:
http://www.msi.com.tw/program/products/mainboard/mbd/pro_mbd_trp_list.php)
Slots
lUnslot PCI Express x16
lUnslot PCI Express x1
lTroisslotsPCI
Périphériquesintégrés
lExterne
-1xPS/2connecteursouris
-1xPS/2connecteurclavier
-1xport parallèle
-1xport COM
-1xport VGA
-4xconnecteursUSB
-1xconnecteurRJ-45
-1xAudiojack
lInterne
-2xpinheadersFrontPanneau
-2xpinheadersFront USB (4ports)
-1xpinheaderCOM
-1xconnecteurventilateurduCPU
-1xconnecteurventilateurdusystème
-1xconnecteurClearCMOS
-1xconnecteurSwitchChassisIntrusion
-1xpinheaderFrontAudio
-2xconnecteursIDE(ATA133)
-1xconnecteurDisquette
-1xconnecteurCD-in
-2xconnecteursSATA
-2xconnecteursAlimentation
This manual suits for next models
1
Table of contents
Languages:
Other MSI Motherboard manuals

MSI
MSI MAG B660M BAZOOKA User manual

MSI
MSI Micro ATX User manual

MSI
MSI X470 GAMING PLUS User manual

MSI
MSI K7T266 Pro2-A User manual

MSI
MSI MS-6791 User manual

MSI
MSI MS-6391 User manual

MSI
MSI H97M-E35 Series User manual

MSI
MSI X470 GAMING PRO User manual

MSI
MSI MPG X670E CARBON WIFI User manual

MSI
MSI MAG Series User manual

MSI
MSI MS-7504 User manual

MSI
MSI MS-7173 User manual

MSI
MSI PRO Z790-P WIFI DDR4 User manual

MSI
MSI RS350 User manual

MSI
MSI X79A-GD45 (8D) series User manual

MSI
MSI AM-690E User manual

MSI
MSI H55-GD65 Series User manual

MSI
MSI H61I-E35 (B3) User manual

MSI
MSI K8MM-ILSR User manual

MSI
MSI B460M PRO-VDH WIFI User manual