manuals.online logo
Brands
  1. Home
  2. •
  3. Brands
  4. •
  5. MTD
  6. •
  7. Lawn Mower Accessories
  8. •
  9. MTD OEM-190-679 Guide

MTD OEM-190-679 Guide

This manual suits for next models

1

Other MTD Lawn Mower Accessories manuals

MTD 139 cc OHV User manual

MTD

MTD 139 cc OHV User manual

MTD 19A30050100 Assembly instructions

MTD

MTD 19A30050100 Assembly instructions

MTD 19B70054 Series User manual

MTD

MTD 19B70054 Series User manual

MTD Cub Cadet 19B70004100 User manual

MTD

MTD Cub Cadet 19B70004100 User manual

MTD 190 User manual

MTD

MTD 190 User manual

MTD 218 User manual

MTD

MTD 218 User manual

MTD OHV Series User manual

MTD

MTD OHV Series User manual

MTD 590-303-000 User manual

MTD

MTD 590-303-000 User manual

MTD 753-0873 Manual

MTD

MTD 753-0873 Manual

MTD OEM-190-180A User manual

MTD

MTD OEM-190-180A User manual

MTD 190-064-000 User manual

MTD

MTD 190-064-000 User manual

MTD 19079 User manual

MTD

MTD 19079 User manual

MTD OEM-190-821 User manual

MTD

MTD OEM-190-821 User manual

MTD 190-116 User manual

MTD

MTD 190-116 User manual

MTD OHD-190-182 User manual

MTD

MTD OHD-190-182 User manual

MTD OEM-190-182A User manual

MTD

MTD OEM-190-182A User manual

MTD 49A70005100 User manual

MTD

MTD 49A70005100 User manual

MTD 190-076-000 User manual

MTD

MTD 190-076-000 User manual

MTD 190-083 User manual

MTD

MTD 190-083 User manual

MTD 110 User manual

MTD

MTD 110 User manual

MTD 190-067-000 User manual

MTD

MTD 190-067-000 User manual

MTD 19B30031OEM User manual

MTD

MTD 19B30031OEM User manual

MTD 190-181 User manual

MTD

MTD 190-181 User manual

MTD 190-806-000 User manual

MTD

MTD 190-806-000 User manual

Popular Lawn Mower Accessories manuals by other brands

Toro 147-1660 manual

Toro

Toro 147-1660 manual

Toro 03484 installation instructions

Toro

Toro 03484 installation instructions

Ariens 891008 Operator's manual

Ariens

Ariens 891008 Operator's manual

Rover 108 - 109 owner's manual

Rover

Rover 108 - 109 owner's manual

Toro 112-5803 installation instructions

Toro

Toro 112-5803 installation instructions

Snapper 1690047 Operator's manual

Snapper

Snapper 1690047 Operator's manual

RHINO 800 Operator's manual

RHINO

RHINO 800 Operator's manual

Exmark Quest 126-7506 Operator's manual

Exmark

Exmark Quest 126-7506 Operator's manual

Snapper 1685167 installation instructions

Snapper

Snapper 1685167 installation instructions

Cub Cadet 19B70029100 installation manual

Cub Cadet

Cub Cadet 19B70029100 installation manual

Stihl AMK 043.1 instruction manual

Stihl

Stihl AMK 043.1 instruction manual

Toro 30810 installation instructions

Toro

Toro 30810 installation instructions

Bush Hog RG60 Operator's manual

Bush Hog

Bush Hog RG60 Operator's manual

Scag Power Equipment GC-F4 Operator's manual

Scag Power Equipment

Scag Power Equipment GC-F4 Operator's manual

Land Pride RCF2760 Operator's manual

Land Pride

Land Pride RCF2760 Operator's manual

Peco SPARTAN RZ Series Operator's manual

Peco

Peco SPARTAN RZ Series Operator's manual

Peco 28621206 Operator's manual

Peco

Peco 28621206 Operator's manual

Toro 31212 installation instructions

Toro

Toro 31212 installation instructions

manuals.online logo
manuals.online logoBrands
  • About & Mission
  • Contact us
  • Privacy Policy
  • Terms and Conditions

Copyright 2025 Manuals.Online. All Rights Reserved.

SECTION 1: CALLING CUSTOMER SUPPORT
If you have difficulty assembling this product or have any questions regarding the controls, operation or
maintenance of this unit, please call the Customer Support Department.
Call 1- (330) 220-4MTD (4683) or 1- (800)-800-7310 to reach a Customer Support representative.
Please have your unit’s model number and serial number ready when you call. See previous section
to locate this information. You will be asked to enter the serial number in order to process your call.
SECTION 2: CONTENTS OF CARTON
Before beginning installation, remove all parts from the
carton to make sure everything is present. Carton
contents are listed below. Part numbers are shown in
parentheses.
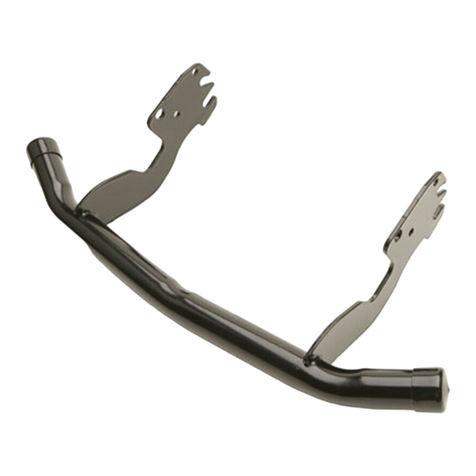
• Front Bumper - (768-0010B)
• Two Clevis Pins - (711-0332)
• Two Cotter Pins - (714-0145)
• Four Hex Bolts - (710-1260A)
• Four Hex Flange Nuts - (712-3004A)
SECTION 3: ASSEMBLY
WARNING: Before beginning installation,
place the tractor on a firm and level
surface. Place the PTO in the disengaged
(OFF) position, stop the tractor engine and
set the parking brake.
NOTE: References to LEFT and RIGHT indicate the left
and right sides of the tractor when facing forward in the
operator’s position. Reference to the FRONT indicates
the grille end; to the REAR the drawbar end.
Mounting Bumper to all FastAttach
™
Compatible Tractors
WARNING: Muffler may be hot! Make sure
engine has cooled down before installing
bumper.
• To mount the bumper to the tractor, hook the
notched ends (slots) of the bumper onto the
shoulder bolts on the sides of the tractor frame.
See Figure 1.
Figure 1
• Align the holes in the bumper with the holes in the
tractor frame and insert the clevis pins through the
holes from the outside. Secure the pins in place
with the cotter pins.
Shoulder Bolt
Clevis Pin
Slot
Cotter Pin
Front Bumper Kit
For FastAttach
™
Compatible 600- and 800-Series Tractors
For Compatible 600- and 800-Series Box-Frame Tractors
FORM NO.
769-00041C.fm
(1/25/06)
PRINTED IN U.S.A.
Model OEM-190-679 / 190-679-101
Mounting Bumper to Box-Frame Lawn Tractor
WARNING: Muffler may be hot! Make sure
engine has cooled down before installing
bumper.
NOTE: The front bracket is exploded from the tractor
for clarity in Figure 2.
• To mount the bumper to the tractor, slide the
bumper over the front brackets, aligning the two
holes in the bumper over the two upper holes in the
bracket. See Figure 2.
• Insert the hex bolts from the outside through the
holes and secure with the hex flange nuts.
IMPORTANT:
If the tractor is equipped with a muffler
guard between the tractor brackets, the hex bolts
should be bolted into the guard. The nuts will not be
neccessary.
Figure 2
Mounting Bumper to Box-Frame Garden Tractor
WARNING: Muffler may be hot! Make sure
engine has cooled down before installing
bumper.
NOTE: The front bracket is exploded from the tractor
for clarity in Figure 3.
• To mount the bumper to the tractor, slide the
bumper over the front brackets, aligning the two
holes in the bumper over the two upper holes in the
bracket. See Figure 2.
• Insert the hex bolts from the outside through the
holes and secure with the hex flange nuts.
IMPORTANT:
If the tractor is equipped with a muffler
guard between the tractor brackets, the hex bolts
should be bolted into the guard. The nuts will not be
neccessary.
Figure 3
1
4.5HP/42"
F
T-ON-THE-GO
Hex Flange Nut
Hex Bolt
Tractor Bracket
Tractor Bracket
Hex Flange Nut Hex Bolt
MTD LLC, P.O. BOX 361131 CLEVELAND, OHIO 44136-9722