manuals.online logo
Brands
  1. Home
  2. •
  3. Brands
  4. •
  5. mundoclima
  6. •
  7. Air Conditioner
  8. •
  9. mundoclima MAXI MVD V6X User manual

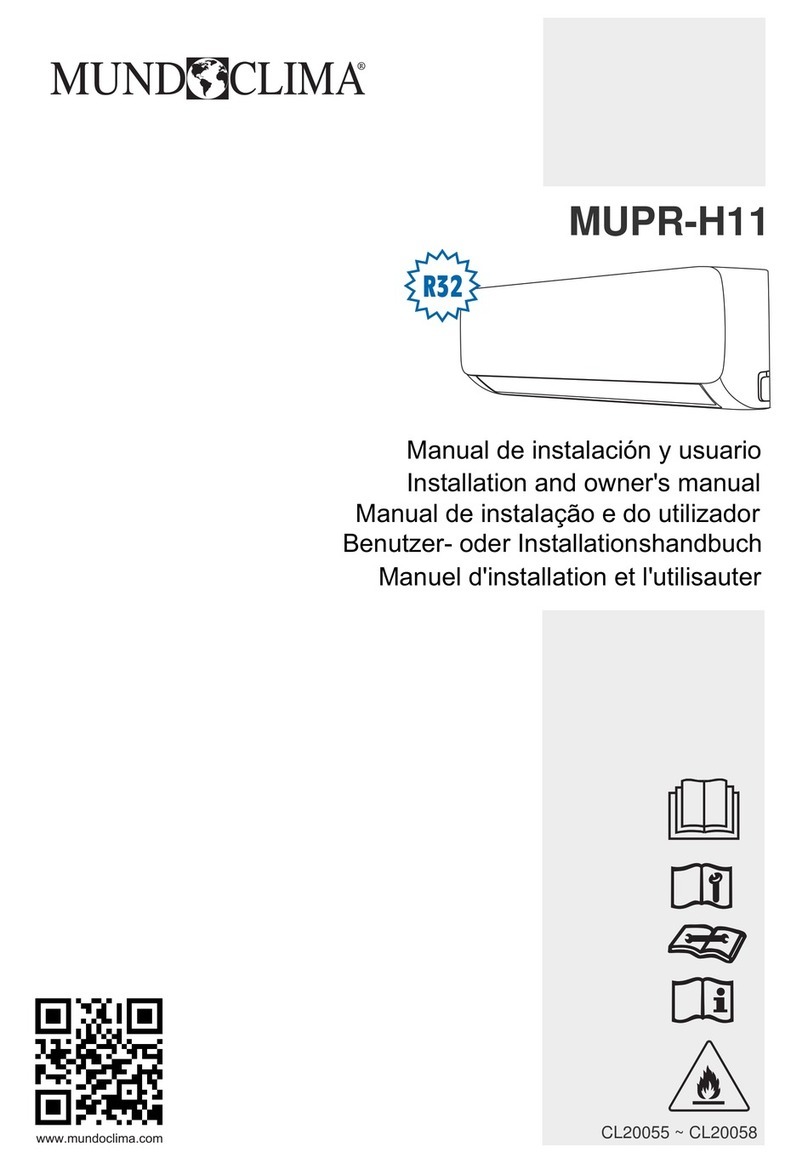
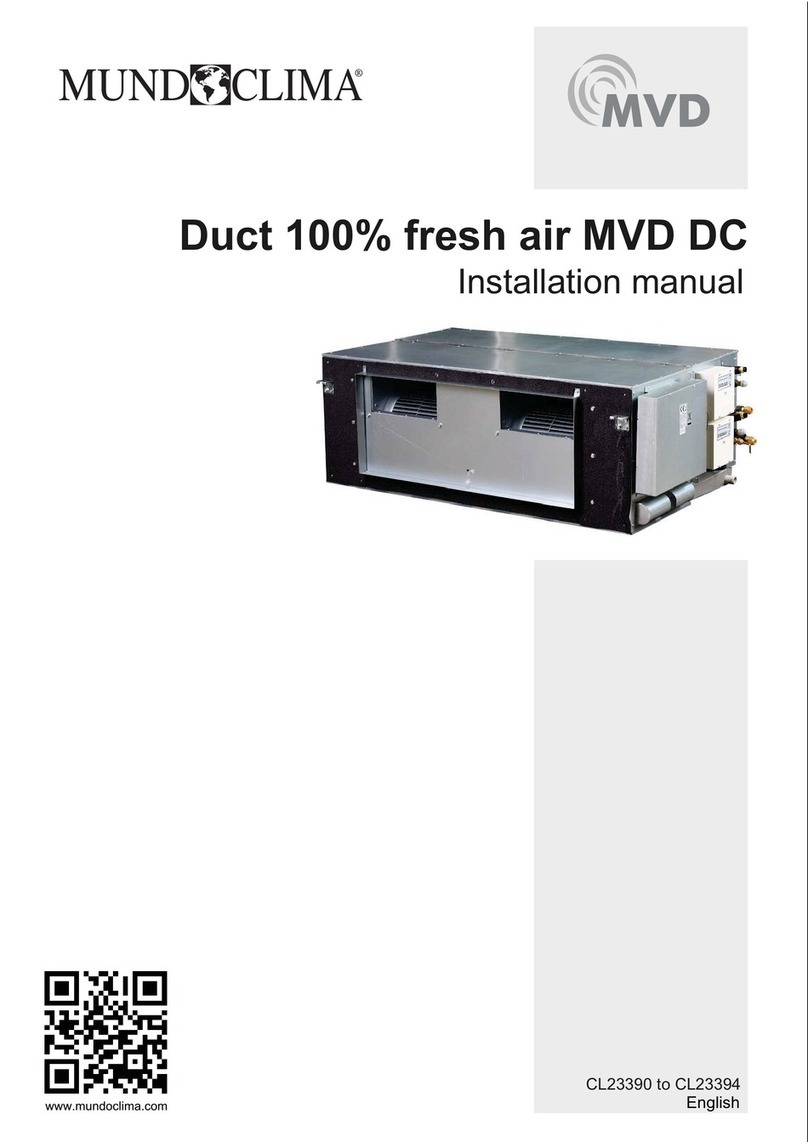
mundoclima MAXI MVD V6X User manual

Installation and owner's manual
English
CL23600 to CL23612
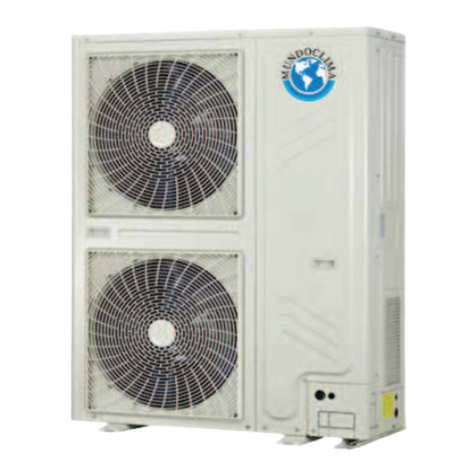
OUTDOOR UNIT
www.mundoclima.com

MVD
MAXI MVD V6X
and information requirements
FR: "Manual d’utilisation et d’installation" voir www.mundoclima.com/fr
DE: "Benutzer- und Installationshandbuch" sehen www.mundoclima.com/de
PT: "Manual de instalaçao e do utilizador" ver www.mundoclima.com/pt

CONTENTS
Installation manual ....................................................................................3
Owner's manual ...................................................................................... 41
Installation and owner's manual
Information requirements (Technical fiche LOT 21)
EU 2016/2281
Information requirements for air-to-air air conditioners ......................47
Information requirements for heat pumps ............................................60
CONTENTS
Thank you for selectiong super quality air conditioner. To ensure satisfactory operation for many ears to come,
this manual should be read carefully before the installation and before using the air conditioner. After reading,
store it a safe place. Please refer to the manual for questions on use or in the event that any irregularities occur.
This Air Conditioner should be used for hosehold or commercial use.
This unit must be installed by a professional.
The power supply must be SINGLE-PHASE (one phase (L) and one neutral (N)) with his grounded power (GND))
switch. Any breach of these specifications involve a breach of the warranty conditions provided by the
In line with the company's policy of continual product improvement, the aesthetic and dimensional characteristics,
technical data and accessories of this appliance may be changed without notice.
 
 

Read this manual carefully before installind or operating you new chiller unit. Make sure to save this manual for
future reference.
 
or THREE-PHASE (three phase (L1, L2, L3) and one neutral (N) with his grounded power (GND)) and his manual
manufacturer.
Maxi MVD V6X
2
Overview
Meaning of Various Labels


Warning
Warning
Caution
Warning
A situation that may lead to severe injury or death.
What the Installation Operator Must Know
Overview
If you are uncertain on how to install or run the unit, please contact the agent.
Make sure the installation, testing and materials used comply with the
applicable law.
Plastic bags should be disposed of properly. Avoid contact by children.
Potential risk: Asphyxia.
Do not touch the refrigerant piping, water piping or internal parts during
operations, and when the operation has just been completed. This is
because the temperature may be too high or too low. Let them recover to
the normal temperature first. Wear protective gloves if you must come in
contact with these.
Do not touch any refrigerant that has accidentally leaked.
Installation site
Provide sufficient space around the unit for maintenance and air
circulation.
Make sure the installation site can bear the weight of the unit and
vibrations.
Make sure the area is well ventilated.
Make sure the unit is stable and level.
Do not install the unit in the following locations:
An environment where there is a potential risk of explosions.
Where there are equipment emitting electromagnetic waves. Electromagnetic
waves may disrupt the control system, and cause the unit to malfunction.
Where there are existing fire hazards like leakage of flammable gases,
carbon fibres, and combustible dust (such as diluents or gasoline).
Where corrosive gases (such as sulphurous gases) are produced.
Corrosion of copper pipes or welded parts may lead to refrigerant leakage.
During the test, do not exert a force greater than the maximum allowed
pressure on the product (as shown on the nameplate).
Take appropriate precautions to prevent refrigerant leakage. If the
refrigerant gas leaks, ventilate the area immediately. Possible risk: An
excessively high concentration of refrigerant in an enclosed area can
lead to anoxia (oxygen deficiency). The refrigerant gas may produce a
toxic gas if it comes in contact with fire.
Refrigerant must be recovered. Do not release it to the environment.
Use the vacuum pump to draw the refrigerant out from the unit.
Make sure the refrigerant piping is installed in accordance with the
applicable law. In Europe, EN378 is the applicable standard.
Make sure the piping and connections are not placed under pressure.
After all the piping connections have been completed, check to make
sure there is no gas leak. Use nitrogen to conduct the leak check for gas.
Do not charge refrigerant before the wiring layout is completed.
Only charge the refrigerant after the leak tests and vacuum drying
have been completed.
When charging the system with refrigerant, do not exceed the
allowable charge to prevent liquid strike.
Refrigerant
Only use tools specific to the type of system refrigerant to make sure the
system can withstand the pressure, and prevent foreign objects from
entering the system.
Follow the steps below to charge the liquid refrigerant:
Open the refrigerating cylinder slowly.
Charge the liquid refrigerant. Charging with gas refrigerant may hamper
normal operations.
Do not charge more than the specified amount of refrigerant. This is to
prevent the compressor from malfunctioning.
The refrigerant type is clearly marked on the nameplate.
The unit is charged with refrigerant when it is shipped from the factory. But
depending on the piping dimensions and length, the system require
additional refrigerant.
The precautions and things to note in this document involve very important
information. Please read them carefully.
All the activities described in the installation manual must be performed by
an authorized installation personnel.
Please wear the appropriate personal protective tools during installation,
maintenance or repair of the system (protective gloves, safety glasses,
etc.).
Do not touch the air inlet or aluminium fin of the unit.
The figure shown in this manual is for reference only and
may be slightly different from the actual product.
Improper installation or connection of equipment and accessories
may cause electric shocks, short circuits, leaks, fires, or other
damage to the equipment. Use only accessories, equipment and
spare parts made or approved by manufacturer.
Take appropriate measures to prevent small animals from entering
the unit. Contact between small animals and electrical components
may cause system malfunction, leading to smoke or fire.
Do not place any object or equipment on top of the unit.
Do not sit, climb, or stand on the unit.
Operation of this equipment in a residential environment could
cause radio interferece.
1
1.1
1.2.2








1.2.3














1.2
1.2.1












Caution
A situation that may lead to mild or moderate injury.
Note
Note
A situation that may cause damage to the equipment or loss of property.
Information
Indicates a useful hint or additional information.
ۄ
Note
1. Overview ....................................................................................... 3
2. About the Packing Box .................................................................. 4
3. About the Outdoor Unit Combination ............................................. 5
4. Preparations Before Installation ...................................................... 7
5. Outdoor Unit Installation..................................................................13
6. Configuration .................................................................................23
7. Commissioning ..............................................................................27
8. Maintenance and Repair ...............................................................28
9. Error codes ....................................................................................29
10. Disposal ..........................................................................................29
11. Technical Data ..............................................................................30
Contents
Installation manual Maxi MVD V6X
INSTALLATION MANUAL
3
12. Automatic refrigerant charging guideline ........................................40
Electricity
Caution
Warning
Once refrigerant charging is completed or suspended, close the refrigerant
tank valve immediately. The refrigerant may volatilize if the refrigerant tank
valve is not closed in time.
1.2.4
 
control box, and access any circuit wiring or components inside. At the
same time, this prevents the unit from being accidentally powered up during
installation or maintenance work.
 
spill into the box, and do not touch the components in the box with wet
hands.
 Cut off power suppy more then 5 minutes prior to access the electrical
parts. Measure the voltage of the main circuit capacitor or electrical
component terminals to make sure the voltage is less than 36 V before you
touch any circuit component. Refer to the connections and wiring on the
nameplate for the master circuit terminals and connections.
 
local laws and regulations.
       
local law.
 
             
nameplate.
 
device that can completely disconnect all polarities is included in the
installation, and that the safety device can be completely disconnected
when there is excessive voltage (such as during a lightning strike).
 
pull or squeeze the cables and wires. At the same time, make sure the
wiring ends are not in contact with the piping or sharp edges of the sheet
metal.
 
absorbers and other places that are not designed for grounding. A gentle
reminder that improper grounding may cause electric shock.
       
power source with other equipment.
 
local law.
           
electric shocks or fire. The model specifications and characteristics (anti
high-frequency noise characteristics) of the electric leakage protection
device are compatible with the unit to prevent frequent tripping.
 
close the cover of the electric control box. Before you power on and start
the unit, check that the cover of the electric control box is tight and secured
properly with screws. Once the box is covered, do not let any liquid spill into
the electric control box, and do not touch the components in the box with
wet hands.
 
places that can be easily struck by lightning.
          
regulations.
 
its service agent or a similarly qualified person in order to avoid a hazard
           
3mm in all poles should be connected in fixed wiring
           
appliance including the minimum permissible distances to adjacent
structures
 -
nection cable away from the copper tube
Important Information for User
If you are uncertain on how to run the unit, please contact the installation
personnel.
This unit is not suitable for people who lack physical strength, cognitive sense
or mental ability, or who lack experience and knowledge (including children).
For their own safety, they should not use this unit unless they are supervised
or guided by the respective personnel in charge of their safety. Children must
be monitored to ensure that they do not play with this product.
To prevent electric shock or fire:
Do not wash the electric bo of the unit.
Do not operate the unit with wet hands.
Do not place any items that contain water on the unit.
Do not place any object or equipment on top of the unit.
Do not sit, climb, or stand on the unit.
About the Packing Box
Overview
Fragile. Handle with care.
This chapter mainly introduces the subsequent operations after the outdoor unit
has been delivered to site and unpacked.
This specifically includes the following information:
Unbox and handling the outdoor unit.
Take out the accessories of the outdoor unit.
Dismantle the transport rack.
Remember the following:
At the time of delivery, check the unit for any damage. Report any damage
immediately to the carrier's claim agent.
As far as possible, transport the packaged unit to its final installation site to
prevent damage during the handling process.
Take note of the following items when transporting the unit:
Keep the unit with its front facing upwards so as not to damage the
compressor.
Select the unit transportation path in advance.
Warning
1.3














2
2.1
Note
 Do not install the power cord near equipment that is susceptible to
electromagnetic interference, such as TV, and radios to prevent
interference.
 Use a dedicated power supply cord for the unit. Do not share the same
power source with other equipment. A fuse or circuit breaker must be
installed, and these must conform to the local law.
Information
ۄ
Note
The installation manual is only a general guide on the wiring and connections,
and is not specifically designed to contain all information regarding this unit.
Installation manual Maxi MVD V6X
4
Unbox the Outdoor Unit
Taking Out Accessories of Outdoor Unit
Pipe Fittings
As shown in the following figure, it is better to use a crane and two long belts to lift
the unit. Handle the unit carefully to protect it, and note the position of the centre
of gravity of the unit.
Use a leather belt that can adequately support the weight of the unit, and

Images are for reference only. Please refer to the actual product.
Take the unit out from the packing materials:
Be careful not to damage the unit when you use a cutting tool to remove the
wrapping film.
Remove the four nuts on the wooden back stand.
Plastic film should be disposed of properly. Avoid contact by children.
Potential risk: Asphyxia.
The accessories for the unit are stored in two parts. Documents like the manual
are located at the top of the unit. Accessories like the pipes are located inside
the unit, on top of the compressor. The accessories in the unit are as follows:
The schematic after the L-shaped pipe (from accessories) is properly
connected to the unit is shown below:
Unit: mm
About the Outdoor Unit Combination
Overview
This chapter contains the following information:
List of branch joint fittings.
Recommended combination for outdoor unit.
Branch joints
Description Model Name
Outdoor Unit Branch
Joint Assembly
Indoor Unit Branch
Joint Assembly
On the choice of branch joints, refer to section 4.3.3 on the selection of branch
joints for refrigerant piping.
Warning
14-168-10 18-24 30-3212 26-28

2.2


2.3



FQZHW-02N1E
FQZHW-03N1E
FQZHN-01D
FQZHN-02D
FQZHN-03D
FQZHN-04D
FQZHN-05D
FQZHN-06D
FQZHN-07D
3
3.1


3.2
SIZE
HP
B
A19.1
31.8
15.9
31.8
22.2
22.2
31.8 38.1
SIZE
HP

 15.9
28.6
12.7
25.4
2.4

Check port (used to measure
system pressure, charge
refrigerant and vacuumize)
77
63
50
Liquid pipe
connection

Gas pipe
connection

Check port (used
to measure system
pressure, charge
refrigerant and
vacuumize)
Liquid pipe
connection

Gas pipe
connection

55
63
62
8-22HP 24-32HP
Note
2.5 Remove the Protect board
condenser
protect board
Protecting boards are placed around the condenser , please remove the
protecting boards when installing the unit; otherwise the capacity of the
outdoor unit will be affected.
Hook
Belt
Need protect plates
Outdoor unit
installation manual
Outdoor unit
operation manual
90° socket elbow
Sealing cover
L-shaped pipe
connection
To clean pipes
To connect piping
To connect gas and
liquid pipes
Qty Function
Screw pack
Name
To improve
communication stability
Reserved for
maintenance
Build-out resistor
To CN91 port
Outline
1
1
1
1
1
1
2
8
2
1
Erp information
Information
requirements
for heat pump
Installation manual Maxi MVD V6X
5
Wrench To remove the side
plate screws
1
Long-distance control
of priority mode wire
In the system where all indoor units are running at the same time, the total capacity of the indoor units should be less than or equal to the
combined capacity of the outdoor unit to prevent overloading in bad working conditions or narrow operating space.
The total capacity of the indoor units can be up to a maximum of 130% of the combined capacity of the outdoor unit for a system where not all
the indoor units are operating at the same time.
If the system is applied in a cold region (ambient temperature is -10°C and below) or a very hot, heavy loading environment, the total capacity
of the indoor units should be less than the combined capacity of the outdoor unit.
Caution



Recommended Outdoor Unit Combination3.3
8 10 12 14 16
18 20 22 24
26 28 30 32
8
Ș
Ș
Ș
Ș
Ș
Ș
Ș
Ș
Ș
Ș
Ș
Ș
Ș
Ș
Ș
Ș
Ș
Ș
Ș
Ș
Ș
Ș
Ș
Ș
Ș
Ș
Ș
Ș
Ș
Ș
Ș
Ș
ȘȘ
Ș
ȘȘ
Ș

Ș
Ș
Ș
Ș
Ș
Ș
Ș
ȘȘ
Ș
Ș
Ș
Ș
Ș
Ș
Ș
Ș
Ș
Ș
Ș
Ș
Ș
Ș
Ș
Ș
ȘȘ
Ș
ȘȘ
ȘȘ
ȘȘȘ
ȘȘ
Ș
Ș
ȘȘ
ȘȘ
Ș
ȘȘ
Ș
Ș
Ș
Ș
Ș
Ș
Ș
Ș
Ș
10
12
14
16
18
20
22
24
26
28
30
32
34
36
38
40
42
44
46
48
50
52
54
56
58
60
62
64
66
68
70
72
74
76
78
80
82
84
86
88
13
16
20
23
26
29
33
36
39
43
46
50
53
56
59
63
64
64
64
64
64
64
64
64
64
64
64
64
64
64
64
64
64
64
64
64
64
64
64
64
64
HP
HP
90
92
94
96
64
64
64
64
Max Qty. of
indoor units
Installation manual Maxi MVD V6X
6
Preparations Before Installation
Overview
This mainly includes the following information:
Choose and Prepare the Installation Site
Site requirements for installation of outdoor unit
Site requirements for installation of outdoor unit in cold regions
Do not install the unit in the following locations:
This chapter mainly describes the precautions and things to note before the unit is
installed at the site.
Choose and Prepare the Installation Site
Select and Prepare the Refrigerant Piping
Select and Prepare the Electrical Wiring
Provide sufficient space around the unit for maintenance and air circulation.
Make sure the installation site can bear the weight of the unit and vibrations.
Make sure the area is well ventilated.
Make sure the unit is stable and level.
Choose a place where the rain can be avoided as much as possible.
The unit should be installed in a location where the noise generated by the unit
will not cause any inconveniences to any person.
Choose a site that will comply with the applicable law.
An environment where there is a potential risk of explosions.
Where there are equipment emitting electromagnetic waves. Electromagnetic
waves may disrupt the control system, and cause the unit to malfunction.
Where there are existing fire hazards like leakage of flammable gases, carbon
fibres, and combustible dust (such as diluents or gasoline).
Where corrosive gases (such as sulphurous gases) are produced. Corrosion of
copper pipes or welded parts may lead to refrigerant leakage.
Where mineral oil mist, spray, or steam may exist in the atmosphere. Plastic
parts may age, fall off or cause water leakage.
Where there is a high salt content in the air such as places near the sea.
Do take into considerations adverse environmental conditions such as
strong winds, typhoons or earthquakes as an improper installation may
cause the unit to overturn.
Take precautions to make sure the water will not damage the installation
space and environment in the event of a water leakage.
If the unit is installed in a small room, refer to section 4.2.3 “Safety
measures to prevent refrigerant leak” to make sure the refrigerant
concentration does not exceed the permissible safety limit when there is
a refrigerant leak.
Make sure the air inlet of the unit is not directed at the main wind
direction. Incoming wind will disrupt the operations of the unit. If
necessary, use a deflector as an air baffle.
Add water discharge piping on the base so that the condensed water will
not damage the unit, and prevent the accumulation of water to form pits
when the works are in progress.
Snow protection facilities must be installed in areas with snowfall.
Refer to the following figure, (malfunctions are more common when
there is insufficient snow protection facilities). In order to protect the
unit from accumulated snow, increase the height of the rack, and
install a snow shield at the air inlets and outlets.
Do not obstruct the air flow of the unit when you install the
snow shield.
Safety measures to prevent refrigerant leak
About the maximum concentration level
The installation personnel must make sure the safety measures to prevent
leaks comply with local regulations or standards. If the local regulations do not
apply, the following criteria can be applied.
The system uses R410A as the refrigerant. R410A itself is a completely
non-toxic, and non-combustible refrigerant. However, do ensure that the air
conditioning unit is installed in a room with sufficient space. This is so that when
there is a serious leak in the system, the maximum concentration of the
refrigerant gas in the room will not exceed the stipulated concentration, and is
consistent with the relevant local regulations and standards.
The calculation for the maximum concentration of the refrigerant is directly
related to the occupied space that the refrigerant may leak to and the charging
amount of the refrigerant.
The measurement unit for concentration is kg/m3(weight of gaseous refrigerant
that has a volume of 1 m3in the occupied space).
The highest level of permissible concentration must comply with the relevant
local regulations and standards.
Based on the applicable European standards, the maximum permissible
concentration level of R410A in the space occupied by humans is limited to
0.44 kg/m
3
.
This is a class A product. This product may cause radio interference in
the home environment. The user may need to take the necessary
measures if such a situation does arise.
The unit described in this manual may cause electronic noise generated
by radio frequency energy. The unit conforms to the design specifications
and provides reasonable protection to prevent such interference.
However, there is no guarantee that there will be no interference during
a specific installation process.
Therefore, it is suggested that you install the units and wires at an
appropriate distance from devices like sound equipment and personal
computers.
Electric appliances that should not be used by the general public must be
installed in the safety area to prevent others from getting close to these
electric appliances.
Both indoor and outdoor units are suitable for the installation of
commercial and light industrial environment.
An excessively high concentration of refrigerant in an enclosed area can
lead to anoxia (oxygen deficiency).
4
4.1






















4.2
4.2.1
4.2.2





4.2.3
Caution
Note
Note
Note
Figure 4.1
Snow shield for air outlet
Snow shield for air inlet
Installation manual Maxi MVD V6X
7
Select and Prepare the Refrigerant Piping
Refrigerant piping requirements
The R410A refrigerant pipeline system must be kept strictly clean, dry and
sealed.
Cleaning and drying: prevent foreign objects (including mineral oil or
water) from mixing into the system.
Seal: R410A does not contain fluorine, does not destroy the ozone layer,
and does not deplete the ozone layer that protect the earth from harmful
ultraviolet radiation. But if it is released, R410A can also cause a slight
greenhouse effect. Therefore, you must pay special attention when you
check the sealing quality of the installation.
The piping and other pressure vessels must comply with the applicable
laws and suitable for use with the refrigerant. Use only phosphoric acid
deoxidized seamless copper for the refrigerant piping.
The equivalent length of each branch joint is 0.5m.
As much as possible, install the indoor units such that they are
equidistant on both sides of the U-shape branch joint.
When the outdoor unit is above the indoor unit, and the level
difference exceeds 20 m, it is recommended that an oil return bend be
set up at every 10 m interval on the gas pipe of the main piping. The
recommended specifications of the oil return bend are as shown in
figure 4.3.

to increase the size of the liquid pipe in the main piping by one size.
The allowable length of the farthest indoor unit to the first branch joint
in the system should be equal to or less than 40m unless specified
conditions are met, in which case the permitted length is up to 90m.
Please refer to requirement 2.
Special-purpose branch joints from manufacturer for all branch joints
should be used. Failing to do so may lead to severe system malfunc-
tion.
Foreign objects in the pipes (including lubricant used during pipe bending) must

Calculate all piping lengths and distances.
Allowable length and height difference for refrigerant piping
Refer to the following table and figure (for reference only) to determine the
appropriate size.
Figure 4.2
4.3
4.3.1










4.3.2
N1
(140)
N4(140)
N9
(112)
N10
(140) N12
(28)
N13
(140)
N16
(56)
N15
(140)
N3(71)
N7(28)
N6
(140)
N8(140)
N14
(56)
N17
(140)
A
B
IJ
N
K
O
C
FH
E
L1
L2
L3
L5
L7L8
L11 L12
L13
L15
L14 L16
L9
ac
d
f
g
h
jl
m
no
p
q
k
SR
g1 g2 g3
G1
D
N2
(140)
b
L4
N5
(112)
G
L6
e
N11
(71)
i
L
L10 M
P
W3
(12)
W2
(22)
W1
(32)
Largest level difference betwee indoor

Piping between farthest indoor unit and first indoor

Equivalent length of piping between farthest indoor

ILargest level difference between

Note
Note
Table 4.1
Permitted
values Piping
 1000m L1+ 2 x {L 2to L 16} + {a to q}
Actual length
Actual length
 175m
Equivalent length  200m
 

 40m / 90m {L9 to L13} + k
(Refer to Requirement 2)
Outdoor unit is
above  90m
Outdoor unit is
below  110m
 30m (Refer to Requirement 4)
(Refer to Requirement 3)
Level
differences
Largest level difference
between indoor unit and
outdoor unit
Largest level difference between indoor units
Piping lengths
Total piping length
Piping between farthest indoor
unit and first outdoor branch
joint
Piping between outdoor unit and
outdoor branch joint
L1+ {L 9to L 13 } + k
(Refer to Requirement 1)
Piping between farthest indoor unit and first indoor
branch joint
Installation manual Maxi MVD V6X
8
Piping diameter
1) Select the branch joint diameters for the indoor unit
Model
Piping Name
Main piping
indoor main piping
piping of indoor unit
Indoor Unit Branch Joint Assembly
Outdoor Unit Branch Joint Assembly
Connection piping of outdoor unit
Based on the total capacity of the indoor unit, select the branch joint
for the indoor unit from the following table.
Table 4.4














8HP
10HP
12~14HP
16HP
18~24HP
26~34HP
56~66HP
 

36~54HP
FQZHN-02D
FQZHN-02D
FQZHN-02D
FQZHN-03D
FQZHN-03D
FQZHN-03D
FQZHN-04D
FQZHN-05D
The first indoor
branch joint



68~82HP
84~96HP
FQZHN-05D
FQZHN-05D
Gas side
(mm)
HP of
ODU Liquid side
(mm)
Equivalent length of all liquid piping < 90 m
Table 4.3


4.3.3
Table 4.2
Figure 4.3
L2, L3, L4, L5,... L16
L1
a, b, c, d,... q
g1, g2, g3, G1
A, B, C, D, ... P
S, R
The piping length and level difference requirements that apply are
summarized in Table 4.1 and are fully described as follows.
1. Requirement 1: The piping between the farthest indoor unit (N11) and
the first outdoor branch joint (R) should not exceed 175m (actual
length) and 200m (equivalent length). (The equivalent length of each
branch joint is 0.5m.)
2. Requirement 2: The piping between the farthest indoor unit (N11) and

-
ing measures are taken, in which case the permitted length is up to
90m.
Conditions:
a) Each indoor auxiliary pipe (from each indoor unit to its nearest branch

b) The difference in length between {the piping from first indoor branch
joint (A) to the farthest indoor unit (N11)} and {the piping from the first
indoor branch joint (A) to the nearest indoor unit (N1)} does not exceed

Measures:
a) Increase the diameter of the indoor main pipes (the piping between the
first indoor branch joint and all other indoor branch joints, L2 to L16) as
follows, except for indoor main pipes which are already the same size
as the main pipe (L1), for which no diameter increases are required.
3 Requirement 3: The largest level difference between indoor unit and
outdoor unit should not exceed 90m (if the outdoor unit is above) or
110m (if the outdoor unit is below). Additionally: (i) If the outdoor unit is
above and the level difference is greater than 20m, it is recommended
that an oil return bend with dimensions as specified in Figure 4.3 is set
every 10m in the gas pipe of the main pipe; and (ii) if the outdoor unit
is below and the level difference is more than 40m, the liquid pipe of
the main pipe (L1) should be increased one size.
4 Requirement 4: The largest level difference between indoor units
should not exceed 30m.
2) Select the diameter of the main piping
 The main pipe (L1) and first indoor branch joint (A) should be sized
according to whichever of Table 4.3, 4.4 and 4.5 indicates the larger
size.
Capacity of indoor unit
Total capacity of
indoor units
A (×100W)

Gas side
(mm)
Liquid side
(mm) Branch joint















A<168










FQZHN-01D
FQZHN-01D
FQZHN-03D
FQZHN-02D
FQZHN-05D
FQZHN-03D
FQZHN-03D
FQZHN-04D
  FQZHN-05D
  FQZHN-06D
  FQZHN-07D




Installation manual Maxi MVD V6X
9
3) Select the branch joint diameters for the outdoor unit
 
by considering the following factors:
  
up pipe should be used.
  
standard size that is the “Size up Size” (for example: when the
equivalent length of all the liquid piping is larger than 90m, the
pipe size needs to be one size up; when the piping length from
the farthest indoor unit to the first indoor unit is more than 40m,
the indoor main pipe size needs to be one size up to allow the
piping length up to 90m). In case the “Size up Size” is not
available in the local market, the standard size pipe must be used.
 
used under any circumstances.
  
according to section 5.9 on the determination of the additional
refrigerant volume.
For systems with multiple units, the branch joints of the
outdoor unit are sold separately.
4) indoor main piping
Select the branch joint of the outdoor unit from the table below.
Table 4.5

Liquid side
(mm)
Gas side
(mm) Liquid side
(mm)
Gas side
(mm)
Indoor unit
capacity
A(×100W)


 
   
 
Table 4.8
Pipe length 10m Pipe length > 10 m
Table 4.6
Illustration
Outdoor
unit Qty.
2 units
3 units
Main pipe
S
g1g2
R
S
g1g2
G1
g3 Main pipe
g1, g2:
8~12HP: 25.4/12.7;
14~22HP: 31.8/15.9
24-32HP:38.1/19.1
R:
FQZHW-02N1E
R+S:
FQZHW-03N1E
g1, g2,g3:
8~12HP: 25.4/12.7;
14~22HP: 31.8/15.9;
24-32HP:38.1/19.1
G1: 41.3/22.2
Table 4.7
Outdoor
unit Qty.
2 units
3 units
Outdoor connection
pipes diameter
Outdoor branch
joint kits
Example: A system consisting of three outdoor units (32HP + 22HP +
12HP). The system's equivalent total liquid piping length is in excess

capacity index of all indoor units is 1794, refer to Table 4.3, main pipe


Note
Model
















8HP
10HP
12~14HP
16HP
18~24HP
36~54HP
26~34HP
68~82HP
 
56~66HP
FQZHN-02D
FQZHN-02D
FQZHN-03D
FQZHN-03D
FQZHN-03D
FQZHN-04D
FQZHN-04D
FQZHN-05D
FQZHN-06D
 
84~96HP FQZHN-07D
Gas side
(mm) Liquid side
(mm) First branch joint
of the indoor unit

Installation manual Maxi MVD V6X
10
5) An Example of Refrigerant Piping Selection
Arrangement and Layout of Multiple Outdoor Units
In systems with multiple outdoor units, the units should be
placed in order from largest capacity unit to smallest
capacity unit. The largest capacity unit must be placed on
the first branch, and be set as the master unit, while the
others should be set as slave units. The capacity of
outdoor units A, B and C must meet the following

           
upwards.
 
not be higher than the refrigerant outlets. If necessary, to avoid
obstacles the piping may be vertically offset below the outlets. When
inserting a vertical offset to avoid an obstacle, the whole outdoor
piping should be offset, rather than just the section adjacent to the
obstacle.
Correct
× Incorrect
Figure 4.6
Figure 4.7
Figure 4.4
Figure 4.5
× Incorrect
To indoor unit
Outdoor branch joint assembly (first branch joint)
Outdoor branch joint assembly (second branch joint)
a
b
c
units
ABC
abc

4.3.4
The example below illustrates the piping selection procedure for a system
consisting of three outdoor units (32HP + 22HP + 12HP) and 17 indoor
units,asa shown in Figure 4.2. The system's equivalent length of all liquid
pipes is in excess of 90m; the piping between the farthest indoor unit and
the first indoor branch joint is less than 40m in length; and each indoor
auxiliary pipe (from each indoor unit to its nearest branch joint) is less than
10m in length.
 Select indoor main piping
Refer to Table 4.9 to select indoor auxiliary pipes (a-q)
 Select indoor main pipes and indoor branch joints B to P
The indoor units (N3 and N4) downstream of indoor branch joint E
have total capacity of 14 + 7.1 = 21.1kW. Refer to Table 4.3. Indoor

 The indoor units (N1 to N8) downstream of indoor branch joint B have
total capacity of 14 x 5 + 11.2 + 7.1 + 2.8 = 91.1kW. Refer to Table 4.3.
            
FQZHN-03D.
 The other indoor main pipes and indoor branch joints are selected in
the same fashion.
 Select main pipe and indoor branch joint A
The indoor units (N1 to N17) downstream of indoor branch joint A have
total capacity of 14 x 9 + 11.2 x 2 + 7.1 x 2 + 5.6 x 2 + 2.8 x 2 =
179.4kW. The system's equivalent length of all liquid pipes is in excess
of 90m. The total capacity of the outdoor units is 32 + 22 + 12 = 66HP.

            
FQZHN-05D.
Note
 Select outdoor connection pipes and outdoor branch joints
The master unit is 32HP and the slave units are 22HP and 12HP. Refer



There are three outdoor units in the system. Refer to Table 4.7.
Outdoor branch joints S and R are FQZHW-03N1E.
Installation manual Maxi MVD V6X
11
Select and Prepare the Electrical Wiring
Safety device requirements
This equipment conforms to:
EN/IEC 61000-3-12 specifications which states that the short circuit
capacity (of the power supply), Ssc, is greater than or equal to the
minimum Ssc value of the interface point between the user's power
supply and the public system.
The installation personnel or users have the responsibility to consult the
distribution network operators when necessary to ensure that the
equipment only connects to a power supply with short circuit capacity,
Ssc, greater than or equal to the minimum Ssc value.
Electrical compliance
Information
Phase and frequency of power supply system: 3N~50 Hz
Voltage: 380-415 V
The European/international technical standards specified a harmonic current limit for
devices connected to a public low-voltage system where the input current of each

Note:
ۄ
Voltage
(V)
Hz Min.
(V)
Max.
(V)
MCA
(A)
TOCA
(A)
MFA
(A)
MSC
(A)
RLA
(A)
KW FLA
(A)
Outdoor Unit Pow er Current Compressor OFM
1
1
1
1
1
2
2
2
2
3
2
25.2 30.9
-
10.6 0.56 6.3
440 32380-415 342
-
15.4 0.56 6.9
26.4 31.5440 32380-415 342
-
33.1 40.3 25.8 0.92 7.3
440342 40380-415
-
33.1 40.3 25.8 0.92 7.3
440 40380-415 342
-
40.8 59.3 10.114+13
440 50380-415 342
-
17+16
43.9 60.1 0.56+0.56
0.56+0.56
10.9
440 50380-415 342
-
19+18
47.9 60.1 0.56+0.56 10.9
440 63380-415 342
440 80380-415 342
-
0.92+0.92
22+30
66.9 72.5 14.9
440 80380-415 342
-
0.92+0.92
20+30
64.9 72.5 14.9
440 63380-415 342 0.92+0.9252.9 62.3 13.120+19.8
-
440 63380-415 342 0.92+0.9258.7 64.1 14.922+21.8
-
440 63380-415 342
-
48.4 17.4+16.6 0.92+0.92 13.1
62.3
24 32
-
0.56 6.3
380-415 50
50
50
50
50
50
50
50
50
50
50
50
50
342 440 30.9 10
System
10HP
8HP
12HP
14HP
16HP
18HP
20HP
22HP
24HP
26HP
28HP
30HP
32HP
4.4.2
8HP
Minimum Ssc value(KVA)
16HP
14HP
12HP
10HP
5207
6023
5863
5687
5447
Table 4.9
Table 4.10
Table 4.11
4.4
4.4.1
the national wiring regulation.
2. Maximum allowable voltage range variation between phases is
2%.
3. Select circuit breaker that having a contact separation in all poles
not less than 3 mm providing full disconnection,where MFA is
used to select the current circuit breakers and residual current
operation breakers:
Rated current
of appliance(A)
Nominal cross-sectional area (mm )
>3
>6
>10
>16
>25
>32
>50
and
and
and
and
and
and
and
3
6
10
16
25
32
50
63
1. Select the wire diameters( minimum value) individually for each
unit based on the table 4.10 and table 4.11,where the rated
current in table 4.10 means MCA in table 4.11. In case the MCA
exceeds 63A, the wire diameters should be selected according to
2
0.75
1
1.5
2.5
4
6
10
and
and
and
and
and
and
and
1
1.5
2.5
4
6
10
16
1
1
1.5
2.5
4
6
10
and
1 and
and
and
and
and
and
and
2.5
2.5
2.5
4
6
10
16
25
0.5 and 0.75
Flexible cords Cable for fixed wiring
Installation manual Maxi MVD V6X
12
Outdoor Unit Installation
Open the unit
Outdoor unit installation
Welding refrigerant piping
Refrigerant piping check
Refrigerant charging
Power on the unit
Open the Unit
Open the outdoor unit
To enter the unit, you need to open the front panel, as shown below:
This chapter includes the following information:
Overview
For 8-22HP, first dismantle the front left and right columns. For
24-32HP, first dismantle the front left, middle, and right columns,
where buckles are included in all 3 columns. Remove the screws,
rotate and shift upwards by about 2 mm to remove left and right
columns. Shift the middle column upwards by about 8 mm to take it
out.
Dismantle upper panel: Each upper panel has 4 screws (8-22HP) or
6 screws (24-32HP). After dismantling, lift it up by about 3 mm to take
it out. (left decorated column hook) (panel hook)
(middle decorated column hook)
Once the front panel is opened, you can access the electric control box. Refer to section 5.2.2 on how to open the electric component box of the
outdoor unit.
Open the electric control box of outdoor unit5.2.2


5~10°
Figure 5.1
Figure 5.2
5






5.2
5.2.1
5.1



8-22HP
left pillar right pillar
24-32HP
left pillar right pillar
middle pillar
12
3
4
Remove the cover of electric control box: (1) Loosen the two screws (by turning counter-clockwise for 1 to 3 turns) from the cover of the electric
control box; (2) lift the cover upwards for 7 to 8 mm, and then turn it outwards for 10 to 20 mm; (3) slide down the cover to remove it.
Open and rotate the middle partition plate: (1) Loosen the two screws (by turning counter-clockwise for 1 to 3 turns) from the middle partition
plate; (2) lift the partition plate upwards for 4 to 6 mm, and then turn it outwards to open the partition plate; (3) slide the hinge (which can slide
up and down along a sliding slot) at the bottom of the partition plate to the uppermost position to rotate the partition plate completely.
Note
Do not open the cover of electric control box until the prepareing of wireing is OK.
The
middle partition plate
is used for maintaining. Do not open it when installation
Dismantle lower panel: Each lower panel has 4 screws (8-22HP) or 6
screws (24-32HP) and 2 hooks. After dismantling, lift it up by about 3
mm to take it out.
Installation manual Maxi MVD V6X
13
Outdoor Unit Installation
Prepare structure for installation

Make sure the base where the unit is installed is strong enough to prevent
vibrations and noise.
When there is a need to increase the installation height of the unit, it is
recommended that you use the installation structure shown in the
following figure. Use a rack to support the four corners of the unit where
necessary.
The unit must be installed on a solid longitudinal base (steel beam
frame or concrete). Make sure the base below the unit is larger than the
area shaded in grey.
Use four ground bolts, M12, to secure the unit in place. Best is to screw in
the ground bolt until it is embedded in the base surface by at least 3 threads.
15 x 23 U-shaped hole
At least 3 threads
Shock-absorbing
rubber cushion
Solid ground
or roof







Figure 5.6
B
A
C
D
5.3
5.3.1


Expansion bolt positioning (Unit: mm)

Figure 5.5
Outdoor unit
200mm

Note
The base of the outdoor unit must use the solid concrete surface
as the cement base or the steel beam frame base.
The base must be completely level to ensure that every point of
contact is even.
During installation, make sure the base supports the vertical
folds of the front and back under plates of the chassis directly as
the vertical folds of the front and back under plates are Unit
where the actual support for the unit load is.
No gravel layer is required when the base is built on the roof
surface, but the sand and cement on the concrete surface must
be level, and the base should be chamfered along the edge.
A water drainage ditch should be set around the base to drain
the water around the equipment. Potential risk: slip.
Check the load-bearing capacity of the roof to make sure it can
support the load.
When you choose to install the piping from the bottom, the base
height should be above 200 mm.
Make sure the power supply is off before you carry out any
electric control installation and maintenance work.
To remove the entire electric control box, first discharge the
refrigerant from the system, disconnect the pipe connecting
the refrigerant radiator at the bottom of the electric control
box. At the same time, remove all wiring connecting the
electric control box and the internal components of the air
conditioner.
The images shown here are for illustrative purposes only and
may differ from the actual product due to reasons like model
and product upgrade. Please refer to the actual product.
The heat radiator piping of the refrigerant is
connected to the system
Minimum turning
angle (degrees) Maximum turning
angle (degrees)
Caution



Figure 5.3
Figure 5.4
56
910
7
8
(1)Main board
(2)AC filter board
(3)Terminal block
(4)Comm. board
(5)Compressor drive board
(6)Compressor drive board
(7)DC fan drive board
(8)DC fan drive board
(9)Reactance
(10)Reatance
Installation manual Maxi MVD V6X
14
Outdoor refrigerant connecting pipe position
Connecting refrigerant piping to outdoor unit
Connecting VRF piping assembly
The fittings provided as accessories can be used to complete the
connection from the stop valve to the field piping
Note the precautions when connecting the field piping for the
refrigerant. Add brazing material.
Use the attached piping fittings when working on the pipeline
engineering on site.
After installation, make sure the piping does not come in contact
with each other, or the chassis.
The wrong installation will cause the unit to malfunction.
U type branch joint
A-direction view
Error
Level
Correct
The outdoor refrigerant connecting pipe position is shown in the
following figure.
Pipe Welding
Things to note when connecting the refrigerant piping
Connect refrigerant piping
Make sure the refrigerant piping is installed in accordance
with the applicable law.
Make sure the piping and connections are not placed under
pressure.
After all the piping connections have been completed, check
to make sure there is no gas leak. Use nitrogen to conduct
the leak check for gas.
During the test, do not exert a force greater than the
maximum allowed pressure on the product (as shown on the
nameplate).
Take appropriate precautions to prevent refrigerant leakage.
Ventilate the area immediately if the refrigerant leaks.
Possible risk (An excessively high concentration of
refrigerant in an enclosed area can lead to anoxia (oxygen
deficiency); the refrigerant gas may produce a toxic gas if it
comes in contact with fire.)
Refrigerant must be recovered. Do not release it to the
environment. Use professional fluorine extraction equipment
to extract the refrigerant from the unit.
Before the refrigerant piping is connected, make sure both the indoor
and outdoor units are installed properly.
Connecting refrigerant piping includes:
Connect refrigerant piping to outdoor unit
Connect refrigerant piping to indoor unit (refer to the installation
manual of the indoor unit)
Connecting VRF piping assembly
Assembly for connecting refrigerant piping branch joint
Bear in mind the following guidelines:
Braze
Stop valve is used correctly
Caution
Caution
The branch joints should be as level as possible, and the angular error
does not exceed 10°.
Figure 5.8
Figure 5.7
Unit: mmTable 5.1
A
B
D
C
SIZE
HP
740
990
723
790
1090
790
1340
723
8,10, 12 14,16,18, 20, 22 24,26,28, 30, 32
723
1480
1730
790
5.4
5.4.1






5.4.2







A
10°
10°
5.4.3
8~12HP 14~22HP
24~32HP
5.4.4
5.4.5




Note
Note
Installation manual Maxi MVD V6X
15
Brazing
During brazing, use nitrogen as protection to prevent the formation
of a large amount of oxide film in the pipes. This oxide film will have
adverse effects on the valves and compressors in the cooling
system, and may hamper normal operations.
Use the reducing valve to set the nitrogen pressure to 0.02~0.03
Mpa
(a pressure that can be felt by the skin).
Do not use antioxidants when brazing the pipe joints.
Use copper-phosphorus alloys (BCuP) when brazing copper and
copper, and no flux is required. When brazing copper and other
alloy, flux is required.
Flux produces an extremely harmful effect on the refrigerant piping
system. For example, using a chlorine-based flux is used may
corrode the pipes, and when the flux contains fluorine, it will
degrade the frozen oil.
Connect stop valves
The stop valve
The following figure shows the names of all parts required for the
installation of the stop valves.
Stop valves are closed when unit is shipped from the factory.
Copper pipe, 1/4"
Nitrogen
Oxygen
Brazing part
Pipe interface fittings
for nitrogen filling
Packless valve
Copper pipe
Copper pipe
fittings
Stop valve lid
Stop valve connection tube
Maintenance access and
its valve lid
When there are multiple outdoor units, the branch joints must not be
higher than the refrigerant piping as shown below:
High pressure
hose for nitrogen
filling
Figure 5.11
Figure 5.10
Figure 5.9
5.4.6






5.4.7
Maintenance access
Stop valve lid
Hexagonal hole
Axis
Sealing component
Using of stop valve
1. Remove the stop valve lid.
2. Insert the hex wrench into the stop valve, and rotate the stop valve
counter-clockwise.
3. Stop turning when the stop valve cannot be rotated further.
Result: Valve is now open.
The fastening torque of the stop value is shown in table 5.2.
Insufficient torque may cause the refrigerant to leak.
Direction to close:
Result: Valve is now closed.
Close stop valve
1. Remove the stop valve lid.
2. Insert the hex wrench into the stop valve, and rotate the stop valve
clockwise.
3. Stop turning when the stop valve cannot be rotated further.
a
b
c
d
e
1
2
3
4
Figure 5.13
Figure 5.12
Figure 5.14
Table 5.2 Fastening torque
Stop valve
size
(mm)
Tightening torque/N.m (turn clockwise to close)
Axis
Valve body
Ø12.7 9~30
Ø19.1 12~30
Ø22.2 16~30
Ø25.4 24~30
Ø28.6
Ø31.8
Ø35.0 25.0~35
abc
de
Installation manual Maxi MVD V6X
16
5.5 Pipe Flushing
To remove dust, other particles and moisture, which could cause
compressor malfunction if not flushed out before the system is run,
the refrigerant piping should be flushed using nitrogen. Pipe flushing
should be performed once the piping connections have been
completed with the exception of the final connections to the indoor
units. That is, flushing should be performed once the outdoor units
have been connected but before the indoor units are connected.
The liquid and gas sides can be flushed simultaneously; alternatively,
one side can be flushed first and then Steps 1 to 8 repeated, for the
other side. The flushing procedure is as follows:
Cover the inlets and outlets of the indoor units to prevent dirt
getting blown in during pipe flushing. (Pipe flushing should be
carried out before connecting the indoor units to the piping
system.)
Attach a pressure reducing valve to a nitrogen cylinder.
Connect the pressure reducing valve outlet to the inlet on the
liquid (or gas) side of the outdoor unit.
Use blind plugs to block all liquid (gas) side openings, except for
the opening at the indoor unit which is furthest from the outdoor
units (“Indoor unit A” in Figure 5.15).
1.
2.
3.
4.
Caution
         
leaving condensation in the piping. Oxygen, air, refrigerant,
flammable gases and toxic gases must not be used for
flushing. Use of such gases may result in fire or explosion.
Caution
         
Oxygen, air, flammable gases and toxic gases must not be
used for gastightness testing. Use of such gases may result
in fire or explosion.
 Make sure that all the outdoor unit stop valves are firmly
closed.
Figure 5.15
Figure 5.16
Figure 5.17
Start to open the nitrogen cylinder valve and gradually increase
the pressure to 0.5Mpa.
5.
Allow time for nitrogen to flow as far as the opening at indoor unit
A.
Flush the first opening:
Using suitable material, such as a bag or cloth, press firmly
against the opening at indoor unit A.
When the pressure becomes too high to block with your hand,
suddenly remove your hand allowing gas to rush out.
Repeatedly flush in this manner until no further dirt or moisture
is emitted from the piping. Use a clean cloth to check for dirt or
moisture being emitted. Seal the opening once it has been
flushed.
Flush the other openings in the same manner, working in
sequence from indoor unit A towards the outdoor units. Refer to
Figure 5.16.
Once flushing is complete, seal all openings to prevent dust and
moisture from entering.
6.
7.
8.
9.
a)
b)
c)
liquid pipe
gas pipe
Outdoor
unit
Nitrogen gas
cylinder
Indoor
unit A Indoor
unit B
5.6 Gastightness Test
To prevent faults caused by refrigerant leakage, a gastightness test
should be performed before system commissioning.
The gastightness test procedure is as follows:
Once the piping system is complete and the indoor and outdoor
units have been connected, vacuum the piping to -0.1Mpa.
Charge the indoor piping with nitrogen at 0.3Mpa through the
needle valves on the liquid and gas stop valves and leave for at
least 3 minutes (do not open the liquid or gas stop valves).
Observe the pressure gauge to check for large leakages. If there
is a large leakage, the pressure gauge will drop quickly.
If there are no large leakages, charge the piping with nitrogen at
1.5Mpa and leave for at least 3 minutes. Observe the pressure
gauge to check for small leakages. If there is a small leakage, the
pressure gauge will drop distinctly.
1.
2.
3.
If there are no small leakages, charge the piping with nitrogen at
4.2 MPa and leave for at least 24 hours to check for micro leakages.
Micro leakages are difficult to detect. To check for micro leakages,
allow for any change in ambient temperature over the test period
by adjusting the reference pressure by 0.01Mpa per 1°C of
temperature difference. Adjusted reference pressure = Pressure
at pressurization + (temperature at observation – temperature at
pressurization) x 0.01Mpa. Compare the observed pressure with
the adjusted reference pressure. If they are the same, the piping
has passed the gastightness test. If the observed pressure is
lower than the adjusted reference pressure, the piping has a micro
leakage.
If the leakage is detected, refer to following part “Leak detection”.
Once the leak has been found and fixed, the gastightness test
should be repeated.
If not continuing straight to vacuum drying once the gastightness
test is complete, reduce the system pressure to 0.5-0.8Mpa and
leave the system pressurized until ready to carry out the vacuum
drying procedure
4.
5.
6.
Outdoor unit
Indoor unit
Nitrogen
Liquid pipe
Gas pipe
Liquid side
stop valve
Gas side of stop valve
The general methods for identifying the source of a leak are as
follows:
Audio detection: relatively large leaks are audible.
Touch detection: place your hand at joints to feel for escaping gas.
Soapy water detection: small leaks can be detected by the
formation of bubbles when soapy water is applied to a joint.
1.
2.
3.
Leak detection
Installation manual Maxi MVD V6X
17
After the leak test and the vacuum drying are completed, the pipe
must be insulated. Considerations:
 
insulated.
 
 
withstand temperature of 70°C), and polyethylene foam for the gas
pipes (able to withstand temperature of 120°C).
 
installation environment.
Condensed water may form on the surface of the insulation layer.
Figure 5.18






Vacuum pump
Pressure gauge
Yellow hose
Blue hose Red hose
Master unit Slave unit Slave unit
Field piping
Gas pipe stop valve
Liquid pipe stop valve
Service port
During vacuum drying, a vacuum pump is used to lower the pressure
in the piping to the extent that any moisture present evaporates. At
5mmHg (755mmHg below typical atmospheric pressure) the boiling
point of water is 0°C. Therefore a vacuum pump capable of
maintaining a pressure of -756mmHg or lower should be used. Using
a vacuum pump with a discharge in excess of 4L/s and a precision
level of 0.02mmHg is recommended.The vacuum drying procedure is
as follows:
1. Connect the blue (low pressure side) hose of a pressure gauge to
the master unit gas pipe stop valve, the red (high pressure side)
hose to the master unit liquid pipe stop valve and the yellow hose
to the vacuum pump.
2. Start the vacuum pump and then open the pressure gauge valves
to start vacuum the system.
3. After 30 minutes, close the pressure gauge valves.
4. After a further 5 to 10 minutes check the pressure gauge. If the
gauge has returned to zero, check for leakages in the refrigerant
piping.
5. Re-open the pressure gauge valves and continue vacuum drying
for at least 2 hours and until a pressure difference of 0.1Mpa or
more has been achieved. Once the pressure difference of at least
0.1Mpa has been achieved, continue vacuum drying for 2 hours.
6. Close the pressure gauge valves and then stop the vacuum pump.
7. After 1 hour, check the pressure gauge. If the pressure in the
piping has not increased, the procedure is finished. If the pressure
has increased, check for leakages.
8. After vacuum drying, keep the blue and red hoses connected to
the pressure gauge and to the master unit stop valves, in
preparation for refrigerant charging.
Caution
         
outdoor unit stop valves are firmly closed.
 
stopped, the low pressure in the piping could suck vacuum
pump lubricant into the air conditioning system. The same
could happen if the vacuum pump stops unexpectedly during
the vacuum drying procedure. Mixing of pump lubricant with
compressor oil could cause compressor malfunction and a
one-way valve should therefore be used to prevent vacuum
pump lubricant seeping into the piping system.
If the power supply of some units is off, the charging program
cannot be completed normally.
If this is a multi-unit outdoor system, the power supply for all
outdoor units should be turned on.
Make sure the power supply is turned on 12 hours before
operations so that the crankcase heater is properly energized.
This is also to protect the compressor.
Make sure all connected indoor units have been identified.
Charge the refrigerant only after the system has not failed the
gas tightness tests and vacuum drying.
Volume of refrigerant charged must not exceed the designed
amount.
Warning
         
cause explosions and accidents.
 
value is 2088. Do not discharge the gas into the atmosphere.
        
protective gloves and safety glasses. Be careful when you
open the refrigerant piping.
Note
5.9 Refrigerant Charging
Calculating additional refrigerant charge
The additional refrigerant charge required depends on the lengths and
diameters of the outdoor and indoor liquid pipes. Table below shows
the additional refrigerant charge required per meter of equivalent pipe
length for different diameters of pipe. The total additional refrigerant
charge is obtained by summing the additional charge requirements for
each of the outdoor and indoor liquid pipes, as in the following formu-
la, where T1 to T8 represent the equivalent lengths of the pipes of
different diameters. Assume 0.5m for the equivalent pipe length of
each branch joint.
Liquid side
piping (mm) Additional refrigerant charge per meter
of equivalent length of piping (kg)








0.022kg
0.057kg
0.110kg
0.170kg
0.260kg
0.360kg
0.520kg
0.680kg






5.7 Vacuum Drying 5.8 Piping Insulation
Vacuum drying should be performed in order to remove moisture and
non-condensable gases from the system. Removing moisture
prevents ice formation and oxidization of copper piping or other
internal components. The presence of ice particles in the system
would cause abnormal operation, whilst particles of oxidized copper
can cause compressor damage. The presence of non-condensable
gases in the system would lead to pressure fluctuations and poor heat
exchange performance.
Vacuum drying also provides additional leak detection (in addition to
the gastightness test).

Piping size

Humidity<80%RH
Thickness
6.4~38.1mm 15mm

20mm
41.3~54.0mm 20mm

25mm
Humidity80%RH
Thickness
Installation manual Maxi MVD V6X
18
Figure 5.19






R410A
refrigerant tank
Weighing scale
Pressure gauge
Yellow hose
Blue hose Red hose
Master unit Slave unit Slave unit
Field piping
Gas pipe stop valve
Liquid pipe stop valve
Service port
4. Connect the yellow hose from the pressure gauge to the R410A
refrigerant tank.
5. Open the valve where the yellow hose meets the pressure gauge, and
open the refrigerant tank slightly to let the refrigerant eliminate the air.
Caution: open the tank slowly to avoid freezing your hand.
6. Set the weighing scale to zero.
7. Open the three valves on the pressure gauge to begin charging
refrigerant.
8. When the amount charged reaches R (kg), close the three valves. If
the amount charged has not reached R (kg) but no additional
refrigerant can be charged, close the three valves on the pressure
gauge, run the outdoor units in cooling mode, and then open the
yellow and blue valves. Continue charging until the full R (kg) of
refrigerant has been charged, then close the yellow and blue valves.
Note: Before running the system, be sure to complete all the
pre-commissioning checks and be sure to open all stop valves as
running the system with the stop valves closed would damage the
compressor.
Warning
 
 
installation personnel with the proper electrician certification,
and the installation process must comply with the applicable
regulations.
 
          
polarities must be installed, and the switching device can be
completely disconnected when the corresponding excessive
voltage situation arises.
           
stated in the product nameplate.
 
wiring is not in contact with the sharp edges of the sheet metal.
 
not connect the earth wire to public pipes, telephone earth
wires, surge absorbers and other places that are not designed
for grounding. Improper grounding may cause electric shock.
  
corresponding specifications.
 
prevent electric shocks or fires.
 
-quency noise characteristics) of the electric leakage protection
device are compatible with the unit to prevent frequent
tripping.
         
power cord and terminals of the components are secure, and
the metallic cover of the electric control box is closed tightly.
 
phase, the device will malfunction.
 
used to check if the wiring is reversed when the unit is power on.
 
is in standby status. It cannot conduct the reverse phase
checking when the product is operating normally.
   
replace any two of the three phases (A, B, C).
         
intermittent phase (such as a generator). For this type of power
sources, a reverse-phase protection circuit should be installed
locally in the unit, as operating in the inverted phase may
damage the unit.
 
 
you should maintain a certain distance from equipment that
may be susceptible to such interference.
 
power supply, in order not to damage the system.
 
 
is set for each outdoor unit.
Note
5.10 Electrical Wiring
5.10.1 Electrical wiring precautions
×
 

0.680
The procedure for adding refrigerant is as follows:
1. Calculate additional refrigerant charge R (kg) .
2. Place a tank of R410A refrigerant on a weighing scale. Turn the tank
upside down to ensure refrigerant is charged in a liquid state. (R410A
is a blend of two different chemicals compounds. Charging gaseous
R410A into the system could mean that the refrigerant charged is not
of the correct composition).
3. After vacuum drying, the blue and red pressure gauge hoses should
still be connected to the pressure gauge and to the master unit stop
valves.
Installation manual Maxi MVD V6X
19
Communication wiring of indoor unit: The P,Q,E communication line
should be connected in a chain starting from the outdoor unit to each
indoor unit one by one up to the last indoor unit. In the last indoor
unit, connect a resistor of 120 ohms between the P and Q terminals.
The correct and wrong connection methods are demonstrated below:
Communication wiring of outdoor unit: The H1H2E communication
lines of the outdoor unit should be connected in a chain starting from
the master unit to the last slave unit. As shown below.
         
separately, they cannot be placed in the same conduit. Use a
power supply conduit to isolate if the current of the power supply
is less than 10 A. If the current is greater than 10 A but less than
50 A, the spacing must exceed 500 mm at all times; otherwise; it
may lead to electromagnetic interference.
 Arrange the refrigerant piping, power cords and communication
wiring in parallel, but do not tie the communication lines together with
the refrigerant piping or power cords.
         
contact with the internal piping so as to prevent the high
temperature piping from damaging the wires.
 Once the wiring layout is completed, close the lid tightly to prevent
the wiring and terminals from being exposed when the lid is loose.
Note
5.10.3 About wiring layout
Master
unit
Slave
unit
Slave
unit
H1 H2 E H1 H2 E
5.10.4 Communication wiring layout
5.10.4.1 Wiring mode
Figure 5.22
After the last indoor unit, the communication wiring should not
route back to the outdoor unit as this will form a closed loop.
Wiring layout comprises of the power cords and communication wiring
between the indoor and outdoor units. These include the earth lines, and
the shielded layer of the earth lines of the indoor units in the P,Q,E
communication line. See below for an example of a wiring layout.
a. Three-phase power supply (with earth lines and leakage
protection)
b. Power distribution box
c. Power supply terminal of outdoor unit
d. Single phase power supply (with earth lines and leakage
protection)
e. H1, H2 and E communication wire(with shielded layer)
f. P, Q and E communication wire(with shielded layer)
g. Earth line
h. Outdoor unit
i. Indoor unit
j. Main switch (with leakage protection)
b bbbb
b b b
j
d
jjj
a
ccc
g
e
f
hh
iiiii
5.10.2 Wiring layout (overview)
Figure 5.20
Master
unit
P Q E
P Q E
P Q E P Q E P Q E
Master
unit
P Q E P Q E
P Q E
P Q E
P Q E
P Q E P Q E
P Q E
P Q E
P Q E
Master
unit
Figure 5.21
Do not connect two chains from one outdoor unit.
Indoor unit
Indoor unit
Indoor unit Indoor unit
Indoor unit Indoor unit Indoor unit Indoor unit
Indoor unit Indoor unit Indoor unit
Installation manual Maxi MVD V6X
20

Other manuals for MAXI MVD V6X

1

Other mundoclima Air Conditioner manuals

mundoclima MUPR-H10X Series Installation instructions

mundoclima

mundoclima MUPR-H10X Series Installation instructions

mundoclima MUPO-C6 User manual

mundoclima

mundoclima MUPO-C6 User manual

mundoclima MUENR-H Operating manual

mundoclima

mundoclima MUENR-H Operating manual

mundoclima MUEN-30-H6T Service manual

mundoclima

mundoclima MUEN-30-H6T Service manual

mundoclima MUCR-H8 Series Installation instructions

mundoclima

mundoclima MUCR-H8 Series Installation instructions

mundoclima MU-WZ Series User manual

mundoclima

mundoclima MU-WZ Series User manual

mundoclima CL23420 User manual

mundoclima

mundoclima CL23420 User manual

mundoclima MVD DC2 CL23530 Installation instructions

mundoclima

mundoclima MVD DC2 CL23530 Installation instructions

mundoclima H7 Series Installation instructions

mundoclima

mundoclima H7 Series Installation instructions

mundoclima MUP User manual

mundoclima

mundoclima MUP User manual

mundoclima WF105 Installation instructions

mundoclima

mundoclima WF105 Installation instructions

mundoclima MUPO-H6 Installation instructions

mundoclima

mundoclima MUPO-H6 Installation instructions

mundoclima CL23215 User manual

mundoclima

mundoclima CL23215 User manual

mundoclima MUVR-12-H10 Installation instructions

mundoclima

mundoclima MUVR-12-H10 Installation instructions

mundoclima MUST 18 HF User manual

mundoclima

mundoclima MUST 18 HF User manual

mundoclima MVD Installation instructions

mundoclima

mundoclima MVD Installation instructions

mundoclima MUPO-07-C10 Installation instructions

mundoclima

mundoclima MUPO-07-C10 Installation instructions

mundoclima MUCSR-H6 User manual

mundoclima

mundoclima MUCSR-H6 User manual

mundoclima MUP-W9 User manual

mundoclima

mundoclima MUP-W9 User manual

mundoclima MVD D4+ User manual

mundoclima

mundoclima MVD D4+ User manual

mundoclima CL23190 User manual

mundoclima

mundoclima CL23190 User manual

mundoclima CL23320 User manual

mundoclima

mundoclima CL23320 User manual

mundoclima MINI MVD V4+ User manual

mundoclima

mundoclima MINI MVD V4+ User manual

mundoclima MVD DC2 Series Installation instructions

mundoclima

mundoclima MVD DC2 Series Installation instructions

Popular Air Conditioner manuals by other brands

LG LM50 2004-E1 Product data

LG

LG LM50 2004-E1 Product data

Panasonic S-18MK2U6 operating instructions

Panasonic

Panasonic S-18MK2U6 operating instructions

York E3GE036S01B installation instructions

York

York E3GE036S01B installation instructions

Zamil PS036 Installation, operation & maintenance manual

Zamil

Zamil PS036 Installation, operation & maintenance manual

Trane A4AC3018B1000B Installer's guide

Trane

Trane A4AC3018B1000B Installer's guide

Hitecsa ECV-SP 1001 Installation, operation and maintenance manual

Hitecsa

Hitecsa ECV-SP 1001 Installation, operation and maintenance manual

Noaton AC 5109 Instructions for use

Noaton

Noaton AC 5109 Instructions for use

DeLonghi CLIMAVENETA HED HCAT 0011 SE Installation and service manual

DeLonghi

DeLonghi CLIMAVENETA HED HCAT 0011 SE Installation and service manual

Carrier 40VMM007A 3 Series Installation and maintenance instructions

Carrier

Carrier 40VMM007A 3 Series Installation and maintenance instructions

Fujitsu AOU9RLF installation manual

Fujitsu

Fujitsu AOU9RLF installation manual

Mitsubishi Electric Mr. Slim MXZ-3B24NA installation manual

Mitsubishi Electric

Mitsubishi Electric Mr. Slim MXZ-3B24NA installation manual

Pioneer WYB030-036 Series user manual

Pioneer

Pioneer WYB030-036 Series user manual

Heat Controller B-MMC09FA-1 Service manual

Heat Controller

Heat Controller B-MMC09FA-1 Service manual

Mitsubishi Electric MSZ-GE22VA installation manual

Mitsubishi Electric

Mitsubishi Electric MSZ-GE22VA installation manual

Whirlpool WHAP081AW Use and care guide

Whirlpool

Whirlpool WHAP081AW Use and care guide

Kinghome KU21-FCU18-3 instruction manual

Kinghome

Kinghome KU21-FCU18-3 instruction manual

OPTIMEO OPC-A01-160HP instruction manual

OPTIMEO

OPTIMEO OPC-A01-160HP instruction manual

Friedrich ZoneAire P09B Specifications

Friedrich

Friedrich ZoneAire P09B Specifications

manuals.online logo
manuals.online logoBrands
  • About & Mission
  • Contact us
  • Privacy Policy
  • Terms and Conditions

Copyright 2025 Manuals.Online. All Rights Reserved.