manuals.online logo
Brands
  1. Home
  2. •
  3. Brands
  4. •
  5. Musterring
  6. •
  7. Indoor Furnishing
  8. •
  9. Musterring setOne Tacoma 31 User manual

Musterring setOne Tacoma 31 User manual

-1-
304_08 MN-Tacoma 31,32 rev.B
Tacoma 31, 32
1801
502
380
1501
502
380
A1
A2
B
B
C
D
E
E
F
G
H
I
F
G
H
I
Alt. 31
Alt. 32
A, D: Hinweisblatt
-
bitte unbedingt beachten!
Lieber Kunde,
herzlichen Glückwunsch zum Erwerb Ihres neuen Möbelstücks. Bitte beachten Sie die nachfolgenden Hinweise,
die zur sach-gerechten Nutzung des neuen Möbels erforderlich sind.
Lesen Sie die Montageanleitung aufmerksam durch und verfahren dementsprechend. Bei nicht
vorschriftsmäßiger oder nicht fachmännischer Montage wird bei Personen- und Sachschäden keinerlei Haftung
übernommen!
Legen Sie bei der Montage die Möbelteile auf einen weichen Untergrund - so vermeiden Sie Kratzer!
Verwenden Sie die Beschläge bzw. Einzelteile nach den vorgegebenen Montageschritten!
Die einwandfreie Funktion des Möbels ist nur bei lot- und waagerechter Aufstellung gewährleistet.
Die Standfläche ist ggf. so auszugleichen, dass das Möbel sicher steht.
Ist für die Montage des Möbels eine Wandbefestigung vorgesehen, so prüfen Sie bitte die Wand auf
ausreichende Tragfähigkeit und Beschaffenheit.
Es werden keine Dübel für die Wandmontage mitgeliefert, da sie für die jeweilige Wandbeschaffenheit (Tragkraft)
geeignet zu wählen sind. Bei von Massivwänden (z.B. Beton- und Festmauerwerk) abweichendem Mauerwerk,
welches spezielle Befestigungsmittel erfordert, empfehlen wir ggf. eine Beratung durch den Fachhandel.
Elemente mit Kippmoment sind zur Sicherheit mit der Gebäudewand zu verbinden. Der Kippsicherungswinkel
wird bei den entsprechenden Elementen mitgeliefert.
Alle Schubkästen und Auszüge sind gegen unabsichtliches herausziehen zu sichern. Die Türen sind ab Werk
vorjustiert, müssen aber aufgrund der örtlichen Bedingungen beim Kunden ggf. neu ausgerichtet bzw. eingestellt
werden. Die Türen nicht weiter als 90° öffnen, da es sonst zur Beschädigung der Tür oder den Beschlägen
kommt.
Alle Schrauben sowie tragende Verbindungsteile sind nach 5 bis 6 Wochen nachzuziehen, um eine dauerhafte
Standsicherheit zu gewähren!
Alle elektrischen Installationen sind nach den gültigen Normen bzw. Vorschriften gefertigt. Die beigelegte
Montageanleitung für die Beleuchtung ist einzuhalten! Die max. Wattzahl vom Leuchtmittel ist auf der jeweiligen
Lampenfassung angegeben. Bei Nichteinhaltung der max. Wattzahl besteht durch Überlastung BRANDGEFAHR.
Das Zudecken von Leuchtmittel - Hitzestau - ist wegen BRANDGEFAHR zu unterlassen.
Beim Einlegen oder herausnehmen der Einlegeböden, aller Materialarten, bitte nicht verkanten. Dies kann zu
Beschädigungen der Möbelelemente führen. Scharfkantige bzw. spitze Gegenstände, sowie hartes Aufsetzen
können zu Beschädigungen beim Einlegeboden oder zum Glasbruch beim Glaseinlegeboden führen.
Sollte ein Teil fehlen oder beschädigt sein, kreuzen Sie bitte dieses deutlich auf der Montageanleitung an
oder machen Sie Angaben über die Typen- und Teilebezeichnung. Geben Sie außerdem die
Seriennummer und das Datum von der Verpackung und / oder der Rückwand an. Diese Informationen
schicken Sie dann an Ihren Vertragspartner.
PFLEGE:
■Die Verarbeitung und Materialbeschaffenheit machen eine besondere Pflege und teure Pflegemittel nicht
erforderlich
■Verwenden Sie keine Lösungs- und scheuernden Putzmittel.
■Bei der Reinigung nur saubere Staubtücher aus Baumwolle oder feuchte Lappen verwenden.
HINWEIS:
Alle Fronteile sind mit einer Schutzfolie geschützt, die erst nach einer erfolgreichen Montage vom Kunden entfernt
wird. Nach der Entfernung der Folie darf die Hochglanzoberfläche erst nach 72 Stunden gereinigt werden, siehe
Pflege.
-2-
-3-
GB: Instructions
-
please observe the following warnings!
Dear Customer,
We cordially congratulate you for buying new furniture. Please note the following cautions, which are
necessary for the proper use of new furniture.
The attached mounting instructions need to be read carefully and observed.
We assume no liability for errors resulting from improper installation!
Place the furniture (part of the furniture) on a soft base to prevent scratches!
Please use the fitting, respectively individual parts acco
rding to the accompanying mounting
procedures!
The flawless function of the furniture is guaranteed only in vertical and horizontal
installation. The area under the furniture should be so balanced that the furniture is secure!
If it is assumed to mount th
e furniture on the wall, it is necessary to verify in advance the sufficient load
capacity and composition of the wall.
No wall plugs
are supplied for wall mounting as they have to be specially choosen suitable for the
respective wall condition (load capac
ity). For masonry that deviates from solid walls (for example,
concrete and solid masonry), which requires special fasteners, we recommend consulting the
specialist trade if necessary. Elements with tilting moment are to be connected to the building wall f
or
safety reasons. The anti-tilt bracket is supplied with the corresponding elements.
All drawers and runner systems drawers have to
be secured against falling out. Doors are preset
adjusted at the factory, but may, at local conditions, be rebalanced / adjusted at the customer.
Do not
open the doors more than 90 °, otherwise the door or the fittings will be damaged.
All screws as well as supporting fasteners should be tightened after 5 to 6 weeks in order to guarantee
the permanent stability of the furniture!
All electrical installations are manufactured in accordance with applicable standards and regulations.
! Observe the enclosed assembly instructions - light guide!
The light output used is indicated on the
lamp socket. If the max. number of watts i
s exceed, it threatens overloading and the risk of fire. Avoid
covering the lamp or heat accumulation due to fire hazards
When inserting or removing the shelves, all types of material, please do not tilt. This can lead to
damage to the furniture elements. Sharp-edged or pointed objects, as well as hard touchdown can
lead to damage to the shelf or to glass breakage in the glass shelf.
If a part is missing or damaged, please tick this clearly on the assembly instructions or give details of the
type and part designation. Also, provide the serial number and date from the packaging and / or the back
panel. This information will then be sent to your contract partner.
MAINTANCE:
■Processing and quality of the material do not require special maintenance or expensive care products.
■Do not use solvents and abrasive cleaners.
■Only clean the furniture with a duster or damp cloth
NOTE:
All front panels are protected with a protective foil film, which is only removed after a successful assembly by the
customer. After removing the foil, the high-gloss surface may only be cleaned after 72 hours, see care.
-4-
SK: Poučenie
-
dodržujte prosím nasledovné upozornenia !
Milý zákazník,
srdečne Vám blahoželáme ku kúpe nového nábytku. Dbajte prosím na nasledovné upozornenia, ktoré sú
nevyhnutné pre správne používaniu nového nábytku.
Priložený montážny návod je potrebné pozorne prečítaťa riadiťsa ním.
Za chyby vzniknuté pri nesprávnej montáži nepreberáme žiadnu zodpovednosť!
Položte nábytok (časťnábytku) na mäkký podklad, čím zabránite poškriabaniu!
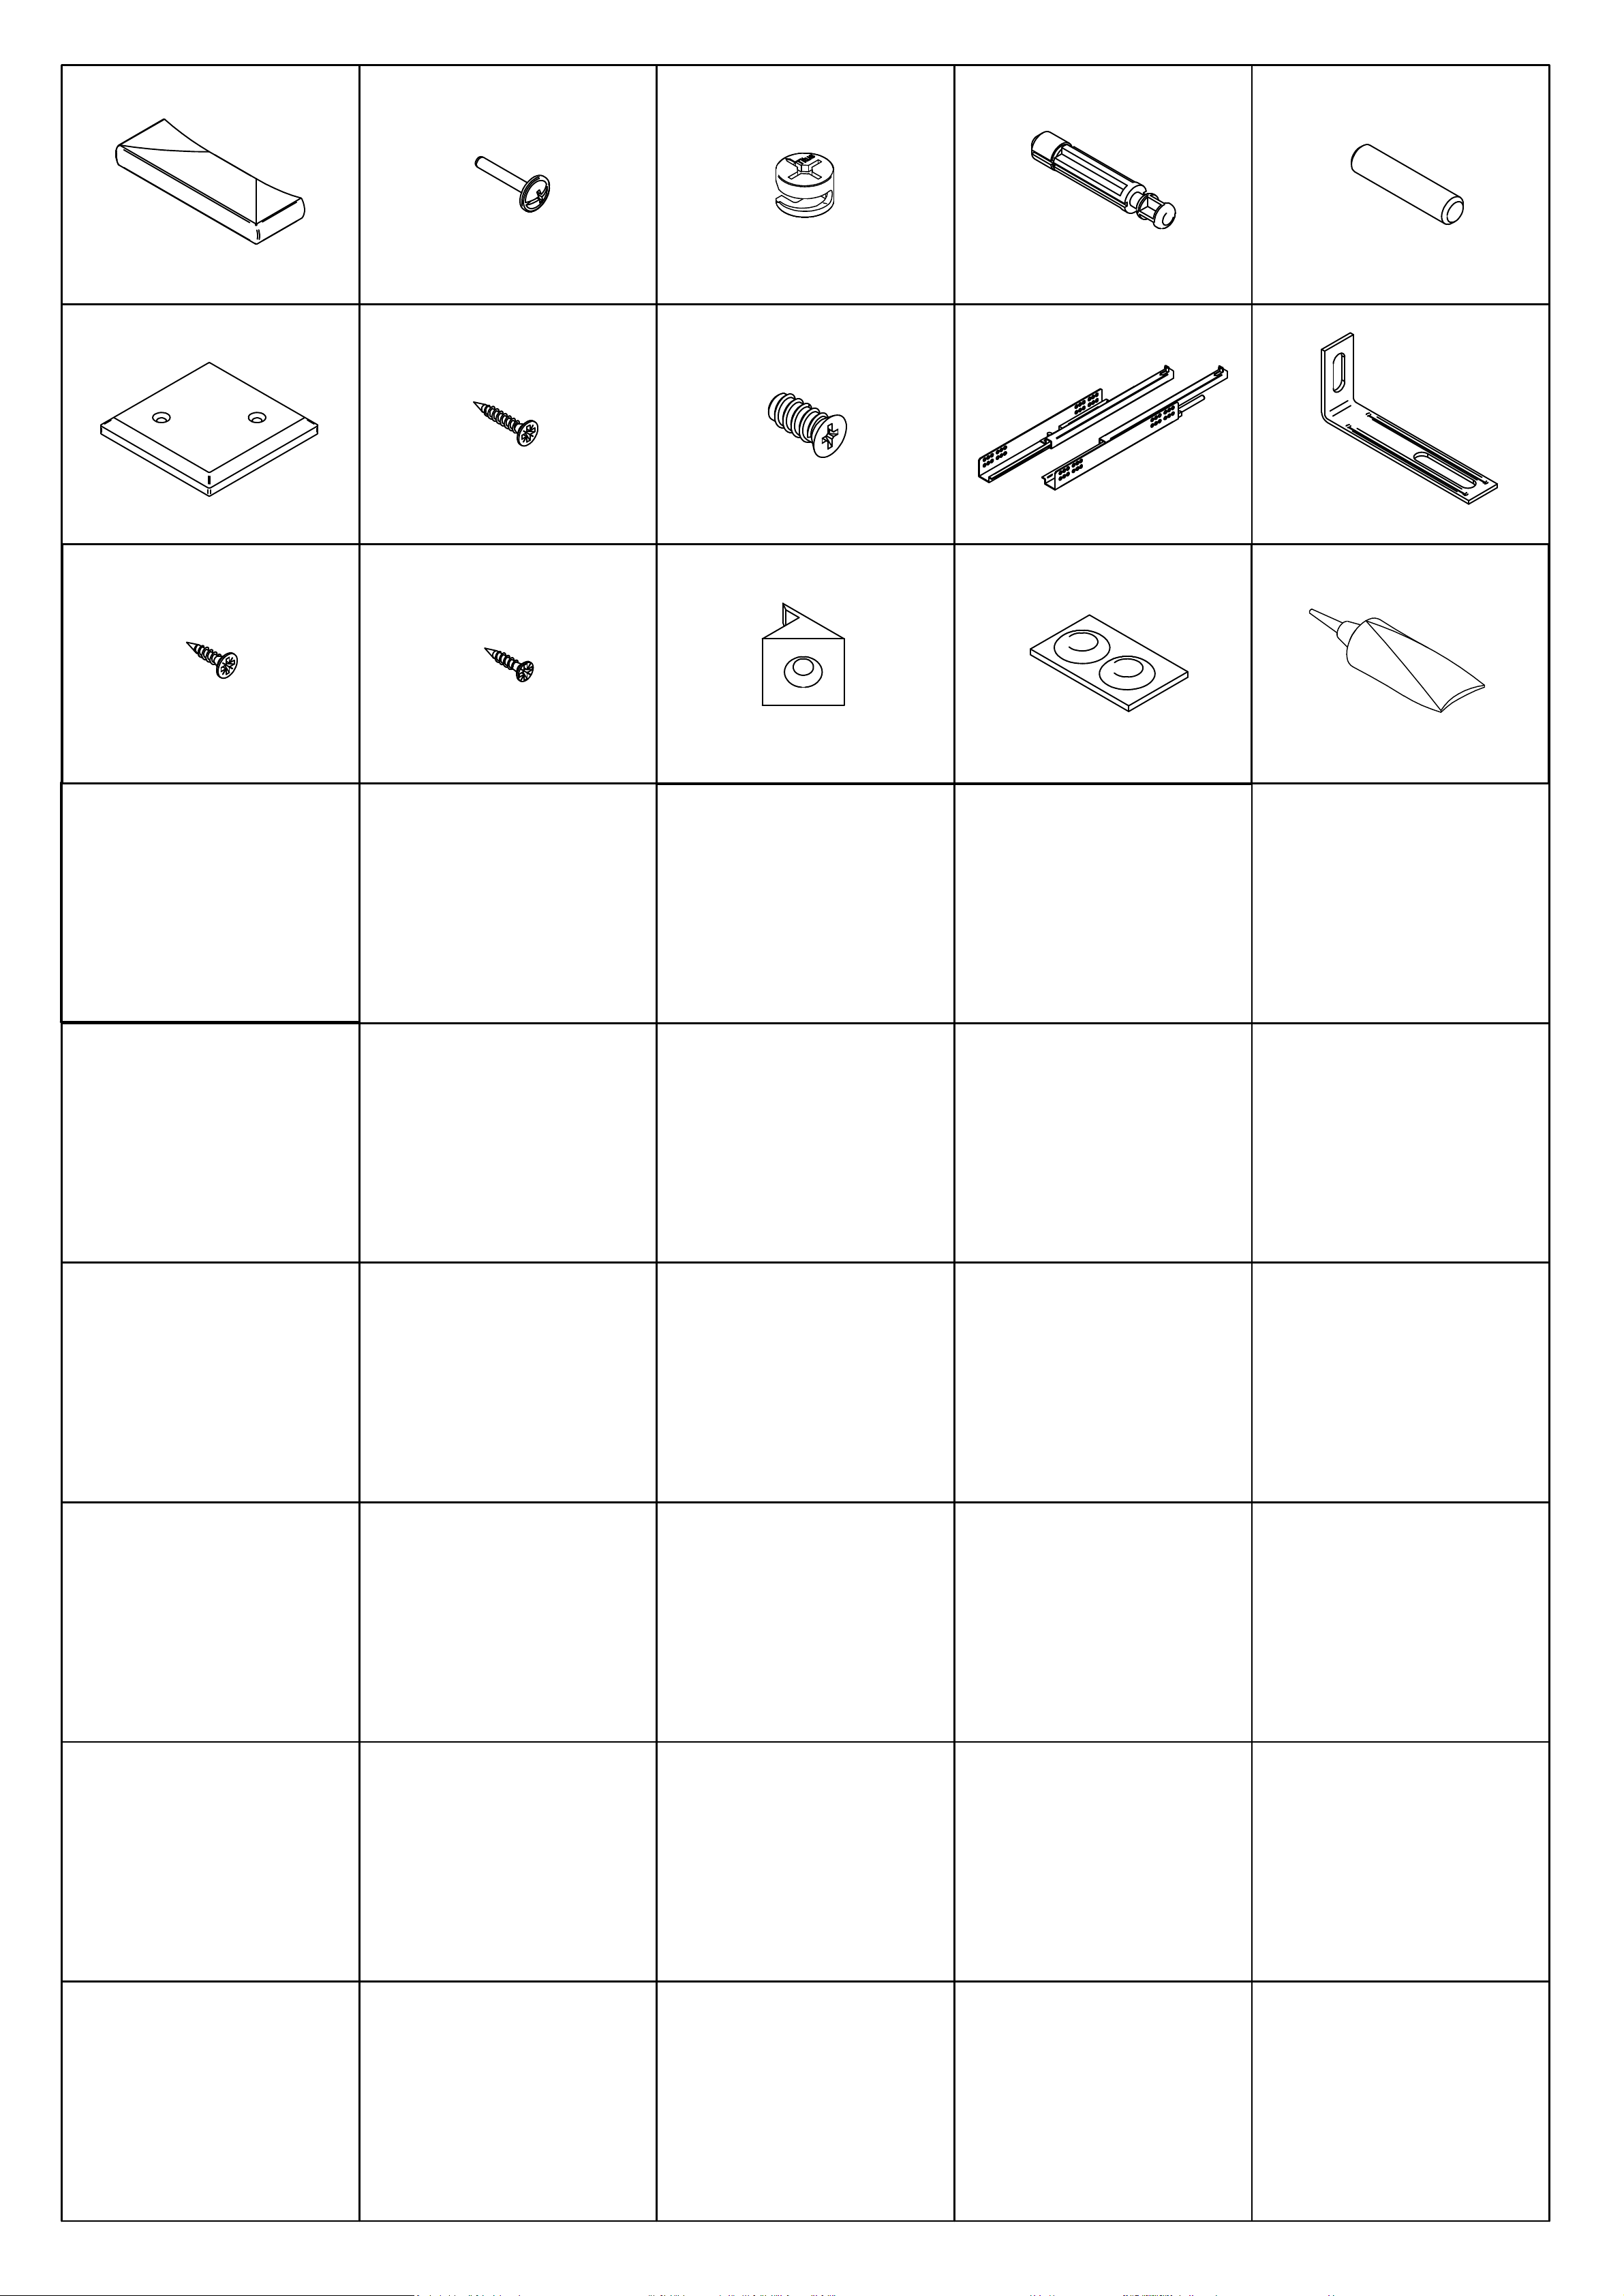
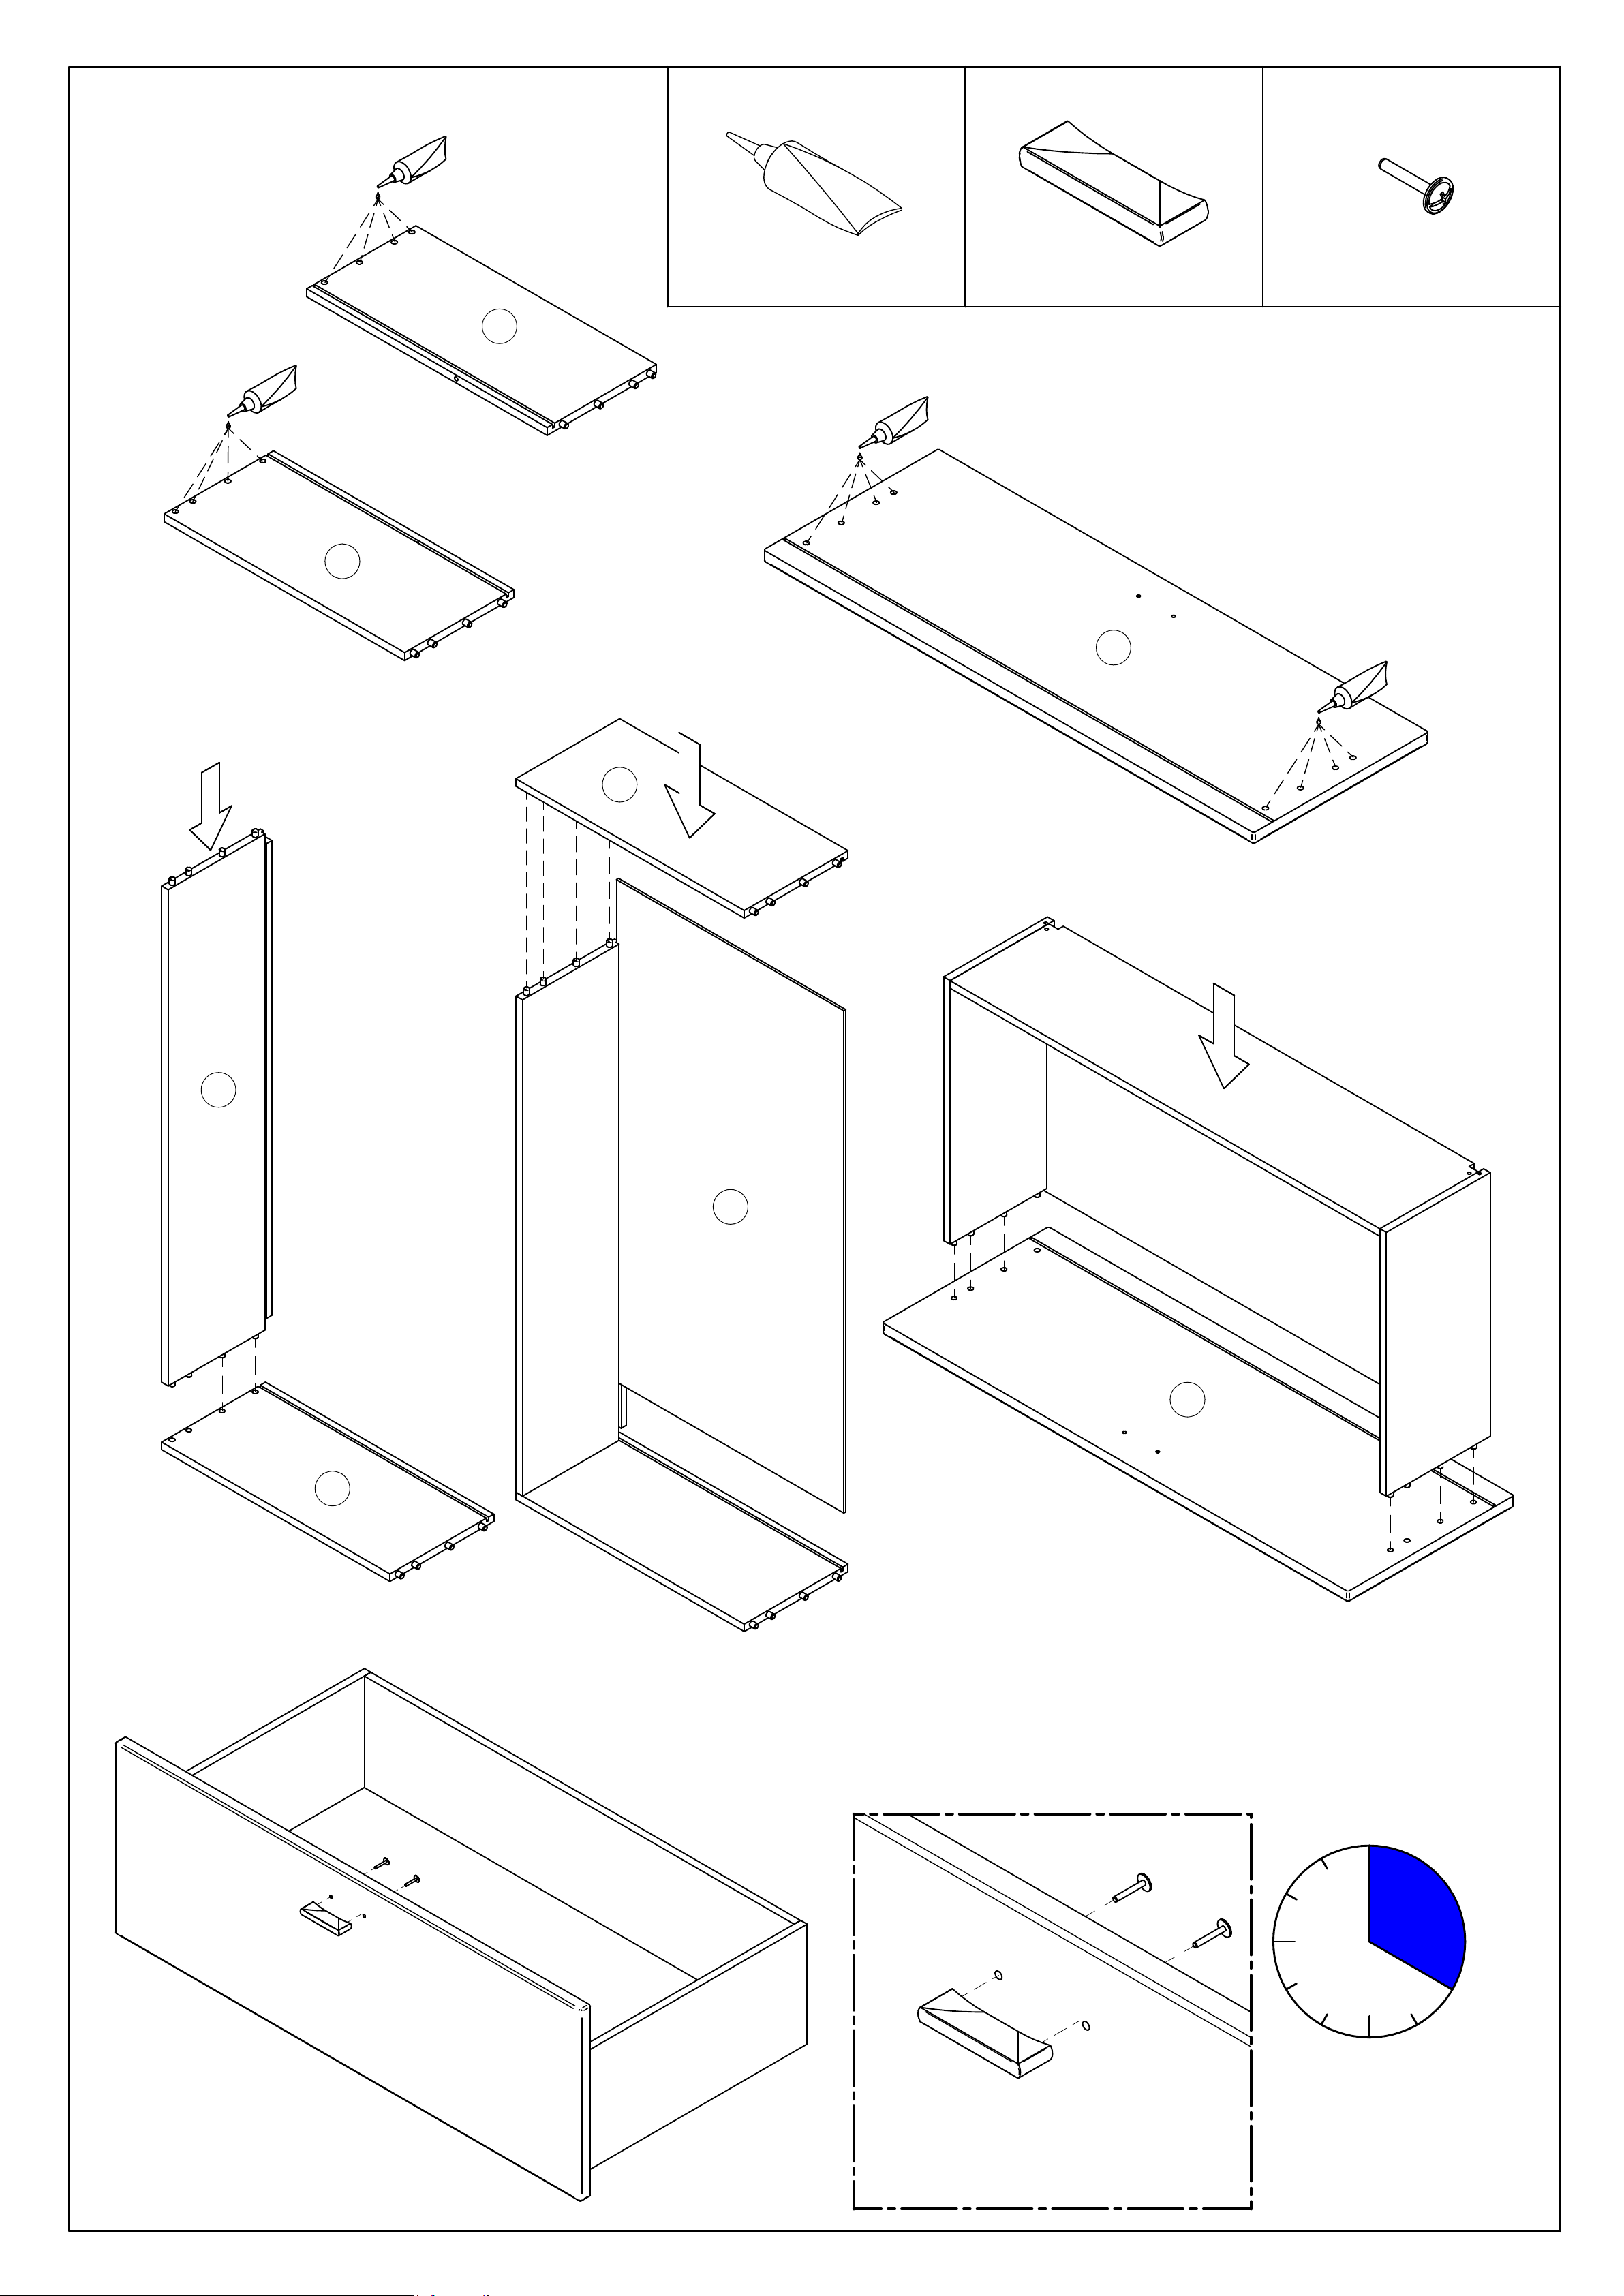
Používajte prosím kovanie resp. jednotlivé časti podľa priložených montážnych postupov!
Bezchybná funkcia nábytku je zaručená len pri zvislej a vodorovnej inštalácii. Plocha pod nábytkom má byťv
danom prípade tak vyrovnaná, aby nábytok bezpečne stál!
Ak sa predpokladá pri montáži nábytku jeho pripevnenie na stenu, je
nutné vopred overiťdostatočnú nosnosťa
zloženie steny.
Na montáž na stenu nie sú dodávané žiadne hmoždinky a preto sa vhodné hmoždinky musia vybraťpre
príslušný stav steny (nosnosť). Pre murivo, ktoré sa líši od pevných stien (napr. betón a pevné murivo), ktoré
vyžadujú špeciálne spojovacie materiály, odporúčame v prípade potreby konzultovaťodborný obchod. Z
bezpečnostných dôvodov musia byťprvky so sklopným momentom / tendenciu k prevráteniu spojené so stenou
budovy. Konzola (L-profil) proti sklopeniu sa dodáva s príslušnými prvkami.
Všetky zásuvky a výsuvy musia byťzaistené proti vypadnutiu. Dvere sú pri výrobe prednastavené, ale prípadne,
na základe lokálnych podmienok, musia byťu zákazníka nanovo vyvážené / nastavené. Dvere neotvárajte viac
ako 90°, môže dôjsťk ich poškodeniu, resp. poškodenniu kovania.
Všetky skrutky ako aj nosné spojovacie prvky by mali byťpo 5 až 6 týždňoch dotiahnuté, aby mohla byťzaručená
trvalá stabilita nábytku!
Všetky elektrické inštalácie sú zhotovené podľa platných noriem a predpisov. ! Dodržujte pribalený mont. návod
pre svietidlo! Použitý svetelný výkon je udaný na objímke lampy. Pri nedodržaní max. počtu wattov hrozí
následkom preťaženia riziko vzniku požiaru. Vyhýbajte sa zakrytiu lampy resp. akumulácii tepla kvôli
nebezpečenstvu požiaru!
Pri vkladaní alebo vyberaní políc, všetkých druhov materiálu, prosím, dávajte pozor na ich vzpriečenie. To môže
viesťk poškodeniu nábytkových prvkov. Ostré hrany alebo špicaté predmety, ako aj tvrdé dotyky môžu viesťk
poškodeniu police alebo rozbitiu skla v sklenenej polici
.
V prípade, že nejaká časťnábytku chýba alebo je poškodená, zakrúžkujte ju prosím zreteľne na
montážnom návode, udajte označenie typu resp. časti, okrem toho udajte sériové číslo a dátum balenia,
resp. z chrbýtu skrinky a pošlite tieto informácie k Vašemu zmluvnému predajcovi.
STAROSTLIVOSŤ:
■Spracovanie a materiálové vlastnosti robia špeciálnu starostlivosťa drahé ošetrovacie produkty zbytočnými
■Nepoužívajte rozpúšťadlá a abrazívne čistiace prostriedky.
■Pri čistení používajte iba čistú bavlnenú utierku alebo vlhkú handričku.
POZNÁMKA:
Všetky predné panely sú chránené ochrannou fóliou, ktorá musí byťodstránená až po úspešnej montáži zo
strany zákazníka. Po odstránení fólie je možné povrch s vysokým leskom čistiťaž po 72 hodinách.
-5-
CZ:
Poučení
-
dodržujte prosím následovné upozornění !
Milí zákazníku,
srdečněVám blahopřejeme ke koupi nového nábytku. Dbejte prosím na následovné upozornění, ktoré je
potřebné pro správné použití nového nábytku.
Přiložený montážní návod je potřebné pozorněpřečíst a řídit se jím.
Za chyby vzniklé při nesprávné montáži nepřebíráme žádnou odpovědnost!
Položte nábytek (část nábytku) při montáži na měkký podklad, čímž zabráníte poškrábaní!
Používejte prosím kování, resp. jednotlivé části podle přiložených montážních postupů!
Bezchybná funkce nábytku je zaručená jen při svislé a vodorovné instalaci. Plocha pod nábytkem má být v
daném případětak vyrovnaná, aby nábytek bezpečněstál!
Jestliže se předpokládá při montáži nábytku jeho připevnění na stěnu, je nutné předem ověřit dostatečnou
nosnost a složení stěny. Pro montáž na stěnu nejsou dodávány žádné hmoždinky. Vhodné hmoždinky je nutné
zvolit pro příslušný stav stěny (nosnost). Pro zdivo, které se liší od pevných stěn (např. betonové a pevné zdivo),
které vyžaduje speciální spojovací materiál, doporučujeme v případěpotřeby konzultovat odborný obchod. Prvky
s tendecií k naklápění / naklápěcím momentem se z bezpečnostních důvodůpřipojují ke stěněbudovy. L-profil /
konzola proti sklopení se dodává v sáčku kování s odpovídajícími prvky.
Všechny zásuvky a výsuvy musí být zajištěné proti vypadnutí. Dveře jsou při výroběpřednastavené, ale případně,
na základěmístních podmínek, musí být u zákazníka znovu vyvážené / nastavené. Dveře neotvírejte víc jak do
90°, protože se poškodí dvěře nebo kování!
Všechny šrouby a také všechny spojovací prvky by měli být po 5 -
6 týdnech dotáhnuté, aby byla zaručena trvalá
stabilita nábytku!
Všechny elektrické instalace jsou zhotovené podle platných norem a předpisů. Dodržujte přibalený montážní
návod pro svítidlo! Použitý světelný výkon je uvedený na objímce lampy. Při nedoržení max. počtu wattůhrozí
následkem přetížení riziko VZNIKU POŽÁRU.
Vyhýbejte se zakrytí lampy resp. akumulaci tepla kvůli nebezpečí
požáru!
Všechny šrouby a také všechny spojovací prvky by měli být po 5 -
6 týdnech dotáhnuté, aby byla zaručena trvalá
stabilita nábytku!
Poličky všech druhůmateriálu nesmí být při vložen
í resp. vyložení vzpříčené, protože to může vést k jejich
poškození. Hranaté resp. špičaté předměty a také hrubé zacházení může vést k poškození polic, i těch
skleněných.
V případě, že nějaká část nábytku chybí nebo je poškozená, zakroužkujte ji prosím z
řetelněna montážním
návodě, udejte označení typu resp. části, kromětoho udejte sériové číslo a datum balení
s obalu a/nebo
chrbátu a tyto informace zašlete k vašemu zmluvnému prodejci.
Ošetřování:
■Zpracování a kvalita materiálu si nevyžaduje zvláštní údržbu ani drahé ošetřovací prostředky.
■Nepoužívejte žádné čistící prostředky!
■Nábytek očišťujte pouze čistou prachovkou nebo vlhkou utěrkou.
POZNÁMKA:
Všechny přední panely jsou chráněny ochrannou fólií, která smí být odstraněna pouze po úspěšné montáži
zákazníkem. Po odstranění fólie lze povrch s vysokým leskem čistit pouze po 72 hodinách, viz péče.

This manual suits for next models

1

Other Musterring Indoor Furnishing manuals

Musterring SORRENT User manual

Musterring

Musterring SORRENT User manual

Musterring SORRENT 990744 User manual

Musterring

Musterring SORRENT 990744 User manual

Musterring SORRENT 990 005 User manual

Musterring

Musterring SORRENT 990 005 User manual

Musterring LARENA M150 User manual

Musterring

Musterring LARENA M150 User manual

Musterring set one Atlanta/160 User manual

Musterring

Musterring set one Atlanta/160 User manual

Musterring NEVIO V2007 User manual

Musterring

Musterring NEVIO V2007 User manual

Musterring NANDO D2007 User manual

Musterring

Musterring NANDO D2007 User manual

Musterring Mix Box 0771-HS 1-120 User manual

Musterring

Musterring Mix Box 0771-HS 1-120 User manual

Musterring Set One Atlanta/160 User manual

Musterring

Musterring Set One Atlanta/160 User manual

Musterring STUHLWERK 2.0 S2016 User manual

Musterring

Musterring STUHLWERK 2.0 S2016 User manual

Musterring EVOLUTION User manual

Musterring

Musterring EVOLUTION User manual

Musterring SORRENT 992 330 User manual

Musterring

Musterring SORRENT 992 330 User manual

Musterring BRISKO User manual

Musterring

Musterring BRISKO User manual

Musterring set one Kommode User manual

Musterring

Musterring set one Kommode User manual

Musterring Q-MEDIA User manual

Musterring

Musterring Q-MEDIA User manual

Musterring Set One Atlanta/240 User manual

Musterring

Musterring Set One Atlanta/240 User manual

Musterring SORRENT 99282 User manual

Musterring

Musterring SORRENT 99282 User manual

Musterring SORRENT 992 328 User manual

Musterring

Musterring SORRENT 992 328 User manual

Musterring Set one FONTANA GD39ZK Manual

Musterring

Musterring Set one FONTANA GD39ZK Manual

Popular Indoor Furnishing manuals by other brands

Regency LWMS3015 Assembly instructions

Regency

Regency LWMS3015 Assembly instructions

Furniture of America CM7751C Assembly instructions

Furniture of America

Furniture of America CM7751C Assembly instructions

Safavieh Furniture Estella CNS5731 manual

Safavieh Furniture

Safavieh Furniture Estella CNS5731 manual

PLACES OF STYLE Ovalfuss Assembly instruction

PLACES OF STYLE

PLACES OF STYLE Ovalfuss Assembly instruction

Trasman 1138 Bo1 Assembly manual

Trasman

Trasman 1138 Bo1 Assembly manual

Costway JV10856 manual

Costway

Costway JV10856 manual

moss DESIGN Caisson Credenza Assembly instructions

moss DESIGN

moss DESIGN Caisson Credenza Assembly instructions

Aquaglide FULL DECK 15.0 owner's manual

Aquaglide

Aquaglide FULL DECK 15.0 owner's manual

AREBOS AR-HE-SW30 user manual

AREBOS

AREBOS AR-HE-SW30 user manual

Till-Hilft Fulda 87005.330 Assembly instructions

Till-Hilft

Till-Hilft Fulda 87005.330 Assembly instructions

Twoey Outside 2010 quick start guide

Twoey Outside

Twoey Outside 2010 quick start guide

Hettich Easys 200 operating instructions

Hettich

Hettich Easys 200 operating instructions

The bedboss RELAX 404 Series owner's manual

The bedboss

The bedboss RELAX 404 Series owner's manual

Oeseder Möbelindustrie Bern 991 720 Assembly instructions

Oeseder Möbelindustrie

Oeseder Möbelindustrie Bern 991 720 Assembly instructions

Costway HW68469 user manual

Costway

Costway HW68469 user manual

Next ALIX A27743 Assembly instructions

Next

Next ALIX A27743 Assembly instructions

BROSA Hans Assembly guide

BROSA

BROSA Hans Assembly guide

Prodigg MINIKA PBA015T-FUR installation manual

Prodigg

Prodigg MINIKA PBA015T-FUR installation manual

manuals.online logo
manuals.online logoBrands
  • About & Mission
  • Contact us
  • Privacy Policy
  • Terms and Conditions

Copyright 2025 Manuals.Online. All Rights Reserved.