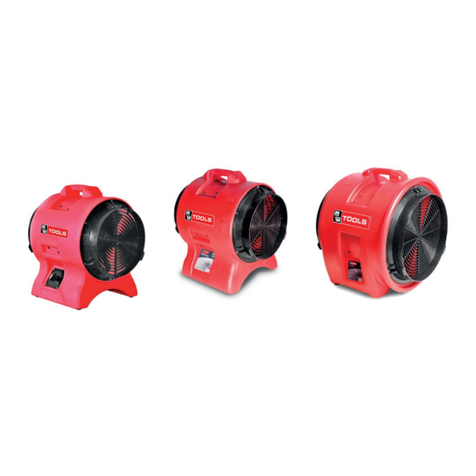
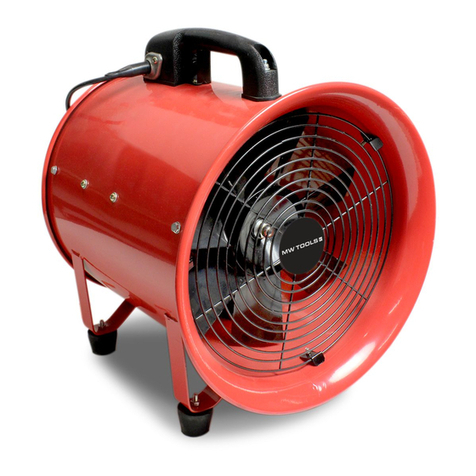
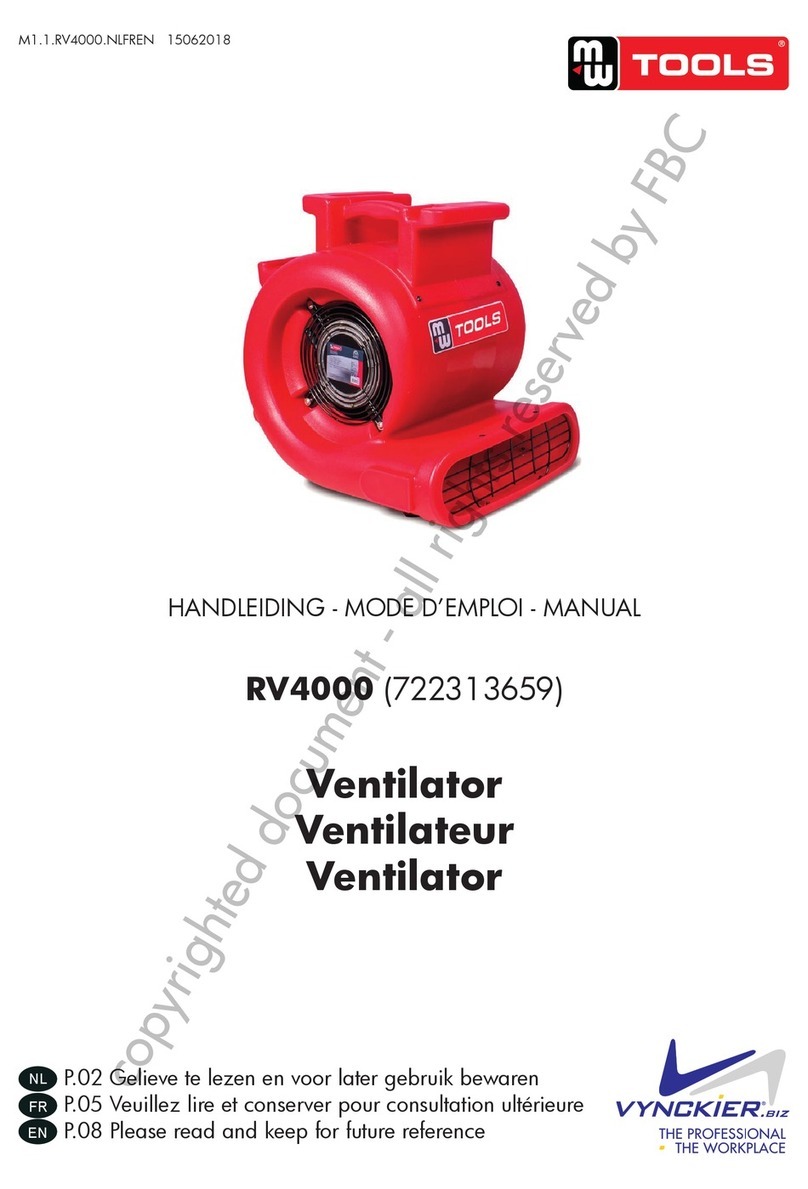
MW TOOLS RV600 User manual

M1.1.RV600-RV3000.NLFREN 15062018
HANDLEIDING - MODE D’EMPLOI - MANUAL
P.02 Gelieve te lezen en voor later gebruik bewaren
P.05 Veuillez lire et conserver pour consultation ultérieure
P.08 Please read and keep for future reference
FR
EN
NL
RV600 (722313567)
RV3000 (722313568)
Ventilator
Ventilateur
Ventilator
RV600
copyrighted document - all rights reserved by FBC

2
NL
M1.1.RV600-RV3000.NLFREN 15062018
1 Specicaties
Model RV600 RV3000
Vermogen 65 W 250 W
Spanning 230 V 230 V
Frequentie 50 Hz 50 Hz
Diameter 145 mm 241 mm
Maximale snelheid 1250 t/min 950 t/min
Luchtdebiet 9,6 m³/h 49,5 m³/h
Afmetingen (l x b x h) 280 x 305 x 335 mm 480 x 430 x 480 mm
Netto gewicht 1,5 kg 12 kg
2 Veiligheid
BELANGRIJK!
Lees en begrijp alle instructies en veiligheidsvoorschriften voor het gebruik van uw
ventilator.
• Houd kinderen op afstand. Laat de kinderen niet met het toestel of in de nabijheid van het toestel spelen.
• Elektrische aansluiting: De ventilator is geschikt voor een 230V/50Hz aansluiting. Gebruik alleen een aansluiting
met aarding en met een aardlekschakelaar.
• Gebruik het toestel niet met een beschadigde voedingskabel. Indien beschadigd, moet de kabel onmiddellijk worden
vervangen door een kabel van hetzelfde type en grootte.
• Gebruik alleen goedgekeurde verlengkabels.
• Laat het toestel niet vallen en gooi het niet. Dit kan de bekabeling en componenten beschadigen.
• Installeer het toestel op een stabiel en vlak oppervlak.
• Zorg ervoor tijdens het transport, dat het toestel niet in het voertuig glijdt.
• Het toestel mag niet in plassen of stilstand water. Gebruik het niet buitenshuis. Als de kabel of onderdelen nat
worden, moeten ze zorgvuldig worden gedroogd voor gebruik.
• De luchtingang en luchtuitgang mogen niet worden afgedekt of verstopt.
3 Gebruik
De ventilatoren zijn ontworpen om lucht op natte oppervlakken te blazen, om deze snel te drogen. Ze zijn uiterst geschikt
voor het drogen van vloeren, omdat ze een vlakke luchtkolom produceren. Een groot volume luchtstroom verhoogt
de verdamping, voorkomt schimmelvorming, en vermindert het risico op bijkomende schade als gevolg van vocht.
Stromende lucht verbetert de verdamping, omdat ze de grenslaag van de verzadigde lucht verwijdert, die boven de natte
oppervlakken ligt.
4 Installatie
Om een gebouw te drogen, moet tenminste een ventilator per kamer worden geïnstalleerd. De ventilator moet een
drievoudige luchtverandering veroorzaken. Zorg ervoor, dat alle natte oppervlakken aan de luchtstroom worden
blootgesteld.
5 Koelen en ventileren
Oververhitte kamers kunnen worden gekoeld door de grote luchtstroming van een ventilator. Positioneer daarvoor het
toestel op de vloer of op een ander vlak oppervlak, en zuig de lucht van koelere zones of van buiten.
copyrighted document - all rights reserved by FBC

3
NL
M1.1.RV600-RV3000.NLFREN 15062018
6 Vochtregeling
Wanneer ventilatoren worden gebruikt om de verdamping in een gebouw te verhogen, verhoogt de luchtvochtigheid
ook onmiddellijk. In dit geval, is de luchtbeweging minder effectief en het drogen wordt vertraagd. Daarom moet de
ventilator samen met genoeg ontvochtiger worden gebruikt. Om de schimmelvorming onder controle te houden, moet de
luchtvochtigheid onder 60% worden gehandhaafd. Indien mogelijk moet de luchtvochtigheid in de kamers onder 45%
blijven. Ontvochtigers kunnen daarvoor worden geïnstalleerd.
Om het drogen te verbeteren, moet de te drogen kamer van de rest van het gebouw worden gescheiden. Regel de
verwarming en de koeling op 20-27 °C. Wanneer geen ontvochtiger beschikbaar is, moeten ventilatoren worden
gebruikt op zolder, in keukens en badkamers om vocht te verwijderen. Wanneer de buitenlucht erg droog is, mogen de
ramen en deuren open blijven.
7 Werking van het toestel
• Sluit het toestel aan een geaard stopcontact aan.
• Zet de schakelaar op ON.
• Controleer de goede werking van het toestel alvorens het zonder toezicht te laten.
• Beweeg en draag de ventilator niet tijdens het gebruik.
8 Onderhoud
AANDACHT!
Ontkoppel het toestel van de stroomtoevoer voor het onderhoud.
Het elektrisch systeem controleren
Controleer regelmatig of de voedingskabel niet beschadigd is. Verwijder regelmatig de behuizing en controleer of er kale
draden, losse verbindingen of kleurveranderingen op de interne bekabeling zijn. Verwijder en repareer de beschadigde
kabels indien nodig.
De luchtingang reinigen
Stof en vuil moeten van de luchtingang worden verwijderd. Verwijder de pluizen en de stof van het ventilatorwiel, van de
motor en van de zijkanten met een stofzuiger of met perslucht.
De behuizing reinigen
Reinig de behuizing met een zacht reinigingsmiddel en water. U kunt de oorspronkelijke glans herstellen door middel van
vinylreiniger en polijstmiddel, bijvoorbeeld voor auto kunststof.
De zijkanten controleren
Controleer de externe zijkanten en zorg ervoor, dat ze correct geïnstalleerd zijn. Pas op voor ongewone geluiden.
De motor en bekabeling moeten droog blijven
Zodat de elektrische componenten niet worden beschadigd, mag de ventilator niet met een bevloeiingsslang of met
een hogedrukreiniger worden gereinigd. Als de elektrische componenten toch nat zijn, moeten ze onmiddellijk worden
gedroogd.
copyrighted document - all rights reserved by FBC

4
NL
M1.1.RV600-RV3000.NLFREN 15062018
9 Problemen oplossen
AANDACHT!
Voor de reparaties moet het toestel van de stroomtoevoer worden ontkoppeld.
Problemen Mogelijke oorzaken Oplossingen
De motor draait niet Geen stroomtoevoer Sluit het toestel aan, controleer de zekering
Het toestel is niet ingeschakeld Zet de schakelaar op ON
Het ventilator wiel is geblokkeerd Verwijder de oorzaak van de blokkering
De luchtingang of -uitgang is
geblokkeerd Ontkoppel de machine van de
stroomtoevoer en laat deze afkoelen.
Verwijder vervolgens de oorzaak van de
blokkering.
De schakelaar is defect Vervang de schakelaar
De bekabeling is los Controleer de bekabeling en draai de
aansluitingen vast indien nodig
De motor draait maar het
wiel draait niet soepel of botst
tegen de zijkanten
Een krachtige slag heeft de
ophanging van de motor verdraaid en
het wiel is geblokkeerd
Demonteer de motor uit de behuizing,
vervang of repareer de ophanging
Een krachtige slag heeft de motor uit
de ophanging laten glijden en het
wiel is geblokkeerd
Demonteer de motor uit de behuizing,
en monteer deze opnieuw correct op de
ophanging
Het toestel trilt te veel Vuilophoping op het wiel Reinig het wiel
Onbalans van het ventilator wiel Breng het wiel in evenwicht of vervang deze
Ventilator wiel verdraaid Vervang het wiel
Motoras verdraaid Vervang de motor
10 Onderdelen
Zie tekening op pagina 11
N° Omschrijving
1 Schroef
2 Schakelaar
3 Schakelaar deksel
4 Kabelklem voor netsnoer
5 Interne kabelklem
6 Netsnoer
7 Voorrooster (afvoerzijde)
8Motor
9 Klinknagel
10 Ventilator wiel
11 Achterrooster (aanzuigzijde)
12 Behuizing
copyrighted document - all rights reserved by FBC

5
FR
M1.1.RV600-RV3000.NLFREN 15062018
1 Spécications
Modèle RV600 RV3000
Puissance 65 W 250 W
Tension 230 V 230 V
Fréquence 50 Hz 50 Hz
Diamètre 145 mm 241 mm
Vitesse maximale 1250 t/min 950 t/min
Débit d’air 9,6 m³/h 49,5 m³/h
Dimensions (L x l x h) 280 x 305 x 335 mm 480 x 430 x 480 mm
Poids net 1,5 kg 12 kg
2 Sécurité
IMPORTANT !
Lisez et comprenez toutes les informations et consignes de sécurité de ce manuel avant
d’utiliser votre ventilateur.
• Tenez les enfants éloignés. Ne laissez pas les enfants jouer avec l’appareil ou à proximité de l’appareil.
• Branchement électrique : Le ventilateur est conçu pour fonctionner sur du 230V/50Hz. Utilisez uniquement une
connexion avec prise de terre et protégée par un disjoncteur différentiel.
• N’utilisez jamais l’appareil avec un câble d’alimentation endommagé. En cas de dommage, le câble doit être
remplacé immédiatement par un câble de même type et de même taille.
• Utilisez uniquement des rallonges agréées.
• Ne laissez pas tomber l’appareil et ne le lancez pas. Cela pourrait endommager des composants et le câblage.
• Installez l’appareil sur une surface stable et plate.
• Pendant le transport, veillez à ce que l’appareil ne glisse pas dans le véhicule.
• L’appareil ne peut pas être utilisé dans des aques ou de l’eau stagnante. Ne l’utilisez pas à l’extérieur. Si le câble
électrique ou des composants deviennent humides, ils doivent être soigneusement séchés avant utilisation.
• Les arrivées et sorties d’air ne peuvent pas être couvertes ou bouchées.
3 Utilisation
Les ventilateurs sont construits de sorte qu’ils soufent de l’air sur des surfaces humides an de les sécher rapidement.
Ils sont particulièrement adaptés pour le séchage de sols car ils provoquent une bande d’air plate. Un ux d’air de
grand volume augmente l’évaporation, aide à empêcher la formation de moisissures et réduit le risque de dommages
supplémentaires liés à l’humidité. L‘évaporation améliore l’air afuant car elle enlève la couche frontière de l’air saturé
qui se trouve au dessus des surfaces humides.
4 Installation
An de sécher un bâtiment, il faut installer au moins un ventilateur par pièce. Il doit provoquer un triple changement d‘air.
Faites attention à ce que toutes les surfaces humides soient exposées au ux d‘air.
5 Rafraîchir et aérer
Les pièces surchauffées peuvent être rafraîchies par le ux d’air important d’un ventilateur. Pour cela, positionnez
l’appareil sur le sol ou une autre surface plate et aspirez l’air des zones fraîches ou de l‘extérieur.
copyrighted document - all rights reserved by FBC

6
FR
M1.1.RV600-RV3000.NLFREN 15062018
6 Contrôle de l’humidité
Lorsque des ventilateurs sont utilisés pour augmenter l’évaporation dans un bâtiment, l’humidité de l’air augmente aussi
immédiatement. Lorsque cela arrive, le déplacement d’air est moins efcace et le séchage est ralenti. C’est pourquoi il est
indispensable que les ventilateurs soient utilisés ensemble avec sufsamment de déshumidicateurs. Pour maintenir sous
contrôle la formation de moisissures, l’humidité de l’air doit être maintenue sous 60%. Si possible, l’humidité de l’air doit
être inférieure à 45% dans les pièces. Des déshumidicateurs peuvent être installés pour cela.
An d’améliorer le séchage, la zone à sécher doit être séparée du reste du bâtiment. Réglez chauffage et climatisation
à 20-27 °C. Lorsqu’un déshumidicateur n’est pas disponible, des ventilations doivent être utilisés sous les combles,
dans les cuisines et les salles de bain pour retirer l‘humidité. Lorsque l’air extérieur est très sec, les fenêtres ou les portes
peuvent être entrouvertes.
7 Fonctionnement de l’appareil
• Raccordez l’appareil à une prise de terre.
• Mettez l’interrupteur sur marche (ON).
• Vériez le bon fonctionnement avant de laisser l’appareil sans surveillance.
• Ne déplacez pas et ne portez pas le ventilateur pendant son fonctionnement.
8 Entretien
ATTENTION !
Débranchez l’appareil avant les travaux d’entretien.
Inspection du système électrique
Vérier régulièrement si le câble électrique n’est pas endommagé. Retirez régulièrement le boîtier et vériez s’il y a des
ls dénudés, des xations desserrées et des changements de couleur sur le câblage interne. Enlevez et réparez les câbles
endommagés si nécessaire.
Nettoyage de l’arrivée d’air
Les peluches et autres saletés accumulées sur l’arrivée d’air doivent être enlevées. Retirez les peluches et poussières de la
roue du ventilateur, du moteur et des parois latérales à l’aide d’un aspirateur ou d’air comprimé.
Nettoyage du boîtier
Nettoyez le boîtier avec un nettoyant doux et de l‘eau. Restaurez l’éclat original avec un nettoyant au vinyle et du produit
lustrant, par exemple pour plastique automobile.
Vérication des côtés extérieurs
Vérier les composants extérieurs et faire attention à ce qu’ils soient installés correctement. Faites attention aux bruits
inhabituels.
Le moteur et le câblage doivent rester secs
An que les composants électriques ne soient pas endommagés, le ventilateur ne peut pas être nettoyé au tuyau
d’arrosage ou avec un appareil de nettoyage sous pression. Lorsque des composants électriques sont néanmoins
humides, ils doivent être séchés immédiatement.
copyrighted document - all rights reserved by FBC

7
FR
M1.1.RV600-RV3000.NLFREN 15062018
9 Résolution des problèmes
ATTENTION !
Les réparations doivent être effectuées sur l’appareil débranché.
Pannes Causes possibles Solutions
Le moteur ne fonctionne pas Pas de courant Branchez l’appareil, vériez le fusible
L’appareil n’est pas allumé Mettez l’interrupteur sur ON
La roue du ventilateur est bloquée Éliminez la cause du blocage
L’arrivée ou la sortie d’air est bloquée Débranchez la machine et laissez-la
refroidir. Éliminez ensuite la cause du
blocage.
L’interrupteur est cassé Remplacez l’interrupteur
Le câblage est desserré Vériez le câblage et resserrez les
connexions si nécessaire
Le moteur fonctionne mais la roue
ne tourne pas régulièrement ou elle
heurte les côtés
Un coup puissant a tordu la
suspension du moteur et la roue est
bloquée
Démontez le moteur du boîtier,
remplacez ou réparez la suspension
Un coup puissant a fait glisser le
moteur hors de la suspension et la
roue est bloquée
Démontez le moteur du boîtier,
remettez ensuite le moteur
correctement sur la suspension
L’appareil vibre de façon excessive Accumulation de saletés sur la roue Nettoyez la roue
Déséquilibre de la roue du ventilateur Équilibrez ou remplacez la roue
Roue du ventilateur tordue Remplacez la roue
Arbre du moteur tordu Remplacez le moteur
10 Pièces détachées
Voir dessin en page 11
N° Description
1Vis
2Interrupteur
3 Cache de l’interrupteur
4 Serre-câble pour câble d’alimentation
5 Serre-câble interne
6 Câble d’alimentation
7Grille avant (côté souferie)
8 Moteur
9Rivet
10 Roue du ventilateur
11 Grille arrière (côté aspiration)
12 Boîtier
copyrighted document - all rights reserved by FBC

8
EN
M1.1.RV600-RV3000.NLFREN 15062018
1 Specications
Model RV600 RV3000
Power 65 W 250 W
Tension 230 V 230 V
Frequence 50 Hz 50 Hz
Diameter 145 mm 241 mm
Maximum speed 1250 t/min 950 t/min
Air ow 9.6 m³/h 49.5 m³/h
Dimensions (l x w x d) 280 x 305 x 335 mm 480 x 430 x 480 mm
Net weight 1.5 kg 12 kg
2 Safety
IMPORTANT!
Read and understand all informations and safety instructions carefully before using your
ventilator.
• Keep out of reach of children. Do not allow children to play with the device or near the device.
• Electrical connection: Fans and ventilators are designed for operation at 230V/50Hz. Use only with a plug with
earthing contact! Sockets used must be earthed and have to save by a fault current protection switch.
• Never use the device with a damaged power cable. If the power cable is damaged, it must be replaced by a cable
of the same type and dimensions.
• Only used approved extension cables!
• Do not drop or throw the device since this could lead to damage of components or wiring.
• Always place the device on a steady, even surface.
• Tie down the device during transport to prevent it from slipping and sliding.
• The device cannot be operated in puddles or stagnant water. Do not store or operate it in open spaces. If the electric
wiring or parts of the device get wet, dry it thoroughly before using it again.
• Do not cover or block the air inlets and outlets.
•
3 Use of ventilators
The ventilators are designed in such a way that they blow air over moist surfaces to dry them quickly. They are
particularly suitable for drying oors, since they produce a at air column. A high volume air ow increases evaporation,
helps prevent the formation of mould and mildew and reduces the risk of additional damage caused by moisture. Flowing
air improves evaporation since it blows away the lm of saturated air on the boundary, lying above wet surfaces.
4 Installation
At least one ventilator must be installed in each room to dry out a building. Air is to be produced on three sides. Please
make sure that all wet surfaces are exposed to air ow.
5 Cooling and ventilating
Overheated rooms can be cooled by the high volume air ow of a fan. Place the device on the oor or another even
surface for this purpose and let the air ow in from cooler areas or from outside.
copyrighted document - all rights reserved by FBC

9
EN
M1.1.RV600-RV3000.NLFREN 15062018
6 Moisture control
If fans are used to increase evaporation in a building the air moisture usually also immediately increases. When this
happens, the movement of air becomes less effective and drying slows down. It is therefore necessary that the fans
are used together with a sufcient number of dehumidiers. Air moisture in rooms must be held at under 60% to keep
formation of mould and mildew under control. If possible air moisture in rooms should be under 45%. Dehumidiers can
be used for this purpose.
The area to be dried must be separated from the rest of the building to improve the drying process.
Set heating or air conditioning to 20-27 °C. If no dehumidiers are available, ventilators should be used in attics,
kitchens and bathrooms to get rid of moisture. If the outside air is very dry, windows or doors can be left slightly ajar.
7 Operating the device
• Connect the device to an earthed socket.
• Set the switch to ON.
• Check for correct operation, before the unit is left unsupervised.
• Do not move or carry the fan during operation.
8 Maintenance
WARNING!
Always pull out the mains plug before maintenance and repair work.
Inspection of the electrical system
Check the electricity cable regularly for damages. Remove the housing regularly and check the internal wiring for blank
conductors, loose ttings and discolouration. Take out and repair damaged cables if necessary.
Clean air inlets
Fluff and other dirt that has collected at the air inlet must be removed. Remove uff, lint and dust from the fan wheel,
motor and side covers with a vacuum or compressed air.
Clean housing
Clean the housing with a mild detergent and water. Restore the original shine with vinyl cleaner and polish, e.g. used for
synthetic materials for vehicles.
External checking
Check the external parts and make sure that they have been properly installed. Look out for unusual noises.
Engine and wiring must remain dry
The ventilator cannot be cleaned with a water hose or pressurised washing device to prevent electrical components from
getting damaged. If electrical components still get wet, they must be dried immediately.
copyrighted document - all rights reserved by FBC

10
EN
M1.1.RV600-RV3000.NLFREN 15062018
9 Trouble shooting
WARNING!
All maintenance work listed below must be carried out without current, i.e. with the plug
pulled out.
Problems Possible causes Solutions
Motor does not run No power supply Connect the device, check fuse
Switch not turned on Turn on switch
Fan wheel blocked Remove reason for blockage
Air inlet or outlet blocked Switch off machine and let it cool,
then remove blockage
Switch interrupted Replace the switch
Wiring loose Check wiring and tighten as per
requirement
Motor runs but wheel turns irregularly
or hits the sides A heavy impact has bent the engine
suspension so that the wheel is stuck Dismantle engine from the housing,
then replace or repair the bent engine
suspension
A heavy impact has let the engine
slide out of the suspension so that the
wheel is stuck
Dismantle the engine from the housing
and then place it correctly into the
suspension
Device vibrates excessively Collection of dirt on the wheel Clean fan wheel
Unbalance of the fan wheel Balance out or replace fan wheel
Fan wheel bent Change fan wheel
Motor shaft bent Change motor
10 Spare parts
See drawing on page 11
N° Description
1Screw
2Switch
3 Cap of switch
4 Strain relief for power cable
5 Strain relief interior pieces
6 Power cable
7 Front grille (discharge side)
8Motor
9Rivet
10 Ventilator wheel
11 Guard (suction side)
12 Housing
copyrighted document - all rights reserved by FBC

M1.1.RV600-RV3000.NLFREN 15062018
11
NL
FR
EN
Onderdelentekening
Dessin des pièces détachées
Spare parts drawing
Ventilateur
TD 300
24
FR
10. Liste des pièces de rechange
Pos.
N° d’article
HEYLO Description
1 1750150 Vis
2 1750151 Interrupteur
3 1750152 Cache pour interrupteur
4 1750153 Serre-câble pour câble d‘alimentation
5 1750154 Serre-câble pièce interne
6 1750155 câble d‘alimentation
7 1750156 Grille faciale (du côté de la soufflerie)
8 1750157 Moteur
9 1750158 Rivets
10 1750159 Roue de ventilateur
11 1750160 Grille de protection (du côté de l‘aspiration)
12 1750161 Boitier
copyrighted document - all rights reserved by FBC
M1.1.RV600-RV3000.NLFREN 15062018
12
Fabrikant/Invoerder
Fabricant/Importateur
Manufacturer/Retailer
Verklaart hierbij dat het volgende product :
Déclare par la présente que le produit suivant :
Hereby declares that the following product :
Product
Produit
Product
Ventilator
Ventilateur
Ventilator
Order nr. :
Geldende CE-richtlijnen
Normes CE en vigueur
Relevant EU directives
Normativas de la CE
2014/35/EU
EN 60335-2-80:2003 + A1:2004 + A2:2009
EN 60335-1:2012 + A11:2014
EN 62233:2008
2014/30/EU
EN 55014-1:2006 + A1:2009 + A2:2011
EN 55014-2:2015
EN 61000-3-2:2014
EN 61000-3-3:2013
Overeenstemt met de bestemming van de hierboven aangeduide richtlijnen - met inbegrip van deze betreffende
het tijdstip van de verklaring der geldende veranderingen.
Répond aux normes générales caractérisées plus haut, y compris celles dont la date correspond aux
modications en vigueur.
Meets the provisions of the aforementioned directive, including, any amendments valid at the time of this
statement.
Test report reference: NBES160400079001 + SHEM160400226801
Bart Vynckier, Director
VYNCKIER TOOLS nv/sa
Vynckier Tools sa
Avenue Patrick Wagnon, 7
ZAEM de Haureu
B-7700 Mouscron
EG conformiteitsverklaring
Déclaration de conformité CE
EC declaration of conformity
RV600 (722313567)
RV3000 (722313568)
FR
EN
NL
Mouscron, 15/06/2018
copyrighted document - all rights reserved by FBC
This manual suits for next models
3
Table of contents
Languages:
Other MW TOOLS Fan manuals
Popular Fan manuals by other brands

EDM
EDM 33951 instruction manual

Savoy House
Savoy House VILLAMOURNA owner's manual

National Ventilation
National Ventilation monsoon MONS100HT Installation and wiring instructions

Hunter
Hunter Kensie 50642 installation manual

Maico
Maico EZF B Series Mounting and operating instructions

KHIND
KHIND SF1821 instruction manual

Maico
Maico ALD 125 Mounting and operating instructions

inVENTer
inVENTer iV-Smart+ installation instructions

Kendal Lighting
Kendal Lighting AC-30052 installation instructions

L.B. White
L.B. White 36X370-N Owner's manual and instructions

Zehnder Rittling
Zehnder Rittling ComfoAir 550 Luxe Installer manual

Prem-I-Air
Prem-I-Air PF-16S instruction manual