Mychef Snack Bakershop User manual


2
INDEX
1. INTRODUCTION ...........................................................................................................3
2. MYCHEF SMART CONTROL CONFIGURATION ..........................................................4
2.1. Creating a new user .............................................................................................4
2.2. Wi-Fi connectivity ................................................................................................5
2.3. Linking the device ................................................................................................7
2.4. Control Panel........................................................................................................9
3. GOOGLE HOME SETUP AND VOICE ASSISTANT .....................................................12
3.1. Synchronizing computers to Google Home......................................................12
3.2. Voice commands for oven control....................................................................15
3.3. Adding automated routines...............................................................................17
4. ANNEXES....................................................................................................................19
ANNEX 1: Support functions.........................................................................................19
1.1. Reset Wi-Fi settings.......................................................................................19
1.2. Show MAC address ........................................................................................19
1.3. Unlink the "Mychef Control" service..............................................................19
1.4. Desktop application for intelligent control ...................................................20
ANNEX 2: Table of states..............................................................................................21
ANNEX 3: Recipes .........................................................................................................21

3
1. INTRODUCTION
This manual has been prepared in order to provide reliable information and help for
the use of the web application that controls the Mychef Bakershop convection oven
and its link with the Google Assistant and the Google Home application.
The following document is divided into two parts, the first part dedicated to the
configuration of the computer to be able to control it from any device with access to a
web browser, and the second part focused on the synchronization of the control of the
oven by voice commands with the help of Google Home.
Before any configuration or use of the control system, it is necessary to
read this manual carefully and completely.

4
2. MYCHEF SMART CONTROL CONFIGURATION
2.1. Creating a new user
The first step to configure the remote control is to create a user, with which the
different ovens to be controlled will be linked later.
Create a user through the following link or QR code:
https://mychef-432df.firebaseapp.com/
1
Once in the authentication panel, select "Create account" to create a new user
account.
Note: the password must contain at least 6 characters.
To link a device (mobile phone, tablet or computer) it is first necessary to set up a Wi-
Fi connection in the oven. The following section (2.2 Wi-Fi Connectivity) explains in
detail how to set up this configuration.
This web address has the functionality to send notifications when the
cooking of the different linked ovens is finished, so that, if you want to
enjoy this service, you have to give permission for the sending of pop-ups
from this address.
1
It is recommended to use the Google Chrome browser for better performance.
Figure 2: Authentication panel.
Figure 1: New user creation
form.

5
2.2. Wi-Fi connectivity
2
Once the oven is connected to the power outlet, it can be viewed as a Wi-Fi network
from any device (mobile phone, tablet or computer).
The Wi-Fi network will appear with the name "Mychef" followed by a number in
parentheses (the MAC address of the device).
This Wi-Fi network will then be selected on the device with which we want to link the
oven. Once the Wi-Fi network is selected, enter the password 123456789 and wait for
a configuration web portal to open automatically
3
.
2
You can reset your Wi-Fi network settings at any time. See ANNEX 1.1.
3
If the configuration portal does not open automatically, open a web browser (Google Chrome
is recommended) from a device connected to the Wi-Fi network and enter the following IP
address in the browser: 192.168.4.1.
Figure 3: Access point of the oven
from Windows.

6
In this configuration web portal you will enter the data of your usual Wi-Fi network and
the one you want to connect the oven to the internet (SSID).
In the field "Mychef login email" you must enter the user name that was created
previously (
4
2.1. Creating a new user)
It is important to write down the MAC
5
address that appears in the different points of
the configuration, since this is unique for each device and will be necessary to link the
equipment to the remote control. We recommend copying the number after the title
"MAC Address:" so you can paste it later.
4
If for any reason an invalid user is entered, it is possible to reset this configuration. See
ANNEX 1.1.
5
If the MAC address of the equipment has not been noted, it can be displayed in the control
panel of the oven once the Wi-Fi network has been set up. See ANNEX 1.2.
Figure 4: The Wi-Fi network settings screen
from different devices.

7
Once all the fields have been completed, you should select the "Save" button to save
the changes and start the connection.
It is important that you connect to a Wi-Fi network with a 2.4GHz frequency
band, as 5GHz networks are not compatible with Smart Control
functionality.
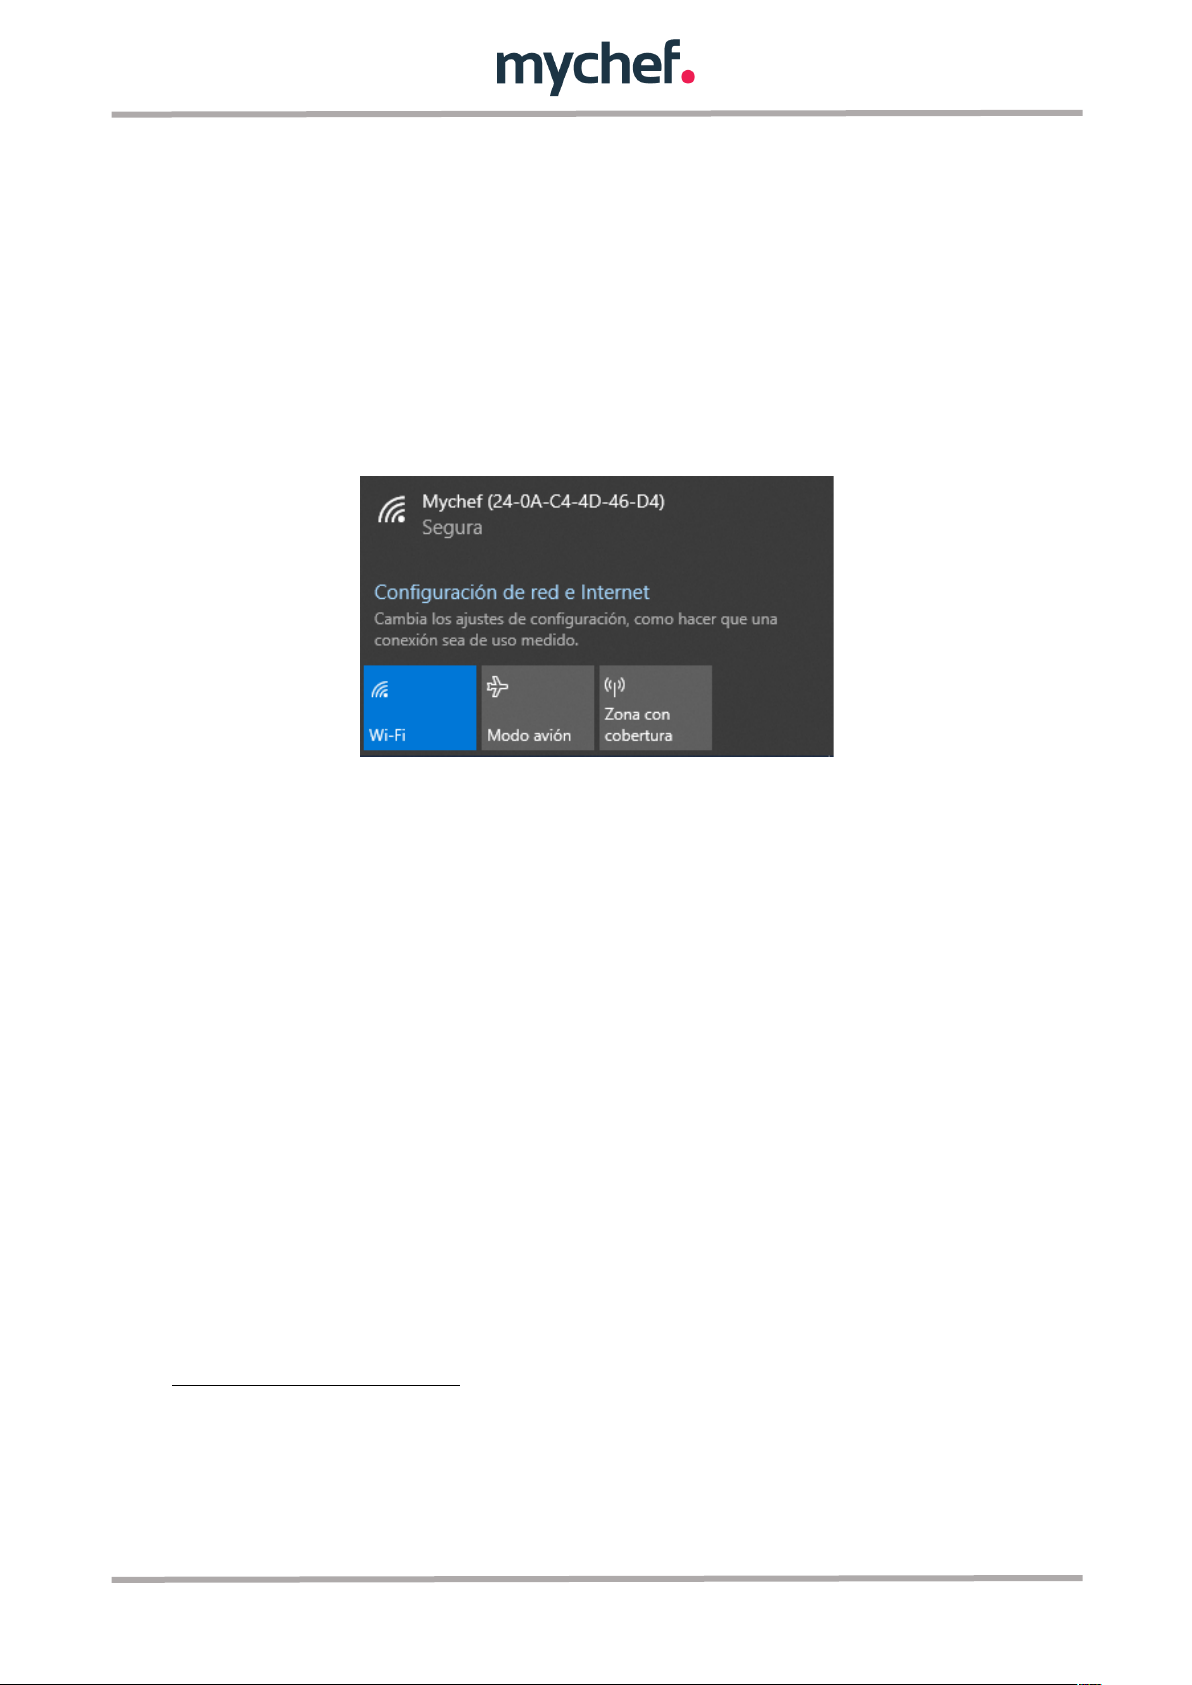
Once the Wi-Fi network is configured, it is important to wait a few minutes
until the Wi-Fi network disappears (Mychef + MAC address), if this does
not happen it means that the configuration data entered to authenticate
the Wi-Fi network is not correct, then the process must be started again.
2.3. Linking the oven to the device (mobile phone, tablet or computer)
Once an Internet connection has been established,
6
the Wi-Fi network will no longer
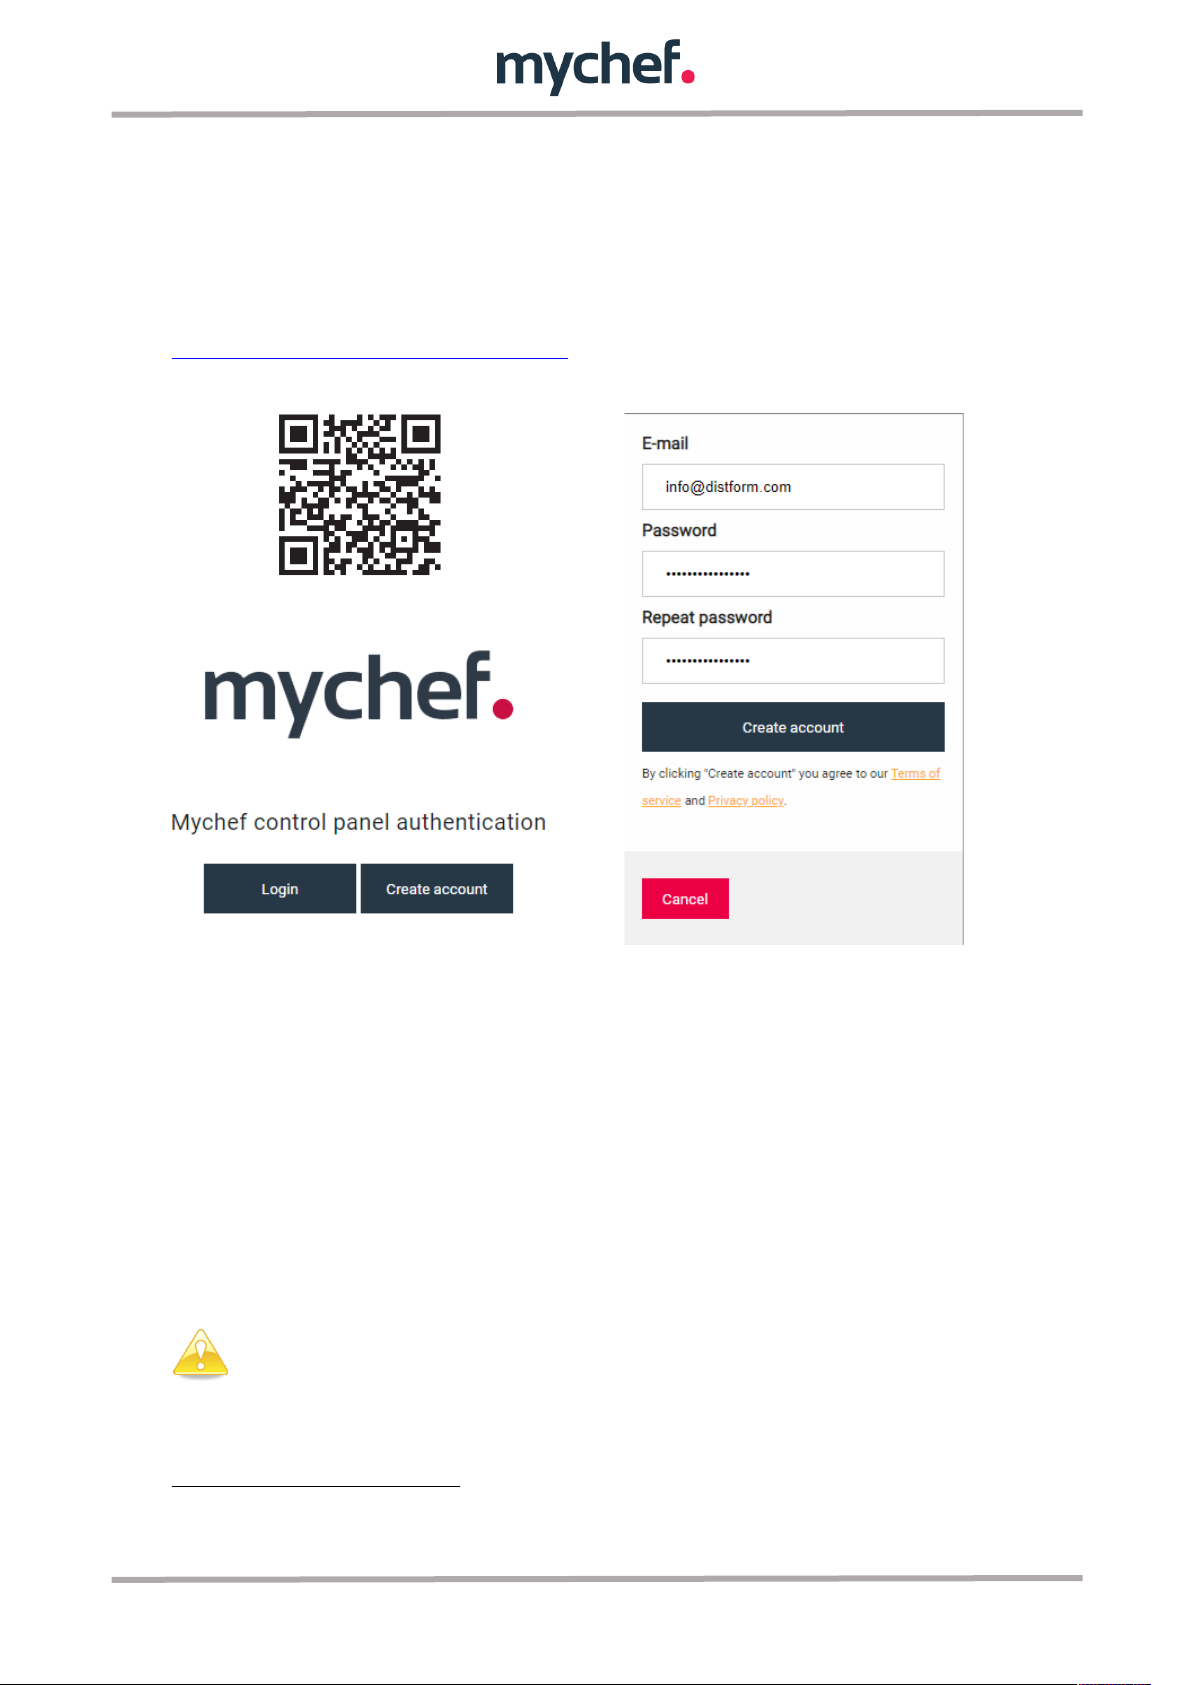
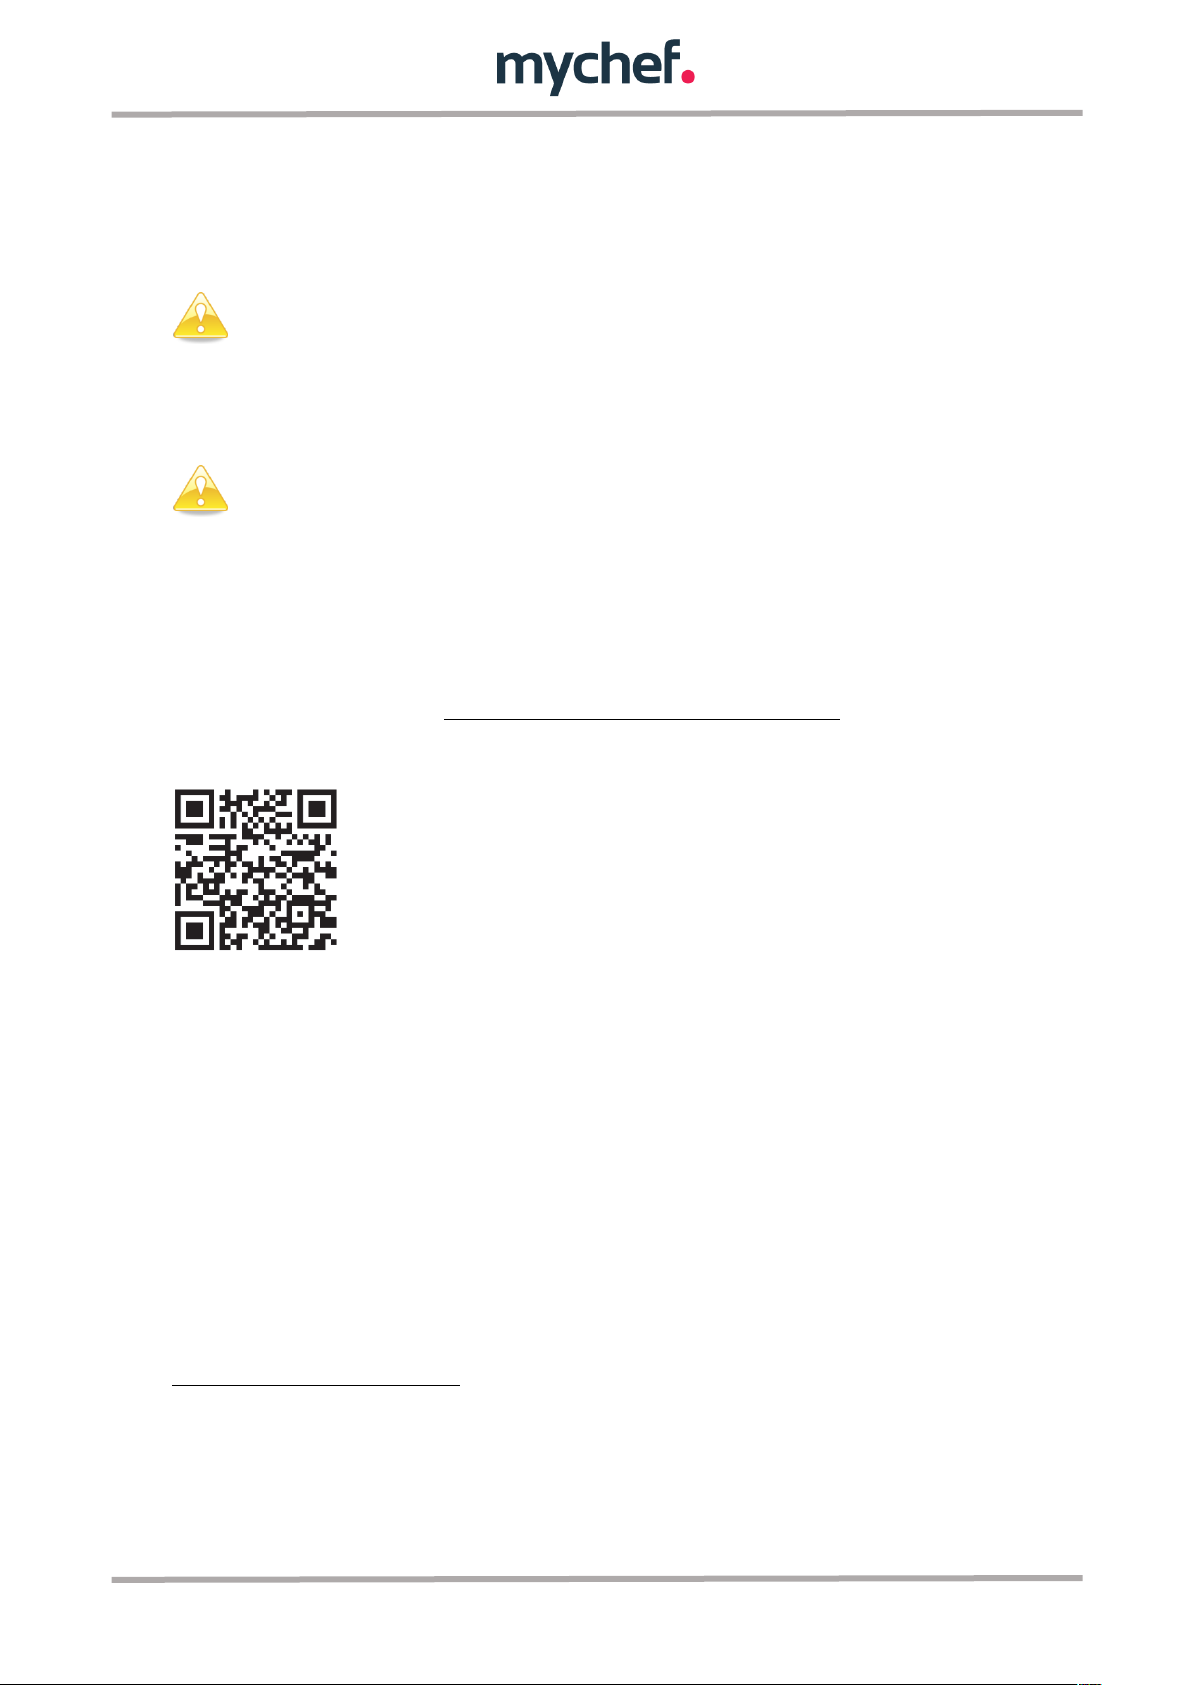
be visible. The next step will be to link our oven to the remote control. To do so, visit
the following web address: https://mychef-432df.firebaseapp.com/ or QR code, log in
with the user created in section 2.1. and linked to the oven in section 2.2.
If this is the first time you are linking a device, you will see the button combination
shown in Figure 5.
To add a new device, select the "Add new device" button and fill in the form in Figure 6
with a name for the device (which will serve to identify it) and the MAC address
7
of the
oven that we have previously copied.
Finally, we select the "Add device" button at the end of the form to add the remote
control of the oven to our device (mobile phone, tablet or computer).
6
See section 2.2. to configure the Internet connection.
7
The MAC address consists of six two-character blocks that can be either a number from 0 to
9 or a letter from A to F. If the MAC address of the equipment has not been noted, it can be
displayed on the control panel of the oven. See ANNEX 1.2.

8
If all the previous steps have been carried out correctly, the control panel of the oven
will appear with the different buttons and text boxes to display and change the
different parameters that are configured in the linked equipment, as well as the actual
values of temperature, humidity and cooking time.
It should be noted that when the user makes a change in this control
system there is a delay between the database being updated and the
change being sent to the equipment.
Figure 6: Form for adding a
new device.
Figure 5 Session started without any
linked device.

9
2.4. Control Panel
Figure 7 shows the control panel for the ovens linked to the user account.
The functionality of each panel element is explained below.
Figure 5: Control panel detail

10
Block
Function
Description
A
Device selection box
In this selection box, a list of all devices linked to the user account
will appear.
B
On/Off button
Equipment on/off button.
C
Start/Stop button
On/off and start/stop button for the oven.
D
Door status indicator
Indicates whether the door is open or closed.
E
Equipment status indicator
It indicates the different states of the equipment, see ANNEX 2.
F
Wi-Fi indicator
Indicates by a percentage the strength of the Wi-Fi signal.
G
Phase 1 button
Selecting this button redirects the front panel of the oven to phase
1 and displays the cooking parameters for this phase. This phase is
always on.
H
Phase 2 button/indicator
Selecting this button redirects the front panel of the oven to phase
2, activates it if it is disabled, and displays the cooking parameters
for this phase. If the button text appears as if it were disabled, it
means that the phase is not active.
I
Phase 3 button/indicator
Selecting this button redirects the front panel of the oven to phase
3, activates it if it is disabled, and displays the cooking parameters
for this phase. If the button text appears as if it were disabled, it
means that the phase is not active.
J
Checkbox phase activation
Deselect if you want to deactivate a phase. Phase 1 is always
active.
K
Input/indicator target cooking
time of the oven (Set Point)
Allows you to enter the desired temperature value in the range
[30,300] ºC for manual cooking or indicates the target temperature
value for a given recipe.
L
Input/target moisture indicator
of the oven (Set Point)
Allows you to enter the desired humidity value in the range
[-100,100]% for manual cooking or indicates the target humidity
value for a given recipe.
M
Input/indicator target cooking
time of the oven (Set Point)
Allows you to enter the desired cooking time value in the range [0-
5940] minutes for manual cooking or indicates the target cooking
time value for a given recipe.
N
Real oven temperature indicator
(Real Point)
Indicates the real time temperature value of the oven's cooking
chamber.
O
Real oven humidity indicator
(Real Point)
Indicates the real time humidity value of the oven cooking
chamber.
P
Real oven cooking time indicator
(Real Point)
Indicates the value of the cooking time that has passed since the
start of the cooking process.
Q
Fan speed button
Fan speed selection button, can be low speed (Slow) or high speed
(Fast).
R
Recipe selection box
A list of all recipes entered by the user will appear in this selection
box.
S
“Add Recipe" button
Button to add a new recipe to the user's recipe list. See ANNEX 3.
T
“Edit Recipe" button
Button for editing the cooking parameters of the recipe selected in
the "recipe selection box" (N). See ANNEX 3.

11
U
"Send recipe" button
Sends the cooking parameters of the recipe selected in the "recipe
selection box" (N) to the oven
V
"Delete recipe" button
Removes the recipe selected in the "recipe selection box" (N).
W
"More information" button
It opens a window with information about the equipment: the user
linked to the equipment, the minutes of operation of the oven and
the temperatures of the electronics of the equipment.
X
“Add New Device" button
Allows you to link a new oven. See section 2.3.
Y
“Delete device" button
Allows you to remove a device from the list of linked computers.
Z
“Logout" button
Log out and redirect the page to the authentication panel.
AA
“Delete account" button
Once all the ovens are deleted, delete the user account
Table 1: Control panel description.

12
3. GOOGLE HOME SETUP AND VOICE ASSISTANT
8
3.1. Synchronizing computers to Google Home
The first step to be able to use the Google Home functionality and control our devices
using the Voice Assistant is to sign in with a Google account on our mobile device and
download the Google Home and Google Assistant application.
Once the two applications are installed, we start Google Home and follow the next
steps:
1. On the app's home screen, select "Add" and then "Configure the device".
8
Mychef's Intelligent Voice Control is currently only available in English, so you need to change
the language of the mobile device you are using to English to enjoy the full functionality.
Figure 7: Google Home application captures steps to be followed.
Figure 6: Google applications required.

13
2. Select the option "Work with Google" and then search the list of suppliers for the
"Mychef Control" service
3. Finally, you will be redirected to the authentication server page to log in with the
user and password created in section 2.1.
It is possible that in some cases the server is busy or that a message
appears informing that the synchronization could not be carried out, the
message should be omitted if the linked ovens appear on the start screen.
If they do not appear, repeat all the steps in this section.
Whenever you add or remove an oven in the control web application, the
Google Home startup screen will automatically update with the new
devices, otherwise you need to unlink your account from the Mychef
Control9service and repeat the steps in this section to make the devices
appear or disappear on the Google Home startup screen.
9
See ANNEX 1.3
Figure 8: Google Home application captures steps to be followed.

14
Figure 10: Google Home Home screen where all the ovens linked to the user's account will
appear, along with all the smart devices that the user has associated with his Google
account.
Figure 9: Authentication server screen and messages that appear while validating and
synchronizing information.

15
3.2. Voice commands for oven control
10
ON/OFF
- Turn on Mychef.
- Is Mychef on?
- Turn off Mychef.
- Is Mychef off?
- Turn on [all] ovens.
- Turn off [all] ovens.
START/STOP:
- Start Mychef.
- Run Mychef.
- Stop Mychef.
- Start [all] ovens.
- Stop [all] ovens.
TEMPERATURE CONTROL: (X = [30-300])
- Set Mychef temperature to X.
- Set Mychef to X.
- What is Mychef temperature?
- What temperature is Mychef set to?
- Set [all] ovens temperature to X.
- What are ovens temperature?
HUMIDITY CONTROL: (X = [High, Medium, Low])
- Set Mychef mode to Humidity X.
- Set Mychef to Humidity Xmode.
- What mode is Mychef set?
- Is Mychef humidity Xmode set?
- Set [all] ovens mode to Humidity X.
TIME CONTROL: (X = [0-99 hours, 0-5940 minutes, 0-356400 seconds])
- Run Mychef for X.
- Set Mychef timer to X.
- Start Mychef for X.
- How many minutes are left on Mychef?
- Cancel Mychef timer.
- How many minutes are left on ovens?
- Increase Mychef timer X.
- Decrease Mychef timer X.
FAN CONTROL: (X = [High,Low])
- Set Mychef fan speed to X.
- Set Mychef speed to X.
- What fan speed is Mychef set to?
- What is Mychef speed?
- Set ovens speed to X.
- What are ovens speed?
Table 2: Different voice commands compatible with the intelligent control
10
The word "Mychef" appears in these commands to refer to the oven in question, but this
word can be replaced by the name you want to give the oven once it is added to the web
control.

16
From the Google Home application's start screen, pressing the microphone icon,
saying "OK Google" or "Hey Google", will open the Google Assistant which will listen to
the voice command the user says and if it is correctly understood as a oven control
command, will perform the action requested or inform about the parameters asked.
You can also do this directly from the Google Assistant application or through any
device that supports the Google Assistant such as a Google Home speaker.
Figure 11: Different voice commands understood and executed by the Assistant.

17
3.3. Adding automated routines
It is also possible to add routines to Google Home, so that different actions are
executed with a single voice command.
Below is an example where just by saying "Cook Pizza", Google Home will execute all
the necessary commands to turn on the oven, set the desired temperature, humidity
and cooking time and finally start a bake with these parameters.
1. Go to the Google Home screen and select the "Routines" icon. Then manage
routines and press the add icon (+).
2. In add commands you will write the voice command you want to execute the
routine, in this example it will be "Cook Pizza".
3. Finally, under "Add action", all commands of Section 3.2. that you want the
oven to perform in this routine are added. For this example they will be as
follows
11
:
- Turn Mychef on.
- Set Mychef temperature to 260.
- Set Mychef mode to Humidity Low.
- Start Mychef for 17 minutes.
- Start Mychef.
11
The word "Mychef" appears in these commands to refer to the oven in question, but this
word can be replaced by the name you want to give the oven once it is added to the web
control.
Figure 12: Google Home application capture.

18
Figure 14: Routine configuration in
the Google Home application.
Figure 13: Executing the configured
routine by voice command in the
Google Assistant application.

19
4. ANNEXES
ANNEX 1: Support functions
1.1. Reset Wi-Fi settings
It is possible to remove the Wi-Fi network settings as well as the user to which the
oven is linked as follows:
• Turn off the oven by pressing and holding the START/STOP button.
• Once off, press and hold the fan icon on the front panel until you hear a
"Click".
• See if the device's Wi-Fi Access Point appears, if not, repeat these actions
again.
1.2. Show MAC address
You can view the MAC address of your device once you have set up a Wi-Fi
connection to your computer as follows:
• Turn off the oven by pressing and holding the START/STOP button.
• Once off, press and hold the temperature icon on the front panel until you
hear a "Click".
• The central display will show the digits of the MAC address in pairs in an
orderly fashion.
If the Wi-Fi connection to your computer has not yet been set up, the MAC
address can be seen in the name of the Wi-Fi access point.
12
1.3. Unlink the "Mychef Control" service
To unlink the Google account to the "Mychef Control" service, follow the steps in
section 3.1. until the list of service providers appears, this screen will show that
we are linked to the "Mychef Control" service with the number of devices
synchronised. If you want to unlink the account, just select the linked account and
choose "unlink".
12
See section 2.2.
Figure 15: Last window concerning the steps to be followed to unlink the account
from the service

20
1.4. Desktop application for intelligent control
If the web control application is accessed through the "Google Chrome" browser, it
is possible to download the page as an application, either on a mobile device or on
a computer.
• Computer: Go to the menu at the top right of Chrome, select "More tools"
and "Create shortcut...". In the pop-up window that will open, put the
desired name for the application and select the box "Open as window" and
"Create". This creates a shortcut to our intelligent control that can be found
in the home menu.
• Mobile device: Similarly, on the mobile device, go to the menu at the top
right of Chrome, select the option "Add to Home Screen" and add. This
creates a shortcut to our intelligent control that can be found on the home
screen of the mobile device.
13
13
In order to add the shortcut to the home screen, the Chrome application must have
permissions to do this
Figure 16: Pop-up window for creating the shortcut
Figure 17: Pop-up window for adding the application to the home screen and application
icon on a mobile device
Table of contents