MYERSON FlexPress User manual

Instruction Manual
more to myerson than teeth
www.myersontooth.com
to proof
6.17.2010

Installation of the Heat Guard 2
Section 1 Components 3
Section 2 Storage & Handling 4
Section 3 Basic Operation 4
Section 4 Editing User Profiles
Section 5 Processing using the “Run Stored Profile” 5
option (Recommended Option)
Section 6 Processing using the “Rerun Last Profile”
Section 7 Myerson DuraFlex Partial Injection Procedure 7
Section 8 Myerson DurAcetal Framework Injection Procedure 14
Section 9 Warranty & Returns 19
Section 10 Technical Data 19
Section 11 Preventative Maintenance & Cleaning 20
Section 12 Service & Repairs 20
Section 13 Declaration of Conformity 19
Section 14 Important Safety Warnings 21
Section 15 Notes 22
Installation of the HEAT GUARD
To prevent damage, the myerson FlexPress™ has been shipped
with the heat guard not installed. To install the heat guard, place
the heat guard over the corner posts with the warning label UP.
Install the (4) black acorn nuts nger tight. The acorn nuts are
simply holding the heat guard down, so they do not need to be
wrenched tight.
The heat guard can be removed periodically for cleaning.
Just follow the above steps in reverse order to remove the
heat guard.
Thank you for your purchase. Feel free to call myerson with
any questions.
2

myerson Flexpress™ x x
(1) Injection Flask BS-0104
x x
(1) 6 Pack myerson DuraFlex x x
Medium Cartridges
(1) 6 Pack myerson DurAcetal x x
Medium Cartridges
(1) 6 Pack myerson VisiClear x x
Medium Cartridges VC-MD-6PK
Power Cord x x
Air hose x x
(1) Thermoplastic Model Separator MS-0200 x x
TMS Swabs (10) MS-0202 x x
TMS Trays (10) MS-0201 x x
Release Compound BS-0105 x x
Polishing Kit FN-0200 x
Bur Finishing Kit AP-0224 x
(1) Stone Removal Tool SC-0100 x
(1) 25lb. Universal Stone x
UNISTONE-25LB
Description Professional Kit Advance Kit
120v - FP-0101 120v - FP-0100
230v - FP-0103 230v - FP-0102
section 1~components
The following is a list of components that are included
in the myerson Flexpress™ Digital Injection Systems:
3

section 2 ~ storage & handling
The myerson Flexpress™ Digital Injection System should be stored in a
cool dry place. The unit should not be used in an environment exceeding
40°C (104°F). Keep all combustibles away from unit while in use. Never
place anything on the top of the unit.
section 3 ~ basic operation
Place the myerson Flexpress™ Digital Injection System on a clean dry
surface. Insert the power cord into the receptacle on the side of the unit
and plug the other end into a grounded 120V or 230v outlet.
To turn on the unit, press the rocker switch located on the left side of the
unit above the power cord receptacle. The control panel will illuminate
briey then turn back off. The myerson Flexpress™ is now in Standby
mode. To turn on the controller press the ON/STBY button (lower left
button). Below is what you should see in the blue LCD display.
From the Main Menu you can select any of 5 options by using the UP &
DOWN arrow keys. Below is the list of options & a description for each:
1. Run Stored Profile- myerson,LLC pre-programs the myerson
Flexpress™ with processing parameters for myerson DurAcetal®,
myerson DuraFlex and myerson VisiClear™. By selecting the pre-
programmed material, the Melt Temp, Melt Time and Hold Time are
already set for you. This is the recommended option to use when
processing cases using the myerson Flexpress™. There is also (3)
“Spare” locations for the customer to save their own settings.
2. Rerun Last Profile- By selecting this option the myerson
Flexpress™ will run the last set prole. This option is great when
processing several cases of the same material.
3. Edit User Profiles- This option is where you can create your own
processing proles and save them for future use. The myerson
FlexPress is capable of storing up to 7 unique processing proles.
4. Edit User Settings- This option allows you to change settings
such as temperature units (C/°F), turn off/on alarms, languages, etc.
6. Configure from PC- This option is used by repair personnel in
the event of a warranty repair of the myerson FlexPress.
4

5
section 4 ~ editing user profiles
The myerson FlexPress allows the user to save up to 7 custom
processing proles for easy switching between materials. The following
procedure outlines how to create and save proles in the myerson
FlexPress™ Digital Injection System. Note: myerson, LLC does not
provide process settings for materials other than myerson, LLC
supplied materials. Refer to the manufacturer supplied information
for processing settings.
1. From the main menu, use the UP/DOWN buttons until
“Edit User Profile” is displayed. Press the ENTER button
to select.
2. Using the UP/DOWN buttons until the “Spare” location to be
edited is displayed. Press the ENTER button to select.
3. The rst parameter to be modied is the “Name” of the spare
prole. Press the ENTER button and a ashing cursor should
appear. Using the LEFT/RIGHT buttons to move the cursor to
the character location you wish to modify. Once the cursor is
in position, use the UP/DOWN buttons to scroll through the
available characters. Press the ENTER button when nished.
4. Press the DOWN button and the “Melt Temperature” parameter
will be displayed. Press the ENTER button and a ashing cursor
will appear. Use the UP/DOWN buttons to change the Melt
temperature to the desired value. Once nished press the
ENTER button.
5. Repeat step 4 for the “Melt Time” and “Hold Time”parameters.
6. Once satised with the changes, press the LEFT button. The
screen should display “Saving Changes”. The prole you just
created will now appear in the “Run Stored Profile” option in
the main menu.

6
section 5 ~
Processing using the
“Run Stored Profile”
(Recommended Option)
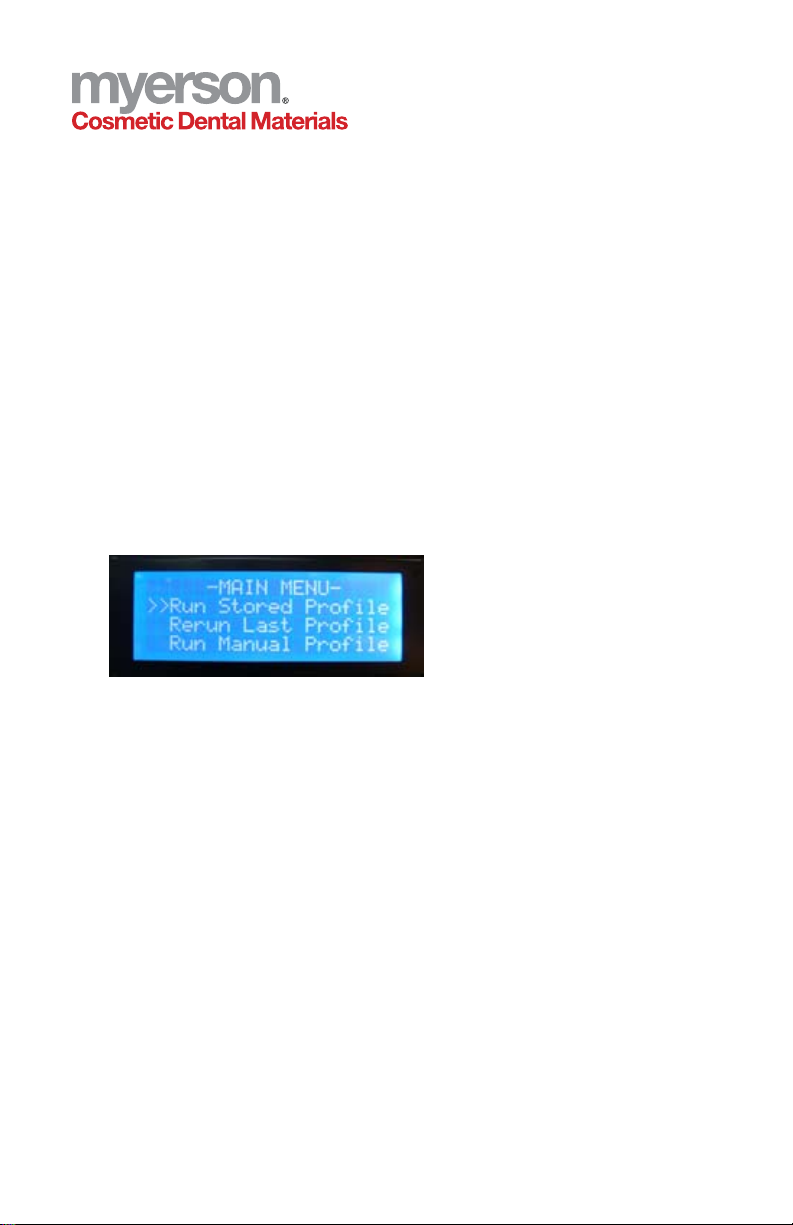
1. From the main menu use the UP or Down buttons until the
“Run Stored Prole” is displayed then press the enter button.
2. Next use the UP/DOWN buttons until prole you wish to run
s displayed.
3. After selecting the prole the display will show the prole name.
Pressing ENTER will scroll between prole name, melt tempera-
ture, melt time and hold time. It is recommended to check the
setting before starting a prole.
4. Press the START button and the machine will begin running the
prole. If the machine is at room temperature, it will take approxi-
mately 15 minutes to reach the processing temperature.
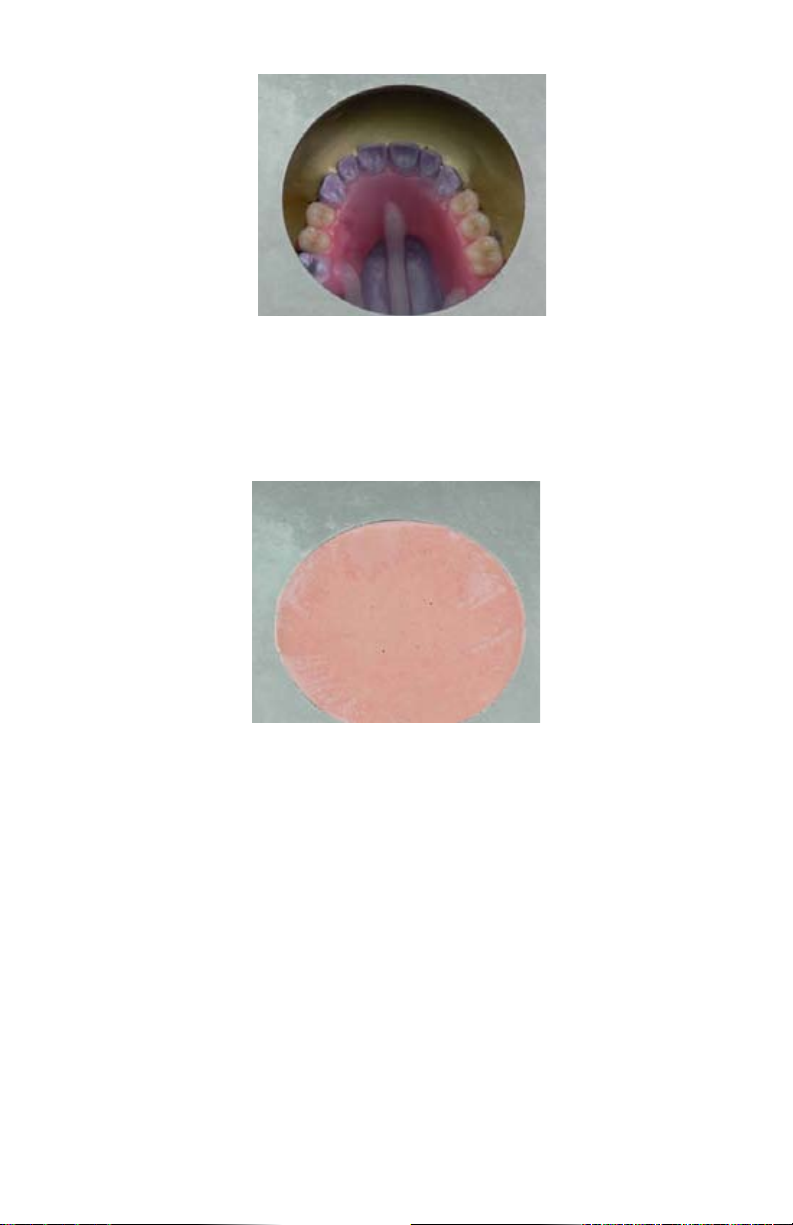
5. Prepare the cartridge by scoring
a “+” using a utility knife.
See the illustration to the right. This will
create an even “Burst” of the cartridge
6. Next, coat the sides of the cartridge
with a light coat of release compound.
This will prevent the cartridge from sticking
to the walls of the heating chamber.
7. When the myerson Flexpress has calibrated itself at the Melt
Temp an alarm will sound and the upper display will read “LOAD”
signaling you to load the cartridge. At this time insert the cartridge
into the heating chamber, center the ask and tighten using the
ask strap and knobs. If you are not ready to start the prole at
this time and want to turn off the alarm, press the UP button.
This will silence the alarm, but the myerson Flexpress™ will
remain calibrated until you press START or put the unit in standby
by pressing the STBY button.
8. Press the START button to begin the prole. Now let the myerson
Flexpress™ do the rest. The unit will begin counting down the
Melt Time and once it expires the unit will automatically inject the
material into the ask. The piston will stay in the up position for
the duration of the Hold time then release.
9. The upper display will read “DONE”.
10. You can now remove the ask strap and knobs.
11. Grasp the ask using heat resistant gloves and press the
EXTEND/RETRACT button. This will extend the piston and
push out the remaining cartridge attached to the ask.

section 7 ~ myerson DuraFlex partial
injection procedure
The following procedure outlines the steps necessary to create
myerson DuraFlex Partials with the myerson Flexpress™ Digital
Injection System.
1. Evaluate the model for major undercuts and block out the
undercuts. Due to the exibility and adjustability of the material,
very little if any blocking out will be needed.
2. Paint the model with myerson Thermoplastic Model Separator
MS-0200.
7
section 6 ~
processing using the
“Re-run Last Profile”
1. From the main menu use the UP or DOWN buttons until the cursor
is to the left of “Rerun Last Prole” then press the enter button.
2. The display will show the prole name and prole settings of the
last injection. If this is not the prole you wish to run, press the
LEFT arrow button to return to the main menu.
3. The myerson Flexpress™ is now ready to process your case.
See steps 5-13 of Section 5 for a complete injection.
12. Press the EXTEND/RETRACT button again to retract the piston.
13. The myerson Flexpress™ is now ready to process another case.
Repeat steps 1-9 for your next injection.

3. Wax and set up the teeth just as you would for an acrylic partial.
4. Add the clasps to the partial. myerson,LLC recommends using
12 gauge sprue wax for creating clasps.
8

5. Coat the inside of the ask with a petroleum jelly. This will prevent
the stone from adhering to the ask.
6. Invest the partial using regular Buff stone. When stone sets, place
sprues using 3/16” (4.75mm) utility rope wax. Extend the sprue to
the injection port in the ask.
7. Coat the stone with stone separator and bolt the top half of the
ask in place. The utility wax should ll the injection port of the
ask. This will keep the stone from leaking out during the second
half of the investing process.
9

8. Pour up the ask using myerson, LLC’s Investing Stone
INVSTONE-25LB. This stone has been designed to prevent
the teeth from shifting during injection. Notice the stone is
not protruding from the widow in the ask.
9. When the last half of the stone is set, remove the bolts but leave
the ask together and place in boiling water.
10. Once the wax has been removed, remove and place holes in
the denture teeth. The holes in the teeth are very important.
They create the mechanical retention necessary to lock the teeth
in place as well as allow air to escape as the myerson DuraFlex
is injected. Once the holes have been created, the teeth need to
be placed back into the proper locations. A small dot of Super
Glue on the incisal area of the teeth will hold them in place as the
material is injected. Bolt the two halves together.
10

11. Next, turn on the myerson Flexpress™ by pressing the
ON/STBY button. Select the method of processing referred to
in sections 4-6.
12. When the myerson Flexpress™ has reached the preset
temperature, a buzzer will sound. At this time, insert the desired
myerson DuraFlex cartridge into the heating chamber with the
crimped end down. A light coat of release compound BS-0105
on the cartridge will help eliminate the cartridge getting stuck in
the heating chamber. Press the start button this will start the
injection cycle.
11

13. Place the ask onto the myerson Flexpress™, centering the sprue
hole of the ask over the center of the heating chamber. Lock the
ask in place using the ask strap and knobs.
14. When the timer expires, the myerson Flexpress™ will automatically
inject the myerson DuraFlex cartridge. The piston will stay in the up
position according to the hold time. Once the piston retracts, it is
safe to unscrew the hold down plate and remove the ask.
15. To remove the ask, loosen the hold down knobs and remove the
ask strap. Using heat resistant gloves, grasp the ask and press
the EXTEND/RETRACT button (lower right button). This will extend
the piston and push the crushed cartridge and ask out.
16. Press the EXTEND/RETRACT button again to retract the piston.
The myerson Flexpress™ is now ready for another injection.
17. After the appliance is divested, it can be placed in a stone remover
to eliminate any extra stone that is adhering to the appliance.
Notice how the Thermoplastic Model Separator MS-0200 has
created a smooth, clean surface on the underside of the appliance.
12

18. This is the nished myerson DuraFlex case. Ready for try in.
13

Section 8 ~ myerson DurAcetal
framework injection procedure
The following procedure outlines the steps necessary to create myerson
DurAcetal®frameworks with the myerson Flexpress™ Digital Injection
System.
1. Block out the saddles on the model. This is in preparation for the
acrylic that will be placed later. The thickness used is 1 to 1.5 mm
thick. You will notice the large tissue stop cut out of the wax.
Stability is the reason for the large tissue stop.
2. Below is the duplicated model. This model has been duplicated
using myerson Universal Stone UNISTONE-25LB.
The expansion stone accounts for the shrinkage that occurs
when myerson DurAcetal cools.
3. Place myerson’s Thermoplastic Model Separator MS-0200
on the duplicated model.
14

4. Wax up the framework.
5. Coat the inside of the ask with a petroleum jelly. This will
prevent the stone from adhering to the ask.
6. Invest the framework using regular Buff stone. When stone
sets, place sprues using 3/16” (4.75mm) utility wax.
Extend the sprue to the injection port in the ask.
15

7. Coat the stone with stone separator and bolt the top half of
the ask in place. The utility wax should ll the injection port
of the ask. This will keep the stone from leaking out during
the second half of the investing process.
8. Pour up the ask using myerson, LLC’s Investing Stone
INVSTONE-25LB. Notice the stone is not protruding from
the widow in the ask.
9. When the last half of the stone is set, remove the bolts but
leave the ask together and place in boiling water.
10. Once all the wax has been removed, bolt the two halves
together.
16

11. Next, turn on the myerson Flexpress™ by pressing the
ON/STBY button. Select the method of processing referred
to in sections 4-6.
12. After the appliance is divested, it can be placed in a stone
remover to eliminate any extra stone that is adhering to the
appliance. Notice how the Thermoplastic Model Separator
MS-0200 has created a smooth, clean surface on the
underside of the appliance.
17

13. Here you have your nished myerson DurAcetal appliance.
The holes in the saddle areas were created using a standard
round bur. This will allow the acrylic to mechanically retain to
the myerson DurAcetal framework.
18

19
Section 9 ~
myerson warranty & returns
myerson offers a three (3) year limited warranty for US and Canada
against defects in material and workmanship. If you would like to
submit a product for warranty return, please contact a myerson
distributor or myerson. Include only the defective product submitted
for warranty replacement; also include a letter describing in detail the
problem, date of purchase of the product, as well as a return address
and contact name. myerson, LLC is not responsible for return shipment
costs. myerson will refurbish or replace product found to be defective
of material or workmanship. If after the three (3) year warranty you are
experiencing a problem with a product, please contact a myerson
distributor or myerson.
Section 10~ technical data
• Power Supply 120VAC 50/60Hz or 230VAC 50/60Hz
• MaxMeltingTemp 608F(320C)
• Dimensions H:17in,W:11in,D:10in(43cm,28cm,25cm)
• Weight 29lbs(13.15kg)
• AirPressure 100psiRecommended;150psiMaximum
• Fuse 10amp,(5x20mm)

20
Section 11 ~
preventive maintenance & cleaning
Use only approved materials in the myerson Flexpress™ Digital
Injection System. The use of other materials may cause the unit to fail
and will void the manufactures warranty. See Section 10 for warranty
information.
Keep heating chamber and ask area free from dirt and other foreign
debris to prolong the life of the unit. Periodically clean the heating
chamber with the cleaning brush. The rest of the unit can be cleaned
with a damp rag and mild soap solution. Turn off and unplug the unit
before cleaning. Always keep the unit in an upright position.
Section 12 ~ Service & Repairs
For service and repair of the
myerson Flexpress™ Digital Injection
System, please call 888.401.1126 or go to cdmdental.com.
For technical support contact Kris Schermerhorn CDT
Section 13 ~
Declaration of Conformity
Use only approved materials in the myerson Flexpress™ Digital
Injection System. The use of other materials may cause the unit to
fail and will void the manufactures warranty. See Section 10 for
warranty information.
Keep heating chamber and ask area free from dirt and other foreign
debris to prolong the life of the unit. Periodically clean the heating
chamber with the cleaning brush. The rest of the unit can be cleaned
with a damp rag and mild soap solution. Turn off and unplug the unit
before cleaning.
Always keep the unit in an upright position.
Table of contents
Other MYERSON Laboratory Equipment manuals