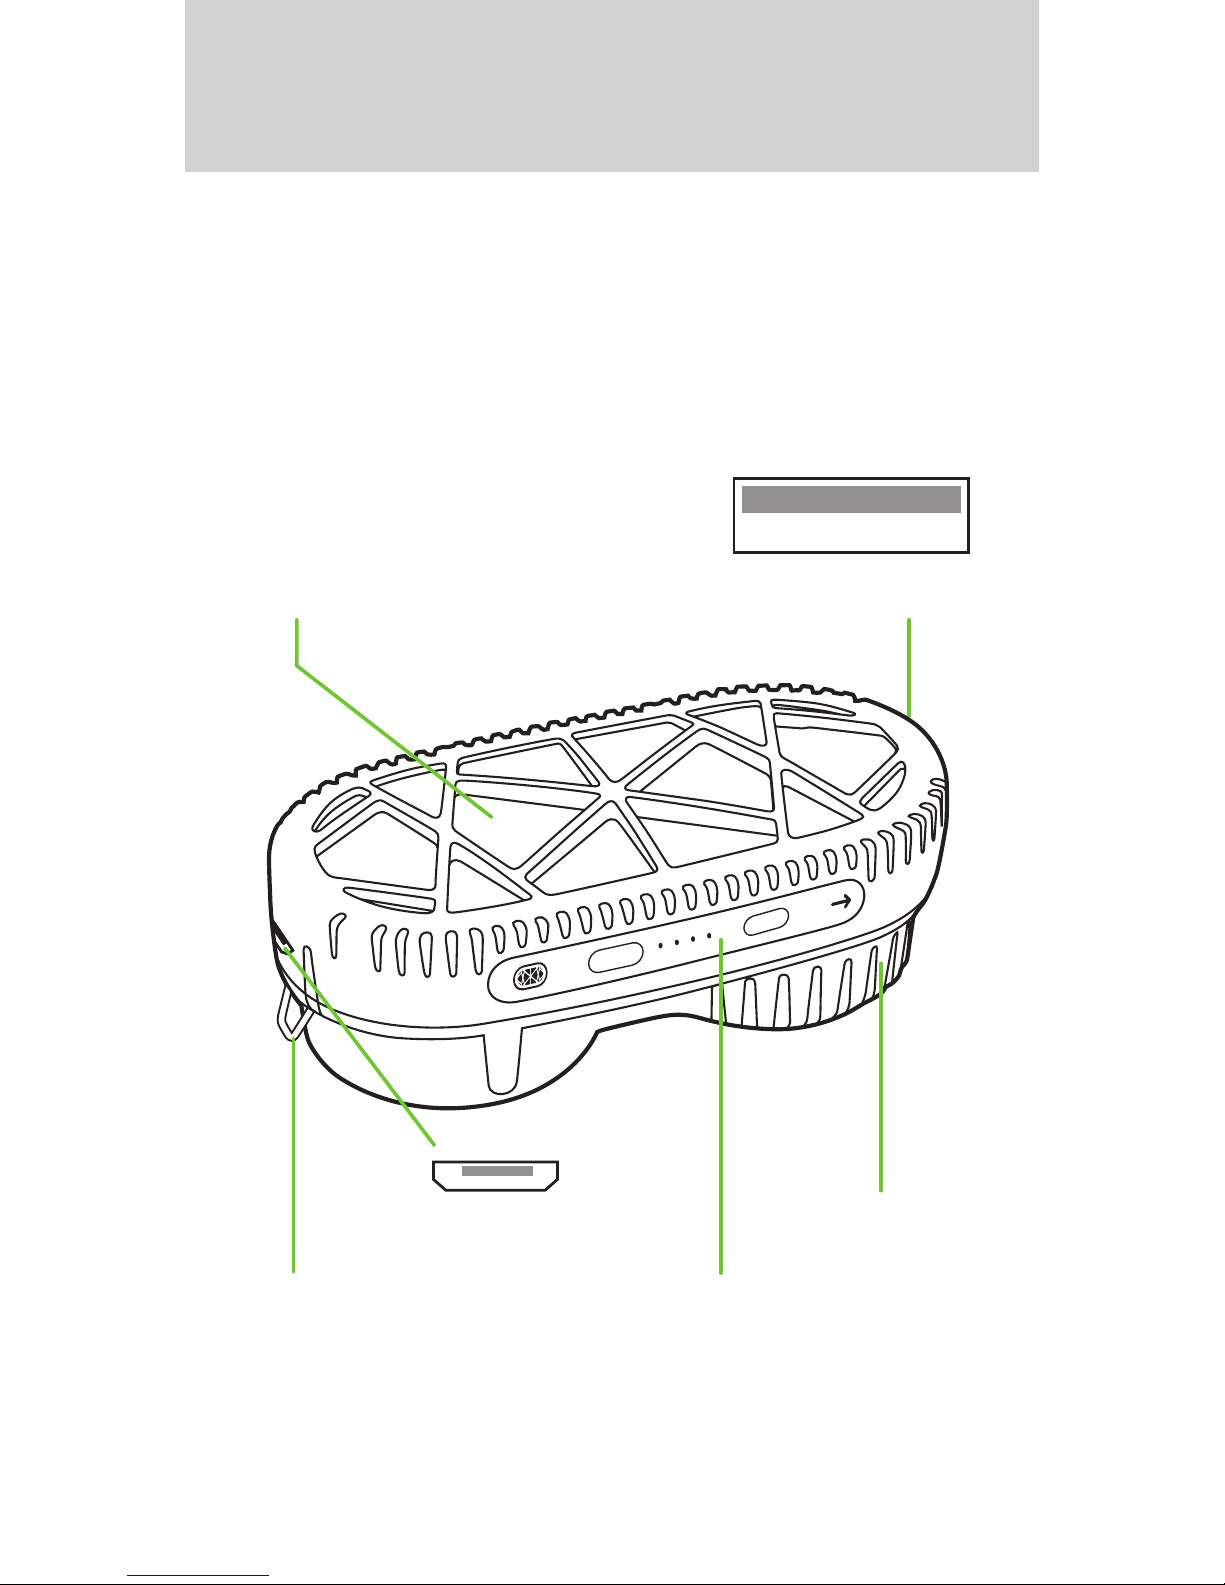
IMPORTANT – First time use
Start-up procedure for the Charger
The first time you use the Charger (or if it has dried out*),
you must follow these procedures to achieve optimal
performance. After that, for everyday use, follow the
procedures on pages 8, 9, 10 & 11.
1) Warm up the Charger
When the Charger is new it needs to be warmed up in
order to reach its full potential. Do this:
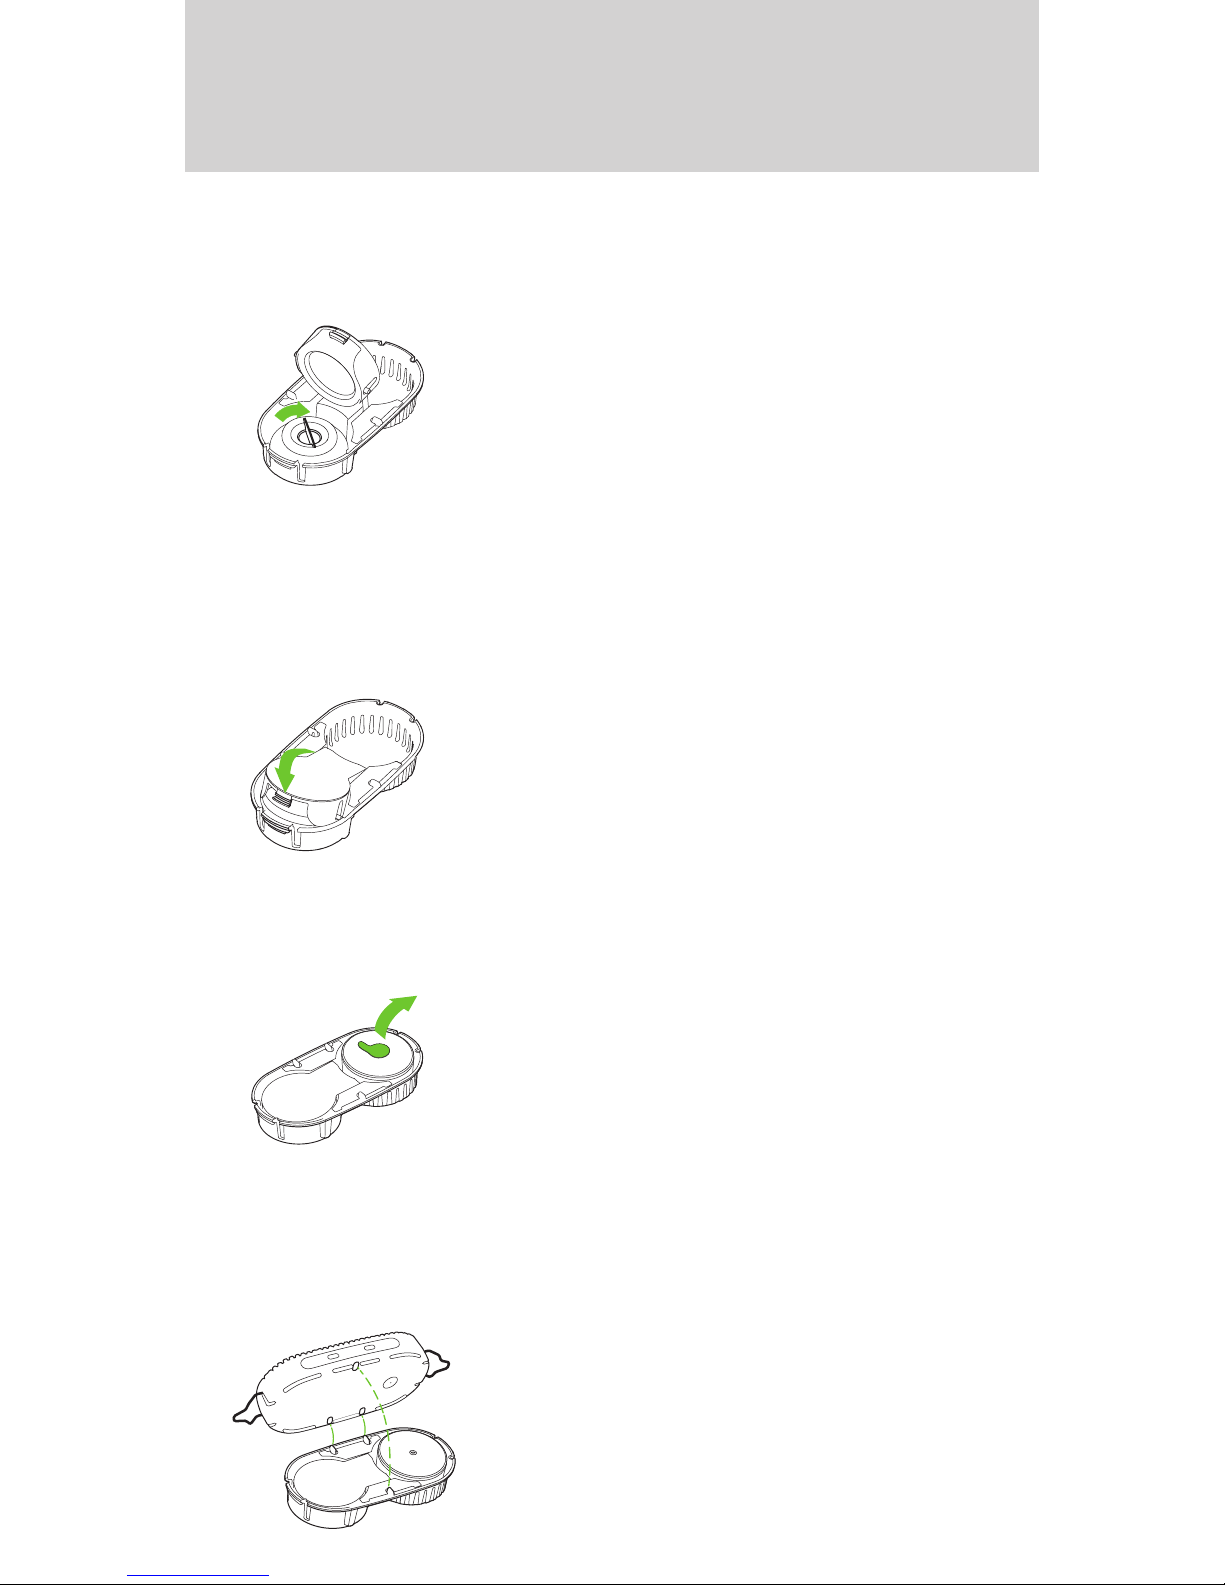
A. Follow the procedure “How to start the Fuel cell”
on page 8–9.
B. Let the Charger run on the first myFC Puck until
the Fuel cell indicator turns off or for at least two
hours. If the Fuel cell indicator is blinking, do not
connect a device to the Charger, since device
charging is not available during this state.
C. After the step above – remove the Puck and wait
30 seconds.
D. If the Fuel cell indicator is blinking during the two
hours with the first Puck – repeat the procedure
and insert a new myFC Puck. Run the Charger
again until the Fuel cell indicator turns off or for at
least two hours.
E. When the Fuel cell indicator starts showing a solid
green light – you can start charging your device.
*All Fuel cells are sensitive to dehydration. This can happen if unused
for quite some time or if you have not stored it in the Storage tube.
If dried out, the Charger may take some time before it starts, and/or
the Fuel cell indicator may blink. If this happens repeat the procedure
on this page, “Warm up the charger”.