Myryad Car Satellite Radio System User manual

User’s Guide

Contents
Introduction 3
Connections 4
Aerial/Aerial Connector 4
Line out 4
Power Supply Unit 4
Line In 5
Headphone Socket 5
M-Port Connector 5
Quick Start Guide 6
Setting the alarm 7
Silencing an alarm 7
Basic Operation 8
Turning the unit ON/OFF 8
Menu 8
Volume 8
Choosing a Source 9
Display 9
Alarm 9
Tuning 9
Using the 10
Tuning to your favourite radio stations 10
DAB Tuning 10
FM Tuning 11
Storing a Preset 12
Setting the Alarm Time 13
Snooze 14
Using the Menu 15
Adjusting the sound 16
Setting the time 16
Further options 17
Line in Boost 17
Backlight Level 17
Scanning for DAB Stations 17
Setting the Standby Alarm Type 18
Setting the Sleep Timer Option 19
Using the Handset from the
Music Pack 20
Radio Operation 20
Source key 20
Volume UP/DOWN 20
The PLUS and MINUS keys 20
Line In Operation 21
Battery Replacement 21
Using an iPod® with the Cable and
Handset from the Music Pack 22
iPod Operation 22
Source Key 22
Tracks/Albums/Playlists 22
Advanced Functionality 23
Alarm Skip 23
Display Backlight 23
Advanced Menu 24
Turn On Volume 24
Advanced Alarm Settings 25
Factory Reset 25
Index 26

3
Introduction
The Myryad has been designed for ease of use as a complete radio
system.
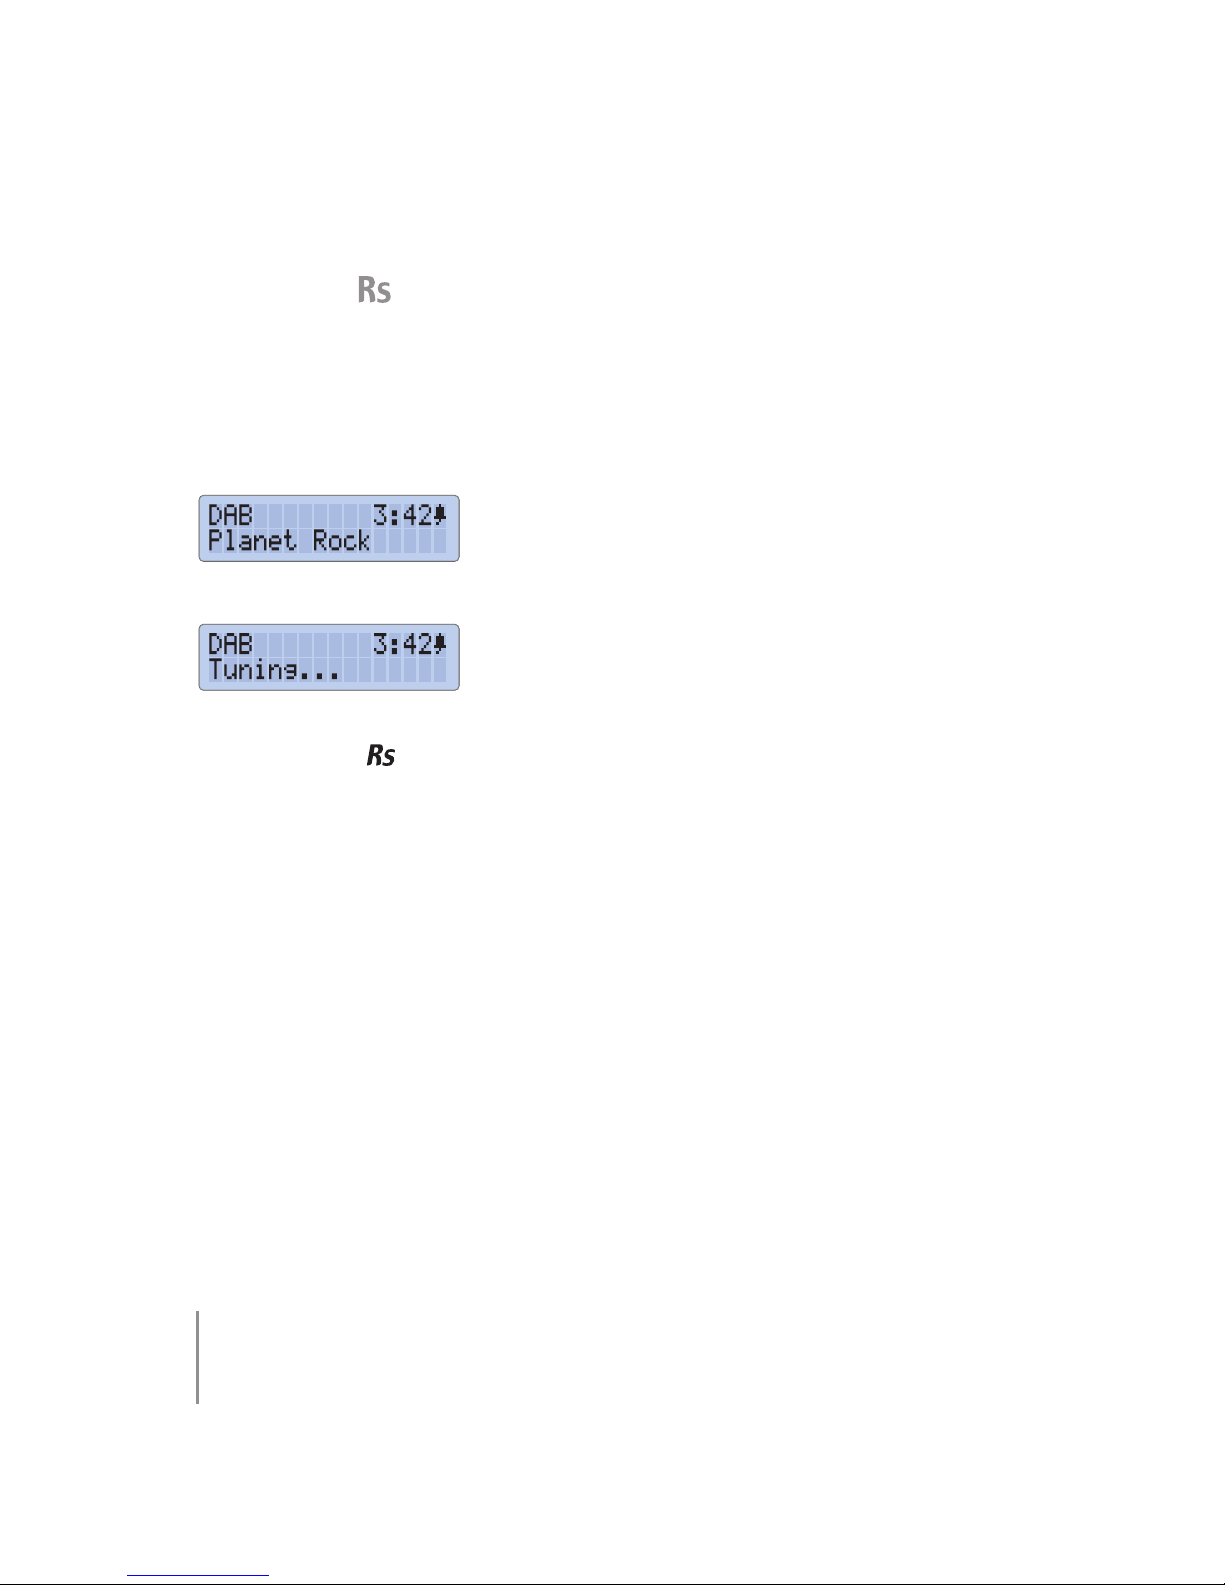
It features both FM (with RDS) and DAB (Digital Audio Broadcasting)
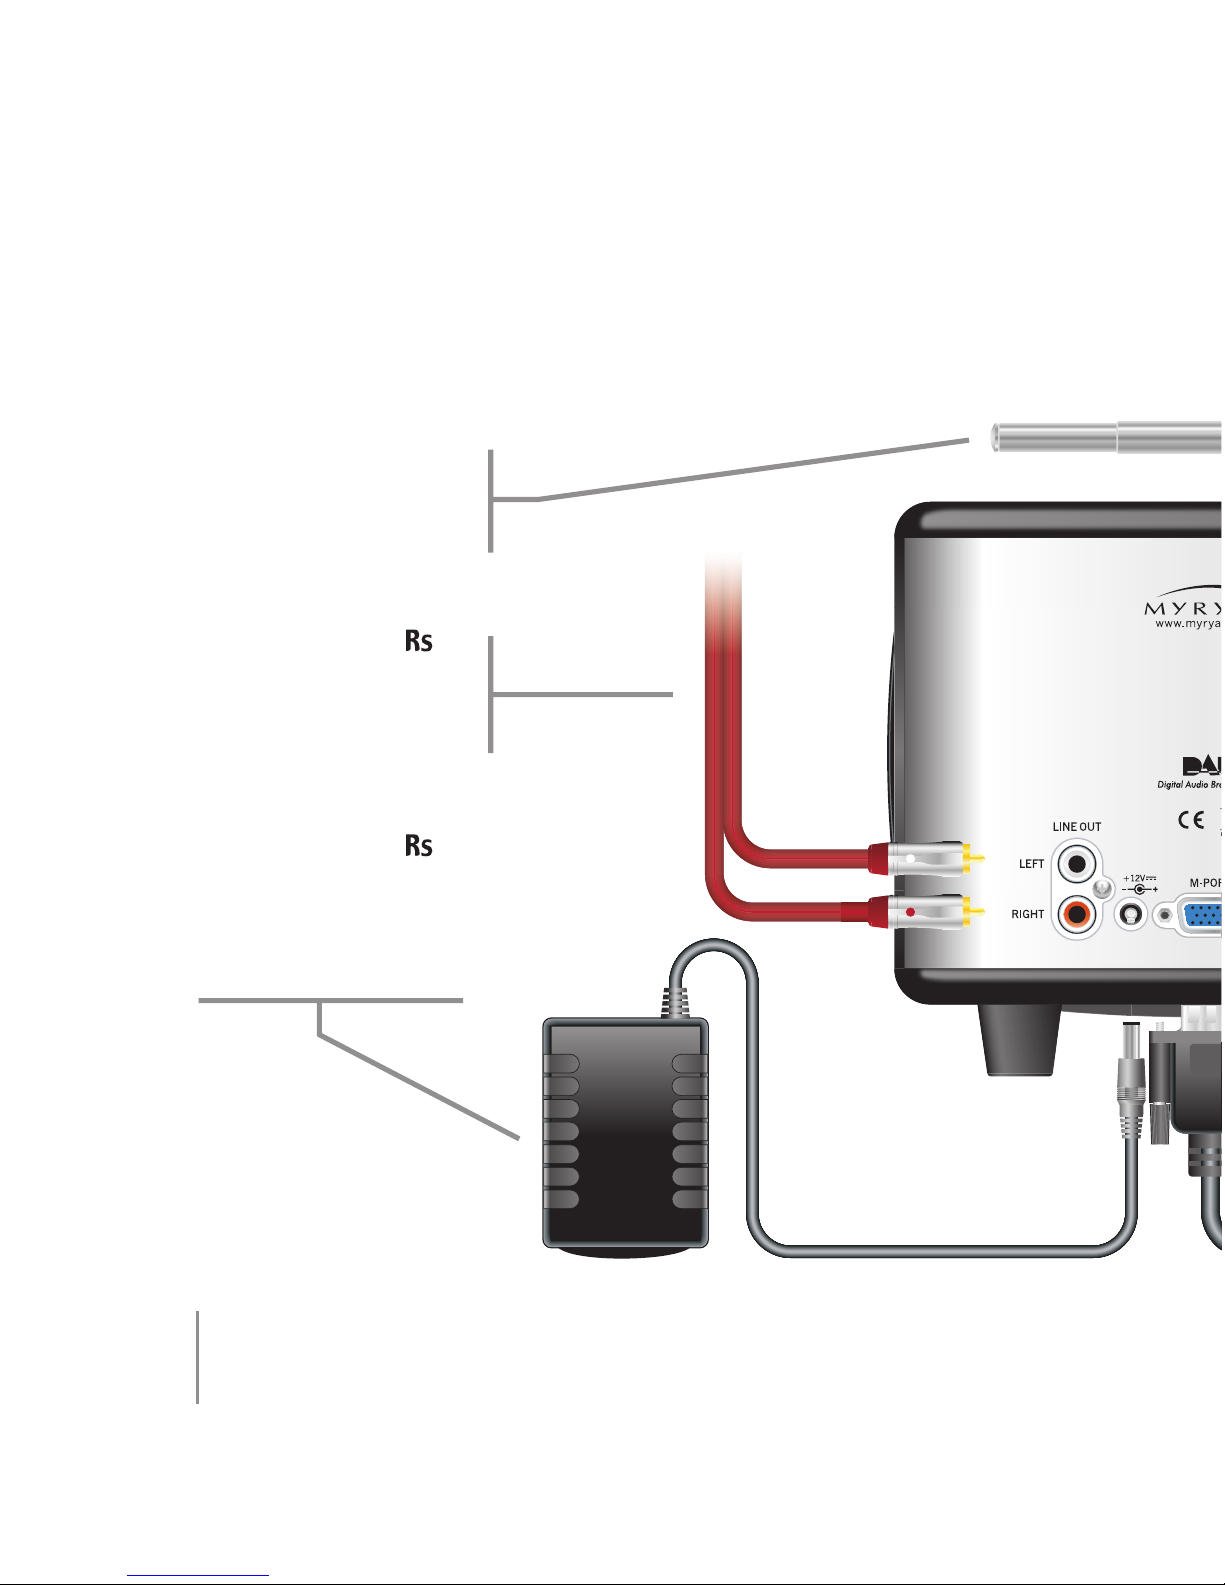
tuners. It also allows for an auxiliary connections through the LINE IN
on the rear panel and—with the optional Music Pack¹—a full function
connection for an iPod®through the M-PORT.
It has a three-way speaker system with 100mm bass driver, delivering
room–filling hi-fi stereo sound and seperate bass/treble controls
allows adjustment of sound.
The LINE OUT connection allows for connection to hi-fi equipment.
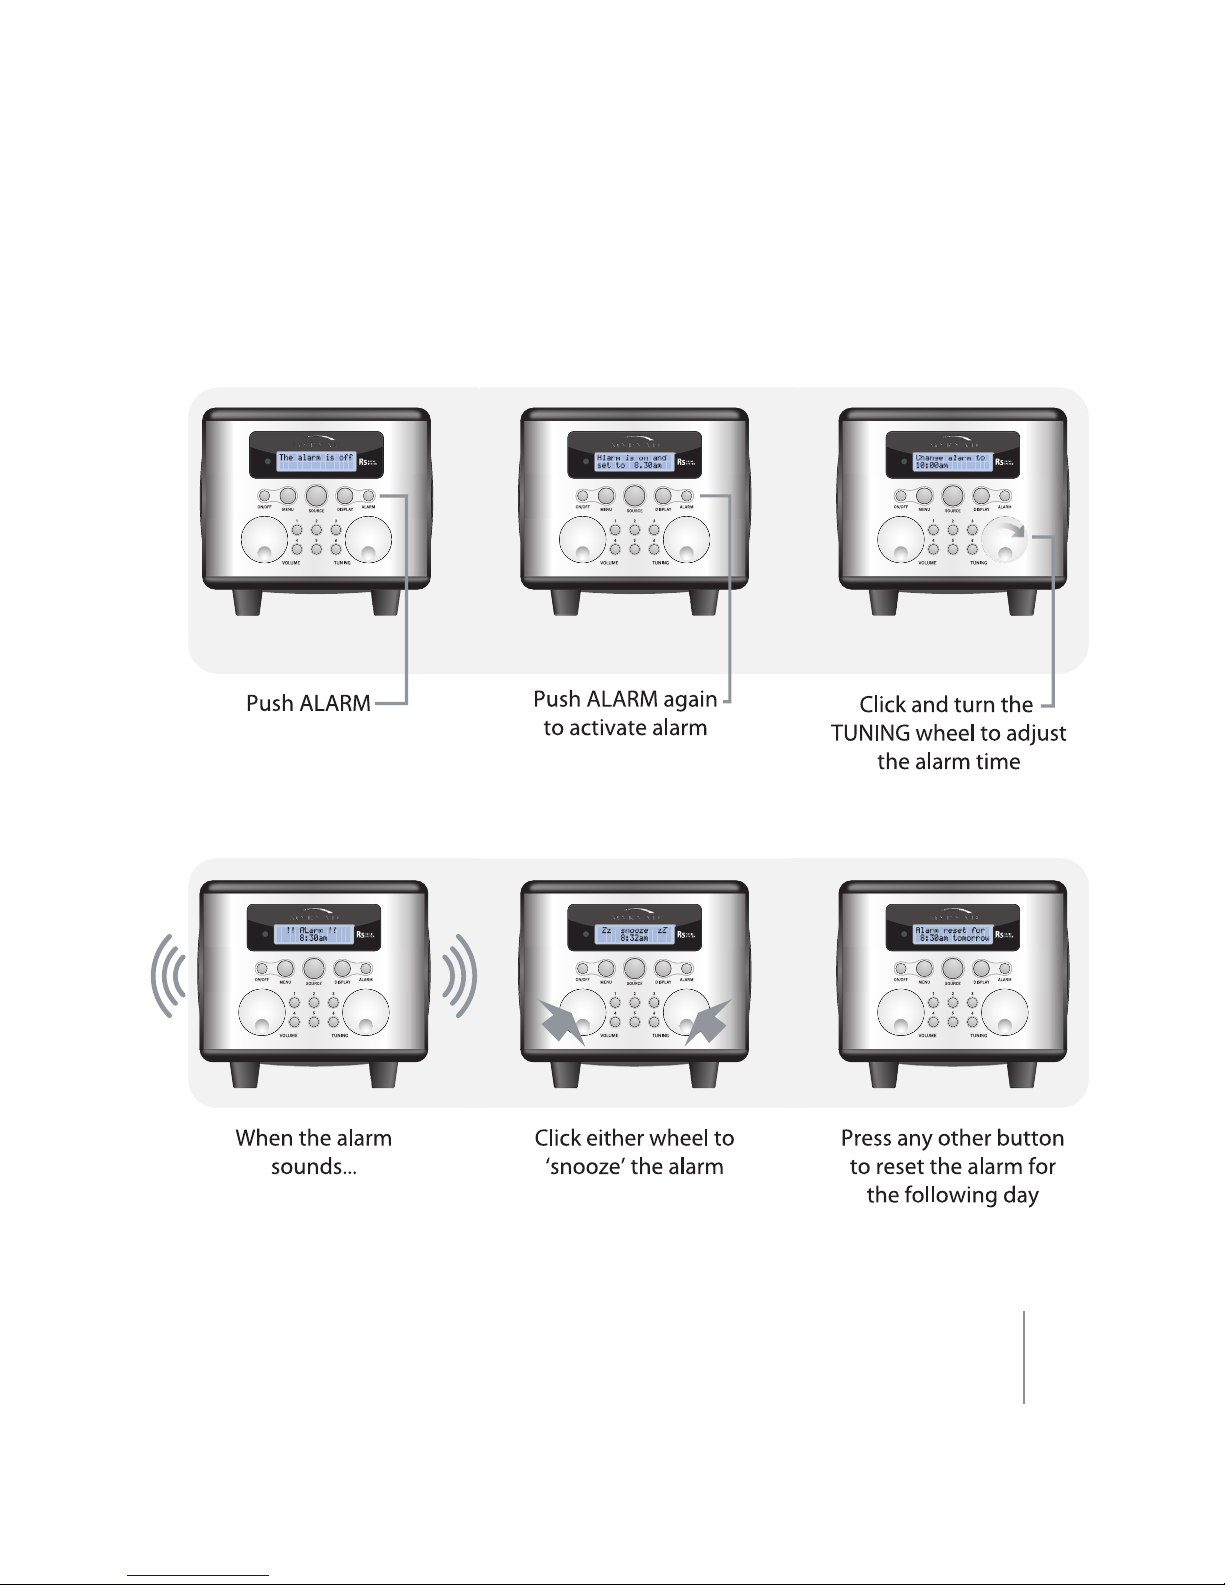
The built-in alarm system offers multiple wake-up options.
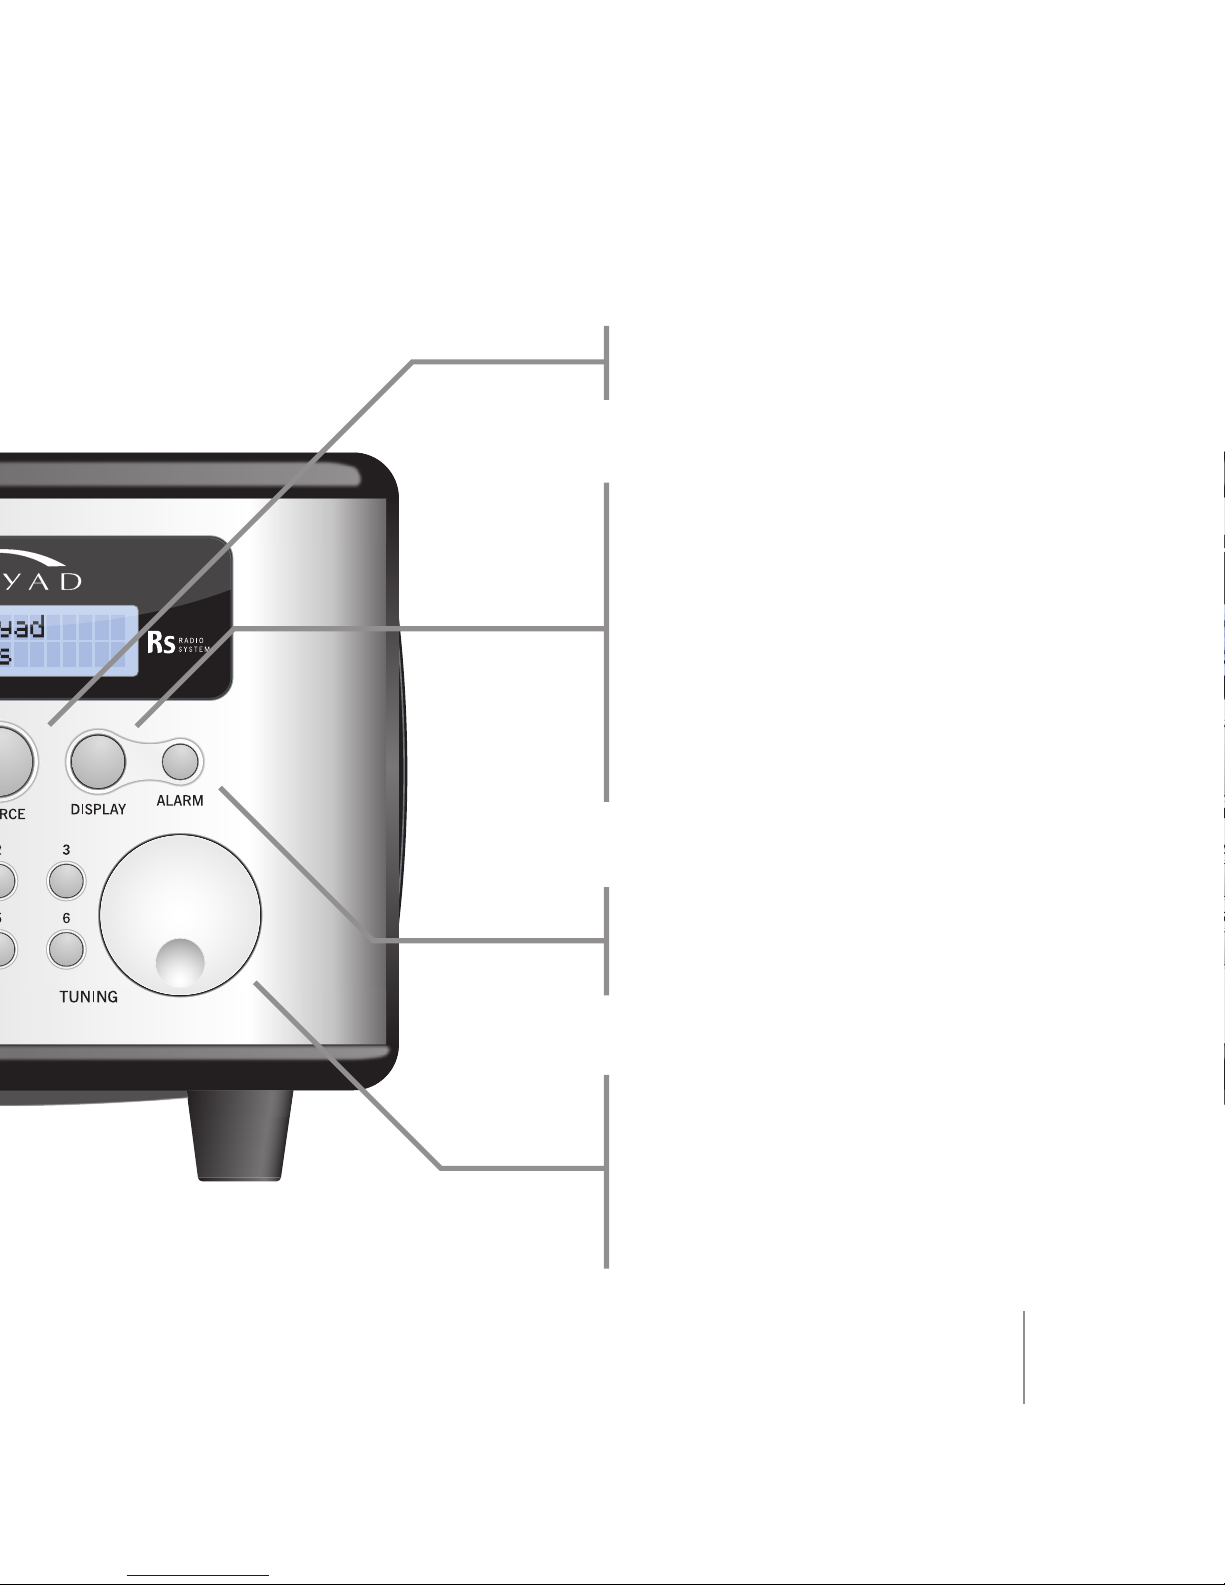
The headphone socket has a amplifier with dedicated tone controls,
ensuring the best possible sound quality.
The is highly flexible and can be tailored to individual preferences.
Doing so will take just a little more investigation but will reward
discerning listeners with exactly the sound and operation that would
be expected from a radio belonging to the Myryad Performance
Lifestyle range.
Note: The first time that the RS is powered up, it will start a DAB scan
which cannot be interrupted unless the unit is powered down. If powered
down, a full DAB scan will need to be done to ensure a complete list
of available DAB stations (refer to‘Using the Menu–Scanning for DAB
Stations’, page 17).
¹Available separately

4
Connections
Aerial/Aerial
Connector
Use to connect the
supplied aerial. It can also
be used to connect an
external aerial.
Line out
Use to connect the
to any line level input,
such as on an amplifier
or recording device.
Power Supply Unit
Use to connect the
to mains power with the
appropriate plug adapter
(comes with UK, European
and US plug types).

5
Line In
Use to connect any line level
source equipment such as
MP3 or CD players (a 3.5mm
jack to 3.5mm jack cable is
provided for this purpose).
The ‘Boost’ function in the
options menu can be used if
the sound level of the input
is too low. .
Headphone Socket
Use to connect your
headphones.The will
mute its speakers (except
when an alarm is activated)
and, when plugged in, any
adjustments to the tone and
volume controls will affect
only the headphone output.
M-Port Connector
Use to connect an iPod
to provide extended
functionality.When the
is active, the source will
automatically switch to
M-PORT when an iPod is
connected.

6
Quick Start Guide
ON/OFF
VOLUME
Click to mute
TUNING
DAB–Turn the
wheel to browse
through stations,
click to select.
FM–Turn the
wheel to tune
through the
frequencies.
SOURCE
Cycles through
DAB, FM and
other sources.
PRESETS
Press to select, press and hold to store
selected station or source.

7
Setting the alarm
Silencing an alarm

8
Basic Operation
Connect the to the mains power supply using the supplied plug-top
adapter and ensure that the wall power switch is on.
Turning the unit ON/OFF
Pressing the ON/OFF button will turn
the on.
Pressing any of the preset buttons
(labelled 1–6) will turn the on
to the preprogrammed source or
station.
Press ON/OFF to turn the off.
Menu
Press the MENU button to enter the
setup options menu (refer to ‘Using
the Menu’, page 15).
Volume
Turning the VOLUME wheel
clockwise increases the volume,
anti-clockwise will reduce the
volume.The display will show the
current volume level.
Click the VOLUME wheel to mute the
volume.The display will show ‘Mute’.
Clicking or turning the VOLUME
wheel again will restore the volume.

9
Choosing a Source
Repeatedly pressing the SOURCE
button cycles through the available
sources.
Display
Use the DISPLAY button to see other
information being broadcast by
the current radio station.This can
include the name of the song being
broadcast and other useful items.
Only DAB and FM radio stations
with RDS provide this information.
Repeatedly pressing the DISPLAY
button cycles through the different
kinds of information available.
Alarm
Press the ALARM button to turn the
alarm on and off or to set the alarm
time (refer to ‘Setting the Alarm’,
page 13).
Tuning
Use the TUNING wheel to tune to
new stations or adjust options in
the menu (refer to ‘Tuning to your
Favourite Radio Stations’, page 10).
Click the TUNING wheel to select
options when in the menu.

10
Using the
Tuning to your favourite radio stations
First select DAB or FM using the SOURCE key.
DAB Tuning
Turning the TUNING wheel cycles
alphabetically through the names of
stations.
Clicking the TUNING wheel tunes to
the station displayed.
Note: When the is switched on for the first time,it will perform an
automatic scan to detect all available DAB radio stations that can be
received.Should the radio be moved to a different location, or you wish to
check for new stations in the future,it will be necessary to perform a DAB
scan (refer to‘Using the Menu–Scanning for DAB stations ’, page 17).
It is possible for the name of a DAB station to be displayed but for there to
be no station audible.This may be due to the fact that the station is not
being broadcast at that time—some stations may only broadcast for a
few hours a day.

11
FM Tuning
Turning the TUNING wheel tunes up
or down the frequencies.The will
automatically tune to the chosen
frequency
Clicking the TUNING wheel when
you see the left pointing chevrons
will scan down the frequencyrange
to the next available station.
Clicking the TUNING wheel when
you see the right pointing chevrons
will scan up the frequency range to
the next available station.
Clicking the TUNING wheel again
will carry on scanning in the same
direction without having to turn the
wheel.
Turn the TUNING wheel again to
tune in the opposite direction.
If the does not present you
with music or chat then it may be
that you are in a weak signal area.
Moving the radio closer to a window
may improve signal reception.
Note: In extreme cases it may be necessary to connect the radio to a
properly installed external radio aerial. Please contact your dealer for
information.

12
Storing a Preset
The numbered buttons 1–6 can be used to preset the to a favourite
radio station or any source.
With a source selected (e.g. LINE IN) or a radio station tuned (e.g. DAB)
pressing and holding one of the numbered preset buttons until you
hear a beep will program that button to automatically switch to that
source or tune to the current radio station when pressed again.
There are 6 presets in total. They
can be a mix of DAB or FM stations
or sources.
Preset 1 is the default alarm source,
Note: The DAB station must be fully tuned in—not just selected—for the
preset to be stored correctly.

13
Setting the Alarm Time
Pressing the ALARM button will
display the current alarm setting.
Pressing the ALARM button again
changes between alarm on and
alarm off.
Click TUNING to change the alarm
time.
Turn the TUNING wheel to adjust the
hour and am/pm, click to set.
Turn the TUNING wheel to adjust the
hour and am/pm, click to set.
Turn the TUNING wheel to adjust
am/pm, click to set.
The alarm is now set and will display
the details of the alarm along with
preset number and type.
An alarm icon ( ) will be displayed
after the time on the display to
indicate that the alarm is set.
Note: When the alarm sounds (if the is in standby) it will switch to the
station or source that is stored as the alarm preset.If the is on, it will
beep to indicate the the alarm—it will not switch presets.

14
Snooze
When the alarm sounds, a click of
either wheel will put the alarm into
‘snooze’ mode.The alarm will repeat
after the preset interval.
Pressing any other button exits
‘snooze’ mode and resets the alarm
for the following day.
Note: Snooze is not available when the alarm type is set to preset only.

15
Using the Menu
When the MENU button is pressed repeatedly, the will cycle through
the options that can be changed.
Click the TUNING wheel when you want to select that menu item, then
rotate the TUNING wheel to change the option. Clicking again moves
on to the next choice.
To exit the menu option and go back to normal operation, press the
MENU button again or wait until the display returns to normal.
Note: When the is in standby, not all menu options are available.

16
Adjusting the sound
Once selected, the options for
adjusting the sound will be
displayed with the option currently
selected flashing.
Move between the options by
clicking the TUNING wheel, adjust
the settings by turning the wheel.
Press the MENU button to exit.
Setting the time
Once selected, the options for
setting the time will be displayed
with the option currently selected
flashing. If in DAB mode, the will
always pick up the current time
from the currently tuned station.
Move between the options by
clicking the TUNING wheel, adjust
the settings by turning the wheel.
Press the MENU button to exit.

17
Further options
Click the TUNING wheel to select an option to change.
Line in Boost
Adjusts the Line In input level for quiet source components.
Backlight Level
Adjusts the LCD display backlight level (refer to ‘Advanced
Functionality–Display Backlight’, page 23).
Press MENU to exit.
Scanning for DAB Stations
Once selected, this option will
scan for DAB Stations, updating its
internal database.
A DAB scan may take a few minutes to complete.
Once complete the will return to normal operation.
Note: This option is only available in DAB Mode when the is not in
standby.The number of DAB radio stations may vary from area to area.

18
Setting the Standby Alarm Type
Preset with Beep
Overlays a beep on the preset
chosen below.
Preset Only
Uses the preset only with no beep.
Snooze is not available with this
option.
Continuous beep
Uses a constant repetitive beep for
the alarm.
Short beep
Uses a single, short beep that
repeats every 15 seconds¹ for the
alarm.
If Preset or Preset with beep was
selected, the next option will be to
choose which preset to use for the
alarm.
Next, (except for preset only) choose
the snooze interval time—up to 1
hour in 1 minute increments.
Note: The alarm presets can be LINE IN or M-PORT as well as DAB or FM
stations.
When the is not in standby and the alarm sounds, the alarm type will
always default to‘short beep’—the will not change preset or sound the
‘continous beep’ alarm.
¹Can be changed in the ‘Advanced Menu – Advanced Alarm Options’, page 25.

19
Setting the Sleep Timer Option
This option will allow for the
to go into standby after a
preprogrammed amount of time, up
to 1 hour in increments of 1 minute.
Sleep mode will start as soon as the
menu option is set to ‘ON’ and will
display the sleep icon ( ) instead of
the normal alarm icon.
Note: The alarm will operate as normal during this time and if activated it
will cancel sleep mode.

20
Using the Handset from the Music Pack
(available separately)
Radio Operation
Source ( ) key
A short press of the SOURCE key turns the on or cycles
through the sources. A long press of the SOURCE key puts
the into standby. A double-click of the SOURCE key
mutes or unmutes the .
Volume UP/DOWN
Controls the volume level.
The PLUS ( ) and MINUS ( ) keys
The PLUS and MINUS keys move up and down the presets
of the currently tuned radio type.
Note: It is only possible to skip presets within the respective
FM or DAB modes,i.e. if there are four DAB preset stations
and two FM stations programmed and DAB is the selected
source it will only be possible to skip between those four DAB
presets.Use the SOURCE key to switch to FM or any other
source (LINE IN or M-PORT).
A double-click of the PLUS or MINUS keys will tune the ,
in FM mode, to the next or previous station. In DAB mode,
it will tune the to next alphabetical station.
A long press of the PLUS or MINUS keys will change the
display to show the information being broadcast by the
current radio station.
This manual suits for next models
1
Table of contents