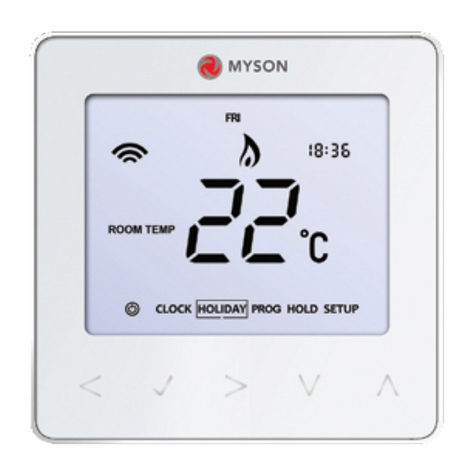
Myson Unisenza Plus Thermostat User manual

Installation
and user manual
Unisenza Plus - Thermostat
EN
H
eating,
cooling
& hot water
Smart, app
connectivity
Battery
powered
Geo location
5 year
guarantee

EN
Unisenza Plus - Thermostat
Installation and user manual
Release Date
First release August 2023

EN
Unisenza Plus - Thermostat
Installation and user manual
Index
1 Safety warnings .....................................................................................................................4
Pictograms used in this manual..............................................................................................4
Purpose of the manual...............................................................................................................4
Intended use...................................................................................................................................4
Safety regulations........................................................................................................................5
2 Technical data .........................................................................................................................6
Unisenza Plus Thermostat .......................................................................................................6
3 Dimensions..............................................................................................................................7
4 Pack contents..........................................................................................................................7
5 Overview ..................................................................................................................................8
Unisenza Plus Thermostat .......................................................................................................8
Button usage..................................................................................................................................8
Display icons..................................................................................................................................9
6 Applications...........................................................................................................................10
Room Thermostat.......................................................................................................................10
Room control unit for Electronic Thermostatic Head...................................................10
7 Download the APP................................................................................................................11
8 Nameplate ..............................................................................................................................11
9 Installation ............................................................................................................................ 12
Recommendations for a correct installation ................................................................... 12
Fixing the bracket to the wall................................................................................................. 13
Inserting the batteries .............................................................................................................. 14
Fixing the thermostat to the bracket................................................................................... 15
10 Use ......................................................................................................................................... 16
Main screen operation.............................................................................................................. 16
Power up........................................................................................................................................ 16
Pairing to Unisenza Plus Gateway ......................................................................................18
Pairing with other Unisenza Plus device (optional) ..................................................... 22
Change operation mode.......................................................................................................... 24
Boost - Set point........................................................................................................................ 25
Change system mode (Heating&Cooling) ........................................................................ 26
Change Hot water operation mode (available only when SYS TYPE is “HEAT+DHW”)
... 26
Schedule setting.........................................................................................................................27
Key lock.........................................................................................................................................30
User setting .................................................................................................................................. 31
Admin setting.............................................................................................................................. 32
Language setting....................................................................................................................... 34
Protection..................................................................................................................................... 34
Error code display..................................................................................................................... 35
11 Maintenance......................................................................................................................... 36
Low battery.................................................................................................................................. 36
Over-the-air (OTA) software update operation. ............................................................. 36
Cleaning ........................................................................................................................................ 36
12 Manual download and updates.........................................................................................37
13 Disposal at the end of life ...................................................................................................37
EN
Unisenza Plus - Thermostat
Installation and user manual
1 SAFETY WARNINGS
Pictograms used in this manual
To make reading clearer and more enjoyable, three types of symbols have been used
in this manual to convey to the reader the meaning or importance of the information
provided:
Hazard signs. Triangular framed shape. Indicate prescriptions relating to
present or possible dangers.
Prohibition signs. Circular, barred frame. Indicate prescriptions relating to
actions that must be avoided.
Mandatory signs. Full circle. Indicate information that is important to read
and comply with.
Purpose of the manual
The purpose of this manual is to guide the qualified installer the installation, maintenance
and proper and safe use of the equipment.
For this reason, it is mandatory for all personnel involved in the installation,
maintenance and use of the equipment to read this manual.
Contact the Manufacturer if any points are unclear or difficult to understand.
This manual contains information regarding:
• Technical specifications of the equipment;
• Installation and connection instructions.
Intended use
The Unisenza Plus Thermostat is a wireless room thermostat with Zigbee 3.0. It offers
two channels control outputs through the Zigbee wireless communications. The first
channel can be used for programmable room temperature controls and the second
channel is designed for a timer control of domestic hot water on/off.
Its features are:
• Large LCD display with backlight
• Have pairing features with compatible Unisenza Plus Receiver and Unisenza PLUS
Electronic Thermostatic Head
• Support Heating, Cooling and Domestic Hot Water timer control (S-Plan, Y-Plan)

EN
Unisenza Plus - Thermostat
Installation and user manual
• Operation modes include Schedule, Manual, Temporary override, Boost, Holiday and
Off with frost protection
• 7-day, 5/2-day or single-day programming options
• Optimum start/stop control strategies for energy efficiency
• Selectable TPI or Span control algorithm
• 2xAA batteries operated (batteries included)
• Two time channels for independent control of Heating/Cooling and/or Hot Water
• Zigbee and App controlled
Safety regulations
Before proceeding with any installation or use, it is necessary to thoroughly inspect the
product. Make sure that all the information contained in this manual correspond exactly
to the purchased equipment. In the event that differences are identified, it is necessary
to contact the Manufacturer in order to obtain the assistance and specific technical
information necessary to operate.
Read this manual carefully before the installation, use and maintenance of the
product and keep it for any further future consultation by the various operators.
All installation, assembly, electrical connections to the mains and ordinary/
extraordinary maintenance must be performed only by qualified personnel or
technicians complying with the legal requirements.
Installation, use or maintenance other than those specified in the manual
may cause damage, injury or death, invalidate the warranty and relieve the
Manufacturer of all liability.
Disconnect the equipment from the mains before installing or maintaining it.
Do not installthe equipment outdoors.The product has been designed to be installed
indoors, protected from bad weather, in places where the temperature is between
0 and +50 °C.
At the end of the installation it is necessary to instruct the user in the correct use
of the equipment.

EN
Unisenza Plus - Thermostat
Installation and user manual
2 TECHNICAL DATA
Unisenza Plus Thermostat
Temperature Scale °C or °F
Temperature Display Range 0°C - 45°C
Temperature Display Resolution 0.1°C o 0.5°C
Temperature Setting Range 5°C - 37°C
Temperature Setting Resolution 0.5°C
Temperature Measurement Accuracy +/-0.5°C @ 0-40°C, +/-1.0°C other range
Firmware update Over the air firmware update capability
Wireless Communication Zigbee 3.0, 2.4GHz
Transmission Power Zigbee: max 10 dbm
Power Supply 2 x AA-sized Alkaline Batteries
Operating Environment Indoor, residential & commercial
Operating Temperature 0°C – 50°C
Storage Temperature -20°C – 60°C
Operating/Storage Humidity 5-95% RH, non-condensing
Dimensions 119(W) x 97(D) x 28(H) mm
Ingress Protection Rating IP30
Regulation CE, UKCA
Environmental Requirement RoHS compliance
The Unisenza Plus Thermostat complies with the following European directives:
• RED directive 2014/53/EU
• ROHS directive 2011/65/EU
• REACH (EC 1907/2006)
The Unisenza Plus Thermostat complies with the relevant UK Statutory Instruments:
• Electrical Equipment (Safety) Regulations 2016
• Restriction of the Use of Certain Hazardous Substances in Electrical and Electronic Equipment
Regulations 2012 (SI 2012/3032)
• REACH ETC. (Amendment etc.) Regulations 2020 - SVHC

EN
Unisenza Plus - Thermostat
Installation and user manual
3 DIMENSIONS
MENU BOOST
97
28
119
4 PACK CONTENTS
+
AA
+
AA
MENU BOOST
x2
x2
de
ab
c
a. Wall mount bracket
b. Unisenza Plus Thermostat
c. 2 x AA-sized Alkaline Batteries
d. Plate fixing screw
e. Fixing wall plug for plate fixing

EN
Unisenza Plus - Thermostat
Installation and user manual
5 OVERVIEW
Unisenza Plus Thermostat
MENU BOOST
+
AA/LR6
+
LR6/AA
1
8
2
3
4
5
6
7
1. Display LCD
2. Operation mode button
3. Boost button
4. Confirm button
5. Button +
6. Button -
7. Menu / Back button
8. Battery compartment
Button usage
Button Function
Menu / Back button
In Main screen: press to go to menu.
In Menu: press to go back to main screen or previous menu, press and hold to
go to main screen without saving the settings at any time.
Button - Decrease parameter value / Moving on the menu in down direction.
Button + Increase parameters value / Moving on the menu in up direction.
Buttons + and - Long press Up and Down buttons for 4 sec – lock or unlock the thermostat.
Confirm button
Confirm Value / Go to next menu / Save settings.
In menu: press and hold for 4 sec to go back to main screen with saving the
settings at any time.
Boost button Activate/Deactivate Boost (For Heating Only) with max. +9 hr Boost.
Operation mode
button Switch between Permanent Hold and Schedule.

EN
Unisenza Plus - Thermostat
Installation and user manual
Display icons
Icon Description
Text Bar (9 digits)
Time
Room Temperature/Set point
Day of the Week (numeric or alphabetic display defined in set-
tings)
Demand Active (Heat / Cool)
Schedule mode
- Schedule mode icon with program number
Temporary Override
Permanent Hold
Boost mode under schedule +Hr
Heat Mode
Cool Mode
Off Mode
Holiday mode
Lock
Hot Water mode indicator
Hot Water Demand Active

EN
Unisenza Plus - Thermostat
Installation and user manual
Hot Water Timer Operation mode:
Auto, Always Off, Always On, Boost
RF Connection indicator
Internet Connection Indicator
Low battery Status
Set Point
Setting
When OpenTherm is detected
Icon Description
“OT” and heating water temperature is displayed
OpenTherm boiler supports hot water function
OpenTherm boiler reports hot water is running
OpenTherm boiler reports the flame is On
6 APPLICATIONS
Room Thermostat
The Unisenza Plus Thermostat can be used for the following system types through the integration
with HVAC equipment or controllers on a wireless Unisenza Plus network with compatible clusters
and attributes, such as Unisenza Plus Receiver.
• Central heating On/Off controls or OpenTherm
• Dual channels On/Off controls for central heating and domestic hot water timer
• Heat/Cool On/Off Control
Room control unit for Electronic Thermostatic Head
The device can also be used as the master room control unit when paired with Unisenza PLUS Elec-
tronic Thermostatic Head. In such use case, Unisenza Plus Thermostat is used as the room temper-
ature sensor and setpoint interface for the paired Unisenza PLUS Electronic Thermostatic Head. A
maximum of six Unisenza PLUS Electronic Thermostatic Heads can be paired to one room control unit.

EN
Unisenza Plus - Thermostat
Installation and user manual
7 DOWNLOAD THE APP
The management of the Unisenza Plus Thermostat is also possible through a dedicated APP
that allows its configuration and the management of the devices you will pair.
In order to download the APP, you need to connect to the STORE of your device used for con-
figuration and install the Unisenza Plus.
Or, again using the device, you can directly access the installation page using the following
QR codes, again depending on the operating system.
8 NAMEPLATE
At the rear of the Unisenza Plus Thermostat there is a sticker (A)
which indicates the device data.
QR code availability for future feature.
+
AA/LR6
+
LR6/AA
A

EN
Unisenza Plus - Thermostat
Installation and user manual
9 INSTALLATION
Recommendations for a correct installation
MENU BOOST
MENU BOOST
0°C
50°C
MENU BOOST
150 cm
90 - 130 cm
MENU BOOST
Unisenza
Plus
Thermostat
MENU BOOST
Unisenza
Plus
Thermostat
MENU BOOST
Unisenza
Plus
Thermostat

EN
Unisenza Plus - Thermostat
Installation and user manual
Fixing the bracket to the wall
1
2
MENU BOOST
3
MENU BOOST
4
5
6
7
8
When fastening,be very careful not to use too much force when tightening the supplied screws.
During assembly, if any problems arise, contact the Manufacturer and request assistance.

EN
Unisenza Plus - Thermostat
Installation and user manual
Inserting the batteries
The Unisenza Plus Thermostat, to work, requires 2 AA alkaline batteries (included in the package).
When installing the batteries, observe the correct polarity indicated in the battery housing.
Reversing the polarity runs the risk of damaging the electronic regulator.
To insert the batteries proceed as shown.
1
+
AA/LR6
+
LR6/AA
2
3
NEW!
1,5
V O LT
ALKALINE
1,5 Volt
Alkaline
+
AA
+
AA
+
AA/LR6
+
LR6/AA
4
5
+
AA/LR6
+
LR6/AA

EN
Unisenza Plus - Thermostat
Installation and user manual
Fixing the thermostat to the bracket
MENU BOOST
1
2
MENU BOOST
3
4
When fastening,be very careful not to use too much force when tightening the supplied screws.
During assembly, if any problems arise, contact the Manufacturer and request assistance.

EN
Unisenza Plus - Thermostat
Installation and user manual
Main screen operation
The LCD backlight is Off during stand by in normal operation. Press any key to turn on the LCD
backlight before performing other user operations as descried below.The LCD backlight will be
turned off automatically when no key press for 15 seconds.
Power up
The ignition of the Unisenza Plus Thermostat takes place by inserting the batteries in their housing,
which has already been seen in the previous chapters.
Below what appears on the display.
1 Display power up 2 Firmware 3 Language
MENU BOOST
MENU BOOST
MENU BOOST
4 Select System Type
4
Unisenza Plus network
MENU BOOST
HEAT ONLY
HEAT+DHW
HEAT+COOL
MENU BOOST
10 USE

EN
Unisenza Plus - Thermostat
Installation and user manual
MENU BOOST
YES or NO
MENU BOOST
MENU BOOST
YES or NO
MENU BOOST
If "YES" was chosen at the "CONNECT" request, remember to activate the association mode in
the Unisenza Plus Gateway, to do this consult the Gateway manual. If "NO" has been chosen,
it will be possible to pair the device at a later time by accessing the menu: ADMIN SETTING→
CONNECTION→ NETWORK→ JOIN.
It is also possible to associate the thermostat from the APP using the "ADD NEW DEVICE"
function.
If "YES" was chosen at the "PAIR" request, remember to activate the association mode in the
device we want to associate, to do this consult the relative manual.
If "NO" has been chosen, it will be possible to associate the device at a later time by accessing
the menu: ADMIN SETTING→ CONNECT→ ASSOCIATION→ ADD.
It is also possible to associate the thermostat from the APP by entering the thermostat set-
tings menu.

EN
Unisenza Plus - Thermostat
Installation and user manual
Pairing to Unisenza Plus Gateway
With APP
The association between the Unisenza Plus Thermostat and the Unisenza Plus Gateway can
be done through the system management APP.
To proceed with the association you need to have already installed and configured the Gateway.
Unisenza Plus
Gateway
Instruction Manual
12
3
MENU BOOST
x2
MENU BOOST
4
SYS MODE
SCHEDULE
USER SET
ADMIN SET
MENU BOOST
5
MENU BOOST
6
TEMP DISP
VLV PROT
CONTROL
MIN SP
MAX SP
CONNECT

EN
Unisenza Plus - Thermostat
Installation and user manual
MENU BOOST
7
MENU BOOST
8
MENU BOOST
9
MENU BOOST
10
11
Cloud
LAN/WiFi
ZigBee
MENU BOOST
If you want to associate a Unisenza Plus Thermostat that was previously associated with an-
other Gateway, it is necessary to perform a reset to the factory settings of the electronic regu-
lator before making the new association.

EN
Unisenza Plus - Thermostat
Installation and user manual
Without APP
The association between the Unisenza Plus Thermostat and the Unisenza Plus Gateway can
also be made directly between the two devices.
To proceed with the association you need to have already installed and configured the Gateway.
Unisenza Plus
Gateway
Instruction Manual
1
3
UP
Cloud
LAN/WiFi
ZigBee
Cloud
LAN/WiFi
ZigBee
3 SEC
Cloud
LAN/WiFi
ZigBee
2
MENU BOOST
4
MENU BOOST
MENU BOOST
5
SYS MODE
SCHEDULE
USER SET
ADMIN SET
LANGUAGE
MENU BOOST
6
MENU BOOST
7
TEMP DISP
VLV PROT
CONTROL
MIN SP
MAX SP
CONNECT
Table of contents
Other Myson Thermostat manuals

Myson
Myson MRT1 User manual

Myson
Myson MPRT RF User manual

Myson
Myson 63050507401 User manual

Myson
Myson MPRT RF User manual

Myson
Myson REMOTE ROOM THERMOSTAT CONTROL User manual

Myson
Myson MPRT MS User manual

Myson
Myson MPRT User manual

Myson
Myson Touch RS User manual

Myson
Myson TOUCH4 User manual

Myson
Myson Touch 2 WiFi User manual
Popular Thermostat manuals by other brands

Robertshaw
Robertshaw 8425 user manual

Lux Products
Lux Products LuxPro PSD010Bc Installation and operating instructions

CLICK INELS
CLICK INELS RFTC-10G Instruction leaflet

VDH
VDH ALFA(NET) 52 user manual

Source 1
Source 1 S1-TBSU22HN Owner's manual and installation instructions

Danfoss
Danfoss GreenCon RC-T2 installation guide