2
Precauciones
Instrucciones importantes de seguridad
※ Siempre desconecte este aparato de la corriente eléctrica antes de darle servicio de mantenimiento o limpieza.
※ Este aparato no es apropiado para usarse en lugares húmedos como baños.
※ Este producto deberá ser usado sólo para los propósitos descritos en este instructivo.
※ La supervisión es requerida mientras los menores de edad estén cerca del producto.
※ Este aparato no se destina para utilizarse por personas (incluyendo niños) cuyas capacidades físicas, sensoriales o
mentales sean diferentes o estén reducidas, o carezcan de experiencia o conocimiento, a menos que dichas personas
reciban una supervisión o capacitación para el funcionamiento del aparato por una persona responsable de su
seguridad.
※ Los niños deben supervisarse para asegurar que ellos no empleen los aparatos como juguete.
※ Evite el contacto con las partes móviles, no trate de introducir los dedos u otros objetos dentro del motor, ni bloquear el
aspa para evitar su movimiento.
※ Este aparato presenta fijación tipo Y, si el cordón de alimentación es dañado, este debe ser reemplazado por el
fabricante, centro de servicio o personal calificado por el fabricante.
※ No opere este producto en presencia de gases explosivos y/o flamables.
※ Mantenga el producto o cualquiera de sus partes alejado del fuego o aparatos que generen calor.
※ No opere este producto si el cable o enchufe estuviera dañado, si el aparato no funcionara adecuadamente o si hubiera
sufrido alguna caída o daño de cualquier otra manera.
※ No use artículos complementarios o refacciones no autorizados.
※ Vigile que el cable no haga contacto con áreas filosas, superficies calientes o cualquier obstáculo que pudiera dañarlo.
※ Para desconectar, tome la clavija y jale. Nunca jale del cable.
※ Siempre use en lugares secos y superficies planas.
※ Este producto puede ser para uso doméstico, comercial o industrial.
※ Este aparato funciona con un voltaje de alimentación de 127 V~ a una frecuencia de 60 Hz con una potencia de 210 W.
2
Precauciones
5
Operación
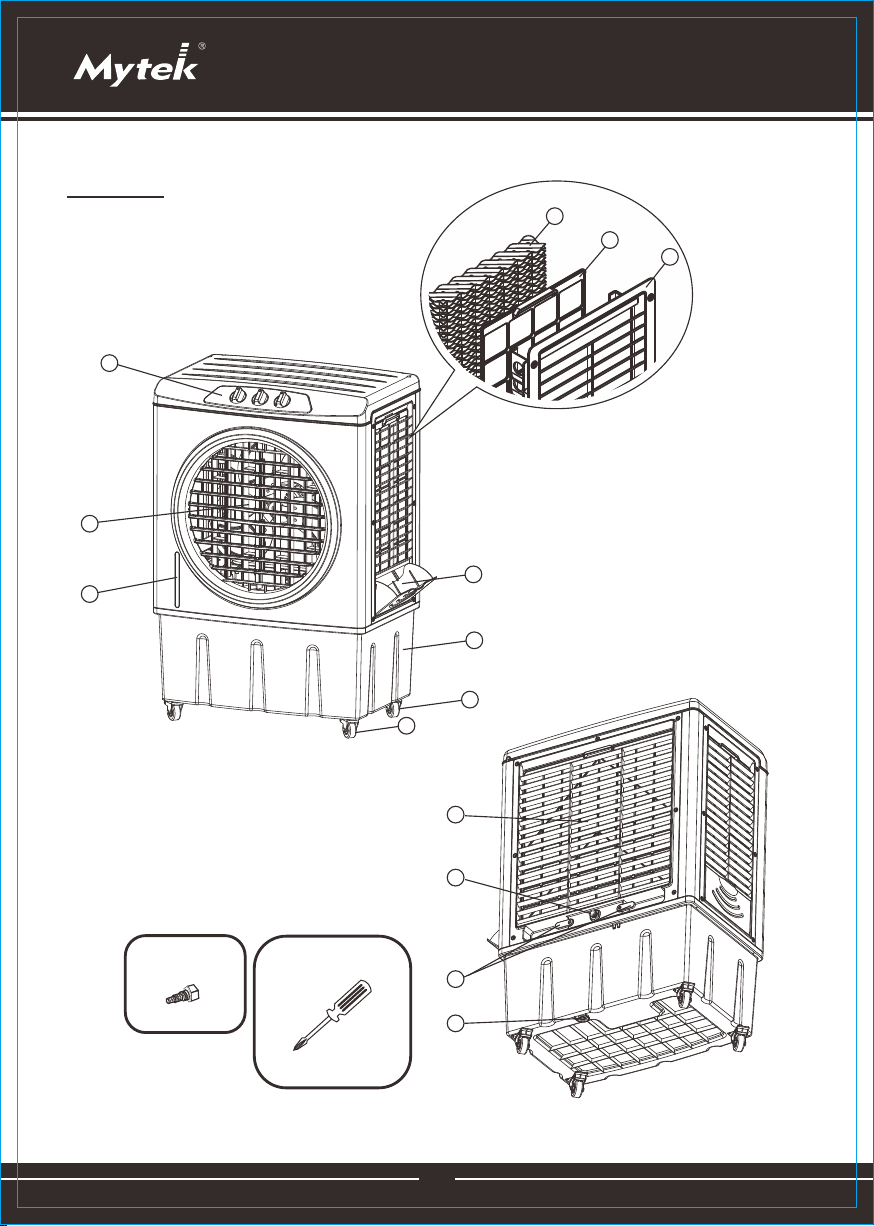
Partes 3
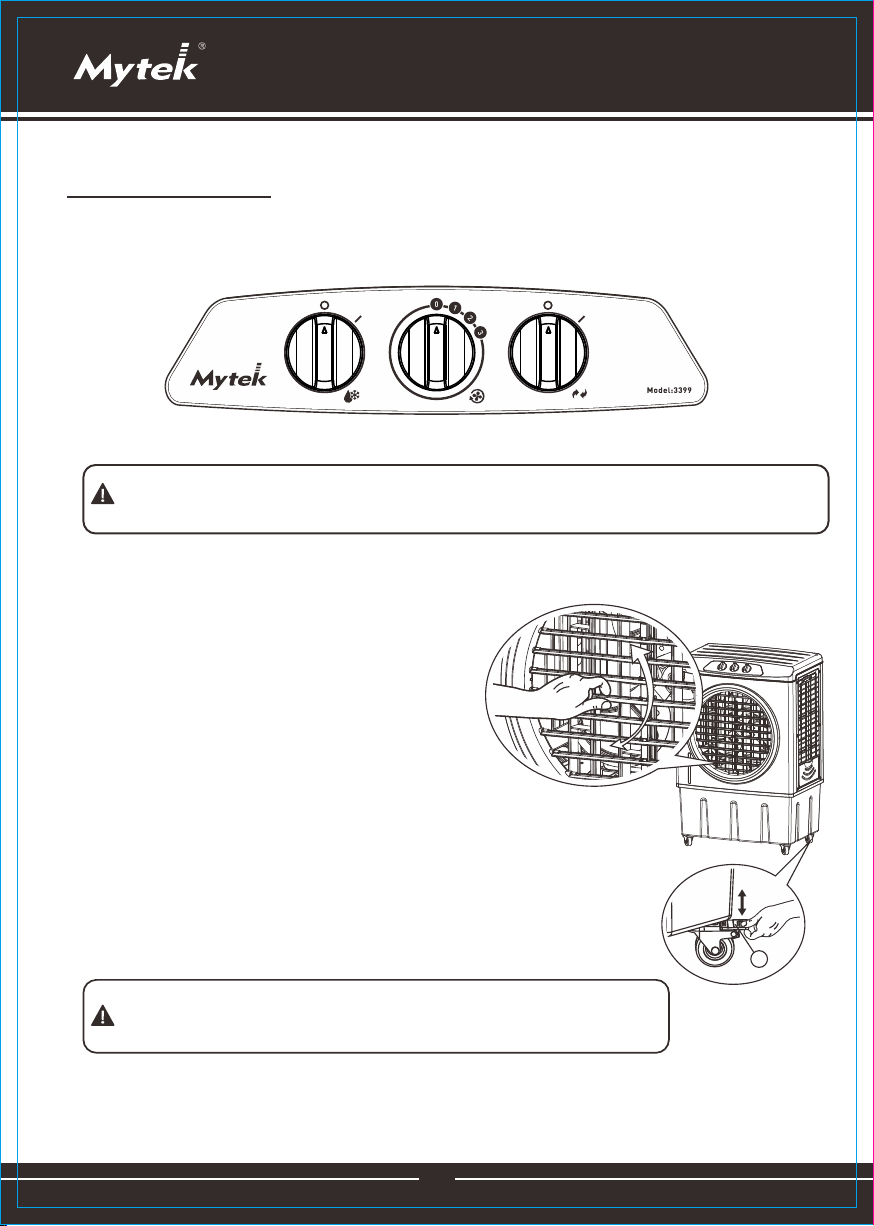
Panel de Control 4
6
Mantenimiento
CONTENIDO
(MANUAL EN ESPAÑOL)
7
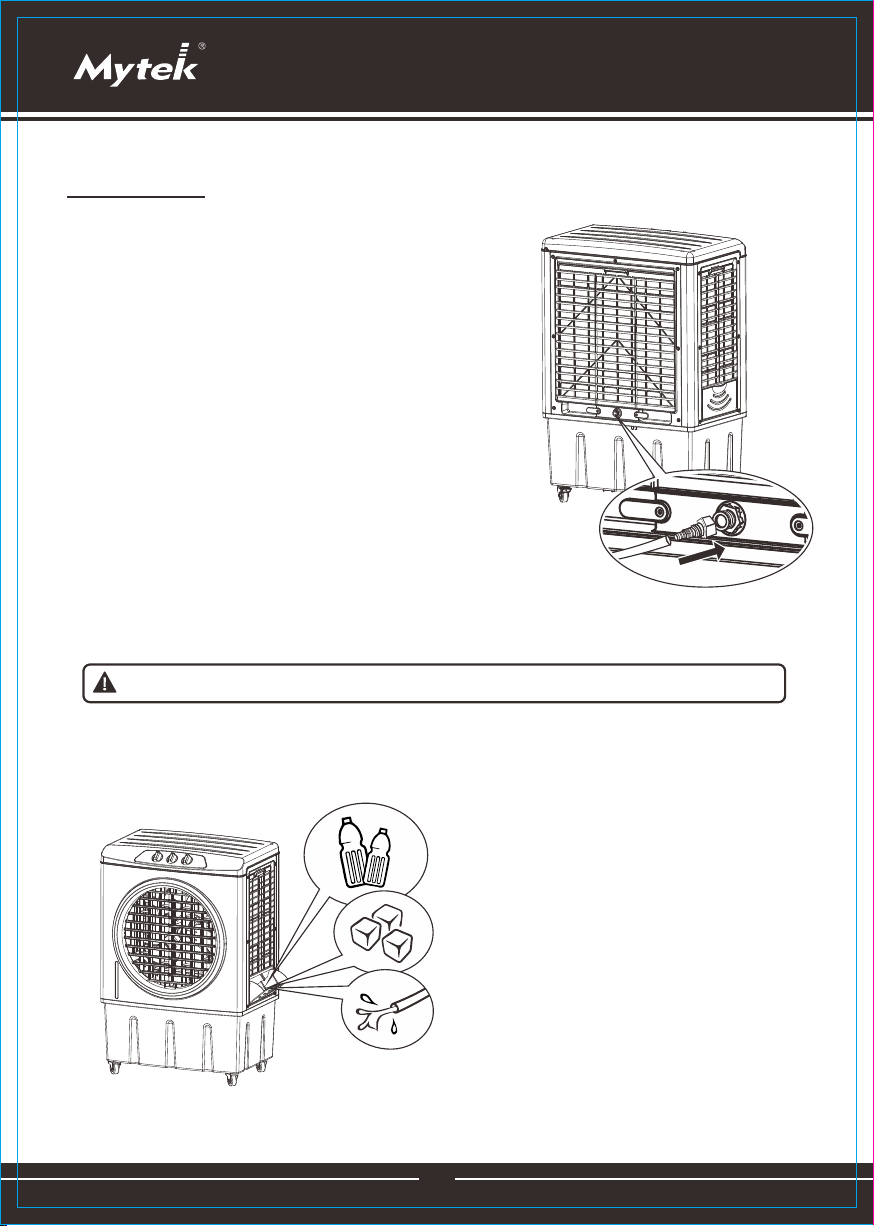
Limpieza
※ Advertencia: Antes de usar este producto, lea y guarde el manual de enfriador de aire portátil.
※ No obedecer las instrucciones podría dañar y afectar la operación, también anular la garantía.
※ Este enfriador de aire portátil no es apto para operar en lugares cerca de fuego.
※ No usar este enfriador en lugares cerca de objetos inflamables, metales, papeles para deshecho, lugares húmedos,
.
manchas de aceite
※ Durante su funcionamiento, no introduzca los dedos u objetos entre las rejillas, ni tocar las aspas.
※ Durante su funcionamiento, evite bloquear las persianas y rejillas.
※ Realice la limpieza y mantenimiento periódicamente, cuando detecte alguna anomalía, primero desenchufe el
enfriador antes de revisar.
※ Al utilizar el producto por primera vez, este emitirá un olor el cual no es tóxico, dicho olor sera solo por unas
horas y es ocasionado por el sistema de enfriamiento al ser utilizado por primera vez, se recomienda desechar
el agua del equipo después de desaparecido el olor y rellenarlo con agua limpia.
A5-w210xh148(出3mm)
K25#339924ES ,+英