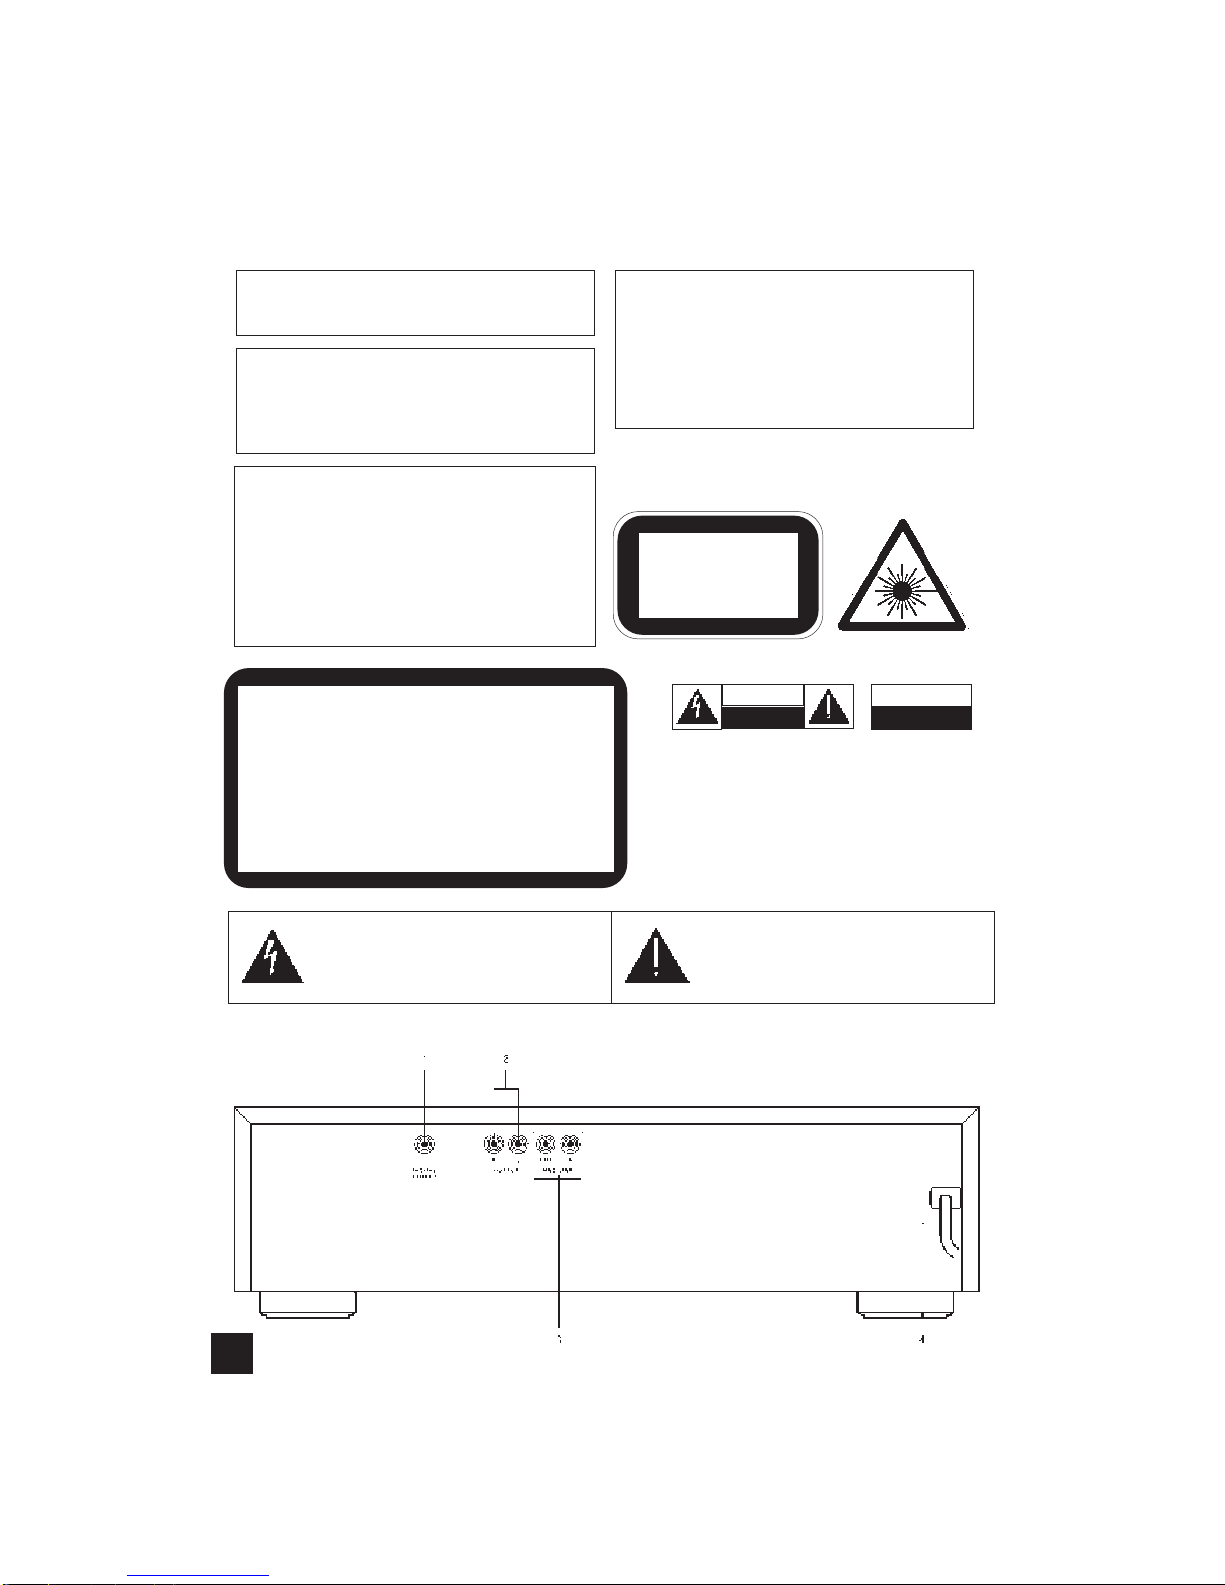
NAD 515 User manual

GB
F
D
E
I
S
NA
D
515
• OWNER'S MANUAL
• MANUEL D'INSTALLATION
• BEDIENUNGSANLEITUNG
• MANUAL DEL USUARIO
• MANUALE DELLE ISTRUZIONI
• BRUKSANVISNING

REAR PANEL CONNECTIONS (Figure 1.)
WARNING:TO PREVENT FIRE OR ELECTRIC
SHOCK, DO NOT EXPOSE THIS APPLIANCE
TO RAIN OR MOISTURE
CAUTION: TO PREVENT ELECTRIC SHOCK,
MATCH WIDE BLADE OF PLUG TO WIDE SLOT,
FULLY INSERT.
ATTENTION: POUR EVITER LES CHOCS ELEC-
TRIQUES INTRODUIRE LA LAME LA PLUS LARGE
DE LA FICHE DANS LA BORNE CORRESPON-
DANTE DE LA PRISE ET POUSSER JUSQU'AU
FOND.
The lightning flash with arrowhead, within an equilateral tri-
angle is intended to alert the user of the presence of unin-
sulated "dangerous voltage" within the product's enclo-
sure; that may be of sufficient magnitude to constitute a
risk of electric shock to persons.
The exclamation point within an equilateral triangle is intend-
ed to alert the user of the presence of important operating
and maintenance (servicing) instructions in the literature
accompanying the appliance
Note to CATV system installer: This reminder is provided
to call the CATV installer's attention to Article 820-40 of the
NEC , which provides guidelines for proper grounding and,
in particular, specifies that the cable should be connected
to the grounding system of the building, as close to the
point of cable entry as practical.
NA
D
2
CLASS 1 LASER PRODUCT
LUOKAN 1 LASERPLAITE
KLASS 1 LASERAPPARAT
WARNING! INVISIBLE LASER RADIATION WHEN OPEN AND INTERLOCKS DEFEATED.
AVOID EXPOSURE TO BEAM.
VORSICHT! UNSICHTBARE LASERSTRAHLEN TRITT AUS, WENN DECKEL GEÖFFNET
UND WENN SICHERHEITSVERRIEGELUNG ÜBERBRÜCKT IST. NICHT DEM STRAHL
AUSSETZEN.
ADVARSEL - USYNLIG LASERSTRÅLING VED ÅBNING, NÅR SIKKERHEDSAFBRYDERE
ER UDE AF FUNKTION.UNDGÅ UDSÆTTELSE FOR STRÅLUNG.
ADVARSEL - USYNLIG LASERSTRÅLING NÅR DEKSEL ÅPNES OG SIKKERHEDSLÅS
BRYTES. UNNGÅ EKSPONERING FOR STRÅLEN.
VARNING - OSYNLIG LASERSTRÅLNING NÄR DENNA DEL ÄR ÖPPNAD OCH SPÄRRAR
ÄR URKOPPLADE. STRÅLEN ÄR FARLIG.
VARO! - AVATTAESSA JA SUOJALUKITUS OHITETTAESSA OLET ALTTIINA
NÄKYMÄTÖNNTÄ LASERSÄTEILYLLE. ÄLÄ KATSO SÄTEESEEN.
CAUTION
RISK OF ELECTRIC
SHOCK DO NOT OPEN
ATTENTION:
RISQUE DE CHOC ELECTRIQUE
NE PAS OUVRIR
CAUTION: TO REDUCE THE RISK OF ELECTRIC
SHOCK, DO NOT REMOVE COVER (OR BACK).
NO USER SEVICEABLE PARTS INSIDE.
REFER SERVICING TO QUALIFIED
SERVICE PERSONNEL.
AFIN DEVITER UN CHOC
ELECTRIQUE, ET LES
CONSEQUENCES GRAVES
QUI POURRAIENT EN
RESULTER, TENTEZ PAS
D'OUVRIR L'APPAREIL ET
DE TOUCHER AUX
COMPOSANTS INTERNES
SANS LA PRESENCE D'UNE
SERVICE PERSONNEL.
THIS DIGITAL APPARATUS DOES NOT EXCEED THE CLASS B
LIMITS FOR RADIO NOISE EMISSIONS FROM DIGITAL
APPARATUS AS SET OUT IN THE RADIO INTERFERENCE
REGULATIONS OF THE CANADIAN DEPARTMENT OF
COMMUNICATIONS.
LE PRESENT APPAREIL NUMVERIQUE N'EMET PAS DE
BRUITS RADIOELECTRIQUES DEPASSANT LES LIMITES
APPLICABLES AUX APPAREILS NUMERIQUES DE LA CLASSE
B PRESCRITES DANS LE REGLEMENT SUR LE BROUILLAGE
RADIO ELECTRIQUE EDICTE PAR LE MINISTERE DES
COMMUNICATIONS DU CANADA.

NA
D
3
FRONT PANEL CONTROLS (Figure 2.)
REMOTE CONTROL (Figure 3.)

CONTENTS
INTRODUCTION 4
INSTALLATION 4
Power supply setting
Siting the Compact Disc Changer
Connections
FUNCTIONAL OVERVIEW 5
Front of changer
Remote control
Display
PLAYBACK 6
Inserting CDs
Normal playback
Selecting another track during play
Selecting another CD during play
Searching for a passage during play
Starting with a particular CD
Starting with a particular track
Scanning CDs
Playing in random order
Calling up other information on the display
Repeating play
PROGRAMMING 8
Storing a programme
Checking the programme
Playing the programme
Erasing a programme
EDIT 9
Before recording
Recording
ADDITIONAL INFORMATION 10
Maintenance
Recycling
TROUBLESHOOTING 11
INTRODUCTION
Thank you for selecting the NAD 515 Compact Disc
Changer.
The NAD 515 combines supreme playback quality
with a high degree of user-friendliness by offering the
following possibilities:
– changing CDs during play;
– quick access to a particular CD by means of
QUICK PLAY;
– storing 30 tracks from different CDs in any
desired order in the changer memory;
– storing the required recording time and playing
time in the EDIT mode.
INSTALLATION
POWER SUPPLY SETTING
• Check that the type plate on the rear of your
changer indicates the correct supply voltage.
• If your mains supply voltage is different, consult
your dealer or our Service Organisation.
SITING THE COMPACT DISC CHANGER
Free standing
• Always position the changer horizontally on a flat,
firm surface.
• Allow a free space of at least 3 cm above the
changer so as not to interfere with the cooling of the
changer.
Stacked
• Site the changer preferably at the bottom or at the
top.
• Never position the changer directly on top of a
high-power amplifier, as such an amplifier gives off a
substantial amount of heat.
FITTING A MAINS PLUG (U.K. only)
This apparatus is fitted with an approved moulded
13 Amp plug.
To change a fuse in this type of plug proceed as
follows:
• Remove fuse cover and fuse.
• Fix new fuse which should be a BS1362 5A,
A.S.T.A. or BSI approved type.
• Refit the fuse cover.
If the fitted plug is not suitable for your socket out-
lets, it should be cut off and an appropriate plug fitted
in its place.
If the mains plug contains a fuse, this should have
a value of 5A. If a plug without a fuse is used, the
fuse at the distribution board should not be greater
than 5A.
NOTE The severed plug must be disposed to avoid
a possible shock hazard should it be inserted into a
13A socket elsewhere.
HOW TO CONNECT A PLUG
The wires in the mains lead are coloured in accor-
dance with the following code:
BLUE – “NEUTRAL” (“N”) and BROWN – “LIVE”
(“L”).
As these colours may not correspond with the
colour markings identifying the terminals in your plug,
proceed as follows:
• The BLUE wire must be connected to the terminal
which is marked with the letter “N” or coloured
BLACK.
• The BROWN wire must be connected to the ter-
minal which is marked with the letter “L” or coloured
RED.
NA
D
4
GB NAD 515 COMPACT DISC PLAYER

• Do not connect either wires to the earth terminal
in the plug which is marked by the letter “E” or by the
safety earth symbol or coloured green or green-and-
yellow.
Before replacing the plug cover, make certain that
the cordgrip is clamped over the sheath of the lead –
not simply over the two wire
REAR PANEL CONNECTIONS
1. DIGITAL OUT
This output supplies a digital signal and can there-
fore only be connected to an input which is suitable
for this signal. Use a phono lead for this connection.
Never connect this socket to a non-digital input of
an amplifier, such as AUX, CD, TAPE, PHONO etc!
2. FIXED LINE OUT
For connecting a cable to the amplifier.
• Insert a red plug into the ‘R’ socket and the other
plug into the ‘L’ socket.
• Insert the two other plugs into the corresponding
sockets of the CD or AUX input of your amplifier.
You can also use the TUNER or TAPE IN connec-
tion, but never the PHONO input!
The NAD Link OUT connector allows remote-con-
trol commands to be relayed from this player to other
products equipped with a NAD-Link (or compatible)
input. To use this option, connect a cable from the
NAD Link OUT socket to the NAD Link IN jack on
another product.
3. NAD LINK IN/OUT
The NAD Link IN connector allows this player to
be operated by external control signals from a multi-
room controller or remote relay system. Connect a
cable from the controller to the NAD Link IN jack.
Using both IN and OUT connections, remote control
commands can be “daisy-chained” from one product
to the next.
4. AC LINE CORD
FRONT PANEL CONTROLS -
FUNCTIONAL OVERVIEW
1. POWER ON/OFF
Switching on and off.
2. DISC CAROUSEL DRAWER
3. OPEN/CLOSE
Opening and closing the CD compartment.
4 - 5
– Selecting another track during play.
– Selecting a track to start play with.
– Selecting tracks when compiling a programme.
– Fast search to a particular passage during play.
– Selecting the recording mode when making a
tape recording.
– Selecting the recording time when making a tape
recording.
6. PLAY
– Starting play.
– Returning to the beginning of a track.
7. STOP
– Stopping play.
– Erasing a programme.
8. SHUFFLE
Playing in random order.
9. PAUSE
Interrupting play.
10. REPEAT
Repeating play.
11. DISPLAY
Informs you about the functioning of the player.
12. TIME
Selecting the information you want to see on the
display.
13. DISC
– Selecting another CD during play.
– Selecting a CD to start play with.
– Selecting CDs when compiling a programme.
14. QUICK PLAY
Immediate playing of a particular CD.
15. LOAD
Rotating the turntable in the CD compartment
when inserting CDs.
– Selecting CDs when compiling a programme.
REMOTE CONTROL
1. STOP
– Stopping play.
– Erasing a programme.
2. SHUFFLE
Playing in random order.
3. 1-10 DIGIT KEYS
– Selecting another track during play.
NA
D
5
GB

– Selecting a track to start play with.
– Fast search to a particular passage during play.
– Selecting the recording mode when making a
tape recording.
– Selecting the recording time when making a tape
recording.
4. REVIEW
Checking a programme.
5. EDIT
Activates the EDIT function when making a tape
recording which determines program playing time to
suit selected tape length.
6. PROGRAM
Opening the memory when compiling a pro-
gramme.
7. PLAY/PAUSE
– Starting play (PLAY).
– Interrupting play (PAUSE).
8. NEXT DISC
– Selecting another CD during play.
– Selecting a CD to start play with.
– Selecting CDs when compiling a programme.
9. SKIP
– Selecting another track during play.
– Selecting a track to start play with.
– Selecting tracks when compiling a programme.
– Selecting the recording mode when making a
tape recording.
- Selecting the recording time when making a tape
recording.
10. SCAN
Fast search to a particular passage during play.
The life of the batteries of the remote control is
around one year. For replacement only use batteries
of the type RO3, UM4 or AAA.
FUNCTIONAL OVERVIEW
DISPLAY
– Lights up when the changer receives a com-
mand from the remote control.
1 - 5 CD NUMBER INDICATOR
– Lights up when you switch the changer on.
– Indicates the number of CDs in the CD compart-
ment.
– Indicates what CD is being played (CD number
flashes).
PROGRAM
– Flashes when a programme is being compiled.
– Lights up when a programme is being played.
TRACK
- Indicates what track is being played;
– Indicates the number of tracks on a CD or in a
programme.
TRACK TIME
– Indicates the elapsed playing time of the track
being played.
REM(aining) TRACK TIME – Indicates the remain-
ing playing time of the track being played.
TOT(al) REM(aining) TIME – Indicates the remain-
ing playing time of a CD.
TOT(al) TIME – Indicates the total playing time of a
CD.
SHUFFLE – Lights up when the tracks are played
in random order.
PAUSE – Lights up when play is interrupted.
REPEAT 1 – Lights up when you repeat a track.
REPEAT DISC – Lights up when you repeat a CD.
REPEAT – Lights up when you repeat all CDs or a
programme from them.
Display messages:
READ – Lights up when a CD’s contents list is
being scanned.
NO DISC– Lights up when there are no CDs in the
CD compartment.NO AUDIO DISC– Lights up when
insert a non audio CD (CD-ROM, CD-I or CDV).
WRONG TRACK– Lights up when you select a
non-existent track number.
WRONG DISC– Lights up when you select a non-
existent CD number.
SELECT DISC– Lights up when you try to activate
a function for which you must first select a CD num-
ber.
INSERT DISC– Lights up when you give a play
command while the CD compartment is empty.
GO TO PLAY – Lights up if you try to activate a
function for which you must first start play.
GO TO STOP – Lights up if you try to activate a
function for which you must first stop play.
EDIT – Lights up when the player is put into the
EDIT mode.
PLAYBACK
INSERTING THE CDs
NOTE! Use only audio CDs; no CD-ROM, CD- I or
CDV.
• Press POWER ON/OFF 1 to switch the changer
on.
– The changer will now start CD detection to check
how many CDs there are in the CD compartment.
The turntable will rotate slowly until all positions (1 -
5) in the CD compartment have been checked.
– The position which is being checked is always
shown on the display (DISC X).
– After CD detection the 1-5 CD number indicator
will show the number of CDs in the CD compartment.
• Open the CD compartment by pressing OPEN (3).
NA
D
6
GB

GB
NA
D
7
– OPEN lights up.
• Insert the CDs, printed side up; use the LOAD
button (15) to rotate the turntable in the CD compart-
ment.
• Close the compartment by pressing OPEN (3).
– CLOSE lights up. The changer will start CD
detection again.
NOTE!
– CD detection may never be interrupted. If, during
detection, you press any button, then the changer will
stop detection and the display will give an incorrect
indication of the number of CDs in the CD compart-
ment.
– Always remove all CDs from the CD compart-
ment if you want to transport the changer.
NORMAL PLAYBACK (PLAY)
– The display shows the number of the current CD.
• Press PLAY (6) to start playback.
READ lights up and play starts from the first avail-
able CD.
– The CD number indicator (1-5) always shows
what CD is being played (flashes).
– The track being played and its elapsed playing
time are shown under TRACK and TRACK TIME.
See ‘CALLING UP INFORMATION ON THE DIS-
PLAY’ if you wish to see other information on the dis-
play.
– Play will stop after all CDs have been played.
• Press POWER ON/OFF(1) to switch the changer
off.
NOTE!
– You can also press PLAY (6) immediately after
inserting the CDs; the compartment then closes auto-
matically and play starts from the first available CD.
– Use the PREFERRED POSITION in the CD com-
partment if you wish to insert only one CD and then
start play by pressing the QUICK PLAY button (14).
Play will then start immediately with the inserted CD.
– You can interrupt playback by pressing
PAUSE(9); PAUSE then lights up. Press PLAY or
PAUSE to restart.
– If you press PLAY during play, the current track
will start again from the beginning.
– You can stop playback by pressing STOP(7).
– If you press OPEN (3) during play, the CD com-
partment will open while play continues. The three
CDs outside the changer may now be changed with-
out playback being interrupted.
SELECTING ANOTHER TRACK DURING
PLAY ( )
• Press 4 or 5 for less than 0.5 sec-
onds) until the desired track number appears under
TRACK.
– The music stops and a moment later the selected
track begins to play.
WRONG TRACK Lights up when you select a non-
existent track number.
You can also select the number by using the 1-10
digit keys (3) on the remote control (numbers consist-
ing of two figures must be keyed in within 2 seconds).
SELECTING ANOTHER CD DURING PLAY
(DISC)
• Key in the desired CD number.
– The music stops and a moment later the selected
CD begins to play.
WRONG DISC lights up if you select a non-existent
number.
You can also select the number by using the NEXT
DISC button 8 on the remote control.
SEARCHING FOR A PASSAGE DURING
PLAY ( )
• Hold (4) down to search backwards to the
beginning.
• Hold (5) down to search forwards to the
end.
The searching speed is determined by how long a
key is pressed:
– the first 2 seconds fairly slowly, with sound;
– then at the maximum speed, with no sound.
If you reach the end of the last track and release
, play will resume a few seconds before the
end of the CD.
STARTING WITH A PARTICULAR CD (DISC)
• Key in the required CD number.
– If the CD compartment was open, it will now
close.
– Play starts from the selected CD.
WRONG DISC lights up if you select a non-existent
number.
You can also select the number by using the NEXT
DISC button 8 on the remote control.
STARTING WITH A PARTICULAR TRACK
(DISC , and PLAY)
• First select the number of the required CD using
DISC (13) or DISC (8) on the remote control.
– If the CD compartment was open, it will now
close.
• Then select the (track) number by using
(4) or (press less than 0.5 seconds).
• Press PLAY (6).
– Play starts from the selected track.
You can also select the track number by using the
1-10 digit keys (3) on the remote control (numbers
consisting of two figures must be keyed in within 2
seconds).
WRONG TRACK Lights up when you select a non-
existent track number.
WRONG DISC lights up if you select a non-existent
number.

PLAYING IN RANDOM ORDER (SHUFFLE)
All CDs:
• Press SHUFFLE 8 before or during play.
– If the CD compartment was open, it will now
close.
– SHUFFLE lights up and all the tracks are now
played in a random order.
– If you press (5), you will select any one of
the following tracks.
• Press SHUFFLE again if you wish to return to nor-
mal play.
NOTE! If, during play, you open the CD compart-
ment to change CDs (see ‘NORMAL PLAYBACK’)
then playback in random order will be cancelled.
Playback will stop as soon as the last track of the cur-
rent CD has been played (in normal order).
One CD:
• The CD-player should be in position STOP.
• Select the number of the required CD using DISC
(13) or NEXT DISC(8) (on the remote control).
• Press SHUFFLE (8), within the time the CD num-
ber is flashing on the display.
– DISC and SHUFFLE light up; the tracks of the
selected CD will now be played in random order
- If you press (5), you will select any one of
the following tracks.
If you press REPEAT (10) twice, the tracks will be
repeated in a different order each time, although the
first track will always be the same.
– When all tracks of the selected CD have been
played, playback stops.
• Press SHUFFLE again if you wish to return to nor-
mal play.
CALLING UP INFORMATION ON THE
DISPLAY (TIME)
In STOP mode:
Time display
– After loading the CDs and closing the CD com-
partment, the display shows the number of the CD to
be played (= default display in STOP mode).
During play:
Time display
– When you start play (from STOP mode), the dis-
play shows the elapsed playing time of the current
track ( default display in PLAY mode).
• Press TIME (12) whenever you want to know the
remaining playing time of the current track (REM
TRACK TIME).
• Press TIME again if you wish to know the remain-
ing playing time of the entire CD (TOTAL REM
TIME).
Note - TOTAL REM(aining) TIME indication is not
available in SHUFFLE mode.
• If you press TIME again, you will switch to text
display; the display shows the number of the current
CD.
• If you wish to know the total playing time of the
entire CD you must go back to STOP mode first and
then press TIME.
– The display now shows the number of tracks and
the total playing time of the current CD
(TOTAL TIME).
REPEATING PLAY (REPEAT)
Repeating a track:
• Press REPEAT (10) before or during playback of
the CD.
– REPEAT (1) lights up; the track will now be
repeated continuously.
• Press REPEAT three times to stop the track being
repeated.
Repeating a CD:
• Press REPEAT (10) twice before or during play-
back of the CD.
– REPEAT DISC lights up; the CD will now be
repeated continuously.
• Press REPEAT twice to stop the CD being repeat-
ed.
Repeating all CDs:
• Press REPEAT (10) three times before or during
playback.
– REPEAT lights up; all CDs will now be repeated
continuously.
• Press REPEAT again to stop the CDs being
repeated.
NOTES!
– Repeating a track is not possible in SHUFFLE
mode or when a programme is being stored.
– When a programme has been stored (for one or
more CDs), then only the programme will be repeat-
ed.
PROGRAMMING
STORING A PROGRAMME (PROGRAM)
– By programming the changer you can play up to
30 tracks in any required sequence.
– FULL lights up if you exceed the maximum of 30
tracks.
– WRONG DISC lights up if you select a non-exis-
tent CD number.
• In STOP mode, press PROGRAM 6 (on the
remote control) to open the memory.
– SELECT DISC lights up and starts flashing.
• Select the number of the first required CD using
DISC (13) or NEXT DISC (8) (on the remote control).
• Press (4) or (5) for less than 0.5
seconds) until the first track number you wish to pro-
gramme appears under TRACK.
• Press PROGRAM (6) (on the remote control)
again.
– The track number has now been stored in the
changers memory.
NA
D
8
GB

GB
• Select the other track numbers required and store
each track by pressing PROGRAM.
– The number of tracks and the playing time of your
programme will be shown under TRACK and TOT(al)
TIME.
• Press STOP (7) TWICE to quit the PROGRAM
mode.
CHECKING THE PROGRAMME (REVIEW)
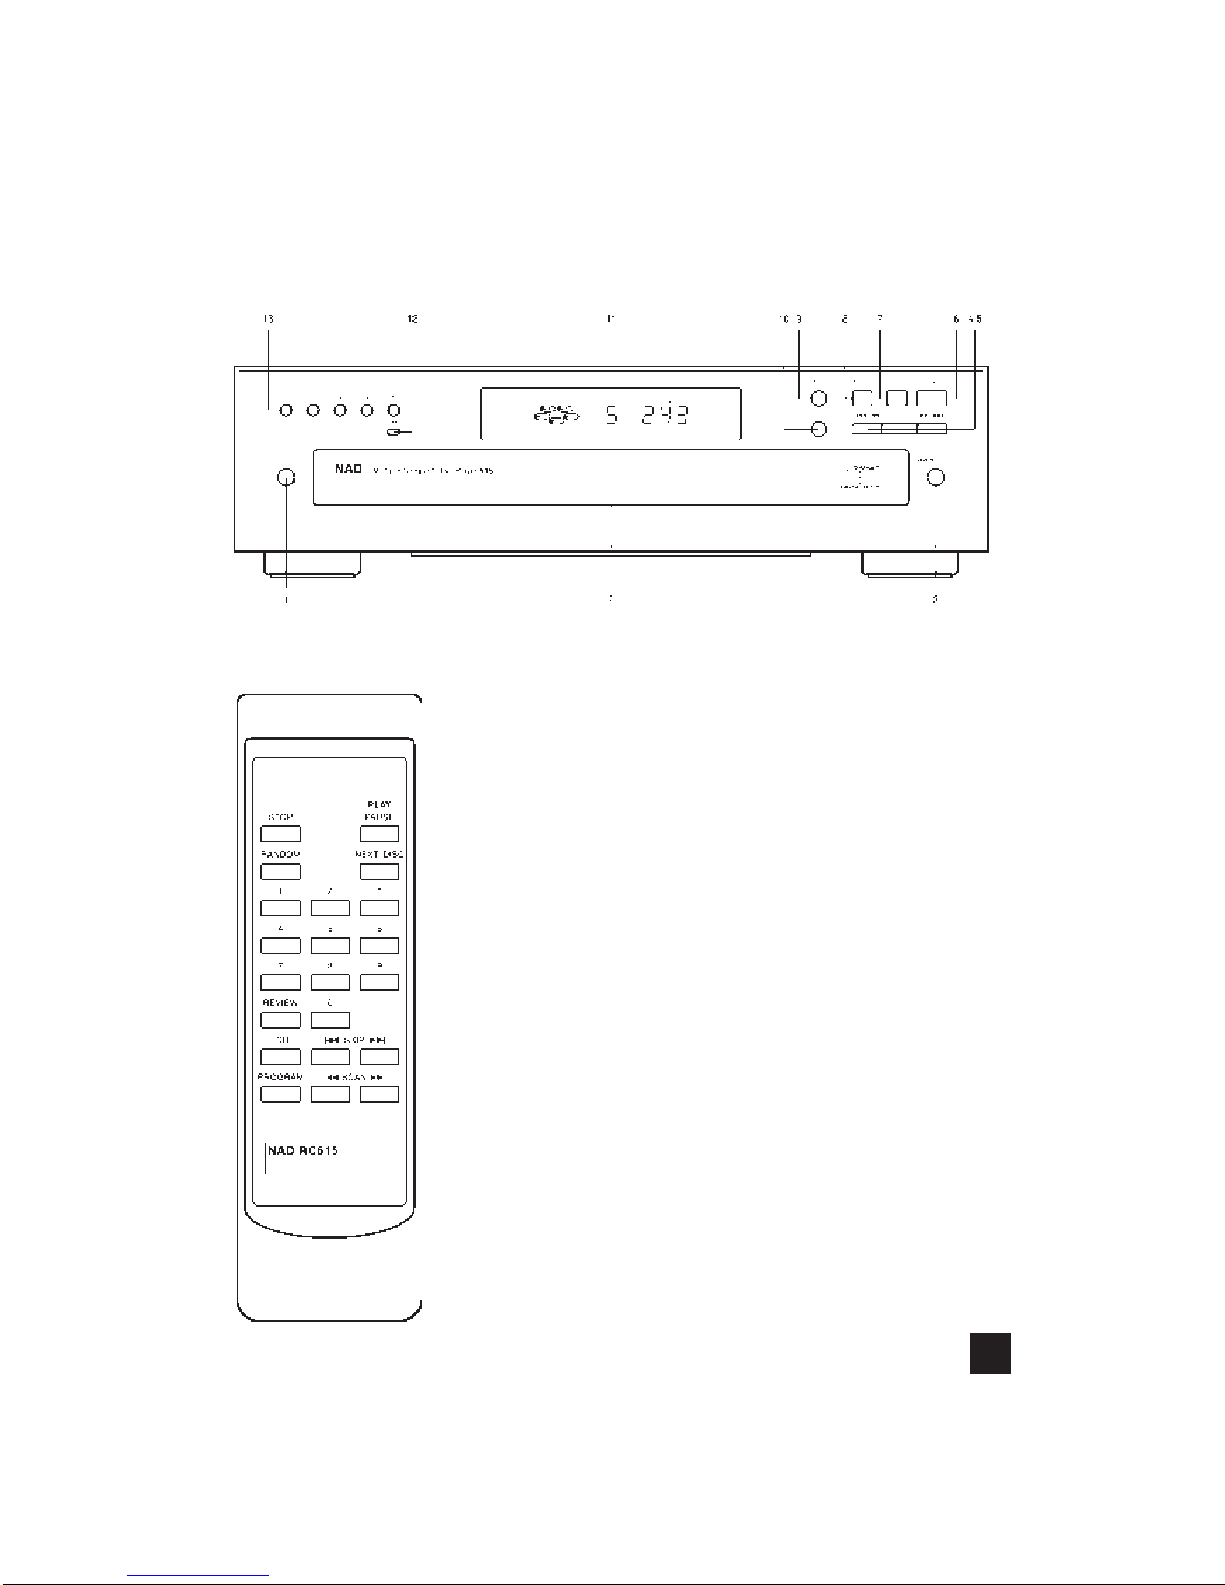
• Press REVIEW (4) on the remote control, prior to,
during or after programmed play.
– All disk and track numbers appear in the pro-
grammed sequence on the display.
PLAYING THE PROGRAMME (PLAY)
• Press PLAY (6).
– Playback starts with the first number of the pro-
gramme.
The PROGRAM (6) and EDIT (5) buttons (on the
remote control) cannot be used during programmed
play.
Search for a particular passage is only possible
within the track being played.
ERASING A PROGRAMME (STOP or OPEN)
In PLAY mode:
• Press OPEN (3) or STOP (7) (twice).
In STOP mode:
• Press OPEN (3) or STOP (7).
– The programme has now been erased.
EDIT
The EDIT function has two recording modes in
which you can store the recording time of the tape in
the changer memory.
EDIT NORMAL – The changer will determine which
programmed tracks fit on each side of the tape and
will stop after the last track. The tracks will be record-
ed in the order in which they appear on the CD(s).
EDIT OPTIMAL – The changer now calculates the
combination of programmed tracks regardless of
sequence that will optimize the use of available
recording time per side.
NOTE!
The EDIT function cannot be used for CDs contain-
ing more than 30 tracks.
BEFORE RECORDING
Preparation:
• A programme to be recorded, must first be stored
using the ‘PROGRAMMING’ mode.
• Press EDIT (5) (on the remote control) to activate
the EDIT mode.
– EDIT lights up and SELECT DISC appears on the
display.
• Select the number of the required CD using DISC
(13) or NEXT DISC (8) (on the remote control).
When recording a programme there is no need to
enter the CD number(s).
Selecting the recording mode:
– The display shows EDIT (= EDIT NORMAL which
is the default setting).
• With (4) and (5) you can now select
OPT(imal), CANCEL or EDIT (NORMAL) again.
– The display shows OPT(imal), CANCEL, or EDIT
again.
• Press EDIT (5) (on the remote control) to store
the required recording mode (NORMAL or OPTimal).
If you select CANCEL, the EDIT mode will be can-
celled and the changer will go back to STOP mode.
– As soon as you have stored the recording mode
the display shows C90 (default setting).
Selecting the recording time:
– As soon as you have stored the recording mode
the display shows C90 (default setting).
• With (4) and (5) you can now select
the required recording time:
C100, C105, C120, C30, C45, C60, C75 or C90.
Other recording times can be selected using the 1-
10 digit buttons. In EDIT NORMAL mode the record-
ing time must be at least equal to the playing time of
the first track on the first CD or in the programme.
In EDIT OPTimal mode the recording time must be
at least equal to the playing time of the shortest track
on the CD(s) or in the programme.
– NOT POSSIBLE lights up if you select a ‘wrong’
time.
• Press EDIT (5)(on the remote control) to store the
required recording time.
–The CD changer will now go back to STOP mode
• You can now record the CD or the programme.
RECORDING
• Press PLAY (6).
– Playback starts with the selected CD (or with the
first track of the programme).
– The display shows the elapsed playing time of
the current track.
• Press TIME (12) to switch to other time display
information.
– The number of tracks for side A and their playing
time are shown on the display.
– After the last track that fits on side A of the tape,
the CD changer will go into PAUSE mode.
– PAUSE lights up.
– Under TRACK you will see the number of the first
track to be recorded on side B of the tape.
• Turn the tape over or select the tape travel direc-
tion for side B.
• Press PLAY (6).
– The remaining tracks will now be played.
– After the last track play will stop; EDIT CAN-
CELLED lights up.
NOTE!
NA
D
9

– As soon as you press PLAY (6) the other chang-
er functions will temporarily be switched off to prevent
the recording being interfered with; EDIT ACTIVE
lights up if you press one of the other buttons during
recording.
– You can quit the EDIT mode by pressing STOP
(7) or OPEN (3); EDIT CANCELLED then lights up.
– EDIT NOT POSSIBLE lights up if you try to
record a CD containing more than 30 tracks.
– Should the CD or the programme be longer than
the total recording time of the tape, play will stop after
the last track that fits onto side B of the tape.
– Should the first track of the first CD or the pro-
gramme be longer than one side of the tape (= the
entered recording time divided by two), then EDIT
NOT POSSIBLE will light up. You will now have to
enter another recording time.
– The EDIT function will be cancelled if the CD
changer (or the system) is set to STAND BY mode
(see ‘ADDITIONAL INFORMATION’).
ADDITIONAL INFORMATION
MAINTENANCE
The CDs
• Never write on the printed side of a CD.
• Do not attach any stickers to the CD.
• Keep the shiny surface of the disc clean.
Use a soft lint-free cloth and always wipe the disc
in a straight line from centre to edge.
• Never use cleaning agents for conventional
records.
• Detergents or abrasive cleaning agents should
not be used either.
The changer
• A chamois leather slightly moistened with water is
sufficient for cleaning the changer.
• Do not use cleaning agents containing alcohol,
spirits, ammonia or abrasives.
RECYCLING
Please observe the local regulations regarding the
disposal of packing materials, exhausted batteries
and old equipment.
1. All redundant packaging material has been omit-
ted. We have done our utmost to make the packaging
easy separable into three mono-materials:
– cardboard (box)
– expandable polystyrene (buffer)
– polythene (bags, protective foam sheet)
2. Your set consists of materials which can be recy-
cled if disassembled by a specialized company.
3. Do not dispose of exhausted batteries with your
household waste.
This Compact Disc changer complies with radio
interference requirements as laid down in EC regula-
tions.
NA
D
10
GB

GB
NA
D
11
TROUBLESHOOTING
If a fault occurs, run through the points listed below before taking your changer for repair.
If the fault remains, try to clear it by switching the changer off and on again. If this also fails to help, consult
your dealer.
Under no circumstances should you repair the changer yourself as this will invalidate the guarantee!
SYMPTOM POSSIBLE CAUSE REMEDY
Playback does not start or
The current CD has been loaded
Reload the CD, label side up.
interruption of playback.
upside down.
No CDs inserted.
Insert the CDs, label side up.
The current CD is badly
Clean the CD with a soft, lint-free cloth.
scratched or dirty.
Moisture condensation on the lens.
Leave the CD changer in a warm
environment until the moisture
evaporates.
Sound skips (at the same part).
The current CD is dirty.
Clean the CD with a soft, lint-free cloth.
The current CD skips tracks.
The CD is damaged or dirty.
Replace or clean the CD.
Playback does not start from the
PRG (programME) or SHUFFLE
Switch off SHUFFLE or clear first track
(of the current CD).
activated.
programme.
No sound or bad sound.
Loose or wrong connections.
Check connections.
Strong magnetic fields near the
Find another place for the unit or change
CD changer.
connections.
Remote control does not function.
Batteries are exhausted.
Replace the batteries.
Remote control commands are
The distance between remote
Reduce the distance between remote
not properly received.
control and CD changer is longer
control and CD changer.
than 10 metres.

TABLE DES MATIERES
INTRODUCTION 12
MISE EN SERVICE 12
Tension secteur
Installation du changeur de CD
Raccordements
APERCU DES FONCTIONS 13
Côté avant du lecteur
Télécommande
Afficheur
LECTURE 14
Mise en place des disques
Lecture normale
Sélection d’une autre plage en cours d’écoute
Sélection d’un autre disque en cours d’écoute
Recherche d’un passage
Début de la lecture par un disque déterminé
Début de la lecture par un numéro de plage
déterminé
Ballayage des disques
Lecture dans un ordre aléatoire
Informations sur l’afficheur
Répétition de la lecture
PROGRAMMATION 17
Mémorisation d’un programme
Contrôle du programme
Lecture du programme
Effacement d’un programme
EDIT 17
Avant l’enregistrement
Enregistrement
GENERALITES 18
Entretien
Récyclage
DEPISTAGE DES PANNES 19
INTRODUCTION
Nous vous remercions d’avoir choisi ce changeur
de disques compacts NAD 515.
A la pointe de la technique, ce changeur de dis-
ques compacts NAD 515 allie une très haute qualité
de lecture à une très grande facilité d’utilisation grâce
entre autres aux possibilités suivantes:
– changement de disques pendant la lecture;
– accès rapide à un disque grâce à la fonction
QUICK PLAY;
– stockage dans la mémoire du changeur de 30
plages de différents disques compacts dans un ordre
quelconque;
– mémorisation de la durée d’enregistrement ainsi
que de la durée de lecture souhaitées en mode EDIT.
MISE EN SERVICE
TENSION SECTEUR
• Vérifiez que la tension secteur indiquée sur la pla-
quette signalétique à l’arrière du changeur est celle
qui dessert votre habitation.
• Demandez conseil à votre revendeur ou à notre
service après-vente si votre réseau local délivre une
autre tension.
INSTALLATION DU CHANGEUR DE CD
Séparé
• Posez toujours le changeur horizontalement sur
une surface plane et dure.
• Laissez au moins 3 cm d’espace libre au dessus
du changeur pour assurer une bonne ventilation.
Superposé
• Placez le changeur de préférence en haut ou en
bas.
• Ne le posez en aucun cas sur un amplificateur à
grande puissance, car ce dernier dégage trop de
chaleur.
RACCORDEMENTS
1. DIGITAL OUT
Cette sortie fournit un signal numérique et ne peut
donc être raccordée qu’à une entré appropriée.
Utilisez à cet effet un câble Phono. Ne raccordez
jamais cette prise à une entré non numérique d’un
d’um amplificateur, comme par exemple AUX, CD,
TAPE, PHONO, etc!
2. FIXED LINE OUT
Pour le câble de raccordement à l’amplificateur.
• Enfoncez une fiche rouge dans la prise ‘R’ et
l’autre fiche dans la prise ‘L’.
• Branchez les deux autres fiches sur les prises
correspondantes de l’entrée CD ou AUX de votre
amplificateur.
Vous pouvez également utiliser l’entrée TUNER ou
TAPE IN (= entrée magnétophone), mais en aucun
cas l’entrée PHONO!
3. NAD LINK IN/OUT(LIASON NAD).
Le connecteur OUT (sortie) de la liaison NAD per-
met de relayer les télécommandes entre ce lecteur et
d’autres produits équipés d’une entrée de liaison
NAD (ou compatible). Pour utiliser cette option,
brancher un câble entre le jack OUT de la liaison
NAD et le jack IN de la liaison NAD d’un autre
appareil.
NA
D
12
FLECTEUR DE DISQUES COMPACTS NAD 515

F
NA
D
13
Le connecteur IN (entrée) de la liaison NAD per-
met de commander ce lecteur à l’aide de télécom-
mandes en provenance d’un contrôleur multi-salles
ou d’un système de relayage déporté. Brancher un
câble depuis le contrôleur et le jack IN de la liaison
NAD. En se servant à la fois des branchements
d’entrée et de sortie de la liaison NAD, il est possible
de relayer les télécommandes d’un produit à l’autre.
4. CORDON D'ALIMENTATION SECTEUR
APERÇU DES FONCTIONS
COTE AVANT DU CHANGEUR
1. POWER ON/OFF
Mise en et hors circuit.
2. COMPARTIMENT CD
Mise en et hors circuit.
3. OPEN/CLOSE
Ouverture et fermeture du compartiment CD.
4 - 5
– Sélection en cours de lecture d’une autre plage.
– Sélection du numéro de plage par lequel vous
souhaitez commencer la lecture.
– Sélection des numéros de plage lors de la pro-
grammation.
– Recherche rapide d’un passage pendant la lec-
ture.
– Sélection de la position d’enregistrement lors
d’un enregistrement sur bande.
– Sélection de la durée d’enregistrement lors d’un
enregistrement sur bande.
6. PLAY
– Début de la lecture.
– Retour au début d’une plage.
7. STOP
– Arrêt de la lecture.
– Effacement d’un programme.
8. SHUFFLE
Lecture dans un ordre aléatoire.
9. PAUSE
Interruption momentanée de la lecture.
10. REPEAT
Répétition de la lecture.
11. AFFICHEUR
Donne des renseignements sur le fonction-
nement du changeur.
12. TIME
Choix de l’information que vous souhaitez voir
s’afficher.
13. DISC
– Sélection d’un autre disque en cours de lecture.
– Sélection du disque par lequel vous souhaitez
commencer la lecture.
– Sélection de disques lors de la programmation.
14. QUICK PLAY
Lecture immédiate d’un disque compact déter-
miné.
15. LOAD
Permet de faire tourner la platine du compartiment
CD lors de la mise en place d’un disque.
TELECOMMANDE
1. STOP
– Arrêt de la lecture.
– Effacement d’un programme.
2. SHUFFLE
Lecture dans un ordre aléatoire.
3. TOUCHES NUMÉRIQUE
– Sélection en cours de lecture d’une autre plage.
– Sélection du numéro de plage par lequel vous
souhaitez commencer la lecture.
– Recherche rapide d’un passage pendant la lec-
ture.
– Sélection de la position d’enregistrement lors
d’un enregistrement sur bande.
– Sélection de la durée d’enregistrement lors d’un
enregistrement sur bande.
4. REVIEW
Vérification d’un programme.
5. EDIT
Activez la fonction EDIT lorsque vous effectuez un
enregistrement de cassette spécifiant la durée de lec-
ture d’un programme pour que la longueur de bande
soit adaptée.
6. PROGRAM
Ouverture de la mémoire lors de l’enregistrement
d’un programme.

7. PLAY/PAUSE
– Début de la lecture (PLAY).
– Interruption momentanée de la lecture (PAUSE).
8. NEXT DISC
– Sélection d’un autre disque en cours de lecture.
– Sélection du disque par lequel vous souhaitez
commencer la lecture.
– Sélection de disques lors de la programmation.
9. SKIP
– Sélection en cours de lecture d’une autre plage.
– Sélection du numéro de plage par lequel vous
souhaitez commencer la lecture.
– Sélection des numéros de plage lors de la pro-
grammation.
– Sélection de la position d’enregistrement lors
d’un enregistrement sur bande.
– Sélection de la durée d’enregistrement lors d’un
enregistrement sur bande.
10 . SCAN
Recherche rapide d’un passage pendant la lec-
ture.
La durée de vie des piles de la télécommande est
d’environ un an. Pour le remplacement des piles,
n’utilisez que des piles de type R03, UM4 ou AAA.
APERÇU DES FONCTIONS
DISPLAY
– S’allume lorsque le changeur reçoit un ordre
de la télécommande.
Indicateur de numéros de CD 1-5
– Clignote lorsque vous mettez le changeur en cir-
cuit.
– Indique le nombre de disques dans le comparti-
ment CD.
– Indique le disque en cours de lecture (le numéro
du disque clignote).
PROGRAM
– Clignote lorsqu’un programme est mémorisé.
–S’allume pendant la lecture d’un programme.
TRACK – Indique:
– le numéro de la plage en cours d’écoute,
– le nombre de plages d’un disque ou d’un pro-
gramme.
TRACK TIME – Indique la durée de lecture
écoulée de la plage en cours.
REM(aining) TRACK TIME – Indique la durée de
lecture restante de la plage en cours.
TOT(al) REM(aining) TIME – Indique la durée de
lecture restante d’un disque.
TOT(al) TIME – Indique la durée totale de lecture
d’un disque.
SHUFFLE – S’allume lorsque les plages du disque
sont lues dans un ordre aléatoire.
PAUSE – S’allume lors de l’interruption de la lec-
ture.
REPEAT 1 – S’allume lorsque vous répétez un
numéro de plage.
REPEAT DISC – S’allume lorsque vous répétez la
lecture d’un disque.
REPEAT – S’allume lorsque vous répétez la lec-
ture de tous les disques ou d’un programme com-
posé à partir de plusieurs disques.
AFFICHAGES:
READ – S’allume lorsque le sommaire d’un disque
est exploré.
NO DISC - S’allume lorsqu’aucun disque ne se
trouve dans le compartiment CD.
NO AUDIO DISC - S’allume lors de l’introduction
ou de la lecture d’un CD non-audio (CD ROM, CD-I
ou CDV).
WRONG TRACK - S’allume lorsque vous choisis-
sez un numéro de plage qui n’existe pas.
WRONG DISC– S’allume lorsque vous choisissez
un numéro de de disque qui n’existe pas.
SELECT DISC– S’allume lorsque vous tentez
d’activer une fonction qui nécessite d’abord la sélec-
tion d’un numéro de disque compact.
INSERT DISC– S’allume lorsque vous essayez de
commencer la lecture lorsque le compartiment CD
est vide.
GO TO PLAY – S’allume lorsque vous essayez
d’activer une fonction qui ne peut être utilisée qu’en
mode lecture.
GO TO STOP – S’allume lorsque vous essayez
d’activer une fonction qui ne peut être utilisée qu’en
mode arrêt.
EDIT – S’allume lorsque le changeur est mis en
position EDIT.
LECTURE
MISE EN PLACE DES DISQUES
ATTENTION! N’utilisez que les disques compacts
audio, à l’exclusion donc des disques les CD-ROM,
CD-I ou CDV.
• Appuyez sur POWER (1) pour mettre le changeur
en circuit.
– Le changeur se met à explorer les disques com-
pacts afin de déterminer le nombre de disques
présents dans le compartiment. Pour ce faire, la pla-
tine se met à tourner lentement afin de vérifier toutes
les positions (1 – 5) dans le compartiment CD. La
position en cours de vérification est toujours indiquée
sur l’afficheur (DISC X).
– Après avoir procédé à l’exploration des disques,
l’indicateur de numéros de CD 1-5 indique le nombre
de disques dans le compartiment CD
• Ouvrez le compartiment CD avec OPEN (3).
NA
D
14
F

F
• OPEN s’allume.
• Insérez les disques dans le compartiment, la face
imprimée vers le haut. La touche LOAD (15) permet
de faire tourner la platine du compartiment CD.
• Fermez le compartiment CD avec OPEN(3).
– CLOSE s’allume. Le changeur procède à nou-
veau à l’exploration des disques.
ATTENTION!
– N’interrompez jamais l’exploration des CD. Si
vous appuyez pendant l’exploration sur l’une des
touches du changeur, celle-ci s’interrompt et
l’afficheur donne une indication inexacte du nombre
de disques présents dans le compartiment.
– Veillez à toujours retirer les disques du comparti-
ment CD lorsque vous voulez transporter le
changeur.
LECTURE NORMALE (PLAY 2)
• L’afficheur indique le numéro du CD devant être
lu.• Appuyez sur PLAY (6).
– READ s’allume et la lecture commence à partir
du premier CD disponible.
– L’indicateur de numéros de CD (1-5) indique tou-
jours le disque en cours de lecture
– La plage en cours de lecture et sa durée écoulée
apparaissent sous TRACK et TRACK TIME.
Reportez-vous au paragraphe ‘INFORMATIONS
SUR L’AFFICHEUR’ si vous voulez afficher d’autre
informations.
– La lecture s’arrête après le dernier disque.
• Appuyez sur POWER (1) pour mettre le changeur
hors circuit.
ATTENTION!
–Après l’introduction des disques, vous pouvez
aussi appuyer immédiatement sur PLAY (6); le com-
partiment CD se ferme alors automatiquement et la
lecture commence à partir du premier CD disponible.
– Si vous ne souhaitez insérer qu’un seul disque,
introduisez-le dans le compartiment CD en vous ser-
vant de l’évidement indiqué par PREFERRED POSI-
TION (position préférée) et appuyez ensuite sur
QUICK PLAY (14). La lecture commence alors
directement par le CD ainsi mis en place.
– Vous pouvez interrompre la lecture en appuyant
sur PAUSE (9); PAUSE s’allume alors. Appuyez sur
PLAY ou PAUSE pour reprendre la lecture.
– Si vous appuyez sur PLAY pendant la lecture, la
lecture de la plage en cours reprend.
– Vous pouvez arrêter la lecture en appuyant sur
STOP (7).
– Si vous appuyez sur OPEN (3) pendant la lec-
ture, le compartiment CD s’ouvre pendant que la lec-
ture continue. Les trois disques disposés sur le bord
extérieur du changeur peuvent à présent être
changés sans que la lecture ne soit interrompue.
SELECTION D’UNE AUTRE PLAGE EN
COURS D’ECOUTE ( )
• Appuyez (4) ou (5) (appuyez moins
d’une demi-seconde) jusqu’à ce que le numéro de la
plage souhaitée apparaisse sous TRACK.
– La lecture est interrompue et la plage choisie est
lue peu de temps après.
WRONG TRACK s’allume lorsque vous choisissez
un numéro de plage qui n’existe pas.
Vous pouvez également sélectionner le numéro au
moyen des touches numériques (3) sur la télécom-
mande (les n uméros comportant 2 chiffres doivent
etre composés dans 2 secondes).
SELECTION D’UN AUTRE DISQUE EN
COURS D’ECOUTE (DISC SELECT)
• Composez le numéro du disque souhaité.
– La musique s’arrête et le disque sélectionné est
lu peu après.WRONG DISC s’allume lorsque vous
choisissez un numéro qui n’existe pas.
Vous pouvez également sélectionner le numéro
avec la touche NEXT DISC (8) sur la télécommande.
RECHERCHE D’UN PASSAGE ( )
• Maintenez enfoncé (4) pour procéder à
une recherche vers le début du disque.
• Maintenez enfoncé (5) pour procéder à
une recherche vers la fin du disque.
Le temps de pression sur la touche détermine la
vitesse de recherche: assez lentement pendant les
deux premières secondes, avec son; ensuite à la
vitesse la plus élevée, sans son.
Lorsque vous arrivez à la fin du disque et que vous
relâchez , la lecture reprend quelques secon-
des avant la fin.
DEBUT DE LA LECTURE PAR UN DISQUE
DETERMINE (DISC SELECT)
• Composez le numéro du disque souhaité.
– Si le compartiment CD était ouvert, il se refer-
mera.
– La lecture commence à partir du disque sélec-
tionné.
WRONG DISC s’allume lorsque vous choisissez un
numéro qui n’existe pas.
Vous pouvez également sélectionner le numéro
avec la touche NEXT DISC (8) sur la télécommande.
DEBUT DE LA LECTURE PAR UN NUMERO
DE PLAGE DETERMINE (DISC,
et PLAY)
• Composez d’abord le numéro du disque souhaité
avec DISC SELECT (13) ou DISC (8) sur la télécom-
mande.
– If the CD compartyement was open it will now
close.
• Vous pouvez également sélectionner le numéro
de plage avec (4) ou (5) (appuyez
moins d’une demi-seconde).
• Appuyez sur PLAY (9).
NA
D
15

– La lecture commence à partir de la plage sélec-
tionnée.
Vous pouvez également sélectionner le numéro au
moyen des touches numériques (3) sur la télécom-
mande (les n uméros comportant 2 chiffres doivent
etre composés dans 2 secondes).
WRONG TRACK s’allume lorsque vous choisissez
un numéro de plage qui n’existe pas.
WRONG DISC s’allume lorsque vous choisissez un
numéro du disque qui n’existe pas.
LECTURE DANS UN ORDRE ALEATOIRE
(SHUFFLE)
Tous les disques:
• Appuyez sur SHUFFLE (8) avant ou pendant la
lecture.
– Si le compartiment CD était ouvert, il se refer-
mera.
– SHUFFLE s’allume et toutes les plages seront
maintenant lues dans un ordre aléatoire.
• Si vous appuyez sur (5) , vous sélection-
nez arbitrairement une plage suivante.
• Appuyez à nouveau sur SHUFFLE si vous voulez
revenir en lecture normale.
ATTENTION!
Si vous ouvrez le compartiment CD pendant la lec-
ture pour changer de disques (reportez-vous au para-
graphe ‘Lecture NORMALE’), la lecture en ordre
aléatoire sera supprimée. La lecture s’arrêtera dès
que la dernière plage du CD en cours aura été lue
(dans sa séquence normale).
Un seul disque:
• Le lecteur de CD doit être arrêtté.
• Composez le numéro du disque souhaité avec
DISC (13) ou NEXT DISC(7) sur la télécommande.
• Appuyez sur SHUFFLE (8), pendant que le
numéro du CD clignote sur l’afficheur.
– SHUFFLE et DISC s’allument et toutes les plages
du disque sélectionné seront maintenant lues dans
un ordre aléatoire.
– Si vous appuyez sur (5), vous sélection-
nez arbitrairement une plage suivante.
Si vous appuyez sur REPEAT(10) deux fois, la lec-
ture se répétera constamment dans un ordre dif-
férent. La lecture debute toujours par la même plage.
– Lorsque toutes les plages du CD sélectionné ont
été lues, la lecture s’arrête.
• Appuyez à nouveau sur SHUFFLE si vous voulez
revenir en lecture normale.
INFORMATIONS SUR L’AFFICHEUR (TIME)
EN POSITION D’ARRÊT:
Affichage de temps
– Dès que les CD ont été insérés, l’afficheur
indique le numéro du CD devant être lu (= affichage
par défaut en position d’arrêt).
Pendant la lecture
Affichage de texte
– Lorsque vous débutez la lecture (depuis le mode
STOP), l’afficheur indique pendant 5 secondes la
durée de lecture écoulée de la plage en cours (=
affichage par défaut en position de la durée).
• Appuyez sur TIME (12) si vous voulez connaître
la durée de lecture restante de la plage en cours de
lecture (REM TRACK TIME).
• Appuyez à nouveau sur TIME si vous voulez con-
naître la durée de lecture restante du disque entier
(TOTAL REM TIME).
Attention - L’indication TOTAL REM(aining) TIME
n’est pas disponible en position SHUFFLE.
– Si vous appuyez à nouveau sur TIME, vous mod-
ifiez l’affichage du texte ; l’afficheur indique le numéro
du CD en cours de lecture.
• Si vous voulez connaître la durée de lecture totale
du CD entier, appuyez d’abord sur STOP puis sur
TIME.
– L’afficheur indique alors le nombre de plages
ainsi que la durée de lecture totale du CD devant être
lu (TOTAL TIME).
REPETITION DE LA LECTURE (REPEAT)
Répétition d’une plage:
• Appuyez sur REPEAT (10) avant ou pendant la
lecture du disque.
– REPEAT (1) s’allume et la plage se répétera con-
stamment.
• Appuyez trois fois sur REPEAT pour faire cesser
la répétition.
Répétition d’un disque:
• Appuyez sur REPEAT (10) deux fois avant ou
pendant la lecture du disque.
– REPEAT s’allume et le disque se répétera con-
stamment.
• Appuyez deux fois sur REPEAT pour faire cesser
la répétition.
Répétition de tous les disques:
• Appuyez deux fois sur REPEAT (10) trois fois
avant ou pendant la lecture.
– REPEAT s’allume et tous les disques sont
répétés sans cesse.
• Appuyez à nouveau sur REPEAT pour faire cess-
er la répétition.
REMARQUES!
– La répétition d’un morceau n’est pas possible en
mode SHUFFLE ou lorsqu’un programme est en
cours d’enregistrement.
– Seul le programme qui a été enregistré (pour un
ou plusieurs CD) sera répété.
NA
D
16
F

F
PROGRAMMATION
MEMORISATION D’UN PROGRAMME (PRO-
GRAM)
– En programmant le changeur vous pouvez jouer
jusqu’à 30 numéros dans n’importe quel ordre.
– FULL s’allume si vous dépassez le maximum de
30 numéros.
– NOT POSSIBLE s’allume lorsque vous choisis-
sez un numéro de disque qui n’existe pas.
• En position d’arrêt, appuyez sur PROGRAM 6 sur
la télécommande pour ouvrir la mémoire.
– SELECT DISC s’allume et PROGRAM se met à
clignoter.
• Composez le numéro du premier disque souhaité
avec DISC (13) ou NEXT DISC 8 (sur la télécom-
mande).
• Appuyez sur (4) ou (5) (appuyez
moins d’une demi-seconde) jusqu’à ce que le premier
numéro apparaisse sous TRACK.
• Réappuyez sur PROGRAM.
– Le numéro est maintenant fixé dans la mémoire
du changeur.
• Choisissez les autres numéros souhaités et
mémorisez chaque numéro à l’aide de PROGRAM.
– Sous TRACK et TOT(al) TIME vous voyez le
nombre de numéros et la durée de votre programme.
• Appuyez sur STOP (7) pour sortir de la program-
mation.
CONTROLE DU PROGRAMME (REVIEW)
• Appuyez sur REVIEW (4) sur la télécommande,
avant, pendant ou après la lecture.
– Tous les numéros apparaissent sur l’afficheur
dans l’ordre programmé.
LECTURE DU PROGRAMME (PLAY)
• Appuyez sur PLAY (6) .
– La lecture commence par le premier numéro du
programme.
Les touches EDIT (5)et PROGRAM 6 ne peuvent
pas être utilisées pendant la lecture d’un programme;
la recherche d’un passage déterminé n’est possible
qu’à l’intérieur de la plage en cours de lecture.
EFFACEMENT D’UN PROGRAMME
(STOP ou OPEN/CLOSE)
En position de lecture:
• Appuyez sur OPEN (3) ou STOP (7) (deux fois).
En position d’arrêt:
• Appuyez sur OPEN (3) ou STOP (7).
– Le programme est maintenant effacé.
EDIT
La fonction EDIT a deux positions d’enregistrement
permettant de déterminer la durée d’enregistrement
de la bande dans la mémoire du changeur.
EDIT NORMAL – Le changeur définit les plages à
faire figurer sur une face de cassette et la lecture
s’arrête automatiquement après la dernière plage.
Les plages seront enregistrées selon l’ordre dans
lequel elles figurent sur les disques.
EDIT OPTIMAL - Le convertisseur calcule la com-
binaison de morceaux programmés, quelle que soit la
séquence, permettant d’optimiser l’utilisation de la
durée d’enregistrement disponible sur chaque face.
.
ATTENTION!
La fonction EDIT ne peut pas être utilisée avec des
disques compacts de plus de 30 plages.
AVANT L’ENREGISTREMENT
Préparation :
Un programme édité devant être enregistré doit être
préalablement stocké en utilisant le mode ‘PRO-
GRAMMATION’
• En position d’arrêt, appuyez sur EDIT (5)(sur la
télécommande) pour activer le mode correspondant.
– EDIT s’allume et l’afficheur indique SELECT
DISC.
• Composez le numéro du disque souhaité avec
DISC (13) ou NEXT DISC (8) (sur la télécommande).
Lorsque vous enregistrez un programme, il n’est
pas nécessaire de composer le(s) numéro(s) du(des)
CD.
Sélection de la position d’enregistrement:
– L’afficheur indique EDIT (= EDIT NORMAL =
paramètre par défaut).
• Vous pouvez alors sélectionner OPT(imal), CAN-
CEL ou EDIT (NORMAL) à l’aide des touches
4 ou 5.
– L’afficheur indique OPT(imal), CANCEL, ou
EDIT.
• Appuyez sur EDIT (5)(sur la télécommande) pour
valider le mode d’enregistrement désiré (NORMAL ou
OPTimal).
Si vous sélectionnez CANCEL, le mode EDIT sera
annulé et le lecteur reviendra en position STOP.
– Dès que vous avez validé le mode d’enreg-
istrement, l’afficheur indique C90 (paramètre par
défaut).
Sélection de la durée d’enregistrement:
– Dès que vous avez validé le mode d’enreg-
istrement, l’afficheur indique C90 (paramètre par
défaut).
• Vous pouvez maintenant sélectionner la durée
d’enregistrement: C100, C105, C120, C30, C45, C60,
C75 ou C90 à l’aide de (4) ou (5).
D'autres durées peuvent être sélectionées à l'aide
des touches numériques.
• En mode EDIT NORMAL, la durée d’enreg-
istrement doit être supérieure ou égale à la durée de
lecture de la première plage du CD ou du pro-
gramme.
NA
D
17

En mode EDIT OPTimal, la durée d’enregistrement
doit être supérieure ou égale à la durée de ecture de
la plus courte plage du CD ou du programme.
– NOT POSSIBLE s’allume si la durée sélection-
née est ‘incorrecte’.
• Appuyez sur EDIT (5)(sur la télécommande) pour
valider la durée d’enregistrement désirée.
– Le changeur de CD revient en position STOP.
•Vous pouvez maintenant enregistrer le CD entier
ou le programme.
ENREGISTREMENT
• Appuyez sur PLAY (6).
– La lecture commence par le disque sélectionné
(ou par le premier numéro du programme).
– L’afficheur indique la durée de lecture écoulée de
la plage en cours.
• Press TIME (12) to switch to other display infor-
mation.
– Le nombre de plages pour la face A ainsi que
leur durée de lecture apparaissent sur l’afficheur.
– Après la dernière plage correspondant à la face A
de la cassette, le changeur de CD se met en mode
PAUSE.
– PAUSE s’allume.
– Le premier numéro à enregistrer est affiché sous
TRACK à la face B de la cassette.
• Retournez la cassette et sélectionnez le sens de
défilement de la face B.
• Appuyer sur PLAY (6).
– Les plages restantes sont lues.
– Après la lecture de la dernière plage, EDIT CAN-
CELLED s’allume.
ATTENTION!
– Dès que vous appuyez sur PLAY 6, les autres
fonctions du changeur sont neutralisées pour éviter
que l’enregistrement ne soit perturbé; EdIT ACTIvE
s’allume si vous appuyez sur une des autres touches
pendant l’enregistrement.
– Vous pouvez sortir du mode EDIT en appuyant
sur STOP (7); ou OPEN (3); EdIT CAnCELLEd s'al-
lume alors.
– EDIT NOT POSSIBLE s’allume si vous essayez
d’enregistrer un CD comportant plus de 30 plages.
– Si le CD ou le programme sont plus longs que la
durée totale d’enregistrement, la lecture s’arrête
après le dernier numéro pouvant figurer sur la face B
de la bande.
– Si le premier numéro du disque ou du pro-
gramme est plus long qu’une face de la bande (= la
longueur de bande indiquée divisée par deux), EDIT
NOT POSSIBLE s’allume. Il vous faut alors introduire
une durée d’enregistrement plus longue.
– Si le changeur de CD (ou le système) se trouve
en position STAND BY, la fonction EDIT sera sup-
primée (Voir ‘GENERALITES’).
GENERALITES
ENTRETIEN
Les disques compacts
• N’écrivez jamais sur la face imprimée du disque
compact.
• Ne collez pas non plus d’étiquette sur le disque.
• Faites en sorte que le côté brillantdu disque com-
pact reste propre. Pour cela utilisez un chiffon doux
non pelucheux et frottez le disque en ligne droite à
partir du centre.
• N’utilisez pas de produits d’entretien pour disques
conventionnels pour le nettoyage d’un disque com-
pact.
• Tout produit de nettoyage dissolvant ou abrasif
est à proscrire.
Le changeur
• Une peau de chamois humidifiée suffit pour le
nettoyage du boîtier du changeur.
• N’utilisez aucun produit contenant de l’alcool, du
white spirit, de l’ammoniaque ou des agents abrasifs.
RECYCLAGE
Veuillez observer les règlements locaux lorsque
vous vous débarrassez des matériaux d’emballage,
des piles usées et de votre ancien appareil.
1. Tous les matériaux d’emballage superflus ont
été supprimés. Nous avons fait notre possible afin
que l’emballage soit facilement séparable en trois
types de matériau:
– carton (boîte)
– polystyrène expansible (matériel tampon)
– polyéthylène (sachets, panneau en matière plas-
tique cellulaire de protection)
2. Votre appareil est composé de matériaux pou-
vant être récyclés s’il est démonté par une firme spé-
cialisée.
3. Ne jetez pas les piles usées avec vos déchets
ménagers.
NA
D
18
F

F
NA
D
19
DEPISTAGE DES PANNES
En cas de panne, vérifiez d’abord les points suivants avant de faire appel à un réparateur. Si la perturbation
persiste, essayez de la faire disparaître en éteignant et en rallumant le changeur. Si vous n’obtenez aucun résul-
tat, demandez conseil à votre revendeur. N’essayez en aucun cas de réparer vous même le changeur, sans quoi
vous perdriez vos droits en matière de garantie!
SYMPTOME CAUSE POSSIBLE REMEDES
La lecture ne se
Le CD en cours de lecture n’est
Introduisez le CD la face imprimée vers le haut.
déclenche pas ou est
pas posé avec la face imprimée
Introduisez des disques la face imprimée vers le
interrompue.
vers le haut.
haut.
Le compartiment est vide
. Nettoyez le CD avec un chiffon doux, non
Le CD en cours de lecture est sale
pelucheux.
ou rayé.
Transportez le changeur de CD dans un endroit
La lentille est embuée.
plus chaud et attendez que la buée disparaisse.
Le son saute (au même
Le CD en cours de lecture est sale
Nettoyez le CD avec un chiffon doux, non
endroit)• pelucheux.
Le changeur de CD saute
Le CD en cours de lecture est sale
Remplacez ou nettoyez le CD.
des plages.
ou rayé.
La lecture ne commence
La fonction PROGRAM
Désactivez la fonction SHUFFLE ou effacez
pas par la première plage
(programme) ou SHUFFLE est
activée.
(du CD devant être lu).
activée.
Absence ou mauvaise
Branchements incorrects ou mal
Champs magnétique très fort près du changeur
qualité du son.
fixés.
de CD
Vérifiez les branchements.
Trouvez un autre endroit pour l’appareil ou
modifiez les branchements.
La télécommande ne
Les piles sont arrivées à
Remplacez les piles.
fonctionne pas.
épuissement.
Les signaux de la
La distanc e entre la télécom-
Reduisez la distance entre la télécommande et le
télécommande ne sont
mande et le changeur de CD
changeur de CD.
pas bien reçus.
est supérieure à 10 metres.

INHALT
EINLEITUNG 20
INSTALLATION 20
Kontrolle der Netzspannungseinstellung
Anordnung des CD-Wechslers
Anschlüsse
FUNKTIONSÜBERSICHT 21
Frontseite des CD-Wechslers
Fernbedienung
Display
WIEDERGABE 22
Einlegen der CDs
Normale Wiedergabe
Wählen eines anderen Titels während der
Wiedergabe
Wählen einer anderen CD während der
Wiedergabe
Suchen nach einer Passage während der
Wiedergabe
Starten mit einer bestimmten CD
Starten mit einem bestimmten Titel
Wiedergabe in zufälliger Reihenfolge
Aufrufen von anderen Informationen auf dem
Display
Wiederholen der Wiedergabe
PROGRAMMIERUNG 25
Speichern eines Programms
Kontrollieren des Programms
Abspielen eines Programms
Löschen eines Programms
EDIT-BETRIEB 25
Vor der Aufnahme
Aufnahme
ERGÄNZENDE INFORMATIONEN 26
Bereitschaft
Pflege und Wartung
Recycling
FEHLERSUCHE UND -BEHEBUNG 27
EINLEITUNG
Wir beglückwünschen Sie zu Ihrer Entscheidung
für den Philips CD-Wechsler NAD 515.
Als moderner CD-Wechsler der Philips Serie 700
kombiniert Der NAD 515 kombiniert eine hervorra-
gende Wiedergabequalität mit außerordentlicher
Bedienungsfreundlichkeit und zeichnet sich durch fol-
gende Merkmale aus:
– Wechseln der CDs während der Wiedergabe;
– Schneller Zugriff auf eine bestimmte CD durch
QUICK PLAY;
– Möglichkeit zum Speichern von 30 Stücken von
verschiedenen CDs in beliebiger Reihenfolge;
– Möglichkeit zum Speichern der erforderlichen
Aufnahme- und Wiedergabezeit im EDIT-Betrieb.
INSTALLATION
KONTROLLE DER NETZSPANNUNGSEIN-
STELLUNG
• Prüfen Sie, ob die auf dem Typenschild an der
Rückseite des CD-Wechslers angegebene
Versorgungsspannung mit der örtlichen
Netzspannung übereinstimmt.
• Wenn die Netzspannung von der angegebenen
Versorgungsspannung abweicht, wenden Sie sich an
Ihren Händler oder unsere Service-Organisation.
ANORDNUNG DES CD-WECHSLERS
Freistehend
• Den CD-Wechsler immer waagerecht auf einer
harten und flachen Unterlage aufstellen. Genügend
Freiraum (mindestens 3 cm) über dem CD-Wechsler
lassen, damit die Kühlung des Gerätes nicht behin-
dert wird.
Gestapelt
• Den CD-Wechsler möglichst ganz unten oder
ganz oben anordnen.
• Den CD-Wechsler niemals direkt auf einen
Verstärker mit hoher Ausgangsleistung stellen, da
dieser viel Wärme abstrahlt.
ANSCHLÜSSE
1. DIGITAL OUT
Dieser Ausgang liefert ein digitales Signal und darf
daher nur mit einem geeigneten Eingang verbunden
werden. Hierzu ist ein Phono-Kabel zu verwenden.
2. FIXED LINE OUT
An diesen Ausgang wird das Verbindungskabel
zum Verstärker angeschlossen.
• Den roten Stecker in die Buchse ‘R’ stecken und
den anderenStecker in die Buchse ‘L’ stecken.
NA
D
20
D
Table of contents
Languages:
Other NAD CD Player manuals