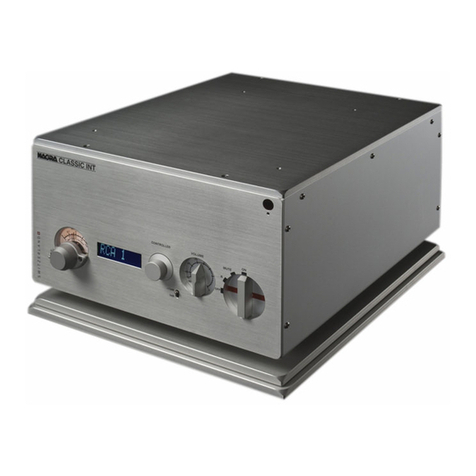
Nagra 300 Series User manual

P/N: 2055023151
A
A
l
l
l
l
r
r
i
i
g
g
h
h
t
t
s
s
r
r
e
e
s
s
e
e
r
r
v
v
e
e
d
d
–
–
©
©
2
2
0
0
1
1
4
4
r
r
e
e
v
v
1
1
300i – 300p
Ultimate 300B amplifiers
I structio ma ual

2
Nagra – 300i / 300p
Table of co te ts
Security war i gs ....................................................................... 3
Warra ty ................................................................................... 3
Co gratulatio s .......................................................................... 4
Package co te t ......................................................................... 4
Setti g-up the amplifier ................................................................. 5
I troductio to set-up ................................................................. 5
Remote device umber a d RC-5 ................................................. 5
Assembli g the amplifier ............................................................. 6
I stalli g the tubes..................................................................... 8
Placi g the tube protectio s......................................................... 9
Co ectio s ............................................................................. 10
Audio i puts ............................................................................ 10
Loudspeaker output .................................................................. 11
Mai s power co ectio ............................................................ 11
Grou d post ............................................................................ 11
Operati g the amplifier ................................................................ 12
Fro t pa el .............................................................................. 12
Rear pa el ............................................................................... 13
How to tur the amplifier ON ..................................................... 14
Cautio to use for the first power o ........................................... 15
How ofte to adjust the bias ...................................................... 15
I stalli g ew tubes ................................................................. 15
Adjusti g backlight a d LED i te sity ......................................... 16
I put selectio ......................................................................... 17
How to use Nagra remote co trol (with 300i o ly) ........................ 18
Load match meter .................................................................... 19
Readi g the modulometer ......................................................... 20
Case clea i g .......................................................................... 20
A ex 1 - Troubleshooti g ........................................................... 21
A ex 2 - Bias setti g ................................................................. 23
A ex 3 - Replaci g the fuse ........................................................ 25
Tech ical specificatio s ................................................................ 26

3
Nagra – 300i / 300p
Security war i gs
•Carefully read this ma ual before i stalli g your ew 300i / 300p;
•Should you have a y questio s o how to set-up or use your amplifier,
co tact your Nagra dealer;
•AUDIO TECHNOLOGY SWITZERLAND SA decli es all respo sibility i
the eve t of a accide t caused by the o -observa ce of these
i structio s or a y other form of user eglige ce;
•Do ot attempt to ope the u it u der a y circumsta ces. Refer a y
service/repair work to qualified perso el. There are o user
serviceable parts i side the amplifier;
•Should you eed to ship or tra sport your amplifier, always use the
origi al packi g supplied by Nagra.
Warra ty
AUDIO TECHNOLOGY SWITZERLAND SA, certifies that this i strume t was
thoroughly i spected a d tested prior to leavi g its factory a d is i accorda ce
with the data give i the accompa yi g measureme t protocol a d test sheet.
We warra t the products of our ow ma ufacture agai st a y defect arisi g from
faulty ma ufacture for a period of three years from the date of delivery to the
user.
Warra ty will be void if the serial umber has bee removed from the u it.
This limited warra ty covers the repair of co firmed defects or, if ecessary, the
replaceme t of the faulty parts, excludi g all other i dem ities.
All freight costs, as well as customs duty a d other possible charges, are at the
customer's expe se.
We decli e a y respo sibility for a y a d all damages resulti g, directly or
i directly, from the use of our products.
We reserve the right to modify the product, a d / or the specificatio s without
otice.
Disposal of Old Electrical & Electro ic Equipme t (Applicable i the
Europea U io a d other Europea cou tries with separate collectio
systems).
This symbol o the product or o its packagi g i dicates that this
product shall ot be treated as household waste. I stead it shall be
ha ded over to the applicable collectio poi t for the recycli g of
electrical a d electro ic equipme t. By e suri g this product is
disposed of correctly, you will help preve t pote tial egative
co seque ces for the e viro me t a d huma health. The
recycli g of materials will help to co serve atural resources. For more
detailed i formatio about recycli g of this product, please co tact your
local authority, your household waste disposal service or the shop where
you purchased the product.

4
Nagra – 300i / 300p
Co gratulatio s
Co gratulatio s, you have just purchased o e of the best 300B amplifiers ever
made!
The 300i a d 300p were created by a e gi eeri g team with more tha 60 years
of experie ce desig i g world-class products for the professio al audio, atio al
security a d military busi esses.
Si ce its i ceptio i 1951, Nagra builds products that co ti ue to ear a
reputatio for deliveri g ultimate so ic performa ce. Numerous awards have
bee bestowed upo Nagra for its tech ical i ovatio , excelle ce i desig a d
flawless co structio i cludi g three Oscars
®
a d o e Emmy
®
.
The Hi-Fi products a d field recorders are developed by the same R&D
departme t. Nagra philosophy is to provide i ovatio a d tech ology i order to
desig high quality products. The Hi-Fi ra ge was created to impleme t
i ovative desig s a d provide Nagra expertise to a ew field.
Tha k you for bei g our customer a d e joy your ew 300B amplifier
!
Package co te ts
I additio to the user ma ual:
•300i or 300p mai u it;
•Tra sformer block;
•1 mai s cable *;
•VFS vibratio free support;
•Set of spare fuses;
•Hex screwdriver (to assemble the tra sformer block);
•Set of 5 screws (to assemble the tra sformer block);
•Ceramic screwdriver (to adjust bias);
•Microfiber gloves (from Swiss Haute Horlogerie);
•Measureme t protocol, this is the actual electrical measureme t of
your amplifier;
•For the 300i a RCU-II Nagra remote co trol with a 9V battery
a d its screwdriver.
If a ythi g is missi g, please co tact your dealer.
*depe di g o your cou try, the AC mai s cable features either bare wires, US,
Europea or Swiss plug.

5
Nagra – 300i / 300p
Setting-up the amplifier
I troductio to set-up
It is recomme ded to wear Nagra gloves to ma ipulate the amplifier a d the
accessories. It is ma datory whe ha dli g the 300B tubes as ha d pri ts ca
affect the tube i the lo g-term.
Place the amplifier o the VFS platform o a perfectly flat a d stable surface.
Provide e ough space above the amplifier to allow air to circulate as the tubes
ru quite hot.
Remote device umber a d RC-5
If you wish to cha ge the amplifier device umber or if
you wa t to use a RC-5 compatible remote, do so
before assembli g the amplifier.
By default, the 300i device umber is 5. You may cha ge this
setti g to a y umber from 1 to 6.
Usi g Nagra gloves, tur the amplifier upside dow a d put it
o a soft surface.
Remove the plastic protectio that hides the access hole to the
selector.
Usi g the ceramic screwdriver,
cha ge the selector to the
desired umber.
Selector position
Device
0
Code
Category
Group
Philips RC
-
5
Preamp Audio 1
16
1
to
6
Nagra
device umber

6
Nagra – 300i / 300p
Assembli g the amplifier
Three guide holes will help you to slide the tra sformer block i to positio .
These short rods fit i to the guide holes.

7
Nagra – 300i / 300p
Be careful to place the block vertically above the amplifier’s base. Place the rods
i the guidi g holes a d push ge tly u til the block is fully co ected.
I this picture you ca see the guide rods bei g i serted i to the base.
Whe reachi g the base, the tra sformer co ector will eed a extra push to be
i serted i the base co ector, this is perfectly ormal.
Inserting the block screws
Usi g the screwdriver provided,
place the three fixi g screws to
hold the tra sformer i place (the
set i cludes two spare screws).

8
Nagra – 300i / 300p
I stalli g the tubes
Tubes are umbered from 1 to 4.
O your ew amplifier, the Nagra Laboratory has already setup the bias, so be
careful to respect the tube placeme t.
The tube umber is writte o the back of each tube co ector o your amplifier,
as well as o the back of each tube base.
Spare tubes provided by Nagra ca be placed i a y positio as you will adjust
the amplifier’s bias to their specificatio .
Please ote the larger pi positio .
Prior to inserting the tubes, make sure the pins are in the right position.
Should ou have an doubt, remove them and start again.
1
2
3
4

9
Nagra – 300i / 300p
To i sert the tube, hold its base a d push dow ,
use the glass part to guide the tube but ot to
push, as the glass is fragile.
The amplifier features a thermal glass epoxy
plate to avoid a y miss-i sertio .
To remove tubes, pull them by the base a d ot
by the glass part.
Warning: placing the tube in a wrong
position can damage the amplifier and thus
the warrant will be void.
Place tube protectio s
The amplifiers are delivered with a set of
tube protectio s made from Pyrex glass
(desig ed to resist the heat).
The protectio ’s base is i iro a d will
be attracted to the amplifier deck by
mag ets.
Place the iro part i to the gutter.
Tube protectio s are desig ed to avoid a y co tact with the hot tube that could
provoke serious i juries. Be careful with the you gest music lovers.

10
Nagra – 300i / 300p
Co ectio s
Your amplifier is ow ready to be co ected to your system. We recomme d
doi g all the audio co ectio s before pluggi g the power cable i .
Audio i puts
The 300i features 4 i puts:
A
symmetrical o XLR
co ector
B & C
Asymmetrical o RCA (CINCH), 2 V rms max.
D
Asymmetrical o RCA (CINCH), 4 V rms max.
The 300p features a
choice of symmetrical o
XLR or asymmetrical o
RCA (CINCH).
Its maximum i put level is
2 V rms.
Use the white jumper to
select XLR or RCA i put.
O this picture, the i put is o RCA.

11
Nagra – 300i / 300p
Loudspeaker output
The output tra sformers provide
differe t output wi di gs to perfectly
match with your loudspeaker
impeda ce.
You may check your speaker
specificatio s to k ow their
impeda ce; you might as well use the
provided « Load match meter », please
read the chapter Load match meter
o page 19.
The speaker’s bi di g posts ca
accommodate a choice of bare wires
up to 4.2 mm, 4mm ba a a plugs or
6.35mm spade lugs.
Mai s power co ectio
You may ow co ect your power cable to the
IEC plug, just below the mai s switch.
Grou d post
Your Nagra dealer may advice you o the opportu ity
to use the grou d post. It is o ly useful i very
specific situatio s.

12
Nagra – 300i / 300p
Operating the amplifier
Fro t pa el
1. VFS platform
2. LED (light emitti g diode) a d modulometer i te sity adjustme t
3. Modulometer
4. Modulometer fu ctio selector
5. Volume pote tiometer
6. Fi e left / right level bala ce
7. I put selectio (display o LED A to D)
8. Mai selector
9. Remote co trol receiver a d remote LED
The 300p fro t pa el is the same except for the
preamplifier fu ctio s (i put selector, volume a d
bala ce).
1. 2. 3. 4. 5. 6. 7. 8. 9.

13
Nagra – 300i / 300p
Rear pa el
1. I puts
A symmetrical i put o XLR co ector
B, C asymmetrical i puts o RCA (CINCH), 2 V rms max
D, asymmetrical i put o RCA (CINCH), 4.1 V rms max
2. Serial umber
3. Grou d post
4. Power supply voltage i dicatio (120 V o this picture)
5. Mai s co ector
6. Fuse holder compartme t
7. Mai s switch (I) ON, (0) OFF
Except for the i put block, the 300i a d 300p’s rear pa els are the same.
1. 2. 3. 4.5. 6. 7.

14
Nagra – 300i / 300p
How to tur the amplifier ON
This page will show you how to tur the amplifier ON a d OFF. However, please
read the ma ual throughout, before doi g so. It is importa t to use some cautio
duri g the first power o , as you will read i the ext sectio .
The mai s switch is located o the amplifier rear pa el (7). I the O positio it is
completely ope a d o power is ru i g through the amplifier, power
co sumptio is 0 Watts. I the I positio , it allows the starti g-up board to be
powered, the amplifier is i a sta d-by positio , the co sumptio is the less
tha 1 Watt.
Before powering on the amplifier,
make sure the volume is down to
the minimum.
To start-up the amplifier, use the mai
selector located o the fro t pa el (8).
It is recomme ded to first put the
selector to MUTE a d after a few
seco ds to ON.
The amplifier eeds to warm-up duri g
about fiftee mi utes before reachi g
its omi al worki g zo e.
You may however start liste i g as soo as the amplifier is o .

15
Nagra – 300i / 300p
Cautio to use for the first power o
Eve with bra d ew tubes the bias setti g ca move, because of tra sport for
i sta ce. If the bias has dramatically moved, the the amplifier might place itself
i a “protectio mode” to avoid a y damage to the tube or the amplifier. For
further details about this mode, please read the “Troubleshooting” sectio o
page 21.
Before goi g further, please read the Bias adjustment sectio o page 23.
For the amplifier’s first power o :
Put the mai s switch o positio
I
(o t
he rear pa el)
Place the mai selector (
8
) o
MUTE
The amplifier is
worki g
fi e
The amplifier shuts dow a d
C
LED is bli ki g
Tur the mai selector to
ON a d e joy your favorite
records
It mea s that o e or several tube bias are wro g
Put the m
ai selector (
8
) to
OFF
Put the mai selector (
8
) to
ON
, the put the
modulometer selector to 1-2 a d 3-4 to ide tify
the tube that has a bias problem
Tur the tube bias pote tiometer to move it closer
to the gree area, do ’t try to fi e tu e it, just to
get it out of trouble
O ce the 4 tube’s bias are closer to the gree
area, wait a other 15 mi utes to fi e adjust the
bias
NB Should the amplifier be tur ed ON a d OFF more tha 4 times duri g the bias
adjustme t, it will cha ge its start-up time to 2 mi utes, the RC LED will bli k
duri g these 2 mi utes. This waiti g might seem lo g, but is ecessary to protect
some compo e ts that e dure a lot of stress duri g start-up phase. It is best to
lear to adjust the bias fast to avoid multiple start-ups.
How ofte to adjust the bias
It is recomme ded to co trol the bias o ce a mo th if you use the amplifier every
day. Let the amplifier warm-up arou d 15 mi utes, the if eeded adjust the bias.
Should the bias be difficult to adjust or move very ofte , this is a sig of a tube
fault or weari g, i these cases, co tact your Nagra dealer.
If you feel that your amplifier is less powerful or if the level of distortio has
i creased, this is a sig of tube agi g, you should co sider cha gi g them.
I stalli g ew tubes
Tur the amplifier OFF usi g the mai s switch o the rear pa el, place the ew
tubes by pair 1-2 a d 3-4, please use Nagra gloves to ma ipulate the tubes.
The , carefully read the sectio “Bias adjustment” o page 23.
Before tur i g the amplifier ON to adjust the bias, place the bias pote tiometer
i their middle positio . To do so, tur fully clockwise, tha fully cou ter-
clockwise a d try to fi d the middle of this circle.
The follow the steps defi ed i « Bias adjustment ».

16
Nagra – 300i / 300p
Adjusti g backlight a d LED i te sity
There are 7 levels of i te sity for the modulometer backlight a d the LED.
Pushi g the (2) switch dow (cloud) will decrease i te sity dow to
exti ctio ; pushi g i the opposite directio (su ) will i crease i te sity.

17
Nagra – 300i / 300p
I put selectio
I put selectio is made through the horizo tal
toggle switch (7). Each left or right push will cha ge
the i put. Here from C to B.
I puts A, B a d C accept sig als up to 2 V rms. I put D allows sig als up to
4.1 V rms, prefer this i put if you use high level sources.

18
Nagra – 300i / 300p
How to use Nagra remote co trol (with 300i o ly)
The RCU-II remote co trol requires a 9 V battery.
We recomme d usi g alkali e batteries for
exte ded battery life.
Hold the remote co trol upside dow . Remove
the screw (screwdriver umber 3 provided). Slide
the battery compartme t off, i stall the battery,
slide the compartme t back o a d replace the
screw.
Remove the battery at the e d of its useful life or if the remote co trol is ot
used for a prolo ged period. Batteries co tai chemical substa ces a d must be
disposed of appropriately.
Block 1
Your RCU-II remote allows you to co trol
several Nagra u its. Each u it has its ow
device, umbered from 1 to 6.
By default, these umbers are:
Device
Unit
1
PL
-
L
2 & 3
DAC
4
CDC
&
CDP
5
300i
Block 2
The 300i uses the fu ctio writte i RED
A, B, C, D i put selectio
Will mute the i put, the LED below the
MUTE positio o the mai selector (7)
will light up
ON allows you to exit the « MUTE » mode
OFF is ot used o the 300i
Block 3
UP
i creases volume level
DOWN
decreases volume level
I creases left cha el level
I creases right cha el level
The ce tre key is ot used o the 300i.

19
Nagra – 300i / 300p
Load match meter
To further optimize the matchi g of your speakers with the amplifier, you may
use the built-i load match meter.
While liste i g to music, place the modulometer fu ctio selector i to the M-L
(left cha el) or M-R (right cha el) positio .
The eedles will the i dicate
Needle
Indication
Black
Represe ts a ode curre t
R
ed
Repr
e
se t
s
a ode voltage
You might select a piece of music that represe ts the typical style you liste to
ofte . Play this tu e (repeat it if ecessary) a d observe the eedles.
Good match
Needles are followi g each
other with little differe ce (as
show o the picture)
The impeda ce choice is
optimal
Poor match
Needles
moveme ts
seem to
ot relate to each other,
specially o bass otes (bass
drum for i sta ce)
Try a other ouptut
impeda ce o the
amplifier a d adjust it
u til it is better

20
Nagra – 300i / 300p
Readi g the modulometer
I the « LEVEL » positio o the modulometer selector, the meter i didates the
amplifier’s output power i Watts. The logarithic deviatio allows for a co ve ie t
readi g, specially at low level. The scale goes from 0 to 20 Watts.
Very ofte , you will see that the power is quite low, from a couple of te ths to a
Watt.
The amplifier ca play up to 20 Watt a d support high level peaks without
problems. However if the eedle is co ti ously at the 20 Watt positio , the
distortio will i crease sig ifica tly.
Case clea i g
Clea the amplifier casi g usi g a soft, o -fluffy, slightly damp cloth. Do ot use
a y clea i g products which could have a corrosive effect. Do ot expose the
amplifier, batteries a d accessories to humidity, rai or excessive heat (from
domestic heati g or direct su light).
This manual suits for next models
2
Table of contents
Other Nagra Amplifier manuals