manuals.online logo
Brands
  1. Home
  2. •
  3. Brands
  4. •
  5. Nahita
  6. •
  7. Measuring Instrument
  8. •
  9. Nahita 910/5 User manual

Nahita 910/5 User manual

Other Nahita Measuring Instrument manuals

Nahita KJR015 User manual

Nahita

Nahita KJR015 User manual

Nahita KDB003 User manual

Nahita

Nahita KDB003 User manual

Popular Measuring Instrument manuals by other brands

Powerfix Profi 278296 Operation and safety notes

Powerfix Profi

Powerfix Profi 278296 Operation and safety notes

Test Equipment Depot GVT-427B user manual

Test Equipment Depot

Test Equipment Depot GVT-427B user manual

Fieldpiece ACH Operator's manual

Fieldpiece

Fieldpiece ACH Operator's manual

FLYSURFER VIRON3 user manual

FLYSURFER

FLYSURFER VIRON3 user manual

GMW TG uni 1 operating manual

GMW

GMW TG uni 1 operating manual

Downeaster Wind & Weather Medallion Series instruction manual

Downeaster

Downeaster Wind & Weather Medallion Series instruction manual

Hanna Instruments HI96725C instruction manual

Hanna Instruments

Hanna Instruments HI96725C instruction manual

Nokeval KMR260 quick guide

Nokeval

Nokeval KMR260 quick guide

HOKUYO AUTOMATIC UBG-05LN instruction manual

HOKUYO AUTOMATIC

HOKUYO AUTOMATIC UBG-05LN instruction manual

Fluke 96000 Series Operator's manual

Fluke

Fluke 96000 Series Operator's manual

Test Products International SP565 user manual

Test Products International

Test Products International SP565 user manual

General Sleep Zmachine Insight+ DT-200 Service manual

General Sleep

General Sleep Zmachine Insight+ DT-200 Service manual

Sensa Core Lacto Spark user manual

Sensa Core

Sensa Core Lacto Spark user manual

VOLTCRAFT UTS-1980 operating instructions

VOLTCRAFT

VOLTCRAFT UTS-1980 operating instructions

EBCHQ 94915 Operation manual

EBCHQ

EBCHQ 94915 Operation manual

Balluff BIP LD2-T017-01-EP-S4 Series user guide

Balluff

Balluff BIP LD2-T017-01-EP-S4 Series user guide

Pulsar IMP Lite Series instruction manual

Pulsar

Pulsar IMP Lite Series instruction manual

ETCR 6800 user manual

ETCR

ETCR 6800 user manual

manuals.online logo
manuals.online logoBrands
  • About & Mission
  • Contact us
  • Privacy Policy
  • Terms and Conditions

Copyright 2025 Manuals.Online. All Rights Reserved.

ENGLISH
Page 32 Instruction manual 50910050 Version 1 June-07
ANNEX I: CE CERTIFICATE
AUXILAB S.L.
Are designed and manufactured according to:
Directive 89/392/CEE, including the modifications and national regulations that
transpose them.
Directive 89/336/CEE modified over electromagnetic compatibility.
And that the following harmonized rules have applied (or part of them):
UNE 292-1/-2/-2/A1,UNE-EN 1050, UNE-EN 614-1,UNE-EN 1037, UNE-EN
1088, UNE-EN 547, UNE-EN 953, UNE-EN 294, UNE-EN 418, UNE-EN 894-1, UNE-
EN 894-2, UNE-EN 954-1, UNE-EN 60204-1, UNE 61010-1/A2, UNE-EN61010-2-051.
Polígono Morea Norte, 8 31191 Beriain (Navarra) - Spain. Tel. 948 310 513 Fax 948 312 071
Internet: www.auxilab.es · Email: [email protected]
DECLARATION OF CONFORMITY
CONDUCTIVITY METER 910/5 of Auxilab, S.L for the
Directive of Machines (89/392/CEE modified) and the regulations
adopted for their transposition
NAME OF THE MANUFACTURER / IMPORTER:
AUXILAB, S.L.
ADDRESS: Polígono Morea Norte, 8
31191 Beriáin (Navarra)
WE STATE THAT:
NAHITA CONDUCTIVITY METER 910/5
CODE 50910050
BERIAIN 19th JUNE 2007
Signed by: ALFONSO AINCIBURU SANZ
DIRECTOR/MANAGER



Revisión 1 Junio-2007 Manual de instrucciones 50910050 Pág. 1
Este manual es parte inseparable del aparato por lo que debe estar
disponible a todos los usuarios del equipo. Le recomendamos leer
atentamente el presente manual y seguir rigurosamente los proce-
dimientos de uso para obtener las máximas prestaciones y una
mayor duración del mismo.
This manual should be available for all users of these equipments. To get
the best results and a higher duration of this equipment it is advisable to
read carefully this manual and follow the processes of use.
CONDUCTÍMETRO DE CAMPO
PORTABLE CONDUCTIVITY METER
MODELO / MODEL 910/5
CASTELLANO
Pág. 2 Manual de instrucciones 50910050 Revisión 1 Junio-07
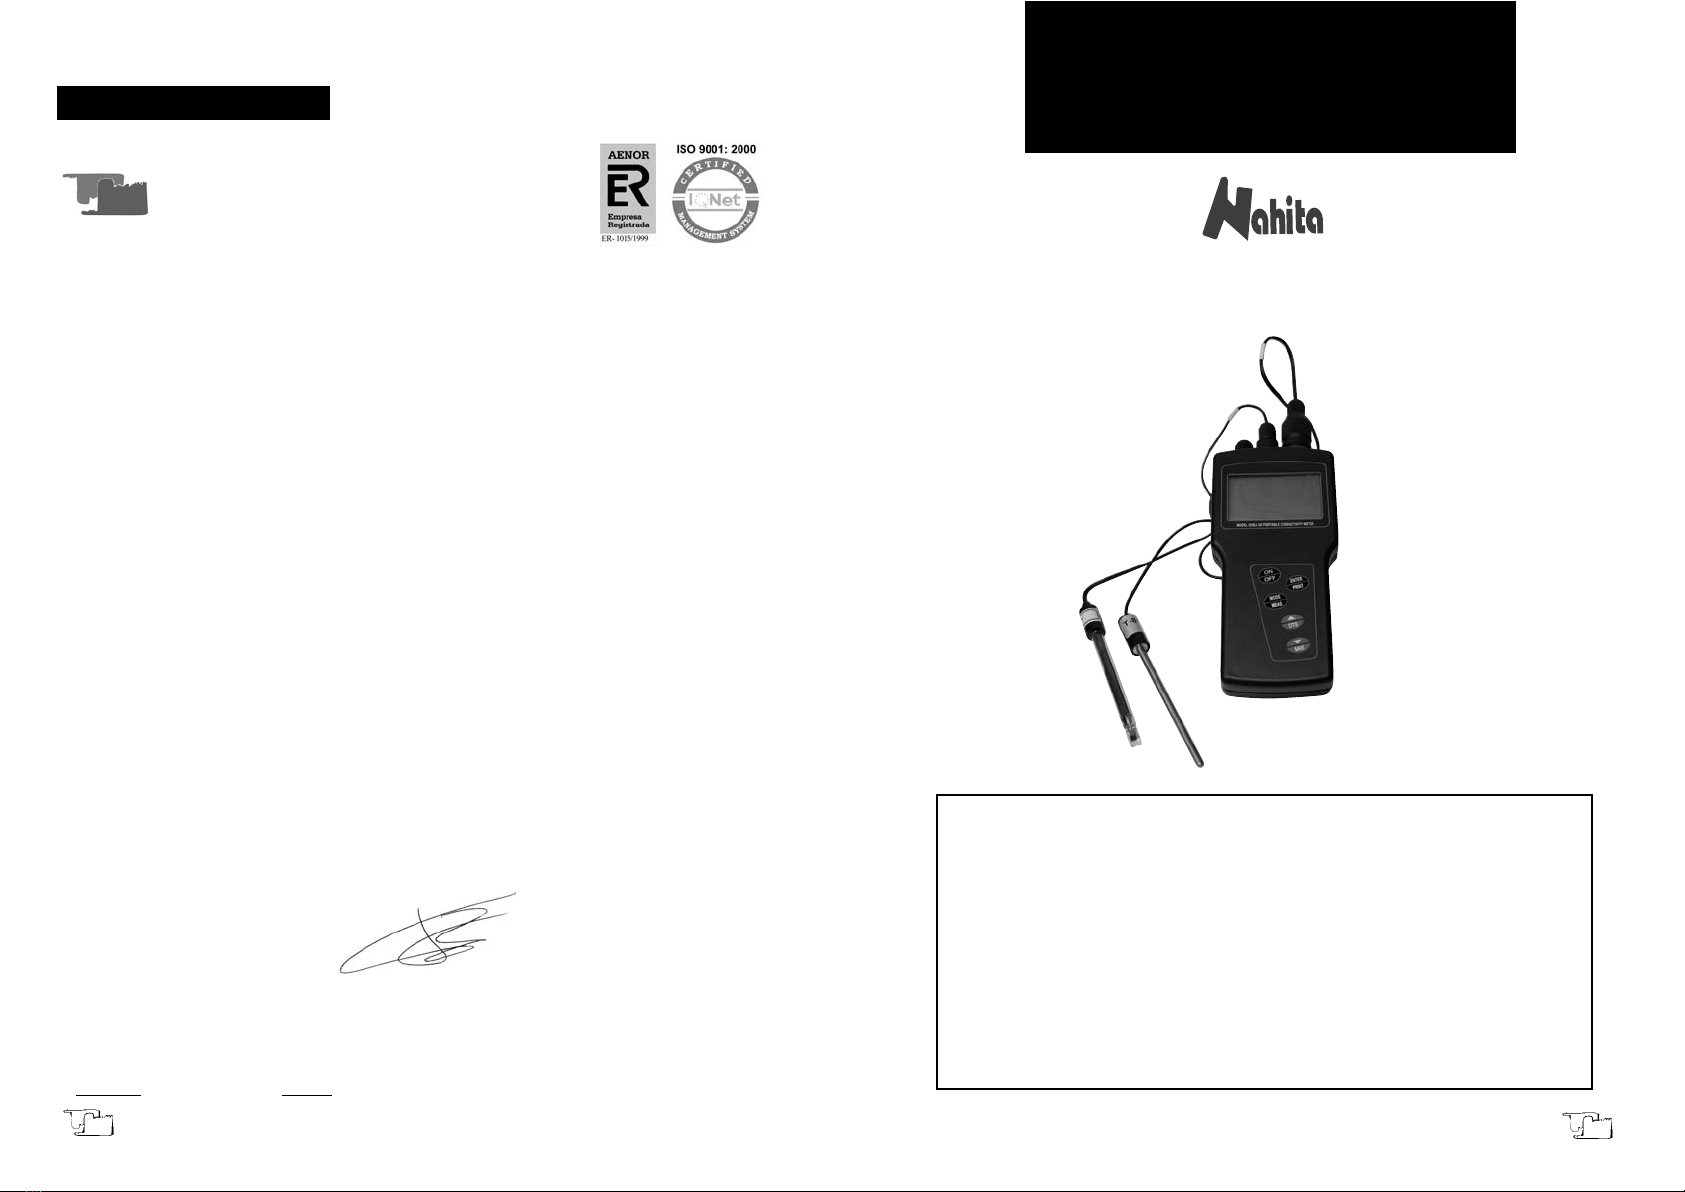
Gracias por haber adquirido este equipo. Deseamos sinceramente que disfrute del con-
ductímetro de campo Nahita 910/5. Le recomendamos que cuide el equipo conforme a lo
expuesto en este manual.
Nahita desarrolla sus productos según las directrices del marcado CE y haciendo hin-
capié en la ergonomía y seguridad del usuario.
La calidad de los materiales empleados en la fabricación y el correcto proceder le per-
mitirán disfrutar del equipo por muchos años.
El uso incorrecto o indebido del equipo puede dar lugar a accidentes, descargas eléctri-
cas, cortocircuitos, fuegos, lesiones, etc. Lea el punto de Mantenimiento, donde se recogen
aspectos de seguridad.
LEA DETALLADAMENTE ESTE MANUAL DE INSTRUCCIONES ANTES DE
OPERAR CON ESTE EQUIPO CON EL FIN DE OBTENER LAS MÁXIMAS PRES-
TACIONES Y UNA MAYOR DURACIÓN DEL MISMO.
Tenga especialmente presente lo siguiente:
Este manual es parte inseparable del conductímetro de campo Nahita 910/5, por lo que
debe estar disponible para todos los usuarios del equipo.
Debe manipularse siempre con cuidado evitando los movimientos bruscos, golpes, caí-
das de objetos pesados o punzantes; evite el derrame de líquidos en su interior
Nunca desmonte el equipo para repararlo usted mismo, además de perder la garantía
podría producir un funcionamiento deficiente de todo el equipo, así como daños a las per-
sonas que lo manipulan.
Para prevenir fuego o descargas eléctricas, evite los ambientes secos y polvorientos. Si
esto ocurre, desenchufe inmediatamente el equipo de la toma de corriente.
Cualquier duda puede ser aclarada por su distribuidor (instalación, puesta en marcha,
funcionamiento). Usted puede también mandarnos sus dudas o sugerencias a la siguien-
te dirección de correo del Servicio Técnico Nahita ([email protected]) o bien llamando
al Tel: 807117040 (0.30 Euros/min).
Este equipo está amparado por la Ley de garantías y bienes de consumo (10/2003).
No se consideran en garantía las revisiones del equipo.
La manipulación del equipo por personal no autorizado provocará la pérdida total de
la garantía.
Los accesorios, así como su pérdida, no están cubiertos por dicha garantía. Tampoco
estarán cubiertos por el periodo de garantía las piezas en su desgaste por uso natural.
Asegúrese de guardar la factura de compra para tener derecho de reclamación o pres-
tación de la garantía. En caso de enviar el equipo al Servicio Técnico adjunte factura o
copia de la misma como documento de garantía.
El fabricante se reserva los derechos a posibles modificaciones y mejoras sobre este
manual y equipo.











¡ATENCIÓN! NO SE ADMITIRÁ NINGÚN APARATO PARA REPARAR
QUE NO ESTÉ DEBIDAMENTE LIMPIO Y DESINFECTADO.
Version 1 June-07 Instruction manual 50910050 Page 31
ENGLISH
5. MAINTENANCE AND CLEANING
To get the best results and a higher duration of the conductivity meter it is essential to
follow the processes of use.
Note: All the processes of use mentioned below will not have any value unless you keep
a continued and careful maintenance.
Please follow the processes of use of this manual.
This manual should be available for all users of this equipment.
Always use original components and supplies. Other devices can be similar but they
can damage the equipment.
Never try to repair the conductivity meter by yourself, since you will lose the warranty
and may provoke damages to the general operating system or the electrical installation,
as well as injuries to the people that usually handle the conductivity meter (burns,
hurts…) or damages in nearby equipments.
Maintenance of the conductivity cell. Rinse the conductivity cell in clean water after
each measurement; for a thorough cleaning, clean the cell with a cloth or a non abrasive
detergent. After cleaning the cell, calibrate the equipment.
In the event of breakdown please contact your distributor to overhaul through Nahita
Technical Assistance Department.
Cleaning
Never use scourers or substances that can grate for cleaning the case of the equipment
as they damage the conductivity meter and produce an early ageing of the equipment.
Use a fluff-free cloth dampened with soaped water that does not contain abrasives.
INSTRUCTIONS ON ENVIRONMENT PROTECTION
At the end of its life cycle, please, do not dispose of this equipment by
throwing it in the usual garbage; hand it over a collection point for the recy-
cling of electrical and electronic appliances. It does not contain dangerous
or toxic products for humans but a non adequate disposal would damage
the environment.
The materials are recyclable as mentioned in its marking. By recycling material or by
other forms of re-utilization of old appliances, you are making an important contribu-
tion to protect our environment.
Please inquire at the community administration for the authorized disposal location.
Accesories
Conductivity meter Nahita 910/5 is supplied without a conductivity cell. The following
models are available in our catalogue.
Code Constant Range
90908010 0.1 ± 0.02 cm-1 0.1 S-300 mS/cm
90908020 1 ± 0.2 cm-1 1 S-100 mS/cm
90908030 10 ± 2 cm-1 300 S-1000 mS/cm








μ
μ
μ
CASTELLANOENGLISH
Page 30 Instruction manual 50910050 Version 1 June-07 Revisión 1, Junio-07 Manual de instrucciones 50910050 Pág. 3
ÍNDICE DE IDIOMAS
Castellano
Inglés
2-17
18-32
1. APLICACIONES DEL INSTRUMENTO
2. DESCRIPCIÓN
3. ESPECIFICACIONES TÉCNICAS
4. INSTALACIÓN / PUESTA EN MARCHA
5. MANTENIMIENTO Y LIMPIEZA
ANEXO I: CERTIFICADO CE
3
3
4
5
15
17
1. APLICACIONES DEL INSTRUMENTO
ÍNDICE DE CONTENIDOS
El conductímetro Nahita 910/5 resulta ideal para trabajos de campo en el análisis de
aguas de ríos, manantiales, aguas de cultivo, etc. Se suministra en un maletín robusto y
amplio que permite transportar cómodamente el equipo y sus accesorios y además pre-
senta un grado de protección IP65 (sin penetración de polvo y con protección contra cho-
rros de agua) y teclado de membrana con 5 botones desde los que se acceden a todas las
funciones del equipo. El conductímetro 910/5 permite determinar al mismo tiempo la con-
ductividad, sólidos totales disueltos (TDS) y salinidad y además está equipado con una
sonda de temperatura para la determinación y compensación automática de este paráme-
tro. Puede ser utilizado con células de conductividad de constantes 0.01, 0.1, 1, 5 y 10
cm-1 según las necesidades específicas de cada aplicación. Además, diversos parámetros
como la constante de la célula de conductividad, el coeficiente de temperatura o el factor
de conversión de TDS pueden ser modificados dependiendo del tipo de muestra a anali-
zar o de la célula de conductividad utilizada.
2. DESCRIPCIÓN
Conexiones
2.1 Conector célula conductividad
2.2 Conector sonda de temperatura
2.3 Interfaz RS 232
2.2
2.3
2.1
5. Auto-off function
Nahita conductivity meter 910/5 presents the possibility to programme and auto-off
function that will turn the equipment off after 2 hours of use. For this purpose:
In any measuring mode, press MODE/MEAS (1.3).
With /C/T/S (1.5) or /SAVE (1.6) select "ASD" on display.
Press ENTER/PRINT (1.4).
With /C/T/S (1.5) select ON (to activate the auto-off function) or OFF (to inactivate
the auto-off function).
Note: By default, the equipment presents the auto-off function activated.
Press ENTER/PRINT (1.4) to confirm the selection.
Press MODE/MEAS (1.3) to return to the measuring mode.
Note: The equipment also presents a low battery alert. When the batteries are lack of
energy, a sign of low battery will be displayed to remind the user to change the batteries.
If you are not using the conductivity meter for a long period of time please remove the
batteries and protected the equipment from dust (this way you will avoid accidents and
will extend its working-life).
S
S
S






Security
The conductivity meter must be used by previously qualified staff that knows how the
equipment works thanks to the user manual.
Put the conductivity meter on top of a horizontal, plane and stable table making a free
space at least at 30 cm per side.
Do not put the conductivity meter near any warm supply (burners, blowlamps…), nor
expose it directly to the sun, etc. Avoid vibrations, dust and dry environments.
During operation, dangerous material such as flammable liquids or pathological mate-
rial must be out of the working area.
It is essential to have the equipment switched off before cleaning, checking components
or replacing any piece.
Never try to repair the conductivity meter by yourself, since you will lose the warranty
and may provoke damages to the general operating system, as well as injuries to the peo-
ple that usually handle the equipment (burns, hurts…).
Try not to spill any liquid on the control panel, though it is properly insulated. In case
you have any doubts do please immediately unplug the equipment (see Maintenance).
Made under the European regulations for electrical security, electromagnetic compati-
bility and security on machines.








Press ENTER/PRINT (1.4) and all the data saved in that measuring mode will be prin-
ted.
Note: If there are no data saved in that measuring mode, "NULL" will be displayed and
after a few seconds the instrument will return to the measuring mode.
Press MODE/MEAS (1.3).
With /C/T/S (1.5) or /SAVE (1.6) select "VIEW" on display.
Press ENTER/PRINT (1.4), so as the equipment enters the data visualization mode.
The last result that has been saved will be displayed.
Note: If there are no saved data at that measuring mode, "NULL" will be displayed.
Use /C/T/S (1.5) to /SAVE (1.6) to see in turn all the saved data. The position num-
ber of each datum will be shown at the lower left side of the screen.
Press ENTER/PRINT (1.4) to exit the data visualization mode.
Press MODE/MEAS (1.3) to return to the measuring mode.
3. Data deleting
This function allows deleting all the data saved in a particular measuring mode:
Select the desired measuring mode by pressing /C/T/S (1.5).
Press MODE/MEAS (1.3).
With /C/T/S (1.5) or /SAVE (1.6) select "DEL" on display.
Press ENTER/PRINT (1.4) so as the equipment enters the data deleting mode.
SURE" will be displayed
Press ENTER/PRINT (1.4) and all the data saved in that measuring mode will be dele-
ted.
Note: Only the data saved in that measuring mode will be deleted. To delete the data
saved in any other measuring mode, firstly select that mode and then proceed as pre-
viously described.
While data are deleted "DEL--" will be displayed.
Once the process has finished "DEL" will be displayed.
Press MODE/MEAS (1.3) to return to the measuring mode.
4. Data printing
The results obtained with the conductivity meter 910/5 can be printed with a TP-16 prin-
ter. For this purpose, connect the conductivity meter with the printer through the interfa-
ce RS232.
To print the current result:
In measuring mode used, press ENTER/PRINT (1.3).
While the current result and the temperature of the solution analyzed are printed,
"PRN" will be displayed at the lower left side.
Once printing is finished, the instrument returns to the measuring mode.
To print the saved data:
Select the measuring mode whose data are going to be printed.
Press MODE/MEAS (1.3).
With /C/T/S (1.5) or /SAVE (1.6) select "PRN" on display.
Press ENTER/PRINT (1.4).
"SURE" will be displayed.
ENGLISHCASTELLANO
Pág. 4 Manual de instrucciones 50910050 Revisión 1 Junio-07
1.1 Pantalla cristal líquido (LCD)
1.2 ON/OFF: encendido/apagado
1.3 MODE/MEAS
1.4 ENTER/PRINT
1.5 /C/T/S
1.6 /SAVE
1.7 Célula de conductividad (no incluida)
1.8 Sonda de temperatura
ON
OFF
ENTER
PRINT
MODE
MEAS
SAVE
C/T/S
S
S
1.1
1.2
1.3
1.4
1.5
1.6
1.7
1.8
3. ESPECIFICACIONES TÉCNICAS
Rango 0.00-19.99 S/cm;
20.0-199.9 S/cm;
200-1999 S/cm;
2.00-19.99 mS/cm;
20.0-199.9 mS/cm
μ
μ
μ
Referencia 50910050
Resolución 0.01 S/cm;
0.1 S/cm;
1 S/cm,
0.01 mS/cm;
0.1 mS/cm
μ
μ
μ
Coductividad
Version 1 June-07 Instruction manual 50910050 Page 29
S
S
S
S
S
S
S





















S
S



Other functions
1. Data saving
Nahita conductivity 910/5 can store up to 250 readings of each measuring mode. For this
purpose, at any measuring mode press /SAVE (1.6) and the result will be automati-
cally saved. While saving the result, "SAVE" will be displayed.
2. Data visualization
To view the data saved in any measuring mode:
Select the desired measuring mode by pressing /C/T/S (1.5).
standard solution to be (25.0±0.1) ºC.
Press MODE/MEAS (1.3).
With /C/T/S (1.5) or /SAVE (1.6) select "TCAL" on display.
Press ENTER/PRINT (1.4) to enter the TDS conversion factor adjustment mode.
When the reading on display is stable, press ENTER/PRINT (1.4). "CA-M" will be dis-
played.
With /C/T/S (1.5) (increase) or /SAVE (1.6) (decrease) introduce the exact value of
TDS according to the TDS standard value chart.
Press ENTER/PRINT (1.4) to save the value; after a few seconds "TCAL" will be displa-
yed.
Press MODE/MEAS (1.3) to return to the measuring mode.
ENGLISH CASTELLANO
Page 28 Instruction manual 50910050 Version 1 June-07







S
S
S
S
Conductivity, TDS or salinity determinations
NOTE: before performing measurements, make sure the equipment is calibrated.
Turn the conductivity meter on by pressing ON/OFF (1.2); by default, the instrument
starts at the last measuring mode used.
Clean the conductivity cell with distilled water and dry it with a filter or cellulose paper.
Submerge the cell and the temperature probe 4 cm into the sample to be analyzed and
stir it with the cell. Wait until the reading is stable. Conductivity, TDS or salinity measu-
rement is displayed at the middle and the temperature is shown below.
Note: Once the temperature probe is connected to the equipment, the measurements will
be compensated to the temperature of reference according to the temperature coefficient
established. If the temperature probe is not connected, the value displayed will be the ori-
ginal value without being compensated. The reference temperature is 25 ºC for conducti-
vity and TDS determinations and 18 ºC for salinity determinations.
To go to any other measuring mode press /C/T/S (1.5).
NOTE: If several samples are going to be analyzed successively it is recommended to
clean the conductivity cell and the temperature probe with distilled water to avoid cross
contamination.



S
S
S

Revisión 1, Junio-07 Manual de instrucciones 50910050 Pág. 5
Precisión (± 1 dígito) ± 1.5 %
Sólidos totales disueltos (TDS)
Rango 0.00-10.00 mg/L;
10.0-100.0 mg/L;
100-1000 mg/L;
1.00-10.00 g/L,
10.00-19.99 g/L
Resolución 0.01 mg/L;
0.1 mg/L;
1 mg/L;
0.01 g/L;
0.01 g/L
Precisión (± 1 dígito) ± 1.5 %
Salinidad
Rango 0.00-8.00 %
Resolución 0.01 %
Precisión (± 1 dígito) ± 0.3 %
Rango temperatura 0.0-40.0 ºC
Coeficiente de temperatura 0.0-40.0 ºC
Temperatura referencia 25 ºC (conductividad y TDS) y 18 ºC
(salinidad)
Factor de conversión TDS 0.40-1.00 (por defecto 0.50)
Condiciones de trabajo 0-40 ºC
Alimentación 4 baterías 1.5 V, tipo AA
Dimensiones (LxAxH) 210x100x45 mm
Peso 0.5 Kg
4. INSTALACIÓN / PUESTA EN MARCHA
Inspección preliminar
Desembale el conductímetro (se suministra en una caja de aluminio para su transporte)
y asegúrese de que no presenta ningún daño debido al transporte. De ser así, comuní-
Calibrate the conductivity cell constant (See Calibration of the conductivity cell).
Select the TDS measuring mode
Clean the conductivity cell with distilled water.
Submerge the conductivity cell in the standard solution. Control the temperature of the
ENGLISHCASTELLANO
Pág. 6 Manual de instrucciones 50910050 Revisión 1 Junio-07
LEA DETALLADAMENTE ESTE MANUAL DE INSTRUCCIONES ANTES DE
OPERAR CON ESTE EQUIPO CON EL FIN DE OBTENER LAS MÁXIMAS PRES-
TACIONES Y UNA MAYOR DURACIÓN DEL MISMO.
1. Instalación de las pilas
El conductímetro Nahita 910/5, emplea 4 pilas alcalinas tipo AA:
Abra el compartimiento de las pilas; para ello, tendrá que desatornillar los cuatro tor-
nillos que se encuentran en la parte de atrás del equipo.
Coloque las pilas según polaridad.
Vuelva a colocar la tapa, y sujétela con los tornillos.
NOTA: Si no va a emplear el equipo durante un largo periodo de tiempo retire las pilas.
2. Conexión de la célula de conductividad
Conecte la célula de conductividad (1.7) (no incluida) en el conector correspondiente
(2.1) situado en la parte posterior del equipo.
Elección de la célula de conductividad
Para adaptarse a todas las aplicaciones requeridas por el usuario, el conductímetro
Nahita 910/5 puede ser utilizado con células de conductividad de diferente valor de cons-
tante (ver Accesorios) permitiendo ajustar el valor de la constante de la célula de conduc-
tividad utilizada en cada momento.
A continuación se muestran distintas tablas en las que se indica la constante adecuada
de la célula de conductividad dependiendo del rango de trabajo:




A) Selección de la constante según el rango de conductividad.
que lo inmediatamente a su transportista o suministrador para que pueda hacer las
debidas reclamaciones en el plazo establecido.
Guarde el embalaje, ya que siempre se deben realizar las devoluciones en su embalaje
original con todos los accesorios suministrados.
Compruebe los accesorios que usted debe recibir junto al equipo:
- Sonda de temperatura
- Cables RS232
- Maletín de aluminio
- Manual de instrucciones
- Certificado de garantía
Solo aceptamos devoluciones de equipos en los 15 días posteriores al envío y siem-
pre que vengan completos en su embalaje original.
Instalación
Antes de comenzar a utilizar el instrumento, es conveniente familiarizarse con sus com-
ponentes y fundamentos básicos, así como con las funciones de sus controles.
Version 1 June-07 Instruction manual 50910050 Page 27
Temperature of the standard solution
Approx. concentration (mol/L) 15.0 ºC 18.0 ºC 20.0 ºC 25.0 ºC 30.0 ºC
1 12120 978000 101700 111310 131100
0.1 10455 11163 11644 12852 15353
0.01 1141.4 1220.0 1273.7 1408.3 1687.6
0.001 118.5 126.7 132.2 146.6 176.5
Press ENTER/PRINT (1.4), to save the value; after a few seconds "CAL" will be displa-
yed.
Press MODE/MEAS (1.3) to return to the measuring mode.
2. Calibration of the TDS conversion factor
Select the Standard solution according to the character of the solution to be measured
and the measuring range.
Relationship between conductivity and TDS of the standard solution
TDS standard value
Conductivity ( S/cm) KCl (mg/L) Conductivity 442* (mg/L)
( S/cm)
23 11.6 10.7 14.74
84 40.38 38.04 50.5
447 225.6 215.5 300
1413 744.7 702.1 1000
1500 757.1 737.1 1050
2070 1045 1041 1500
2764 1382 1414.8 2062.7
8974 5101 4487 7608
12880 7447 7230 11367
15000 8759 8532 13455
80000 52168 48384 79688
*442: 40% Na2SO4, 40% NaHCO3, 20% NaCl
All the values shown in the chart are at 25 ºC
μ
μ







ENGLISH CASTELLANO
Conductivity cell 0.01 0.1 1.0 10.0
constant (cm-1)
Approx. concentration of 0.001 0.001 0.01 or 0.1 0.1 or 1
KCl solution (mol/L)
Page 26 Instruction manual 50910050 Version 1 June-07
Calibration
Calibration of the conductivity cell
Each conductivity cell presents a specific constant value; if user thinks that the value
indicated by the factory is not correct, proceed as follows:
Select the right standard solution depending on the constant value of the cell:

KCl standard solution to be used depending on the cell constant value
Chart for preparation of the KCl standard solutions.
Concentration (mol/L) KCL concentration (g/L) at 20ºC
1 74.2650
0.1 7.4365
0.01 0.7440
0.001 Dissolve 100 mL of the 0.01 mol/L solution in 1 L
Connect the conductivity cell to the equipment and disconnect the temperature probe;
this way, the conductivity value displayed will be the original value without temperature
compensation.
Turn the conductivity meter by pressing ON/OFF (1.2)
Clean the conductivity cell with distilled water.
Submerge the conductivity cell in the standard solution. Control the temperature of the
standard solution to be (25.0±0.1) ºC, (20.0±0.1) ºC, (18.0±0.1) ºC or (15.0±0.1) ºC.
Select the level of the constant value (0.01, 0.1, 1.0, 5.0 or 10.0) (see Parameter adjus-
tment; conductivity cell constant adjustment) and press ENTER/PRINT (1.4).
Press MODE/MEAS (1.3) to return to the measuring mode.
Press again MODE/MEAS (1.3)
With /C/T/S (1.5) or /SAVE (1.6) select "CAL" on display.
Press ENTER/PRINT (1.4) to enter the calibration mode.
When the reading on display is stable, press ENTER/PRINT (1.4). "CA-M" will be dis-
played.
With /C/T/S (1.5) (increase) or /SAVE (1.6) (decrease) introduce the exact value of
conductivity according to the following chart:










S
S
S
S

Exact value of conductivity regarding the approximate concentration of the KCl standard solu-
tion.
Revisión 1, Junio-07 Manual de instrucciones 50910050 Pág. 7
Rango de conductividad
( S/cm)
Rango de resistividad
( cm)
Constante recomendada
de la célula de conductivi-
dad (cm-1)
μ
0.01, 0.1
0.1, 1.0
1.0
1.0, 10
10
ΩΩ
B) Selección de la constante según el rango de TDS
Rango de Conductividad
( S/cm)
Constante recomendada
de la célula de conductivi-
dad (cm-1)
0-1000
1000-10000
1000-19990
0-2000
2000-20000
2000-40000
1.0
1.0, 10
10
μ
C) Para determinaciones de salinidad se recomienda utilizar siempre una célula de
constante 10 cm-1.
3. Conexión de la sonda de temperatura
4. El equipo se suministra con una sonda de temperatura (1.8), conecte dicha sonda en la clavi-
ja correspondiente (2.2) de la parte trasera del equipo.
Encienda el conductímetro presionando el botón ON/OFF (1.2). Al cabo de unos segun-
dos el equipo estará listo para operar.
Selección del modo de trabajo
El conductímetro Nahita 910/5 le permite la determinación de:
a. Conductividad ( S/cm)
b. TDS, sólidos totales disueltos (mg/L)
c. Salinidad (%)
Mediante el botón /C/T/S (1.5) seleccione el modo en el que desea trabajar:
- Cuando seleccione el modo Conductividad en pantalla visualizará "CON"

S
120.1
CON
uS / cm
16.8 ºC
0.05-2
2-200
200-2000
2000-20000
2000-2x10 5
20x106-500x103
500x103-5x10³
5x10³-500
500-50
500-5
Rango de TDS (mg/L)
μ
Press ENTER/PRINT (1.4) to save the value.
Press MODE/MEAS (1.3) to exit the constant adjustment mode and return to the mea-
suring mode.
Note: To cancel the constant adjustment process press MODE/MEAS (1.3)
- Cuando seleccione el modo Salinidad en pantalla visualizará "SALT"
4.50
SALT
%
25.0 ºC
Nota: para asegurar unos resultados precisos, es necesario antes de realizar las medi-
ciones, ajustar y establecer una serie de parámetros (ver Ajuste de parámetros).
Ajuste de parámetros
El conductímetro Nahita 910/5 permite ajustar diversos parámetros para adaptarse a
todo tipo de aplicaciones y asegurar unos resultados precisos:
Constante de la célula de conductividad (para determinaciones de conductividad, TDS
y salinidad)
Factor de conversión TDS (para determinaciones de TDS)
Coeficiente de temperatura (para determinaciones de conductividad y TDS)
1. Ajuste de la constante de la célula de conductividad
Cada célula de conductividad tiene su propio valor de constante; este valor deberá ser
introducido en el equipo cada vez que se cambie de célula. Para ello:
En cualquier modo de medida (Conductividad, TDS o Salinidad), presione
MODE/MEAS (1.3)
Con los botones /C/T/S (1.5) o /SAVE (1.6), seleccione en pantalla "CONT".
Presione ENTER/PRINT (1.4), de esta manera el equipo entra en el modo de ajuste de la
constante de la célula de conductividad.
Presione /C/T/S (1.5) para seleccionar el nivel en el que se encuentra el valor de la
constante de la célula que va a ser utilizada (0.01, 0.1, 1.0, 5.0 ó 10.0).
ENGLISHCASTELLANO
Pág. 8 Manual de instrucciones 50910050 Revisión 1 Junio-07
- Cuando seleccione el modo TDS en pantalla visualizará "TDS"
98.5
TDS
mg / L
22.5 ºC



S
S
S




Version 1 June-07 Instruction manual 50910050 Page 25


2. TDS conversion factor adjustment
Nahita conductivity meter 910/5 takes by default a value of 0.50 for the TDS conversion
factor. The user can adjust this value within a range from 0.40 to 1.00. For this purpose,
proceed as follows:
In the TDS measuring mode press MODE/MEAS (1.3).
With /C/T/S (1.5) or /SAVE (1.6) select "TCOE" on display.
Press ENTER/PRINT (1.4), so as the equipment enters the TDS conversion factor adjus-
tment mode.
Press /C/T/S (1.5) (increase) or /SAVE (1.6) (decrease) to adjust the desired exact
value of the TDS conversion factor.
Press ENTER/PRINT (1.4) to save the value.
Press MODE/MEAS (1.3) to exit the conversion factor adjustment mode and return to
the measuring mode.
Note: TDS conversion factor can only be adjusted from the TDS measuring mode.
3. Temperature coefficient adjustment
Conductivity determination depends on temperature. The temperature variations can
be compensated by introducing a compensation factor (temperature coefficient) that will
be taken into account by the equipment to calculate the conductivity at the reference tem-
perature.
By default, the equipment takes a value of 0.020 (2 %/ºC) for the temperature coefficient;
if this needs to be modified, proceed as follows:
In the Conductivity or TDS measuring mode press MODE/MEAS (1.3).
With /C/T/S (1.5) or /SAVE (1.6) select "COEF" on display.
Press ENTER/PRINT (1.4), so as the equipment enters the temperature coefficient adjus-
tment mode.
Press /C/T/S (1.5) (increase) or /SAVE (1.6) (decrease) to adjust the desired exact
value of the temperature coefficient.
Press ENTER/PRINT (1.4) to save the value.
Pres MODE/MEAS (1.3) to exit the temperature coefficient adjustment mode and return
to the measuring mode.
Note: Temperature coefficient can only be adjusted from the Conductivity and TDS
measuring mode. The temperature coefficient for salinity determinations is already fixed
in the equipment and can not be modified.












S
S
S
S
S
S
S
S
Presione ENTER/PRINT (1.4) para guardar el dato. En pantalla se visualizará automá-
ticamente "ADJS"
Presione /C/T/S (1.5) (incremento) o /SAVE (1.6) (disminución) para ajustar el
valor mostrado en pantalla al valor exacto de la constante de la célula (suministrado por
el fabricante).
Presione ENTER/PRINT (1.4) para guardar el dato.
Presione MODE/MEAS (1.3) para salir del modo de ajuste de la constante y volver al
modo de medida.
Nota: Si en el transcurso del ajuste del valor de la constante de la célula de conducti-
vidad quiere cancelar la función, presione MODE/MEAS (1.3)
2. Ajuste del factor de conversión TDS
El conductímetro Nahita 910/5, por defecto toma un valor de 0.50 para el factor de con-
versión TDS. El equipo permite ajustar este valor en un rango entre 0.40 y 1.00. Para ello,
proceda de la siguiente manera:
En el modo de medida TDS, presione MODE/MEAS (1.3).
Con los botones /C/T/S (1.5) o /SAVE (1.6), seleccione en pantalla "TCOE".
Presione ENTER/PRINT (1.4), de esta manera el equipo entra en el modo de ajuste del
factor de conversión TDS.
Presione /C/T/S (1.5) (incremento) o /SAVE (1.6) (disminución) para ajustar el valor
deseado para el factor de conversión TDS.
Presione ENTER/PRINT (1.4), para guardar el dato.
Presione MODE/MEAS (1.3) para salir del modo de ajuste del factor de conversión y
volver al modo de medida.
Nota: el factor de conversión TDS solamente puede ser ajustado desde el modo de medi-
da TDS.
3. Ajuste del coeficiente de temperatura
Las medidas de conductividad dependen de la temperatura. Las variaciones de tempe-
ratura pueden ser compensadas mediante la introducción de un factor de compensación
(coeficiente de temperatura) que será tomado en cuenta por el equipo para calcular el
valor de conductividad a la temperatura de referencia.
Por defecto, el equipo toma un valor de 0.020 (2 %/ºC) para el coeficiente de temperatu-
ra, pero si éste necesita ser modificado, proceda de la siguiente manera:
En el modo de medida Conductividad o TDS, presione MODE/MEAS (1.3).
Con los botones /C/T/S (1.5) o /SAVE (1.6), seleccione en pantalla "COEF".
Presione ENTER/PRINT (1.4), de esta manera el equipo entra en el modo de ajuste del
coeficiente de temperatura.
Presione /C/T/S (1.5) (incremento) o /SAVE (1.6) (disminución) para ajustar el valor
deseado para el coeficiente de temperatura.
Presione ENTER/PRINT (1.4), para guardar el dato.
Note: to assure precise results, it is necessary to adjust and establish some parameters
(see Parameter adjustment) before performing any reading.
Parameter adjustment
Nahita conductivity meter 910/5 allows the adjustment of different parameters to adapt
to any kind of application and assure precise results:
Conductivity cell constant (for conductivity, TDS and salinity determinations)
TDS conversion factor (for TDS determinations)
Temperature coefficient (for conductivity and TDS determinations)
1. Cell conductivity constant adjustment
Each conductivity cell presents its own constant value; this value must be introduced in
the equipment every time the conductivity cell is changed:
In any measuring mode (Conductivity, TDS or Salinity), press MODE/MEAS (1.3)
With /C/T/S (1.5) or /SAVE (1.6) select "CONT" on display.
Press ENTER/PRINT (1.4), so as the equipment enters the cell constant adjustment
mode.
Press /C/T/S (1.5) to select the level that corresponds to the constant value of the cell
to be used (0.01, 0.1, 1.0, 5.0 ó 10.0).
Press ENTER/PRINT (1.4) to save the selected level. "ADJS" will be automatically dis-
played.
Press /C/T/S (1.5) (increase) or /SAVE (1.6) (decrease) to adjust the displayed value
to the exact value of the cell constant (supplied by the manufacturer).
ENGLISH CASTELLANO
Page 24 Instruction manual 50910050 Version 1 June-07
- When selecting TDS mode, "TDS" will be displayed
98.5
TDS
mg / L
22.5 ºC
- When selecting Salinity mode, "SALT" will be displayed
4.50
SALT
%
25.0 ºC









S
S
S
S
S
Revisión 1, Junio-07 Manual de instrucciones 50910050 Pág. 9

S
S



S
S
S
S
S
S
S
S











Conecte la célula de conductividad al equipo y desconecte la sonda de temperatura; de
este modo, el valor de conductividad mostrado en pantalla será el valor medido original,
sin ser compensado a la temperatura de referencia.
Encienda el conductímetro presionando ON/OFF (1.2)
Limpie la célula de conductividad con agua destilada.
Sumerja la célula de conductividad en la solución estándar. Controle que la temperatu-
ra de dicha solución sea (25.0±0.1) ºC, (20.0±0.1) ºC, (18.0±0.1) ºC ó (15.0±0.1) ºC.
Seleccione el nivel en el que se encuentra el valor de la constante (0.01, 0.1, 1.0, 5.0 ó 10.0)
(vea Ajuste de parámetros; ajuste de la constante de la célula de conductividad) y pulse
ENTER/PRINT (1.4).
Presione MODE/MEAS (1.3) para volver al modo de medida.
Presione de nuevo MODE/MEAS (1.3)
Con los botones /C/T/S (1.5) o /SAVE (1.6), seleccione en pantalla "CAL".
Presione ENTER/PRINT (1.4) para entrar en el modo calibración.
ENGLISHCASTELLANO
Pág. 10 Manual de instrucciones 50910050 Revisión 1 Junio-07
Calibración
1. Calibración de la célula de conductividad
Toda célula de conductividad tiene una constante determinada, si por cualquier causa
cree que el valor de constante indicado por el fabricante no es el correcto proceda de la
siguiente manera:
Dependiendo de la constante de la célula, seleccione la solución estándar correcta de
acuerdo con la siguiente tabla:

Concentración de KCl de la solución estándar a utilizar dependiendo del valor de la constante de
la célula de conductividad
Constante de la célula 0.01 0.1 1.0 10.0
de conductividad (cm-1)
Concentración de KCl (mol/L) aprox. 0.001 0.001 0.01 ó 0.1 0.1 ó 1
Tabla para la preparación de las distintas soluciones estándar del KCl
S
S









Concentración aproximada (mol/L) Concentración KCL (g/L) a 20ºC
1 74.2650
0.1 7.4365
0.01 0.7440
0.001 Disolver 100 mL de solución 0.01 mol/L en 1 L
Presione MODE/MEAS (1.3) para salir del modo de ajuste del coeficiente de tempera-
tura y volver al modo de medida.
Nota: el coeficiente de temperatura solamente puede ser ajustado desde el modo de
medida Conductividad y TDS. El valor del coeficiente de temperatura para las medicio-
nes de salinidad ya ha sido fijado en el equipo y no puede ser modificado.
Version 1 June-07 Instruction manual 50910050 Page 23
Conductivity range
( S/cm)
Resistivity range
( cm)
Recommended constant
value of the conductivity
cell (cm-1)
μ
0.05-2
2-200
200-2000
2000-20000
2000-2x10 5
20x106-500x103
500x103-5x10³
5x10³-500
500-50
500-5
0.01, 0.1
0.1, 1.0
1.0
1.0, 10
10
ΩΩ
B) Selection of the conductivity cell according to the TDS working range
TDS range (mg/L) Conductivity range
( S/cm)
Recommended constant value
of the conductivity cell (cm-1)
0-1000
1000-10000
1000-19990
0-2000
2000-20000
2000-40000
1.0
1.0, 10
10
μ
C) For salinity determinations it is recommended to use always a conductivity cell with
a constant value of 10 cm-1.
3. Connection of the temperature probe
4. The equipment is supplied with a temperature probe (1.8), connect this probe to the corres-
ponding connector (2.2) of the equipment.
Turn the conductivity meter on by pressing ON/OFF (1.2). After a few seconds the ins-
trument will be ready to operate.
Selection of the measuring mode
Nahita conductivity meter 910/5 can perform determinations of:
a. Conductivity ( S/cm)
b. TDS, total dissolved solids (mg/L)
c. Salinity (%)
By pressing /C/T/S (1.5) select the desired measuring mode:
- When selecting Conductivity mode, "CON" will be displayed
S
120.1
CON
uS / cm
16.8 ºC
μ