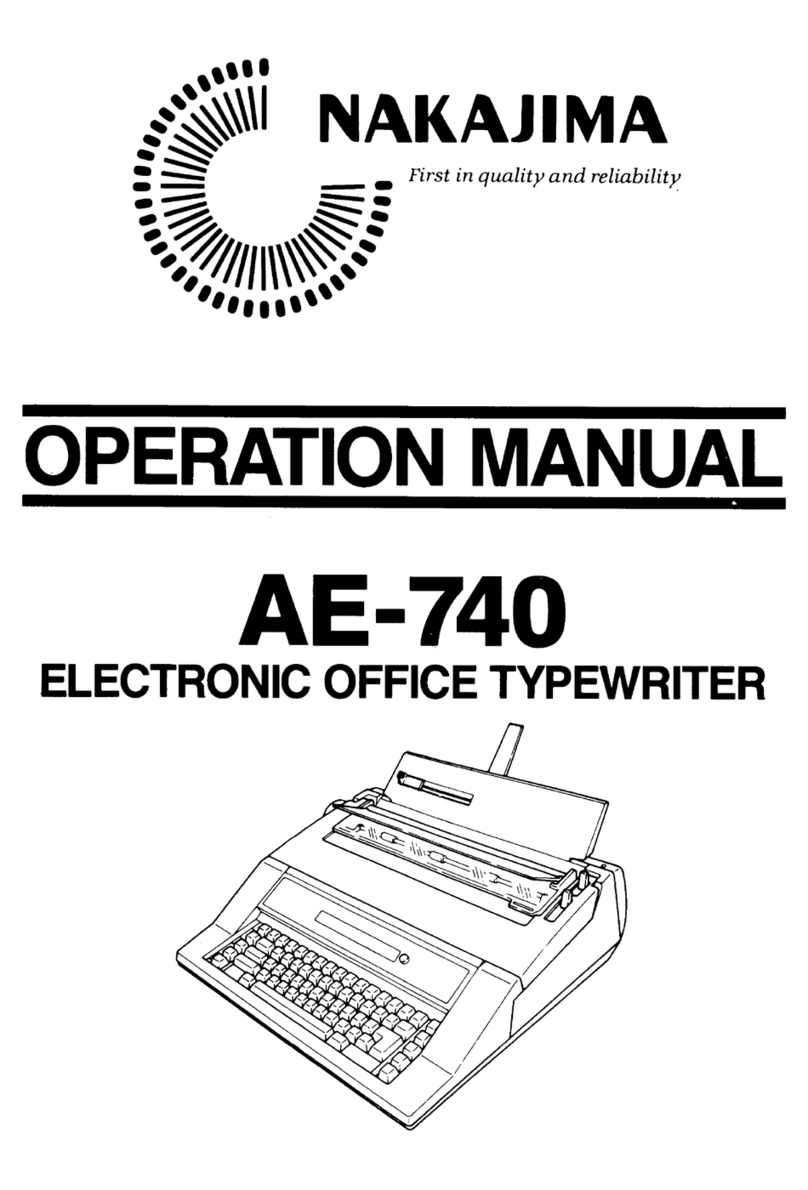
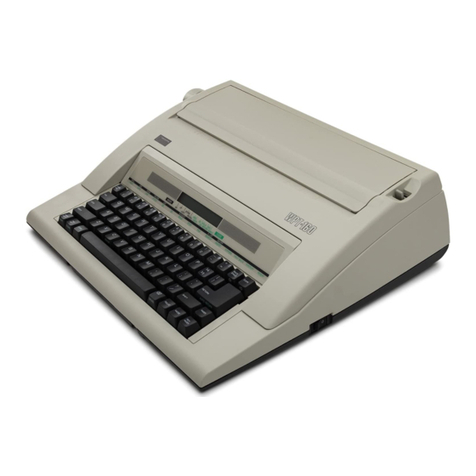
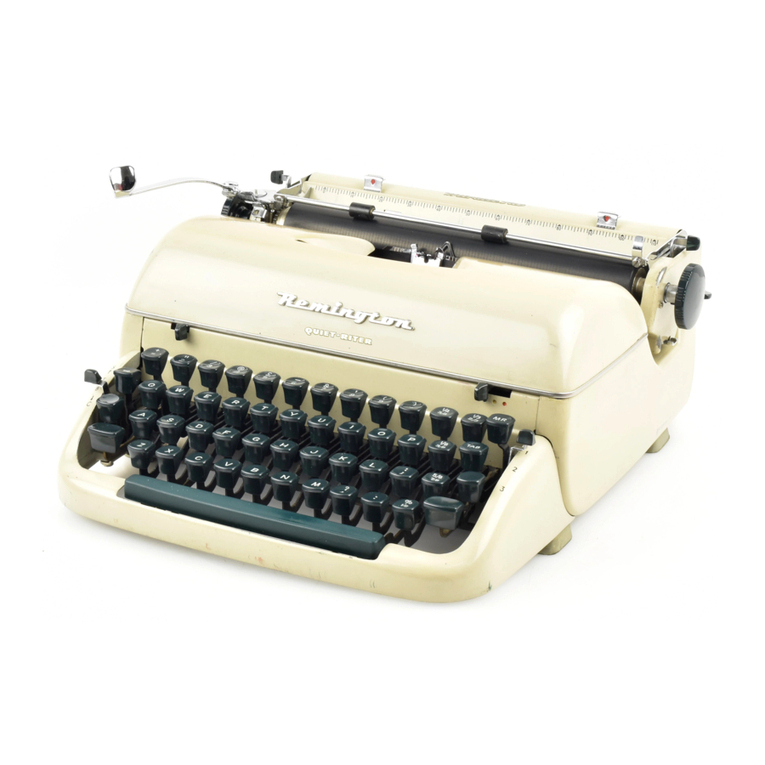
Nakajima AE-710 User manual

It
il
lll
Jlr-
-
rll I
INAKAJIMA
First in quality and relinbility
OPERATIONMANUAL
AE-710
ELECTRONIC
OFFICE
TYPEWRITER
N

FOR
USAONLY
NOTE: Thisequipment
hasbeen
testedandfound
tocomplywith thelimits for aClassB digitaldevice,
pursuant
toPartl5 of theFCCRules.Theselimitsaredesigned
toprovide
reasonableprotection
against
harmfulinterference
in aresidential
installation.
Thisequipment
generates,
uses
andcanradiate
radio
frequency
energyand,if notinstalled
andusedinaccordancewith theinstructions,
may
causeharmful
interference
toradio
communications.
However,
thereisnoguarantee
that
interference
will notoccurin
aparticular
installation.
If this
equipment
doescauseharmful
interference
toradio
ortelevision
reception,whichcan
bedetermined
by turning
theequipmentoff andon,the
userisencouraged
to try to
correcttheinterference
byoneor more
of thefollowlng measures:
- Reorient
or relocatethereceiving
antenna.
- Increase
theseparation
between
theequipmentandreceiver.
- Connecttheequipment
intoanoutletonacircuitdifferent
from that
towhichthereceiver
is
connected.
- Consult
thedealeroranexperienced
radio/TVtechnicianfor help.
FCC WARNING:
- Changes
or modifications not expresslyapproved
by theparty responsible
for compliarrce
could void
the user's authority to operate the equipment.
- Useashielded
interface
cable.

Yournewelectronictypewt'iterincreaies
yourtypingefficiencythroughuse
of themostadvanced
technology.Some
of themanyoutstandingfeaturesof yourtypewriterare:
. |5.0
inch
paper
capacity
. Easy-to-change100-characterdrop-in
printwheel
. l0 linecorrectionmemory
(700
characters
max.)
. Fiveformatmemory
. Pitchselector:
lO, 12,15andPS
(proportional
spacing)
. Linespaceselector:
l,l-l/2 and2
. Full electronic
tabulationfor upto 30
positions
. Paragraphindention
o Decimaltabulation
. Automaticcentering
. Automatic carrierretum
. Automaticunderlinins
. Boldtyping
' Caps
lock
o Micro up/micro down/micro backspace
. Framing
(line
drawing)
o Optional
spell
check
(dictionaries
for English,French,
andSpanish
areavailable;
Thismanual
describes
yourtypewritersfunctions,operatingcontrolsand
procedures,
andreplacement
of
its
accessories.
Thoroughstudyof instructions
will facilitateandmaximizetheettlcientuseof your
new
electronictypewriter.

TABLEOFCONTENTS
INTRODUCTION
RulesFor
SafeOpcration
Part
NamesAnd Functions I
a
KeyFunctions
GETTING STARTED
Unpacking 6
SettingUp... 6
TurningOnTypewriter.... l
Inserting/Ejecting
Paper tj
Typing
Controls . g
Margins .l0
Tabs. ..... ll
Corrections l2
TYPING FUNCTIONS
Paragraph
Indention 16
DecimalTabulation 16
Automatic
Centering 18
Automatic
CarrierReturn 19
RequiredHyphen
And Required
Space 19
Automatic
Underlining 20
KeyboardII (Special
Characters) 20
BoldTyping . .21
Capslock ........21
MicroUp/NlicroDown/-l\4icroBackSpace .........22
Framing(LineDrawing).... ........22
Format
(MarginAnd Tab)Memory . 24
HOW TO CHANGE ACCESSORIES
RibbonCassette .25
CorrectionTape ...2j
Printwheel ......28
SUPPLIES
.,,'. '29
MAINTENANCE
RemovingPlaten ......30
Cleaning ......31
Service .......3t

INTRODUCTION
Rules
For Safe
Operation
Makesure
you
areusing
the
proper
power
asstated
onthename
plateatthebackof the
typewriter
Yourtypewriter
isa
highlysophisticated
mechanism.
Neverattempttorepair
ityourself
lf repair
becomes
necessary,
takeit tothenearest
authorized
servicecenter.
Never
insertmetalobjects
suchasascrewdriver,
paper
clip,
nailfile,etc.,
inside
the
typewriter.This
couldcause
damage
tothetypewriterand/orelectrical
shock.
Do notleave
yourtypewriterunattended
when
it isturnedon.Alwaysturnoff thetypewriter
whenyou
havefinished
typing.
Besuretoturn
off thetypewriter
whenremoving
platen.

Part
Names
AndFunctions
N
\ \,,
) \^\
\\----zl//'

1. PLATEN KNOB 12.POWER CORD
Used
tomanuallyro{ate
the
platen. 13.PLATEN (ROLLER)
Rolls
paper
inandout.
2. PAPER GUIDE
Providesconsistent
placement f4. PAPERBAIL & BAIL ROLLERS
ofpaper. Holdspaperagainsttheplaten.
3. PAPERSUPPORTPANEL 15.RIBBON GUIDE
Supportsthe
paper Guides
ribbon.
4. GLARE SHIELD 16.PRINT POINT INDICATOR
Blocksoutdirect
light
from
thetyping
line. Indicates
prrntingposition.
5. MARGIN SCALE 17.PRINTWHEEL
Provides
numericalindicationofprinting
posrtron. 18.LINE LOCATOR (red
line)
Denotes
thebottomofthetynineIine
6. PAGE END INDICATOR
Supptrrtsthe
paper.
Scaleindicatesremaining 19.CARD HOLDER
paper
lengthininches
(for Il-inch-longpaper Holds
paper
againstthe
platen.
only). 20.GUIDE ROLLER
7. NOISE COVER Guidescorrectiontape.
Buffersthesoundof typing. 21.PRINTWHEEL SET/RELEASE LEVER
8. PAPERRELEASE LEVER Usedforreplacing
printuheel
Releases
paper
foralignment. 22.CORRECTION TAPE
9. PAPERBAILLEVER
Liftsthe
paper
bail Pulltoinsert
paper 23.RIBBON CASSETTE
automatically. 24.RIBBON TAKEUP KNOB
10.TOP COVER Usedtotakeup
anyslack
innbbon.
Opentoreplaceribbon.correction
tapeor
printwheel. 25.PRINT HEAD
Strikesagainst
printu
heel.
II. POWER
SWITCH
KeyFunctions
Keyboard with letter-typefunction keys
t ao
.,9
' [-,ry]fT--A[_l n i--lf-] f-_ln I
[ 'n
I L]J L_J LJ LJ t ll. lL--,l r-
12913
Keyboard
withsymbol-type
function
keys

I. MARGIN RELEASE
KEY
Releases
the
margins
totype
beyond
them
orset
new
ones.
2. LEFTMARGIN KEY
Sets
the
left
margin.
3. RIGHT MARGIN KEY
Sets
the
right
margin.
4. TABSETKEY
Setstabs.
5. TABCLEARKEY
Clears
tabs.
6. CODEKEY
Activates
special
functions
inconjunction
withother
keys.
7. TABKEY
Moves
thecanier
to
atab
Position
8. SHIFT
LOCKKEY
Locks
theShift
keyto
type
aseries
ofcapital
letters.
Thered
lamp
onthe
keylights
up
when
the
keyis
pressed.Release
shift
lock
by
pressing
either
Shift
key
9. SHIFTKEY
Enables
the
typing
ofupper
case
letters
and
symbols
whichappear
onthe
upper
leftcorner
ofeach
key.
IO.REPEAT
KEY
Repeats
thelast
character
typed
or
thelast
ke1
function
entered.
II. SPACE
BAR
Moves
thecarrier
ahead
onespace
to
theright.
Hold
down
the
Space
bar
forcontinuous
movement
tothe
right.
12.HALF SPACE KEY
Movesthe
carrier
one
halfspace
to
the
right.
13.RETURN KEY
Returns
thecarrier
totheleft margin
onthe
next
line.
14.DECIMAL TAB KEY
Automatically
aligns
all nr.rmbers
typed
atthe
tab
position
by
their
decimal
points.
r5. REVERSE INDEX KEY
Retracts
paperdownward
in 1/2
line
(
l/12
inch)
increments
withoutmoving
thecarrier.
Holdthe
keydowntoretract
the
papercontinuously.
16.INDEX
KEY
Advances
paper
upward
in l/2
line
(
1/12inch)
increments
without
moving
thecarrier.
Holdthe
keydown
to
advance
the
paper
continuously.
17.RELOCATION KEY
Mo,''es
thecarrier
one
space
totheright
ofthe
lastcharacter
typed
onthe
page
I8. EXPRESS
(BACKSPACE)KET'
Returns
thecanier
tothe
leftmargin
without
a
line
feed
19.
BACKSPACE KEY
Moves
thecarrier
one
space
tothe
left.Hold
downthe
keyforcontinuous
movement
tothe
left
20.CORRECTION KEY
Corrects
characters.
Holddownthe
key
tbr repeatconection.

GETTING
STARTEI)
Unpacking
SettingUp
Beforeusing
your
typewriter,be
suretoremovethe
packing
materialsasdescribed
inthe
unpackinginstructions.
l) Insertthe
paper
support
panel.
2) Raisethe
page
endindicatorlocatedonthe
backof the
paper
support
panel.
Moveit to thedesired
position
bytilting and
pullingit in thedesireddirectron.
Thescaleonthe
page
end
indicatorindicates
theamountof
spaceremainingin inchesbetween
yourcurrent
position
andthe
endof thepaper.
3) Position
the
glare
shieldtoprevent
directlight from obscuring
thetypingline.

" TurningOnTypewriter
I)
Plugtheappropriateendof the
powercordintothetypewriter
2) Plugtheotherendof the
power
cordintoanoutletof the
proper
voltage/frequency
asspecifiedonthe
name
plate
atthebackof
thetvpewriter.
3) Turn
on
the
power
s\.r'itchlocatedattheleftrearofthe
typewnter
When
the
pou'er
istumedon.abeepsoundsandthe
pou'er-on
lamponthe
keyboard
lightsup.Thecarrierstopsatthe
left
margln.
Besuretobeginoperatir)naftertheinitializesequenceis
comoleted
Note:
Makesurethe
printuheel.
ribbon
cassette
andcorrection
tapeare
properly
installed.

Inserting/Ejecting
Paper
@.8
Inserting paper
I
) Adjustthe
paper
guide
onthe
paper
support
paneltothedesired
position.
The
paperguide
ensuresconsistent
placement
ofyour
paper.
2) Inserta
sheetof paper
behind
the
platen
aligned
withthe
paper
euide,
3) Pullthe
paper
baillevertoward
youasfaras
it goes.
Thepaper
isautomatically
insertedandstopsataposition
one
inchfrom
thetopof the
page.
Note:
Pullingthe
paper
bailleverhalfwayraises
the
paper
bailaway
from the
platen.
4) To releaseandstraighten
the
paper,pull the
paper
releaselever
toward
you.
5) Returnthe
paper
release
leverand
paper
baillevertotheir
normal
position.
Ejecting
paper
HolddowntheCodekeyand
press
the
"E"
keytoautomatically
eJect
paper.

TypingControls
Impression control
Thiscontrol
determinesthe
printing
impact
(how
hardthe
printwheelstrikesthe
paper).
Select
the
proper
impactdependingon
the
typeof printwheel,ribbon,
paper
orthe
numberof multiple
copies.
Thelargestdotrepresents
theheaviestimpact.
Line spaceselector
This
selectordeterminesthe
spacingofthelines
2: double
spacing
(3
lines
per
inch)
l-l12: one-and-a-half
spacing
(,1
lines
per
inchl
l: singlespacing
(6
lines
perinch)
Pitchselector
Thisselector
determinesthecharacter
pitch.
l0: PICA
pitch
(10
characters
perinch)
12 ELITE
pitch
(
tl characters
per
inch)
l5: MICRO
pitch
tl-5
characters
perincht
PS: ProportionalSpacing
spacing
varies
according
tothechirracter.
FS
pitch
isused
withthePS
orintrvheels
only.
Note:
Youcanchange
the
pitch
inthemiddle
oitheline,

Margins
Preset
margins
Whcnyou
I'irstturn
on
therypcw,rirer,
the
preset
margins
areused.
T'hcse
scttingsprovrde
you
wirh
rtundard
oneinch
left
andone
inch
right
rnargins
filr
cachpitch
selcction.
Lcl't
Margin Right
Margin
I0pitch
(PICA)
l2
prtch
(ELITE)
1.5
pitch
(MICRO)
PS
pitch
l0
t')
l5
t2
15
90
il3
90
ffil
ILenl
@
Thc
arca
ol'-5spaccs
imrncdiarcly
belirre
theright
margin
is
called
thch<lt
zone.
Asthc
carricr
movcs
toward
the
cndofaline
and
cnters
thehot
zone,
abecpsounds.
This
beepwarnsyou
that
the
right
margin
is
approaching.
Settinga newmargin
|
) Usethe
Space
bar
ortheBackspace
key
topo_sition
thecarrier
at
the
point
where
you
want
toset
anewmargin.
Toset
amargin
beyond
either
ofthecurrent
margins,
move
the
carrier
tothe
current
margin,press
the
Marginrelease
key,
then
continue
moving
thecarrier
to
thedesiredposition.
2) Press
theLeft margin
keytosetthe
leftmargln
or
Press
theRight
margin
keytoset
therightmargrn.
A beepsounds
to
signal
that
anew
margin
has
beenset.When
you
setnewmargins,
current
margins
areautomatically
cleared.
Note:
You
cannot
setleft
andright
margins
that
areless
than
oneinch
apan.
Typing beyond
themargins
Totypebeyond
the
right
margin,press
the
Margin
release
keywhen
thecarrier
stops
atthe
right
margin,
and
continue
typing.
To type
beyond
theleft
margin,press
rheMargin
release
key
atthe
left
margin.
Then
press
theBackspace
key
tomove
thecarrier
tothe
position
where
you
want
tostart
typing.
Margin back-up
The
current
margin
settings
are
maintained
inmemory
by
the
back-up
battery
evenwhen
you
turn
off thetypewriter.
you can
use
thesame
marginswhen
you
turn
onthe
typewriter
next
tirne.
@ (@)
t0

Tabs
@
(tr)
@
(tr)
@
(tr)
@(E)
e(E)
Setting
a tab
I
) Usethe
Spacebarorthe
Backspace
key
to
position
thecanier
at
the
pointwhere
youwant
toseta
tab.
2) Pressthe
Tabsetkey.A beep
soundstosignalthatthetabhas
been
set.A maximumof 30tab
stopscanbe
set.
Clearing a tab
l) Position
thecarrieratthetab
youwant
toclear.
2) PresstheTabclear
key.A beep
soundstosignalthat
thetabhas
beencleared.
Clearing all tabs
I) PresstheTabclearkeyatany
position.
2) PresstheRepeat
key.Two beeps
soundtosignalthatall
tabs
havebeencleared.
Usinga tab
I) PresstheTabkey Thecarriermoves
tothefirsttabsetting
tothe
rightofyour
current
position.
2) Typethetext.
Tabback-up
Thecurrenttab
settingsaremaintained
inmemorybytheback-up
batteryeven
when
youturn
off thetypewriter.
Youcan
usethose
tabs
when
you
turnonthetypewriter
nexttime.
ll

Corrections
position carrier
tsr/^6r.rr r ts6r
A
Yourtypewriter
has
an
automatic
correctionmemory.
It remembers
thelast700characterstyped
within
thelastl0lines and
will correct
anyorall of thosecharacters.Characterstypedoutsidethe
correction
memory
can
becorrected
easilyusingthemanual
correctlon.
Automatic charactercorrection (correctingcharacterswithin
thecorrection memory)
I) UsetheIndexkeyor Reverseindexkeytoposition
the
print
point
indicatorontheline
which
contains
the
error.Theline
locatof
(red
line)marked
onthecardholdershouldbelineup
belowthe
line.
Do notusethe
platen
knobfor alignment.
2) UsetheBackspaceKeyorSpacebartoposition
the
pnnt point
indicatoronthecharacter
tobecorrected.
3) Press
theCorrectionkey.Thecharacterunderthe
printpoint
indicator
position
iserased.
HolddowntheCorrectionkeytoerase
more
charactersto the
left.
4) Typethecorrectcharacter(s).
5) PresstheRelocationkey.The
printpointindicatorretumstoone
spacebeyondthelast
character
typed
onthe
page.
Note:
Whenyoucorrect
the
lastcharacter
youtyped,
youdonotneed
tobackspacetothecharacter.Simplytouch
the
Conectionkey
andthe
printpoint
indicatorwill automaticallybackspaceand
deletethecharacter.
t€l
t_J
h cr f \/^aL'ri r6i
AI
t
'J
best typewriter
@
(tr)
The best typewriterA
t2

position carrier
Tha ^^^d i\/n6L,ri rar
A
typewrr-cer
t\/6dr.rrr tor
@
(tr)
^.
A
-lno
lv. ::*',i':'':A
The best i,
! peHr r
i el
A
I
Automatic word correction (correctingwords within the
correction memory)
l) Usethe
lndexkey
orReverseindexkeyto
position
theprint
point
indicatoronthe
linewhich
contains
the
word
to
be
corrected.
Thelinelocator
(red
line)markedonthe
cardholder
shouldbelineupbelowthe
line.
Donotusethe
platen
knobfor
alignment.
2) UsetheBackspacekeyorSpacebarto
position
the
printpoint
indicatoronthelastletterofthe
word
tobecorrected.orthe
space
following
the
wordto
be
corrected
3) Holddownthe
Code
key
and
press
the
Correction
ke1'.An
intermittent
beep
sounds.
4) PresstheSoacebar The
word
iserased.
5)Tvoethecorrect
*ord.
6) PresstheRc'locationker'.
The
pnntpoint
indicatorreturnstoone
spacebe1'ondtheIast
characteron
thepage
Note:
You
can
c'rasea
part
ofthe
uord automaticall)
a)Positionthe
printpoint
indicatt'rronthelast
lettertobeerased
inthe
uord.
b)Hold
downtheCode
key
and
prc'ss
theCorrectionkey An
intemrittentbeepsounds.
c)Type
the
l'irstlctter
tobeerasc'dinthe
'*ord.
The
part
of the
word
specifiedis
erased
The best A
r3
wI
rter

position carrier
The bast Lypewriter
A
The best typewriter
A
tr
The b^st typewriter
Manual correction(correctingcharacters
outside
thecorrection
memory)
I) Use
theIndexkeyor Reverse
index
keytoposition
the
print
point
indicator
onthe
line
which
contains
theerror.
The
line
locator
(red
line)marked
onthe
cardholder
should
belineup
below
theline.
Do notusetheplaten
knobfor alignment.
2) UsetheBackspace
key
or Space
bartoposition
the
printpoint
indicator
onthecharacter
tobecorrected.
Note:
Use
themicroup/micro
down/micro
back
spacefor accurate
alignment.
See
"Micro Up/lr4icro
Down/MicroSpace"in the
Typing
Functions"
chapter.
3) HolddowntheCode
keyandpress
theCorrection
key.
4) Press
thecharacter
to beerased.
Thecharacter
iserased
andthe
printpointindicator
remains
atthat
position.
5) Typetheconect
character(s).
t4

TYPINGFUNCTIONS
Theletter
below
shows
yousomeof thesample
usageol'thetypingfunctions
onyourtypewriter.
"Too1s for Everyone"
ConsoLrdated Too.l Co., Irrr
138 Elm Boulev.lrd
Chicago, Illrnois 6A()90
Everyday Hardware, Inc.
10301 Main Street
PoYi l^nd {)rpn^n qH645
Dear Sir;
'Fh:nk \/^rr rrerrr mrrnh t ^r \/^rrr
innrrirrrcc ts^ :n\/ dorro,nnmontc in
lur)e )
, 199-l
letter of May 2'J and fc:r'yottr
our product. line tor next yeclr
As a favored customer we drc dr ptesenL otfer.ng you a l0%
discount on all ploducts ordered. l^Jp
cer'd'n-y unoorstdnd your
posiLion and we realize Lhar recen'Iy the mdrkat ror o*r prodLcts
has been somewhat slow. Therefore to thank you for your continued
patronage, we have decided that we can offer an additional 5%
d-iscount We hope thaL this will he.p fhe siruot'on
We dre noL sLanding sti1l buf .onfinudlly dLLempling to improve
our llne and to meet the changing needs of the narket- We are
plannrng to inLroduce severd- new sets wjr h oi Ilerpn- combinations
of tools aimed aL satisfying the needs of the increasing number of
people just starLing ro become rnvolved in home irp'ovcrento.
We feel that this will be a substantial market in years to come.
f---tE;if ''-O';d
The fol 1
ow i ng pdssage
the matter. from ToolE Todav typifies our feelings on
"The market will continually grow as lhe expense of hiring ou'
home improvements increases. Consumers will be forced to do
wharever ,s necessary and this tdct offers d grdnd opportunity
to all those involved in this area!"
Dlarqe look under the fol lowing areas in the CompanyProspeclus
IWord l. -:*-
L-,.. /
inserted
which
describes
our goals lol rhe coming
yedrs:
I underuntnqF-l
4T ,
Sect j
on Ti tle
MEETTNG THE NEW }4ARKETS
OUR ANSWER
WHAT WE CAN DO TOGETHER
Thank vor :o:in for
f nr rrnrrr ran l rr
re
31 - 46
93 102
249 - 234
arr]- son
n^^l ^!
ASS I S LdIIL 5d]CS I{dIIdcICT
of o rr nrodrre f s Wp wa
j t
qi n.aral v V^,,rc
2.32
11.6
18.L4
l5

Paragraph
Indention
I-r'rpENT-l
@
(tr)
I
@
typenumbers
preceding
decimal
point
@.@
Decimal
Tabulation
-l-his
function
crcatcs
atcmporary
left
margin
toindent
several
lines
such
asa
paragraph
l) Position
thccarricr
atthc
point
wherc
vclu
want
tosetthe
paragraph
indcntion.
2,)Hold
downthc
Codckey
and
press
theINDENT
kcy
(Left
rnargin
kcy.lA bccpsounds
and
thccurrentposition
becomes
thc
tcrnprlrary
lcl'tmargin
3.tTypc
thctcxttobeindentcd.
4; Tocanccl
theparagraph
indcnrion,
hold
downthe
Codekey
and
prcss
thcLcli margin
key
atanytinte.Two beepssound.
Thisfunction
alignsnumbers
bytheir
decimalpoint
atatab
position.
Ithelps
you
totype
statistical
texteasily.
l) Set
tab(s)
atthedecimalposition
for
each
column.
2) Press
theReturn
keyor Express
key.
The
carrierreturns
tothe
leftmargin.
3) Press
theDecimal
tab
key.The
carrier
moves
tothefirst
tab
posrtron.
4) Type
thenumberspreceding
the
decimal
point The
carrier
moves
one
spaceto
theleftfor
each
number
typed.
(Nothing
rs
printed
atthis
time.)
If youmake
amistake,press
the
Correction
keytodelete
all text
(numbers)
typed.The
carrier
returns
tothetab
position.
Then
retype
thenumber.
l6
Table of contents
Other Nakajima Typewriter manuals