TABLEOFCONTENTS
INTRODUCTION
RulesForSafeOperation
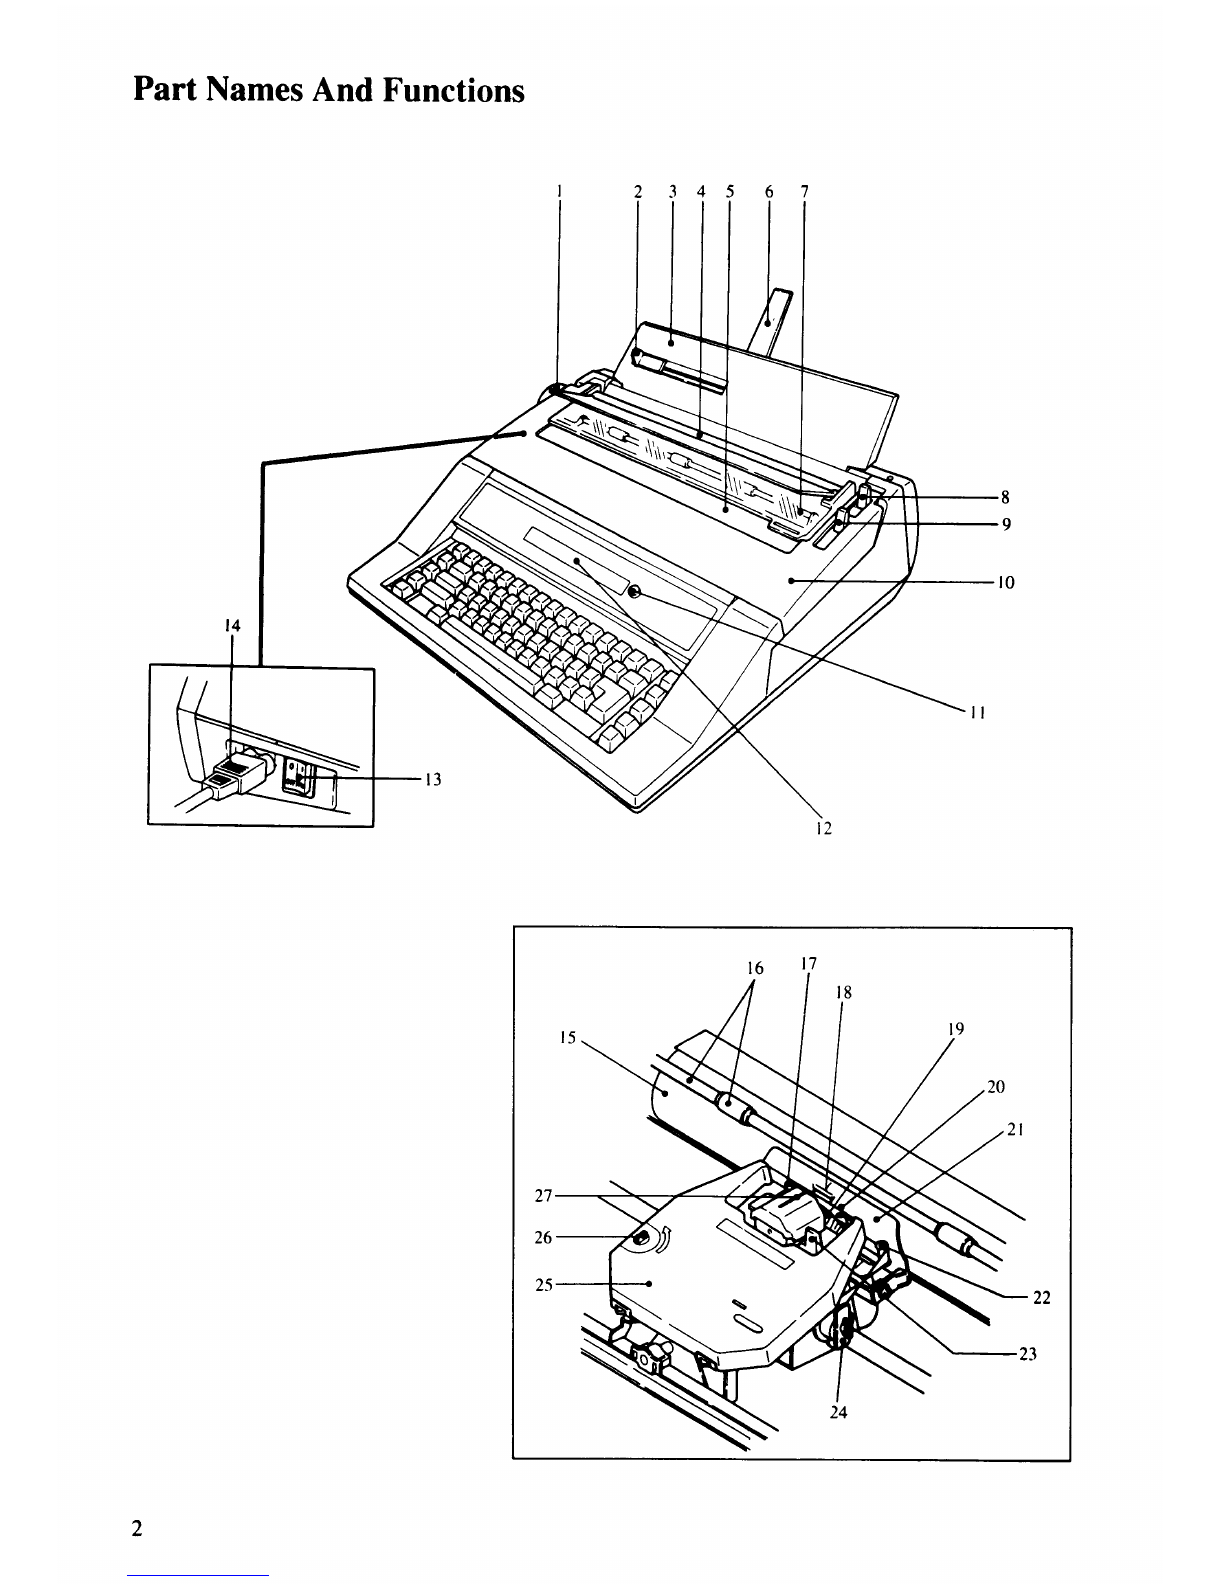
PartNames
AndFunctions
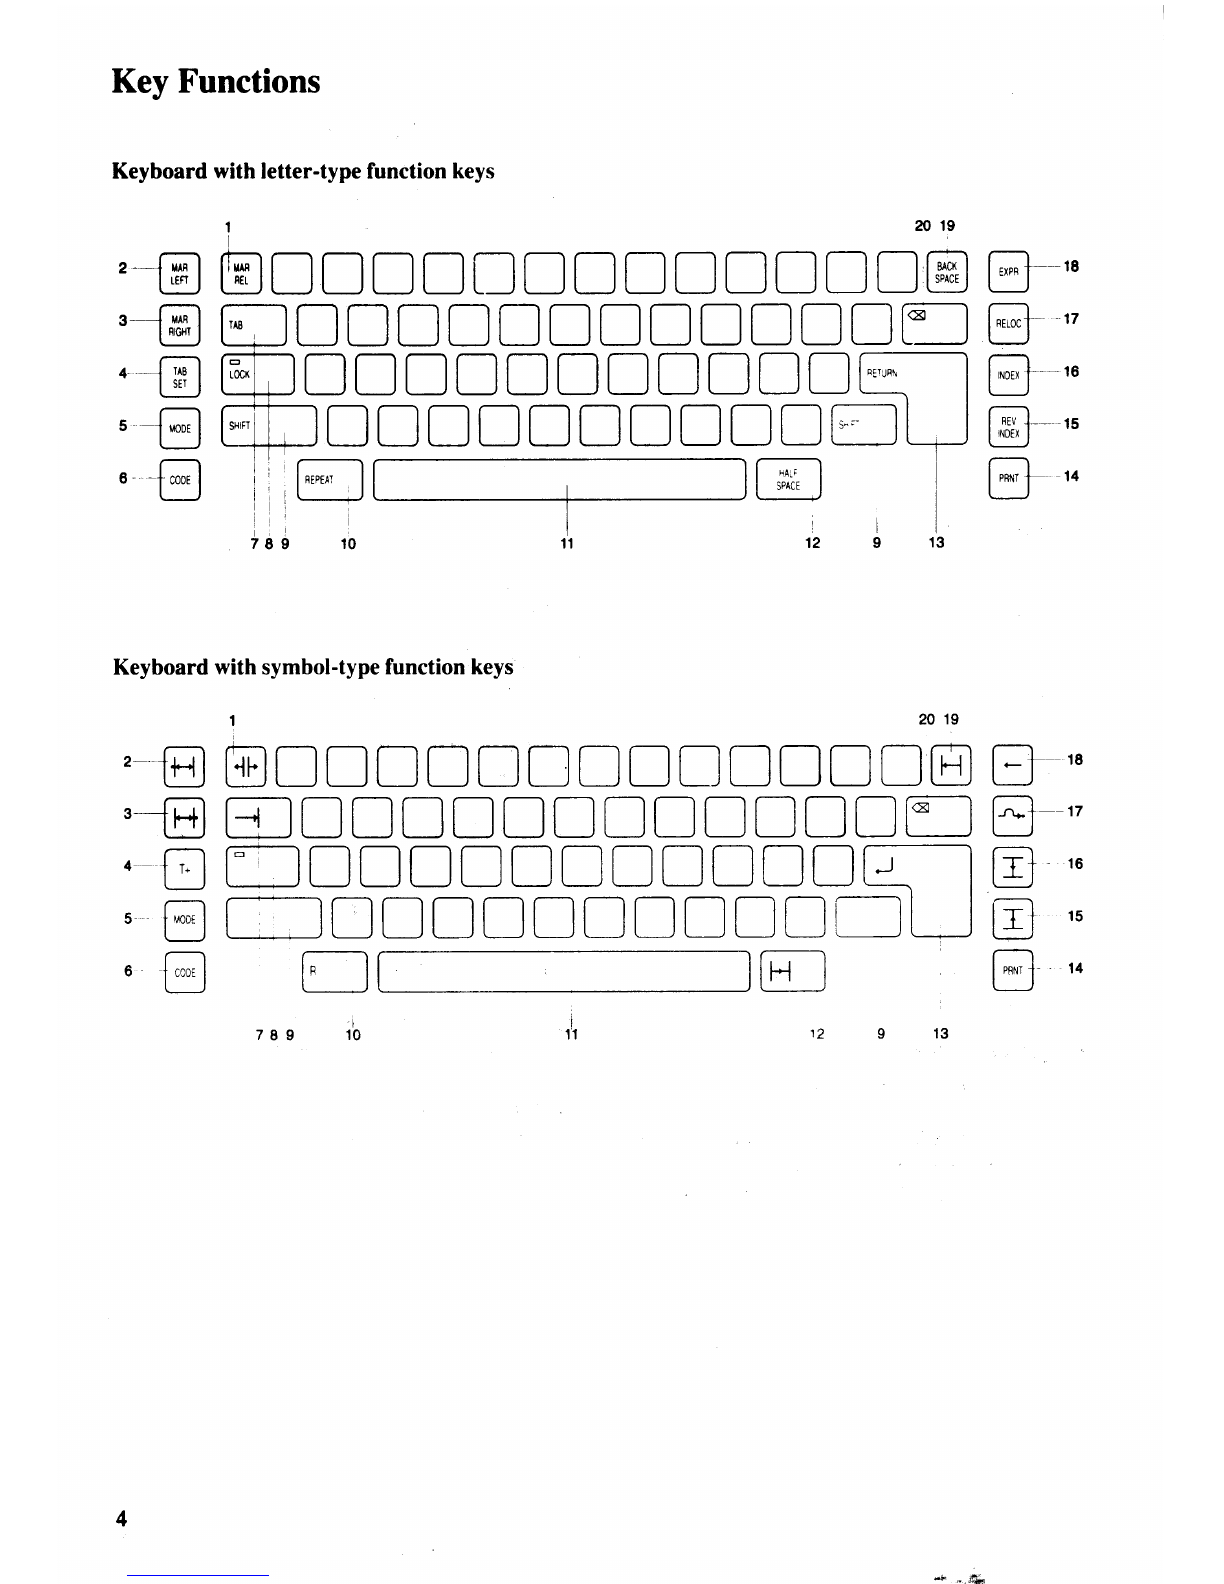
KeyFunctions
GETTING
STARTED
Unpacking
SettingUp .6
rurningonryp.*;i,;;
:::.::.... .......7
InsertinglEjectingPaper ......8
SettingtheTopof Form
(Amount
of PapbrInsert) . . .. .9
TypingControls ......10
TypingModes(NP/LPlJUST/STORE) ...11
Margins ...13
Tabs. .....14
ConectionsonPaper .......16
Correctionsonthe
Display ...19
TYPING FUNCTIONS
Paragraphlndentation... ....22
AutomaticCentering .......23
RightMarginFlush ....26
AutomaticReturn .....27
Required
Hyphen
andRequired
Space . ..28
SyllableHlphen ......28
DecimalTabulation ...29
CenterTabulation .....30
FlushRightTabulation ......31
GroupTabulation .....32
Columnlayout .......34
AutomaticUnderlining ......37
Keyboard
II (Special
Characters) ...38
BoldTyping ....38
Capslock ......39
Overlay . . .40
Superscript/Subscript
... ....41
Micro Up/tlicro Down/Jv1icroBackSpace . . . . .42
Framing(LineDrawing) .....43
MEMORY FUNCTIONS
CreatingaTextFile. ...45
ModifyingaTextFile. ......51
CreatingaPhraseFile. ......54
ModifyingaPhraseFile .....57
InsertingaPhraseFilewithinaTextFile. ......58
Settingthe
PageLengthof a
TextFile . . . .59
StopCode ......60
SearchandReplace.. .......62
Block Operations
(Copy/Tvlove/Delete) . ..67
Printing
aTextFile .,..70