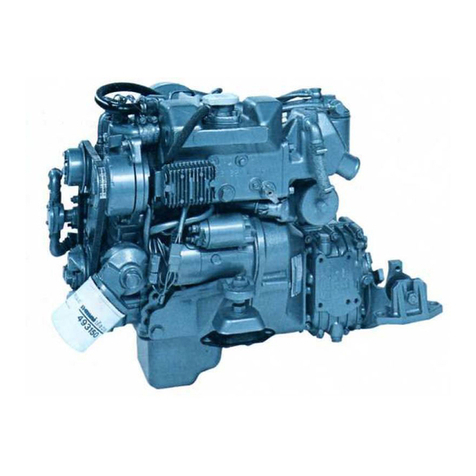
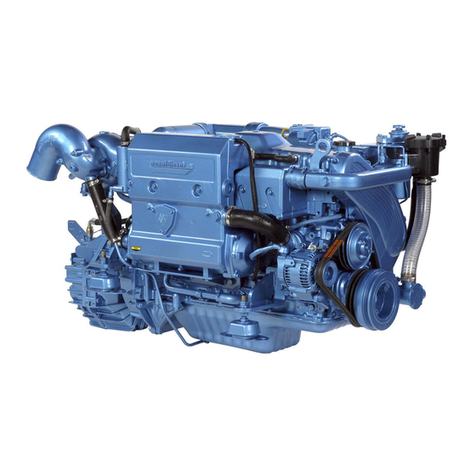
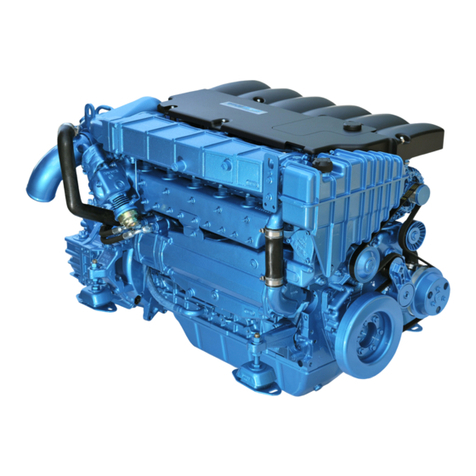
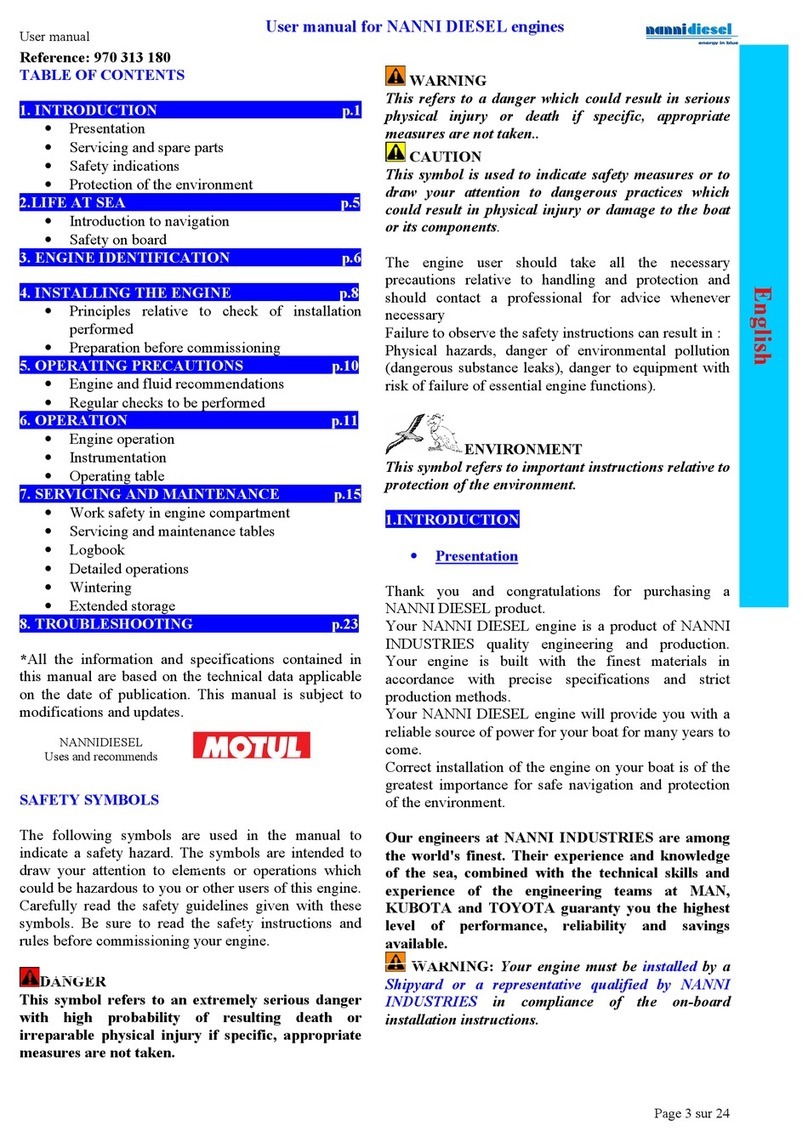
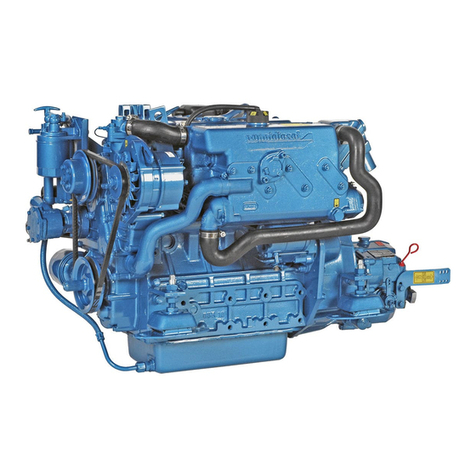
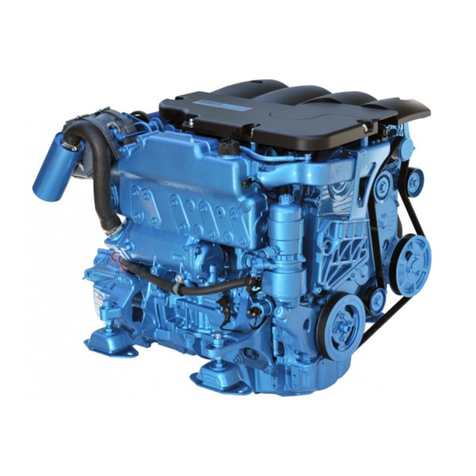
Nanni T4.155 seriers User manual

Notice de conduite
Instruction manual
Manuale d'istruzione
Betriebsanleitung
Instructieboek
Manuale de instrucciones
Instruksjonbok
Käyttöohje
P/N 970 312 832 2004-10


Instruction manual
CONTENTS
1. SAFETY INFORMATION
2. GENERAL INFORMATION
3. ENGINE IDENTIFICATION
4. PRE DELIVERY SERVICE
5. ENGINE OPERATION
• Starting the engine
• Stopping the engine
• Running in / Guarantee visits
• List of guarantee verifications operations
6. MAINTENANCE
• Engine oil extraction
• Oil filter replacement
• Fuel filter replacement
• Injector replacement
• Closed cooling component cleaning
• Sea water pump impeller replacement
• Electrical equipment components
• Valves adjustment
• Gearbox cables adjustment
• Maintenance schedule
• Recommended onboard repair kit
*All informations and specifications contained in this manual
are based on the latest product information available at time
of publication.
1 – SAFETY INFORMATION
These directions for use are provided to help you
to use your engine and its fittings. They include
important instructions, which should be observed
while operating the engine.
The operator must read these instructions.
They should be permanently kept in the place
where the engine is used.
SAFETY SYMBOLS
These symbols are used to indicate danger They
are intended to attract your attention to those ele-
ments or operations, which can endanger you or
other users of this engine. Read the instructions
preceded by the safety symbols attentively. lt is
essential for you to read the instructions and
safety regulations before starting the engine.
I DANGER Signifies that a very serious danger
exists which may result in the strong possibility of
death or serious injury if the specific suitable
safety measures are not observed.
I WARNING Signifies that a danger exists which
may cause injuries or death if specific suitable
safety measures are not observed.
I CAUTION Reminds you of safety measures or
directs your attention to dangerous practices,
which may cause injuries to persons or damage
the boat or its components.
The user should take all necessary precautions
regarding operations and protection and should
seek the advice of a professional.
Disregarding these safety instructions may lead
to:
Bodily harm, environmental pollution (leaks of
dangerous substances), dangers to property with
risks of failure of the essential functions of the
engine.
OBSERVING THE SAFETY RECOMMEN-
DATIONS
Follow the warning and caution labels affixed to
the engine
Disengage the ignition key and turn off the
battery main switch before performing any
work on the engine or its fittings.
Close the engine cover and replace the protec-
tion devices before starting the engine
Always keep the area surrounding the engine
clean and free of any debris
Place any flammable liquids outside and away
from the engine compartment
Never use the engine when under the influence
of alcohol or medication
WEAR PROTECTIVE CLOTHING
To avoid bodily injury, remain clear of rotating
parts and do not wear oversize garments close to
a running engine
Use safety equipment such as glasses, gloves,
etc. according to circumstances and needs
FUELS AND LUBRICANTS
Stop the engine before adding fuel or lubricant.
Do not smoke and do not approach with an open
flame whilst adding fuel. Wear gloves when
checking for any possible leaks. Hot lubricating
oil can burn you - let the engine cool before
checking the motor oil level, changing the motor
oil, or the oil filter cartridge. Always use the fuels
and lubricants recommended by NANNI DIESEL
ENGINE EXHAUST WARNING
Run the engine in a well-ventilated place, away
from persons and animals -the accumulation of
engine exhaust gas can be toxic.
PRESSURE
Do not open the engine coolant and motor oil
caps when the engine is warm. Release all pres-
sure in the line before loosening the caps.

ENGLISH
Do not check for possible pressure leaks with
bare hands - wear gloves - liquids ejected under
pressure may cause serious injuries - in case of
contact with a spurt of fluid, immediately consult
a physician.
BATTERY
A mixture of highly explosive, inflammable and
volatile gases forms when recharging the battery.
Never smoke near the battery or approach it with
an open flame or spark
Never short circuit the battery terminals
The battery electrolyte is highly corrosive – Wear
protective gloves and glasses.
ELECTRICAL WIRING
Turn off engine electrical switches and battery
main switch before any repair to the electrical
equipment.
Check the state of the cables and the electrical
wiring - a short circuit may cause fire.
DISPOSAL OF FLUIDS
The different fluids used for the operation of the
engine may be toxic and hazardous to your
health. Carefully read the instructions appearing
on the labels of these products.
Observe the environmental protection regulations
relative to the disposal of motor oil, fuel, engine
coolant fluid, filters and batteries.
2 - GENERAL INFORMATION
Your NANNI DIESEL engine is a product of the
research and quality manufacturing of NANNI
INDUSTRIES. It is constructed from the finest
materials available, according to finite specifica-
tions, and in accordance with very strict produc-
tion methods.
Your NANNI DIESEL engine is a dependable
and long-lasting power source for your boat.
Proper installation of the engine on board of your
boat is of the greatest importance for safe navi-
gation and also for respect of the environment.
The NANNI INDUSTRIES engineers are among
the worlds most highly skilled. Their experience,
their knowledge of the seas, their mastering of
techniques in association with the skills of the
engineers of KUBOTA, MAN and TOYOTA guar-
antee you the best available combination of per-
formance/reliability/economy.
I WARNING: a boat builder or an authorized
workshop, in conformity with the NANNI INDUS-
TRIES installation instructions, must perform the
installation of your engine.
These operating instructions contain information,
which are necessary for the proper operation of
the engine.
Present in over 50 countries through its network
of agents and authorised dealers, NANNI INDUS-
TRIES guarantees your safety worldwide.
Concerning parts, labour, or simply advice, eve-
rything has been considered to properly serve
your needs. Do not hesitate to contact your
authorised NANNI DIESEL dealer.
We wish you pleasant navigation.
Read this manual carefully before proceeding
with the use of the engine. Follow the safety
measures.
I WARNING: The proper operation of a marine
engine is linked to use suitable for the engine and
its gearbox’s specifications (type of boat, hours
and RPM of use).
3 - ENGINE IDENTIFICATION
On all correspondence, requests for information
and orders for parts, it is essential to indicate the
references appearing on the engine and revers-
ing gearbox identification plates.
IMPORTANT: Note the serial number and the
engine and transmission model designations.
Keep a copy of this information in a safe place.
IDENTIFICATION OF MAIN PARTS
1. Heat exchanger
2. Cooling liquid filler hole
3. Block drain plug
4. Fresh water pump
5. Sea water pump
6. Alternator
7. Flexible mount
8. Electrical connector
9. Starter
10.Engine oil filler hole
11.Engine oil extraction tube
12.Air filter
13.Exhaust elbow
14.Anode
15.Oil filter
16.Oil pressure sender
17.Reverse gear box
18.Injection pump
19.Fuel solenoid control
20.Throttle lever
21.Air cooler
22.Turbo
23.Heat exchanger drain plug
24.Turbo vent valve
25.Turbo drain valve
26.Air cooler condensation exit hole
27.Minus terminal attaching nut
28.Fuel oil cooler ( 4.390 only)
29.Engine fuel filter

4 - PRE DELIVERY SERVICE
Once the engine has been installed on board,
and before removing the protective covers from
the various filler holes, clean the external sur-
faces of the engine. These operations have to be
done by the boat builder representative or an au-
thorized workshop.
GENERAL VERIFICATION
See SILVERWAKE® warranty conditions
- Fill with motor oil and transmission fluid
- Fill with heat exchanger coolant fluid; bleed at
the high point of the turbo volute
- Check tension ot belts
- Check that the different connectors, as well as,
the oil and water drain plugs are properly tight-
ened
- Check that the electrical cable terminal, battery
terminals, battery switch and extension wiring
connectors are properly tightened
- Check the remote control levers (by moving
them several times)
- Check for proper synchronisation of the shift
throttle lever (essential in the case of a single
Lever control). Shift must be fully engaged be-
fore throttle cable start to move.
- Perform a final check of the clamps as well as a
visual check of the complete marine engine. as-
sembly. lf necessary, retouch the paint on the as-
sembly and accessories.
I DANGER: Do not approach the battery with an
open Name or spark. A mixture of extremely ex-
plosive gases forms when the battery is being
recharged - Do not short circuit
• The battery electrolyte is highly corrosive: if the
battery acid comes in contact with the skin, im-
mediately wash with soapy water - in case of
contact with the eyes, rinse abundantly with wa-
ter and consult a physician immediately
- Start with the positive terminal when connecting
cables to the battery
- Start with the negative terminal when discon-
necting cables from the battery
I WARNING: Do not allow fuel or lubricant to
spill on the engine.
• The fluids used for the operation of the engine
may be dangerous to your health.
• The engine oil may damage your skin – wear
gloves.
NOTE: Modern diesel engines are precision ma-
chines which require the use of high quality fuel
and lubricant.
Engine and reversing gear box lubrication
Engine
- Oil pump driven lubrication system, pressure
regulated by a discharge valve.
- Disposable cartridge oil filter
Transmission
Refer to separate specifications
Adding motor oil
Through the filler hole located on the cylinder
head cover, unscrew the cap. Check the level
with the oil dipstick. Do not exceed the maxi-
mum level.
NOTE: Qualities and quantities of oil to be used
are described in the technical characteristics
FUEL SYSTEM
Composition
Main disposable cartridge filter
Seawater fuel cooler (4.390 TDI)
Injection pump
High-pressure injector line
Injectors
Fuel system bleeding
- Check the fuel level in the fuel tank.
- Open the fuel tank delivery valve. Open the air
vent screw on the top of the filter carrier; use the
included lift pump.
- Close the screw when air bubbles have disap-
peared. Start the engine. In the case of complete
lack of fuel:
- Unscrew the pressure line union nut of injector
n° 1.Turn the engine with starter till fuel appears
Tighten the union nut and do the same operation
for the other injectors.
- Start the engine and check the leakage lack.
I DANGER: - Do not smoke, or draw near with
an open flame or spark.
- Always dry off any spilled fuel.
COOLING SYSTEM
It consists of two different systems: the closed
cooling system and the external sea water sys-
tem (raw water.)
Closed cooling system
It consists of a engine water circulating pump
driving from the crankshaft, by two V-belts, a wa-
ter heat exchanger including exhaust manifold, oil
cooler integrated in the block and a thermostat.
Sea water system
It consists of a pump, a heat exchanger for the
fresh and seawater, an air cooler, fuel oil cooler
(4.390), gearbox oil cooler and a mixer exhaust
elbow.

Coolant fluid
Recommendations for the first use
- Check the tightness of the drain valve located
under the turbo, open the air vent valve on the
top of the turbo volute.
- Prepare a permanent antifreeze mixture with
50% antifreeze and 50% fresh water. The re-
quired quantity is indicated in the technical speci-
fications.
- Fill the mixture into the tiller hole, close the
valve on the top of the turbo when the mixture
appears, and continue to fill until the maximum
filling level. (Subsequent checks are to be made
only with fresh water; in cold engine situation).
Start the engine check the level, close the pres-
sure cap. Verify the leakage lack.
Every two years, at the beginning of the boating
season, completely drain the cooling system,
clean it with fresh water; and refill according to
above instructions (see SILVERWAKE warranty
conditions).
I DANGER: - Fill the engine with coolant liquid
only when the engine is turned off and cold
- Do not smoke or draw near with a flame.
- Stay clear of rotating parts while the engine is
operating.
I CAUTION:
NEVER ADD UNDILUTED ANTIFREEZE.
Use of other type of coolant or other additives
may cause fouling on the exchangers and
overheating of the engine.
AUXILIARY HOT WATER HEATER CONNEC-
TIONS
An installation for on board hot water may be
connected to the engine circuit. Consult our net-
work for further information.
Sea water filter
It is recommended that a water filter between the
pump and seawater pickup be fitted. Check and
clean the filter regularly.
I CAUTION: Before starting the engine, check
to see that the seacock is open since even a few
seconds’ dry operation will damage the water
pump impel/en
After cleaning the seawater filter; carefully close
the cover in order to avoid that air enters into the
water pump.
ELECTRICAL EQUIPMENT
Engine - Battery
A. Alternator
B. Starter
C. Glow plugs
D. Fuel solenoid control
E. Oil pressure switch
E Water temperature switch
G. Water temperature sender
H. Connector
I. Oil pressure sender
J. Preheating relay
K. Starting relay
L. Pre/post heating unit temperature sender
M. Water in fuel filter sensor
Instrument panel
a. Engine water temperature & water in fuel filter
light switch. (If equipped).
b. Oil pressure light switch
c. Preheating light
d. Battery charge light
e. Audio warning buzzer
f. Ignition start stop key.
g. Instruments lighting
h. Connector
i. Tachometer with integrated hour meter
j. Pre heating control unit
k. Voltmeter gauge
I. Oil pressure gauge
m. Coolant temperature gauge
5 - ENGINE OPERATION
STARTING THE ENGINE
I DANGER: - Firmly close the hatch and re-
place the protective elements before starting
the engine.
- Check the fuel tank level.
- Open the fuel delivery valve.
- Open the seacock valve.
- Check the engine and gearbox motor oil levels.
- Check the level of coolant fluid.
- Switch On, the battery main switch
ENGLISH
Wire position / Color / Function
1 Red Positive
2 Black Negative
3 Brown Starter
4 Brown 1 . Pre heating
5 White Stop
6 Grey Oil pressure sender
7 Purple D + alternator
8 Grey-1 Oil alarm
9 Yellow green Water switch
10 Yellow green 1 Water temp sender
11 Orange Pre heat. Unit temperature sender
12 Blue-1 Tachometer
13 Blue Tachometer

- Check that the remote control lever is in the
neutral position.
- Disengage the throttle lever from the shift en-
gagement.
- Turn the start key clockwise Stop to Switch On
position, the oil alarm indicator, the battery and
preheating lights will illuminate and the buzzer
will sound; the preheating is activated. Wait until
the extinction of the green lamp and then engine
starts. Release it immediately after the engine
has started.
- Check the indicator lights and other functions
once the engine is running.
- Immediately stop the engine if the buzzer
sounds, if the temperature rises abnormally or if
one or several indicator lights remain illuminated.
I CAUTION: Search for the cause and elimi-
nate it before re starting the engine
- Allow the engine to run at idle rpm, during 2 at 3
minutes
- Check that the seawater comes out freely from
the transom exhaust pipe.
- lf the engine doesn’t start at the first trial, repeat
the steps waiting 5 to 15 seconds between each
trial, switch key switching off.
IMPORTANT:
In case of several unsuccessful engine starter
attempts, search the cause. Never insist because
it may cause water return into the engine from
the exhaust system!
I WARNING: Never cut the electrical circuit by
using the battery main switch while the engine is
running. This may cause damage to the alterna-
tor:
STOPPING THE ENGINE
- Return the control lever to the idle/neutral posi-
tion
- Allow the engine to idle for several minutes in
order to stabilise temperatures and turbo speed
- Never increase the engine rev. Before
switching off the key!
- Turn the key till the “O” position (vertical)
- Switch off the battery main switch; close the
seacock and the fuel-tank delivery valve.
I CAUTION: in case of boat trailer stop the en-
gine and imperatively close the seacock in order
to avoid accidental engine filling by seawater.
Twin installation: In case of using only one en-
gine, close the seacock of the not running en-
gine.
Never forget to open the seacock before restart-
ing the engine.
ENGINE RUN IN - GUARANTEE VISITS
Running in
During the first 20 hours of operation, it is recom-
mended to take precautions to properly run in
your engine and not push to the maximum engine
performance except during short periods. Never
race your engine immediately after starting, with-
out having allowed it to warm up.
Guarantee visits
All preventive maintenance operations and
their periodicities are described on the war-
ranty book: SILVERWAKE®
These compulsory visits condition the warranty
validity. They have to be carried out by an author-
ised NANNI DIESEL representative. Every new
engine is guaranteed against all parts defects
according to the modalities specified on the
SILVERWAKE (r) warranty book furnished to the
buyer upon engine delivery.
6 - MAINTENANCE
I DANGER: To avoid bodily injury, stop the en-
gine and allow it to cool, turn off the battery main
switch before any repair Follow instructions for
safety and environmental protection
IMPORTANT - These recommendations are es-
sential. The observation of these recommenda-
tions will prolong the life of your engine and will
affect the applicability of the guarantee, which is
provided.
- Do not make any unauthorised modifications to
the engine.
- Damage caused by the use of parts not bearing
a manufacturer’s reference number are not cov-
ered by the warranty
- The repairs and maintenance must be carried
out by an authorized NANNI DIESEL workshop.
If the engine is used for a number of hours less
than the number specified for maintenance inter-
vals, then maintenance must be performed at
least once a year.
In this case, it is recommended that maintenance
be performed before winter storage. New, clean
lubricants will thus protect the engine.
Valves adjustments
These operations have to be done by a special-
ized workshop (calibrated shims)

Periodicity: following maintenance table.
(See values on board of technical characteristics)
Replacement of the seawater pump impeller
- Close the seacock valve.
- Take out the water pump cover.
- Extract the worn impeller with the help of a
crocodile clips.
- Clean the kept parts.
- Place the new impeller
- Refit the water pump cover using a new gasket.
- Open the seacock valve.
- Start the engine and check the circuit water-
proof ness
Electrical equipment
Regularly check the tension of the alternator belt.
Tighten the belt between the pulleys. (190 Nm
using a Denso SST).
I DANGER: - Stop the engine and switch off the
main battery switch, before making any repairs to
the electrical system.
Battery `
- Check the battery elements condition once per
season.
- The density of the electrolyte should be be-
tween 1.270 and 1.285
- The electrolyte should be check periodically.
The level should be maintained at 1 cm above
the accumulator plates. Add distilled water, it
necessary.
I DANGER: Never approach with a flame, and
never check the battery with “a spark", because
the gases, which may be released, are inflamma-
ble and explosive - The battery electrolyte is
highly corrosive. If battery acid comes in contact
with your skin, immediately wash with soapy wa-
ter:
Rinse eyes abundantly with water and consult a
physician immediately.
Do not short circuit.
RECOMMENDATIONS: In order to ensure proper
operation of the alternator and integrated regulator:
Never:
- Turn off the battery main switch whilst the en-
gine is running (risk of damage to the regulator)
- Reverse the battery terminals. The terminals
are respectively marked + (positive) and -
(negative); the negative is the ground terminal;
( the cable terminations and the cables must be
correctly attached).
- Change the circuit charger while the engine is
running.
For the use of several batteries, install a battery
isolator (consult our network). '
In case of starting the engine with a spare battery
and jumper cables, proceed in the following man-
ner:
- Disengage the main battery circuit, connect the
spare battery to the main battery by connecting
the + to the + and the –to the -. Once the engine
starts, disconnect the jumper cables and never
cut the main battery circuit.
You must disconnect the 2 battery cables
when:
- You use a battery charger
- Before any repair to the electrical system.
- Before doing any soldering work on a metal hull.
Rinsing the cooling system
Fresh water system
- Remove the Heat Exchanger pressure cap.
- Open the drain valve under the turbo volute
- Release the bolt banjo located under the ex-
haust manifold.
- Remove the block drain plug situated on the
thermostat cover
- Drain the water from the heat exchanger and
from the engine block
- Refill the system with fresh water and let the
engine run for several minutes at low rpm..
- Apply the procedure of filling/priming described
on the paragraph: Closed cooling circuit
- Drain the water and again replace it with a mix-
ture of antifreeze/fresh water.
- Fill the cooling system according to instructions.
NOTE: In the case where a boiler system is con-
nected to the engine, also completely drain this
one, and to refill it, note the quantity of the cool-
ant mixture being added. Check to see that all air
is purged from the system during the refilling.
IWARNING: Liquid under pressure. Do not
open the pressure cap when the engine is warm.
Allow the engine to coo/ and open the cap with
caution (two steps turning).
Draining the Sea water system.
- Close the seacock
- Drain all of the seawater intake pipes, the filter,
the seawater pump, the heat exchanger pipe, by
unscrewing the assembly collars.
- Drain the exhaust system, since a certain quan-
tity of water remains at the bottom of the water
lock.
Cleaning the heat exchanger; air cooler, fuel
oil cooler (if fitted), and gearbox oil cooler.
ENGLISH
In order to Check the exchanger tube stack.
- Remove the covers.
- Remove the tube stack (except on fuel cooler)
and clean it with water and no corrosive acid
(local market).
- Rinse out with fresh water.
- Replace the O-rings and remount the tube stack
and the covers.
IWARNING: Corrosive products may hazard-
ous to your health. Read the instructions on the
product label carefully
Fuel filter cartridge replacement.
The engine fuel filter is a disposable-type filter.
- Close the fuel valve
- Unscrew the cartridge from the head of the fuel
filter assembly.
- Coat the gasket of the new cartridge with en-
gine lubricant.
- Screw the new cartridge onto the filter head,
and then tighten it by hand 3/4 of a turn (do not
use tools).
- Open the fuel valve.
- Energizing the system.
- Start the engine and check waterproof ness.
ICAUTION: - Always dry off any spilled fuel
- Follow the environmental protection instructions
Fuel injectors replacement
Remove:
- The High-pressure fuel delivery pipes.
- The fuel return piping
- The complete injector
- Dismantle the injector
- Replace the injector gasket and nozzle
- Test the injector opening pressure and spray
pattern.
- Re fit all the removed parts.
IWARNING: Do not allow diesel fuel to spray
onto your skin - wear gloves
IMPORTANT: This work must be performed by
an authorised NANNI DIESEL engine repair facil-
ity. The injectors should be checked every 400
hours or every 2 years, according to maintenance
board and SILVERWAKE® booklet.
Engine oil change
The oil change accessory pump removes the en-
gine oil, preferably when the engine is slightly
warm.
- Pump until the engine is completely drained.
- Refill to full level with new motor oil
- Check the level with the use of the dipstick
- Do not exceed the maximum level.
IWARNING: Hot oil can burn you - Avoid all
contact with your skin
Respect the environmental protection regulations
Replacement of the oil filter
The cartridge is of the disposable type
- Join a pipe on the filter head pan and connect it
to a container
- Unscrew the cartridge from the head of the fil-
ter.
- Coat the gasket of the new cartridge with en-
gine lubricant.
- Screw the new cartridge onto the filter head,
then tighten it by hand 3/4 of a turn (do not use
tools)
- Check that the filter does not leak when the en-
gine is running
- Stop the engine and add motor oil between the
low and full marks.
IWARNING: Hot oil can burn your - Avoid all
contact with your skin
Respect the environmental protection regulations
Reversing gearbox
Refer to detailed instructions in the reversing
gearbox manual attached to the Owner ‘s manual
Reversing gear box control system
Verify the remote controls regularly. The cable
stroke should be 35 mm on both sides of dead
centre
(O - A = O - B). The lever must be able to move
freely to its stroke limits.
Mind the levers position!
IDANGER: To avoid bodily injury do not start
the motor without the air Filter
IMPORTANT: Allow the engine to idle before
stopping the engine

TYPE OF OPERATION
C/R/A
Check
Replace
Adjust
Every day At
20h Every
100 h
Every
200h
or every
year
Every
400 h
or every
2 years
Cooling liquid level C/A XXX
Oil level : gear box CXXX
Oil level : engine CXXX
Instrument panel : indications and alarms CXXX
Belts tension C/A/R XXX
Battery electrolyte level C/A
Remote control: cables inspection, throttle shift
and trolling : general greasing C/A XX
Bolts and rings tightness C/A XX
General waterproof ness C/A XX
Engine mountings and alignment C/A XX
Heat exchanger pressure cap RX
Coolant RX
Thermostat RX
Exchanger tube bundle: cleaning CX
Air cooling tube bundle: cleaning CX
Fuel oil cooler (4.390 TDI) CX
Sea water filter: cleaning CAccording clean state
Fuel pre-filter: water draining C/A XXXXX
Fuel filter RXXX
Engine oil filter RXXX
Fuel pre-filter (cartridge) RXXX
Engine oil RXX
Gearbox oil RXX
Seawater impeller RX
Injector opening pressure C/A/R X
Valves clearance A500 H
Stuffing box CXXX
Air filter, cleaning CX
Waste gate lever : free displacement, greasing CX X
Sacrificial anode (on exhaust elbow) C/R XXX
Air coolant: condensation exit hole : Cleaning C X
Timing belt RX
EVERY 15 DAYS
Turbocharger: Inspection/cleaning C
X
MAINTENANCE
Periodical Maintenance Table

Technical specifications
NANNI DIESEL ENGINE T4.155 4.380TDI 4.390TDI
Number of cylinders 4 in line
Max. power* 114.1 kW (155 hp) 128.8 kW (175 hp) 147.2 kW (200 hp)
Maximum rated load* 3600 rpm
Idle speed 800/850 rpm
Max no load speed 4100 / 4300 rpm
Cycle 4 strokes
Bore & stroke 96 x 103
Cylinder size 2982 cm3
Compression ratio 19,7
Rotation direction Counter clockwise
Injection order 1-3-4-2
Injection pump DENSO VE 22100-67080
Injection pressure 15.2 MPa
Fuel consumption 280 g/kWh @ 3600 rpm
Timing point before TDC 0.42 +- 0.02 (Plunger stroke)
Dry weight 346 kg 346 kg (ZF45A) 355 kg (ZF45A)
Alternator 12 V - 80A
Battery capacity (min.) 100/110 A/h
Cooling circuit By heat exchanger / Closed cooling system
Sea water pump Neoprene type rotor
Coolant: 50% water + 50 % anti-freeze 15.5 Litres
Valve clearance (cold) Intake 0.25 - Exhaust 0.30
Engine oil recommended API mini CD - SAE 15 W 40
Engine oil capacity, following installation angle 6.4 to 7.7 l
ZF Marine gearbox ZF25A ZF25A 26 / ZF45A ZF45A
ZF lubricant capacity 1.5 l 1.5-2 l / 2.5 l 2.5 l
Oil specification Automatic transmission fluid, Type A
Technodrive gearbox TM545A TM545A
Oil capacity Technodrive gearbox 2.6 l 2.6 l
Oil specification API mini CD - SAE 15 W 40
Recommended on-board repair kit for motor type T4.155, 4.380TDI, 4.390TDI
DESCRIPTION Quantity P/N
V-belt Set of 2 970 312 335
Engine oil filter 1 970 312 207
Fuel filter 1 970 312 241
Seawater pump impeller kit 1 970 312 432
Preheating plug 1 970 312 323
Thermostat 1 970 312 274
Thermostat gasket 1 970 312 275
Air intake (O-rings) 2 48 418 164
Air exchanger gasket 4 48 418 168
Injector assembly 1 970 312 310
Injector gasket 1 970 312 309
Water / water exchanger gasket 4 48 418 167
CAUTION: These specifications are designated for pleasure use only.
Recommended cruising speed: 200 rpm below maximum authorised speed.


Nanni Industries S.A.S. 11, Avenue Mariotte - Zone Industrielle BP 107-
33260 La Teste France - Tel : + 33 (0)5 56 22 30 60 - Fax : +33 (0)5 56 22 30 79
Other manuals for T4.155 seriers
1
This manual suits for next models
5
Table of contents
Other Nanni Engine manuals

Nanni
Nanni 2.40 HE User manual

Nanni
Nanni N4.60 User manual

Nanni
Nanni Z500-B Instruction manual

Nanni
Nanni N2.10 User manual

Nanni
Nanni V6.180 User manual

Nanni
Nanni 4.390 TDI User manual

Nanni
Nanni N6.285 CR2 User manual

Nanni
Nanni 4.200HE User manual

Nanni
Nanni 3.100 HE User manual

Nanni
Nanni 5.280HE Instruction manual

Nanni
Nanni N9.330 CR2 User manual

Nanni
Nanni N13.430 CR2 User manual

Nanni
Nanni H4.115 User manual

Nanni
Nanni T6.280 User manual

Nanni
Nanni N4.40 Instruction manual

Nanni
Nanni 6.420TDI User manual

Nanni
Nanni T4.165 User manual

Nanni
Nanni V6.270 User manual

Nanni
Nanni N3.30 Instruction manual

Nanni
Nanni N13.700 CR3 HD User manual