User's Manual 15
MENU GUIDE
II. Installation
II. INSTALLATION
User's Manual
14
MENU GUIDE
I. Channel Manager
I-2. Rename
1. Using◀▶go to the Rename mode.
2. Select the channel that you want to rename using ▲▼
and then press OK.
3. Keypad Dialog displays on the screen.
4. Edit the name entering NUMBERS and / or WORDS in the
Keypad Dialog.
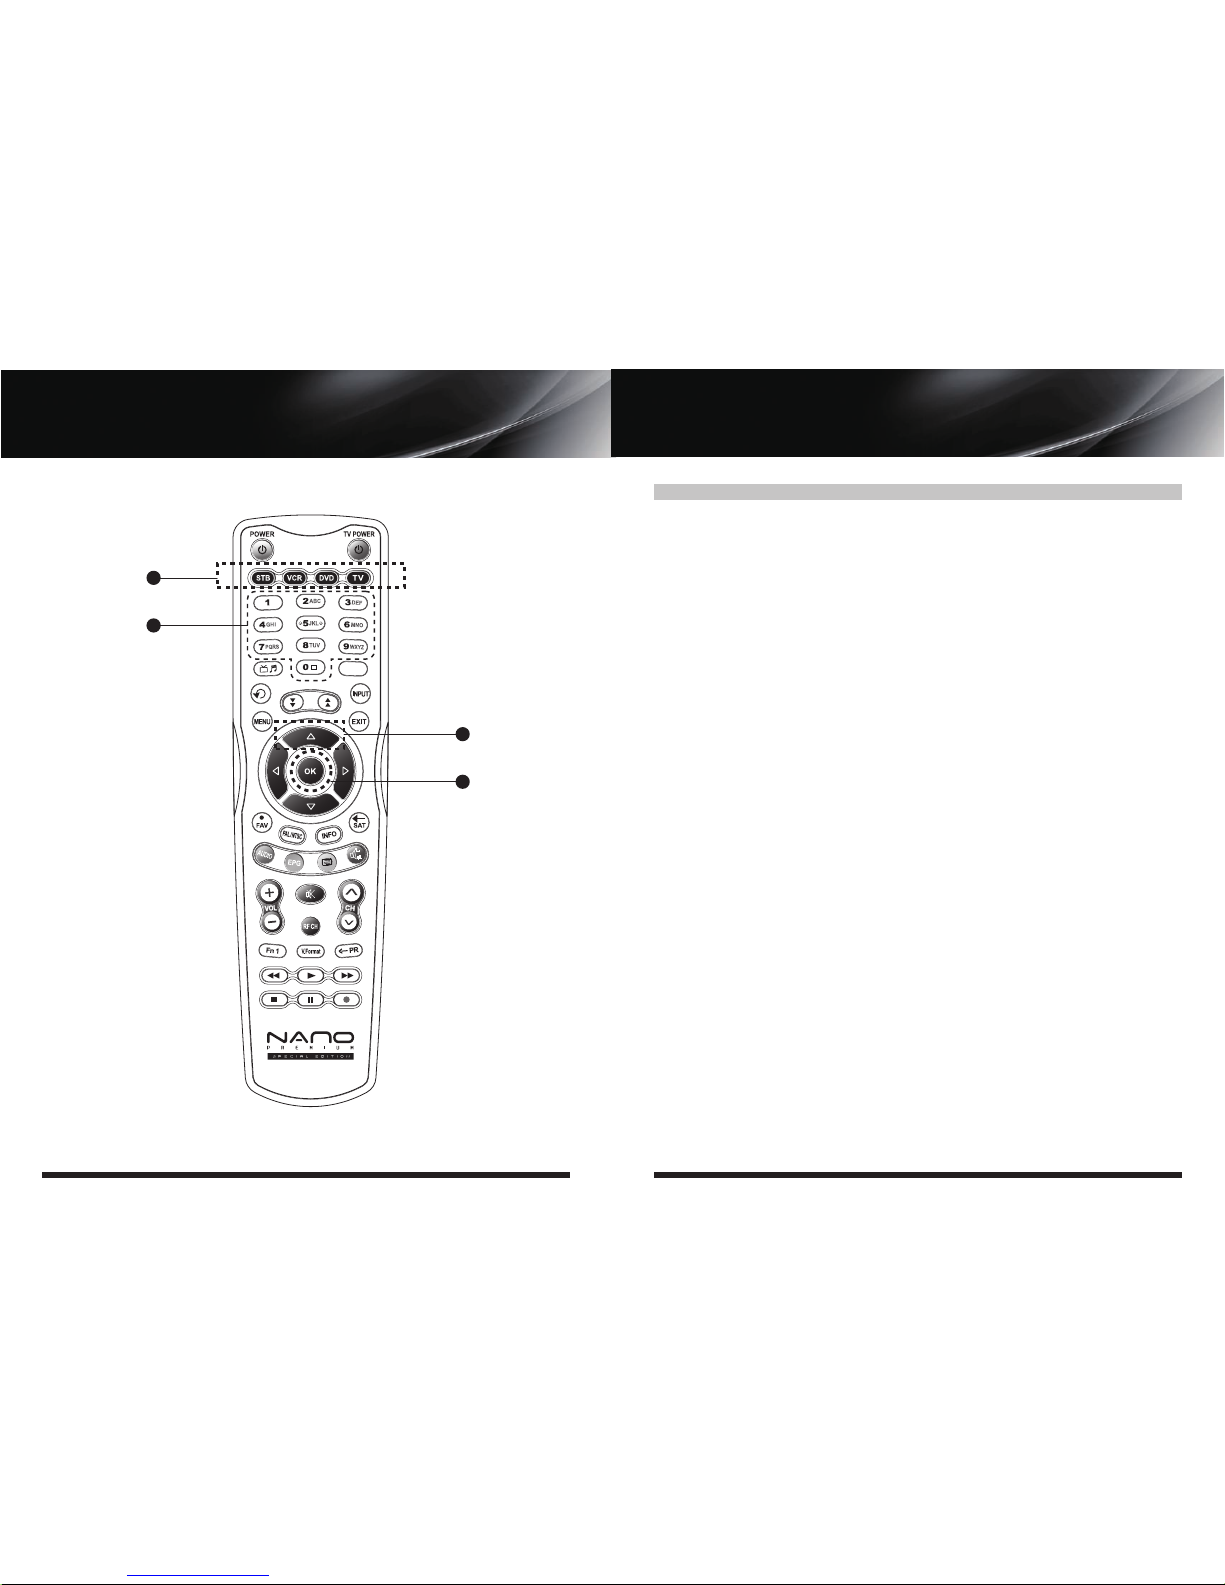
5. Press YELLOW button to rename Favorite 1~8 and press
BLUE button to rename Satellite.
6. Press EXIT to return to the previous menu or press MENU
to go to the current live channel.
I-3. Move
1. Using◀▶go to the Move mode.
2. Select channels which you want to move by pressing OK key.
3. Move cursor that you want to place on than press GREEN
button.
4. Press EXIT to return to the previous menu or press MENU
to go to the current live channel.
I-4. Lock
1. Using◀▶go to the Lock mode.
2. Select the channel that you want to lock and then press
OK. will be marked at the end of the selected chan-
nel name bar. To delete press OK again.
3. Press EXIT to go to Main Page or press MENU to go to
the current live channel.
I-5. Delete
1. Using◀ ▶go to the Delete mode.
2. Select the channel that you want to delete and then
press OK. will be marked on the selected channel
number. To delete press Blue button again.
3. Press YELLOW button to delete TP. Select one channel
and press Blue button. All channels of that TP will be
automatically selected.
4. Press YELLOW button to delete Satellite. Select one chan-
nel and press Blue button. All channels of that the
Satellite will be automatically selected.
5. Press EXIT to return to the previous menu or press MENU
to go to the current live channel.
6. Message Box displays on the screen.
7. Select OK on the Message Box and then press OK to
delete the marked channels.
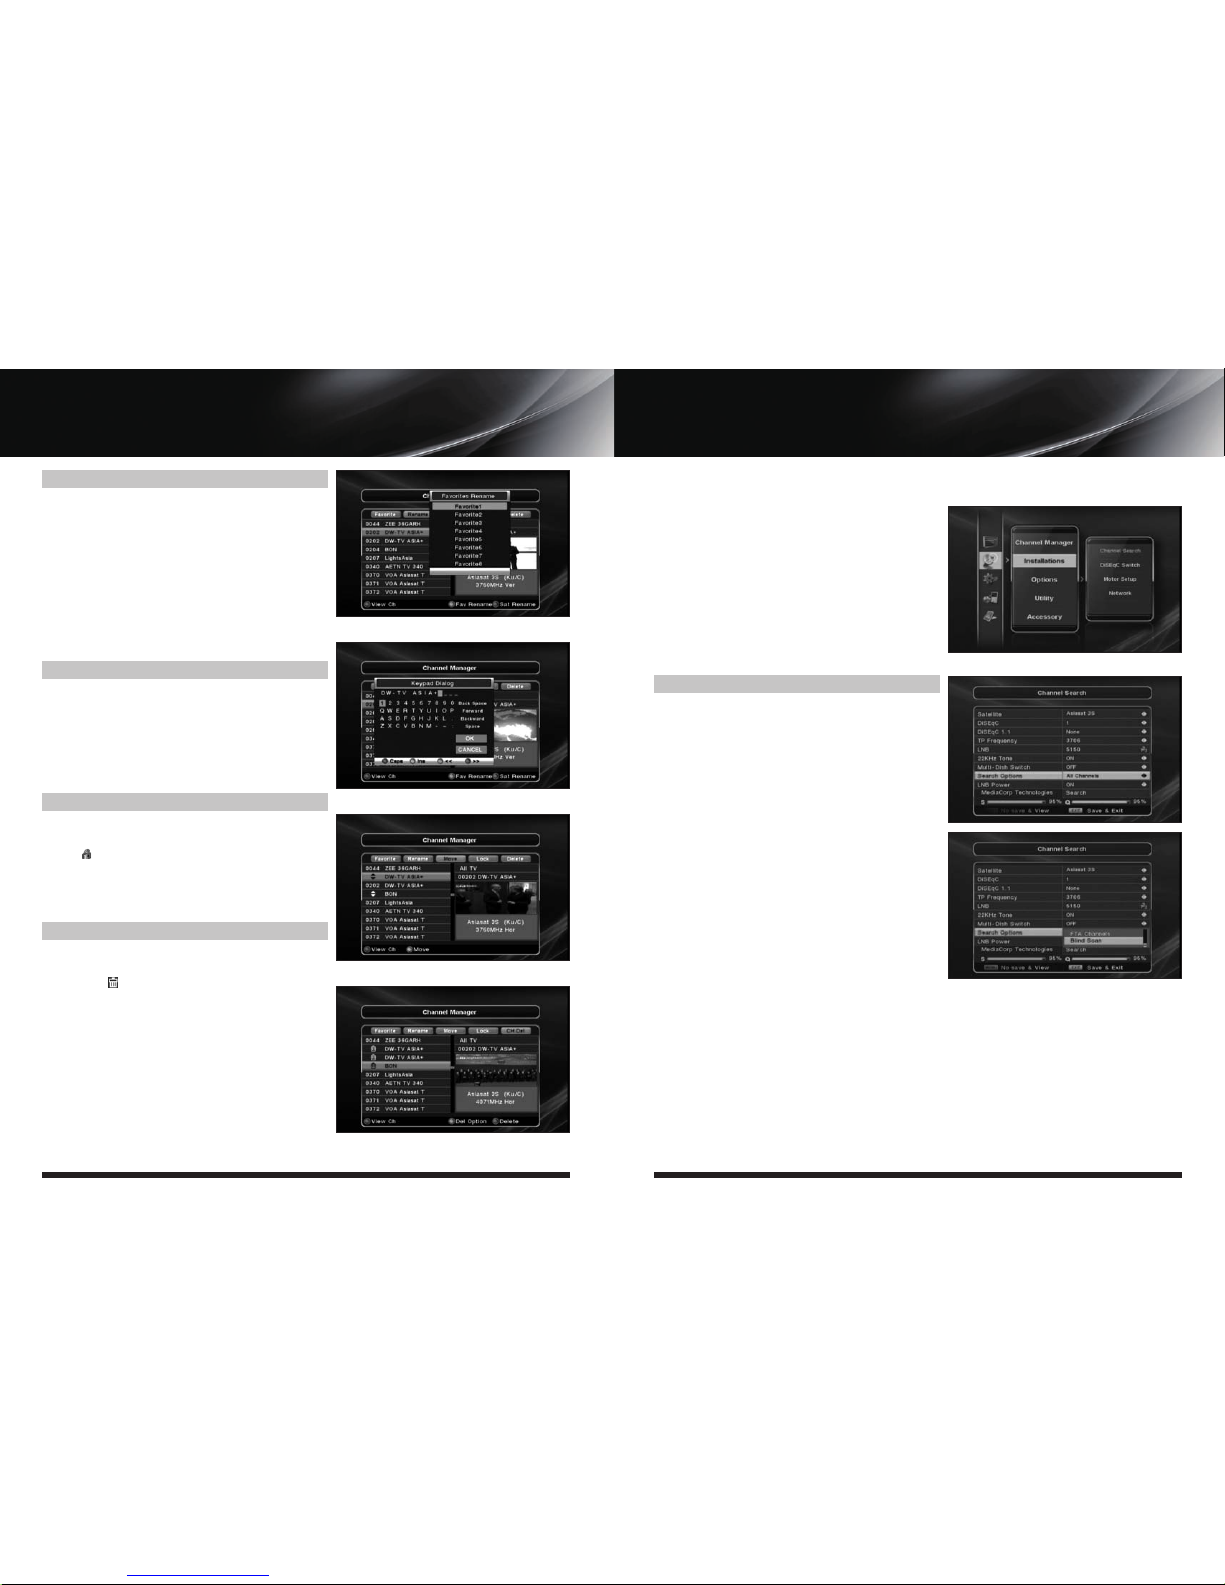
This section may help you to set up antenna and
scan satellite or transponder, etc. Select Installations
in Main Page using ▲▼ and press OK.
Press EXIT to return to the previous menu or press
MENU to go to the current live channel.
II-1 Channel Search
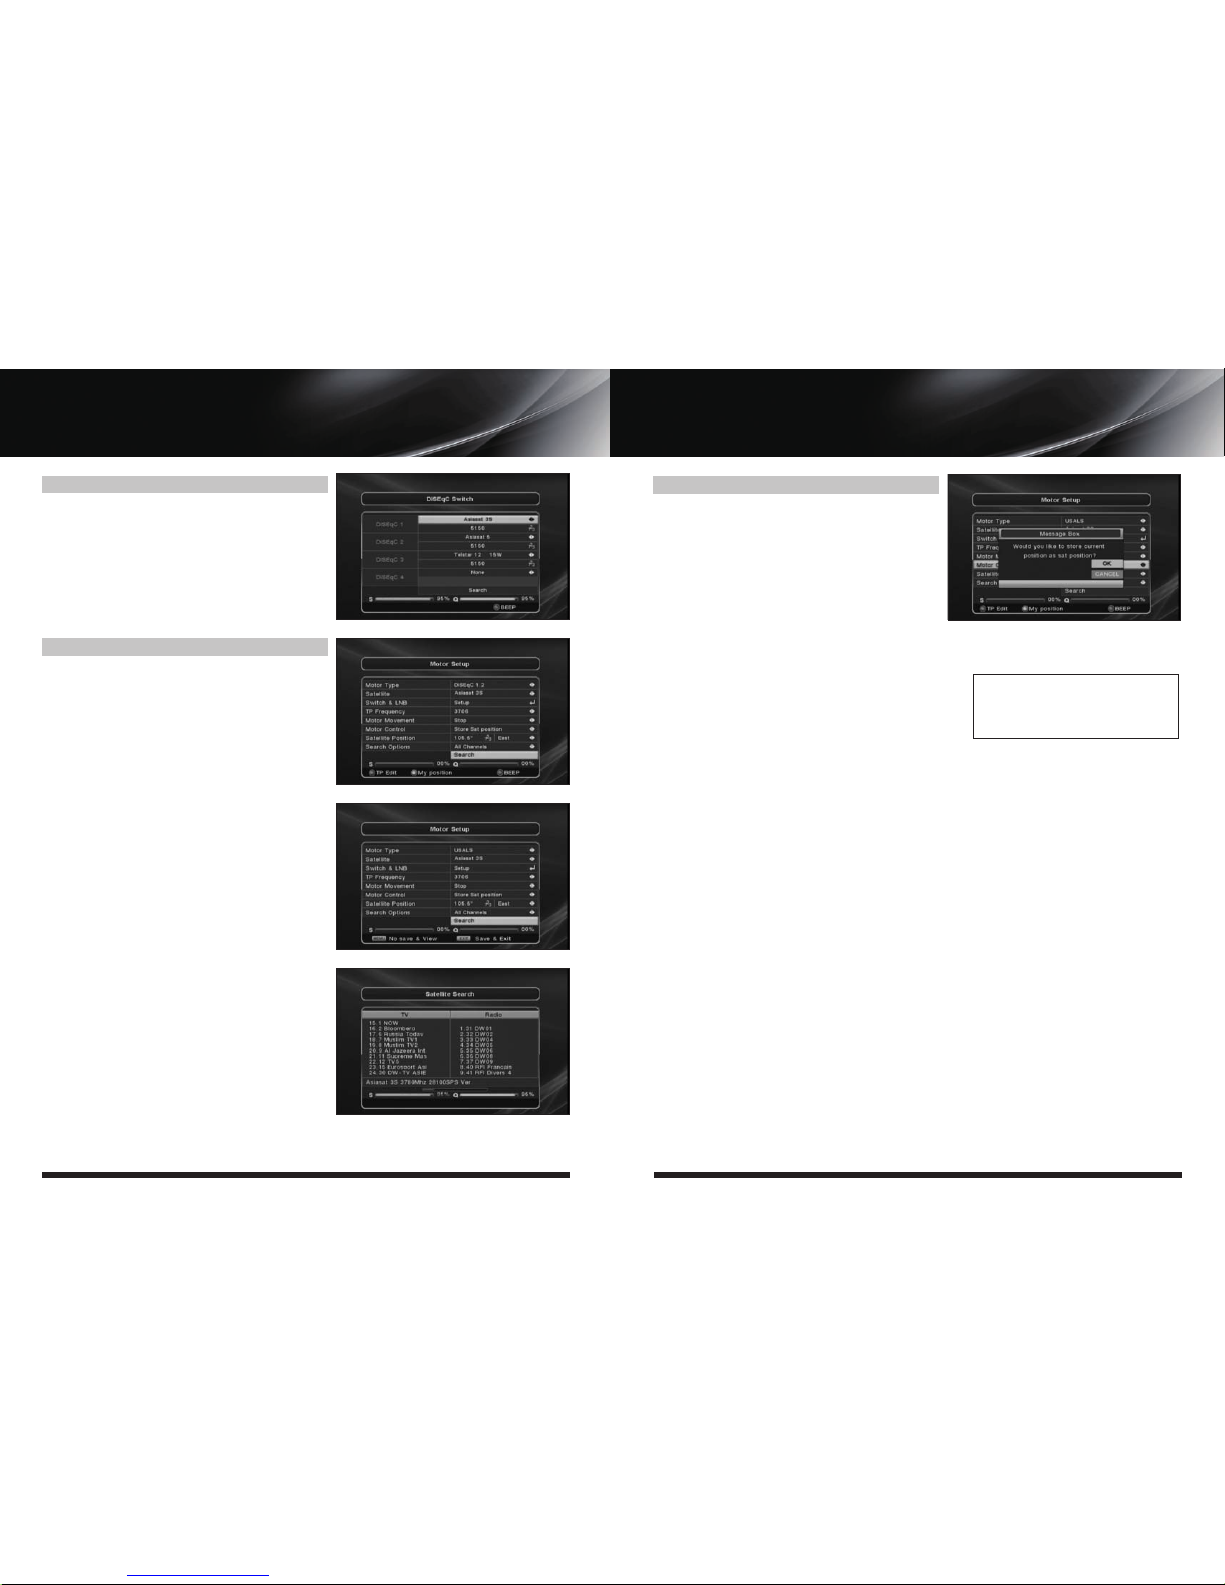
II-2. DiSEqC Switch
II-3. Motor Setup
II-4. Network
II-1 Channel Search
1. You can move the cursor using ▲▼ and press OK
when you select the value that you want.
a) Satellite
- Press OK to display the Satellite List Box.
- Select the proper Satellite and then press OK.
b) DiSEqC
- Press OK to display the DiSEqC Port List.
- Select the proper DiSEqC port and then press OK.
c) Frequency
- Press OK to display the Frequency List.
- Select the proper Frequency and then press OK.
d) LNB
- Press OK to display the LNB Frequency List.
- Select the proper LNB Frequency and then press OK.
- You can also input directly the numbers using NUMBER
KEY on the RCU.
e) 22KHz Tone
- Select the one among None, 0 KHz or 22 KHz depending
on the user’s antenna switch box.
f) Search Option
- Press OK to display the Search Option list.
- Select the Search Option that you want and then press OK.
g) Search
- Press Search to start scan channels.
- Selected Satellite displays on the screen.
- Press ▶to select more Satellite or ◀to cancel the selected Satellites.
- Press OK to start scanning.