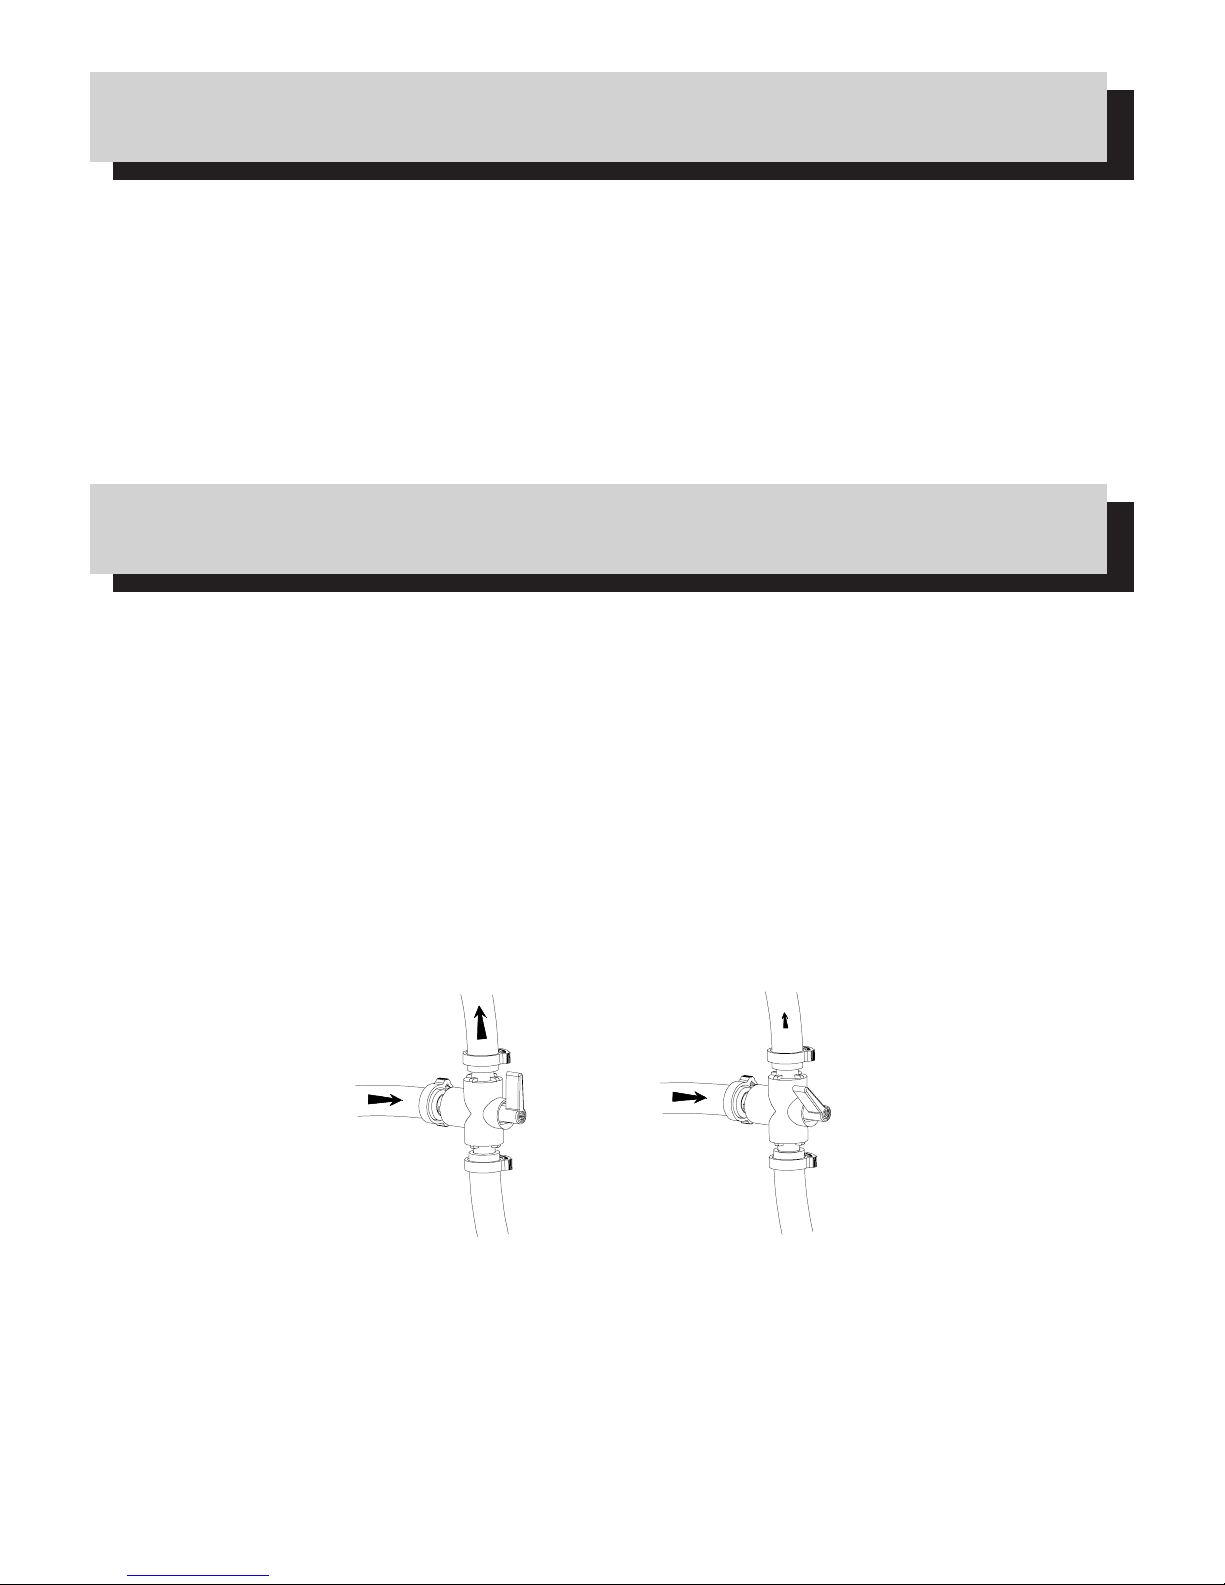
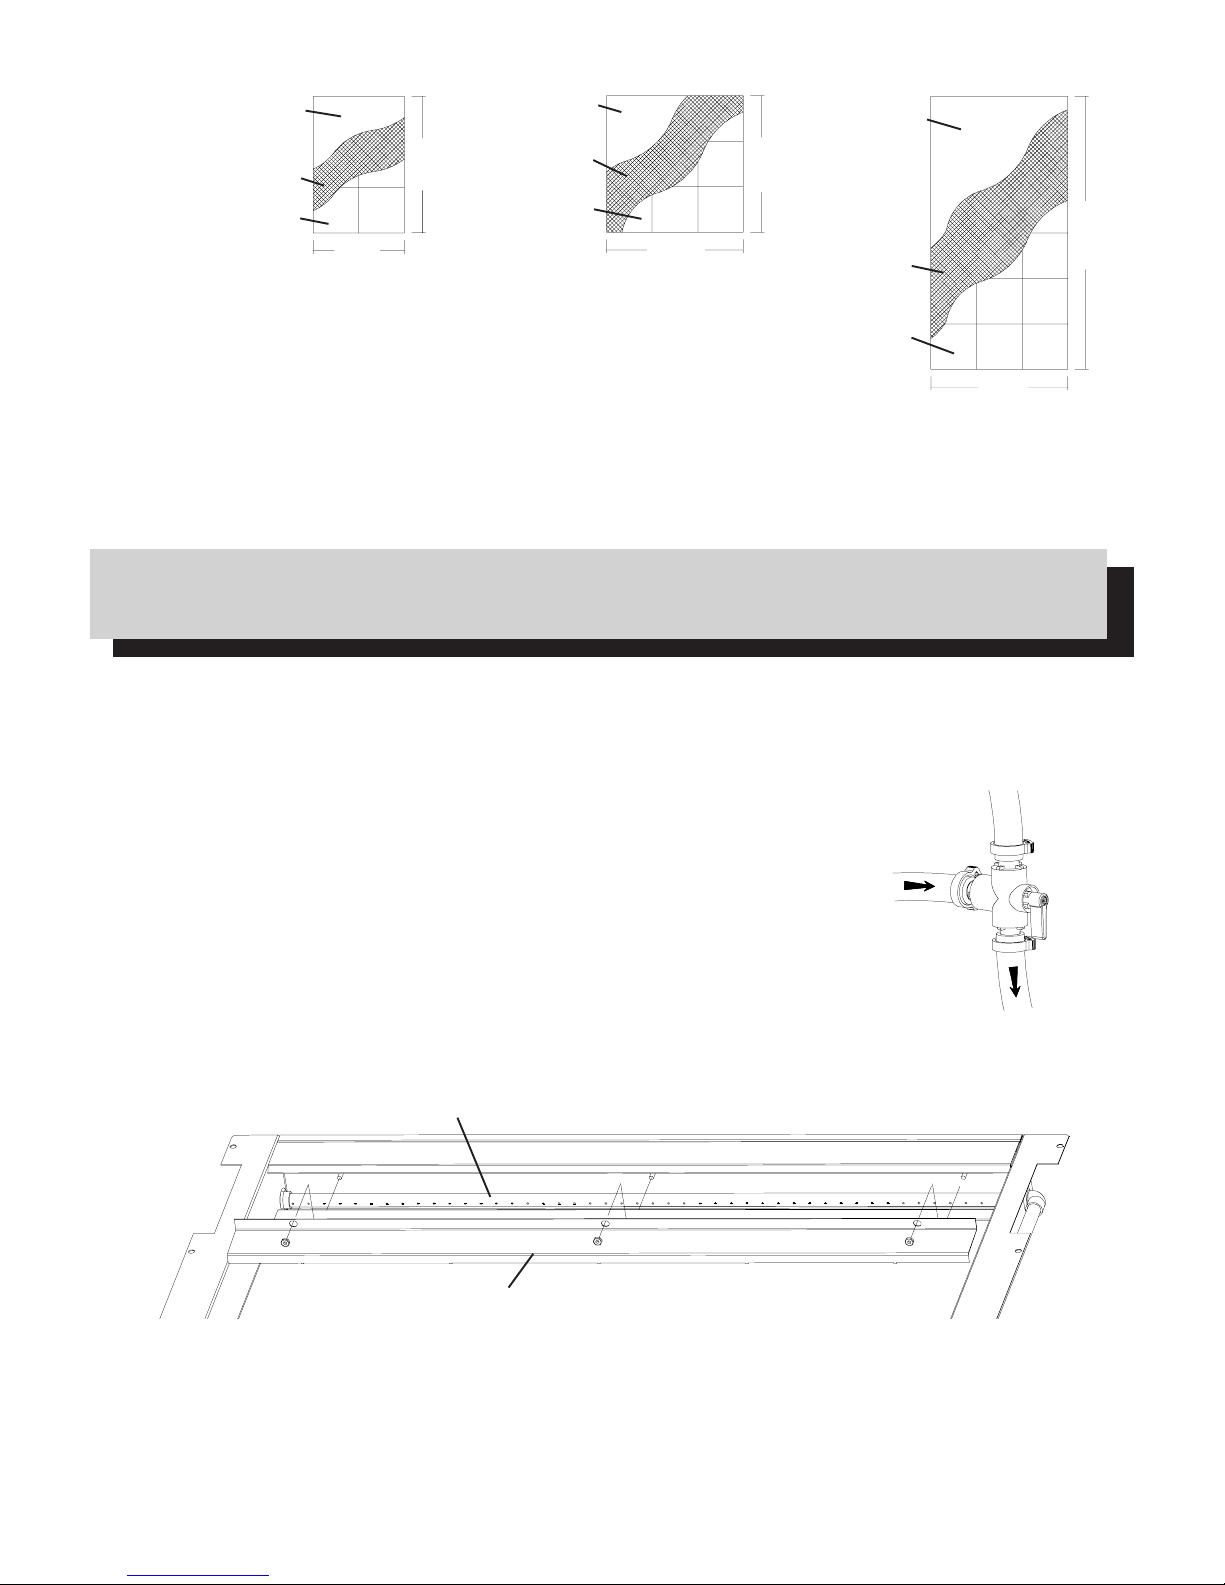
Napoleon WF 18 User manual

WF 6/9/18
WF9ST
N415-0128 / NOV16/06
SERIAL / SÉRIE#______________________
MANUFACTURED BY / MANUFACTURE PAR
:
NAPOLEON APPLIANCE CORP.,
214 BAYVIEW DR., BARRIE, ONTARIO, CANADA L4N 4Y8 PHONE: (705)726-4278
RETAIN THIS MANUAL FOR FUTURE REFERENCE
GARDER CE LIVRE POUR RÉFÉRENCES FUTURES
DECORATIVE INDOOR WATERFALLS
THAT PURIFYAND HUMIDIFY THE AIR

2
CONDITIONSAND LIMITATIONS
NAPOLEON WATERFALL PRESIDENT'S WARRANTY
NAPOLEON waterfalls are manufactured under the strict Standard of the world recognized
ISO 9001-2000 Quality Assurance Certificate.
NAPOLEON products are designed with superior components and materials, and are assembled
by trained craftsmen who take great pride in their work. Every component is thoroughly in-
spected by a qualified technician before packaging and shipping to ensure that you, the
customer, receive the quality product you expect from NAPOLEON.
"NAPOLEON warrants its products against manufacturing defects to the original purchaser only (ie., the individual or legal entity (registered customer)
whose name appears on the warranty registration card filed with NAPOLEON), provided that the purchase was made through an authorized NAPOLEON
dealer and is subject to the following conditions and limitations:"
This factory warranty is non-transferable and may not be extended what-so-ever by any of our representatives.
The waterfall must be installed by a licenced, authorized service technician or contractor. Installation must be done in accordance with the installation
instructions included with the product and all local and national building codes.
This limited warranty does not cover damages caused by misuse, lack of maintenance, hostile environments, accident, alterations, abuse or neglect and
parts installed from other manufacturers will nullify this warranty.
This limited warranty further does not cover any scratches, dents, rust, painted finishes, abrasive and chemical cleaners, nor chipping on porcelain enamel
parts, nor any components used in the installation of the waterfall.
Should deterioration of parts occur to the degree of non-performance within the duration of the warranted coverage, a replacement part will be provided.
In the first year only, this warranty extends to the replacement of warranted parts which are defective in material or workmanship provided that the product
has been operated in accordance with the operation instructions and under normal conditions.
NAPOLEON will not be responsible for the installation, labour or any other costs or expenses related to the re-installation of a warranted
part, and such expenses are not covered by this warranty.
Notwithstanding any provision contained in this President's Warranty NAPOLEON's responsiblity under this warranty is defined as above and it shall not
in any event extend to any incidental, consequential, or indirect damages.
This warranty defines the obligation and liability of NAPOLEON with respect to the NAPOLEON waterfall and any other warranties expressed or implied with
respect to this product, its components or accessories are excluded.
NAPOLEON neither assumes, nor authorizes any third party to assume, on its behalf, any other liabilities with respect to the sale of this product.
Any damages to the waterfall due to weather damage, hail, rough handling, damaging chemicals or cleaners will not be the responsibility of NAPOLEON.
The bill of sale or copy will be required together with a serial number and a model number when making any warranty claims from NAPOLEON. The
warranty registration card must be returned within fourteen days to register the warranty or you can register on-line at www.napoleongrills.com.
NAPOLEON reserves the right to have its representative inspect any product or part prior to honouring any warranty claim.
NAPOLEON shall not be liable for any transportation charges, labour costs, installation or removal cost, water damage or export duties.
NAPOLEON warrants the materials and workmanship in your new NAPOLEON Waterfall against
defects for a period of one year. This excludes filters, light bulbs, and UV light bulbs.
NAPOLEON shall not be liable for any transportation charges, labour costs, installation or removal
costs, water damage or export duties.

3
There are several things to consider when choosing the appropriate location to install your waterfall.
The waterfall is designed to be installed into a 2” x 4” interior wall. The waterfall should not be installed in a load bearing wall,
unless it can be framed in with proper supports and headers as required by your local building codes. Check with your local
building authority for specifications. Installing the waterfall in an exterior wall is not recommended, as it cannot be properly insulated.
If there are no suitable alternative locations, then the waterfall can be installed in a 2” x 6” wall using rigid foam insulation between
the exterior of the house and the back of the fountain. The waterfall cannot be installed in a 2” x 4” exterior wall.
The see-thru waterfall only has water running down one side of the glass, so thought should be given as to which direction the
unit is mounted. The side with the manifold is the side with the water flow. The see-thru waterfall is not designed to be air tight like
a window and cannot be placed on an exterior wall. If being placed between rooms where privacy may be a concern, a clouded or
patterned glass can be used. Some noise will also travel between the two rooms that share the waterfall.
The lights, pump and optional UV-light require power. Make sure you choose a location that has the available power within reach of
the supplied electrical cords. The receptacle must be GFI (ground fault interrupt) protected. Electrical work must be done by a
qualifiedelectrician. Check withyourlocal buildingauthority for specifications for yourarea. Do not run extension cordsbehind walls.
An area to locate the pump module is also required. It should be located as close to the fountain as possible and in a location
that is easily accessible for servicing and maintaining the module. For every 1 foot that the pump module is located away from the
fountain unit, 1 inch of drop is required from the fountain basin drain outlet to the pump module drain inlet.
The waterfall is designed to be connected to a water source, to automatically refill the basin as water evaporates, and to a drain,
in case of accidental overflow. The unit can be operated without the water source connection, but is not recommended. The water
will evaporate naturally and will require additional water to ensure proper flow and pump operation. Damage to the pump incurred
by running dry is not covered by warranty. The waterfall must be hooked-up to a drain which will allow the tank to be purged for
routine cleaning, and will prevent the unit from overflowing if the float valve malfunctions.
Water damage to surrounding objects in your home is not covered in your NAPOLEON warranty. The waterfall is designed to not
splash, however if it is not properly installed or maintained, some splashing may occur. Protect delicate nearby surfaces that could
be damaged by splashing. Do not trim with materials that can be damaged by moisture such as particle board or MDF. It is best to
install the unit in stone, marble, glass, tile etc.
Although your NAPOLEON Waterfall will be beneficial to the air quality of your home, excess moisture can lead to the formation of
mold and mildew. It is recommended that all homes have some form of humidity control and air exchange system to prevent such
an occurence.
appropriate location
Tools:
-utility knife
- adjustable wrench
- 3/8” nut driver
-pliers
- flat screw driver
installation Tools and materials required
Materials:
- saddle valve and 1/4” tubing (ice maker plumbing kit) (required if unit is being connected
to house water supply)
- teflon tape
- possible additional 1/2” i.d. tubing and 3/4” i.d. tubing depending on location of unit.
- liquid TSP(Trisodium Phosphate) or TSP Substitute cleaner
Before you begin hooking up the fountain ensure that you have access to the following materials and tools.
indoor air quality
Your new NAPOLEON waterfall will dramatically improve the indoor air quality in your home. The waterfall is a natural humidifier
which helps alleviate dry skin and allergies. This is extremely beneficial in dry climates and also cold climates where forced air
furnaces dry the air. The waterfall also cleans the air by attracting contaminants. Moving water attracts airborne particles, such as
dust, pet dander, pollen and other pollutants. The waterfall draws these particles into the water, which is then filtered through a 5
micron filter before being recirculated. The result is cleaner, fresher, humidified air. Waterfalls also generate negative ions. These
odourless tasteless invisible molecules are created in nature as air molecules break apart due to sunlight, radiation, and moving air
and water. Researchers now believe that negative ions aid in alleviating depression, reducing stress and boosting energy.

4
The water pump supplied with your waterfall has been selected for its high flow volume, efficiency, quiet operation and reliability.
The pump is suitable for pushing water to a height of 12 feet, however the flow is reduced greatly at that height. This must be kept
in mind when finding a location for the pump and water basin, so the pump module must be located on the same floor as the
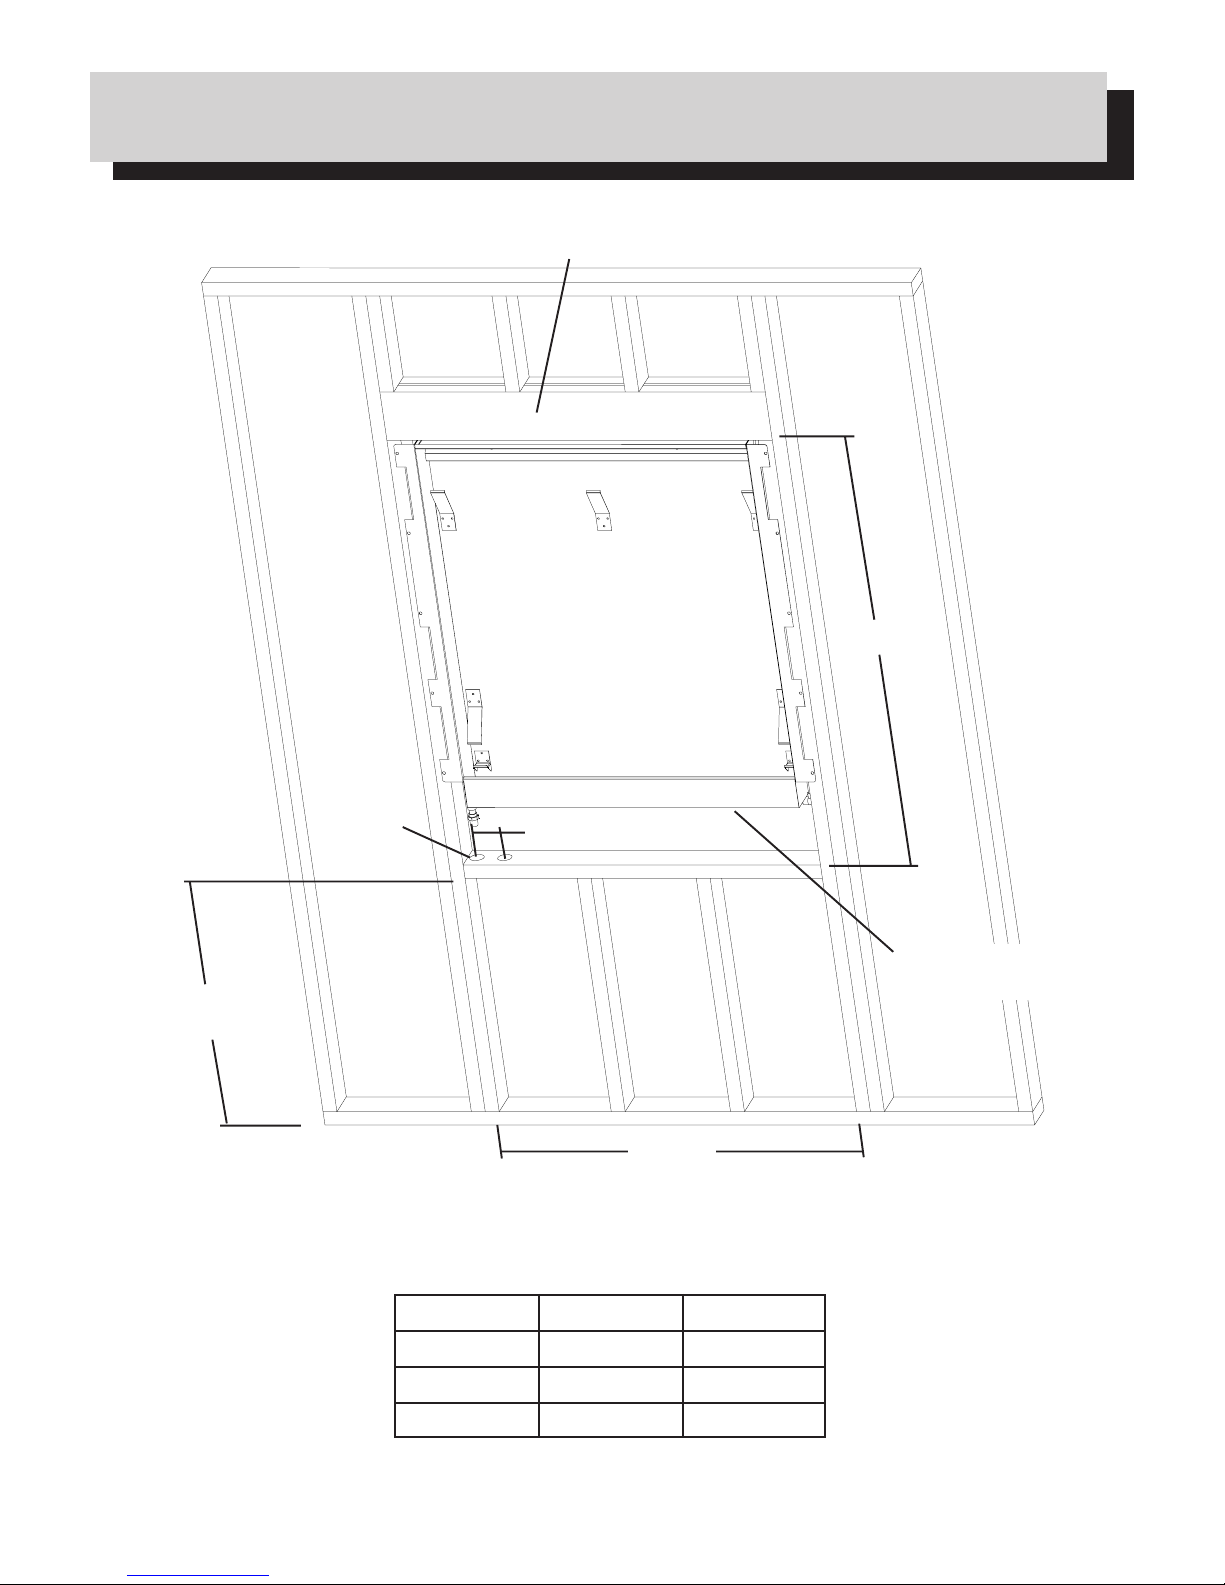
fountain. The minimum space required for the pump module for the waterfall is 18” x 18” x 15” high. The system has a flow control
valve after the filter that can be adjusted to provide the desired flow rate on the waterfall surface.
The pump must be kept submersed in water at all times while in operation. The water acts as a cooling agent for the pump,
preventing the pump from overheating. Low water levels, frequently turning the pump on and off and impurities in the water from
poor waterfall maintenance will shorten the life of the pump. If maintainedproperly, the pump will provide years of reliable service.
If you hear excessive noise coming from your pump, check first to see that you have enough water in the basin to keep the pump
fully submerged below 1-2” of water. The pump should not be vibrating against the tub, but if it is, it can be isolated by placing a
small piece of sponge between the pump and the basin. Be sure to not block or restrict in any way the pump’s water inlet.
The waterfall will require 2 separate 110 volt electrical receptacles, one for the lights and one for the water pump. GFI recepta-
cles must be used, because of the use of water and possibility of contact.
It is not required that the receptacles be wired on their own circuit, as the pump, lights and optional UV-light draw very little
current. If there is already a heavy load elsewhere on that circuit or you have trouble with breakers tripping, a separate circuit will
need to be installed. Any circuit wiring or GFI installation must be done by a qualified electrician. If you would like to be able to turn
the fountain on and off, the receptacles should be wired to a wall switch. Two wall switched receptacles are recommended, one for
the pump and UV-light (optional) and one for the lights. This will allow you to turn the lights on and off independently of the fountain.
WATER PUMPS
ELECTRICAL REQUIREMENTS
water
Water is perhaps the most critical component in the waterfall. Dirty or contaminated water will quickly cause operational problems
with your waterfall. House water must be softened and filtered if the unit is to be connected to the water supply. RO (Reverse
Osmosis) water will give the best results, and require the least amount of maintenance. If the unit is not being connected to the
house supply, distilled bottled water is recommended. The provided filter and optional UV-light cannot prevent hard water deposits
from forming on the surfaces of your waterfall. Hard water will also cause plugged passages and manifold ports, reducing theflow
effect on the waterfall surface. The life-span of the pump will also be adversely affected due to the use of hard water. Use of RO or
distilled water is by far the best way of ensuring years of carefree enjoyment from your waterfall.
The provided sediment filter will help prevent clogging of the manifold ports that disperse the water down the face of the waterfall.
The water that flows down the face will attract dust, debris particles and mould spores that are floating in the air in your home. This
will help to naturally filter the air you breathe and keep your home cleaner. However the filter will become contaminated and the
water flow will be reduced over time. We recommend that the filter be replaced whenever the waterfall is cleaned, every 3-4 months
or sooner as deemed necessary by poor water flow. The filters can be purchased through your authorized NAPOLEON dealer.
The optional ultraviolet-light will help destroy any green algae, bacteria, mould or mildew found in the water. Flowing water is fairly
resistant to this kind of growth, but in time the water will become contaminated and the system will have to be flushed and thor-
oughly cleaned. Not only unsightly but mould and bacteria growth will plug the manifold ports, reducing the flow of water and can
damage the water pump over time. The optional UV-light will help to keep your waterfall relatively maintenance free by keeping the
water cleaner for a longer period of time. The UV-bulb must be replaced every year to ensure proper operation. The UV-bulbs are
availablefrom your authorized NAPOLEON dealer.
The waterfall is designed to be connected directly to a water source. Waterfalls are natural humidifiers for the environment. The
amount of water the waterfall consumes daily is dependant upon how dry the air is, and how large the waterfall surface is. There is
a float valve that will open as the water level drops, allowing water to enter the system. This will ensure that the water level is kept at
the height required for proper operation of the water pump. The pump should never be allowed to run dry and damage resulting
from that will not be covered by warranty. If there is not a suitable water source to be had nearby, the waterfall can be installed as a
stand-alone system, but the water level will have to be monitored frequently and supplemented as needed.

5
INSTALLATION
The framing dimensions are included in the framing specifications drawing. The unit is designed to be installed after drywalling.
For added protection water resistant drywall (green board) or cement board are recommended in the vicinity of the fountain. The
fountain is designed to be attached to the studs over the drywall along both vertical sides of the fountain using drywall screws. This
will leave a basically flush surface to trim over. Leak test the waterfall before fully enclosing. All trim used on the fountain should be
made of real wood (not MDF), or any other material that is not damaged by moisture, with several coats of a water proof coating
(paint or urethane) depending on the desired look. The bottom piece of trim can only be nailed at the ends, because it is mounted
in front of the stainless basin. It should be siliconed to the stainless basin for additional support.
After installing the fountain, connect the piping as shown in the piping diagrams. The tubing to connect the unit overflow to the
house drain is not supplied. If the unit is being connected to the water supply, use an ice maker plumbing kit (not supplied) to
connect the water supply to the float valve. When the unit is operational, adjust the float valve so that it turns the water off when the
top of the pump is submerged below 1-2” of water. Ensure that the wing nut on the side of the float valve is properly tightened.
Connect the light wire to the terminals on the transformer.
WATERFALL SURFACE MATERIALS
The waterfall models WF6, WF9, and WF18 are supplied with a stainless steel panel for the water to flow over. The surface of
the stainless steel must be cleaned to remove any grease or oily materials left behind from the manufacturing process. The protec-
tive coating will also leave a residue behind. Any residue left on the surface, or oily residue from your hands, will repel the water
and prevent a sheet of water from forming over the panel. This will give you thin streams of water with large dry spots in between.
Cleaning the panel with liquidTSP (orTSP Substitute) will remove any residue or film that is impeding the progress of the water.
Clean the panel thoroughly two or three times before the first use.
The See-Thru waterfall model is not supplied with any surface panel. The glass panel can be ordered from any glass and window
dealer in your local area. There is no specific type of recommended glass, but the glass should be 1/4” thick. Clear glass displays
the water flow pattern the best, but if privacy between the adjoining rooms is desired some type of smoked or opaqued glass will
work as well.
Before starting the waterfall, the entire panel surface should be wet down, either by spray bottle, or wet cloth. This will help the
water to spread evenly across the panel. The wave effect of water flowing down the panel, will be attained after the panel is covered
in water. The wave pattern can be adjusted by increasing or restricting the flow of water with the valve at the side of the filter. Adjust
the valve to achieve the effect that is most pleasing to your eye. It is important to remember that too little water flow can cause dry
spots to reappear on the surface of the waterfall. You can increase the flow of water slightly until they disappear. Lightly rubbing a
wet cloth or Scotchbrite pad (careful not to scratch the stainless steel surface), across the panel may be enough to remove any dry
spots.
GROOVED LUXIDIO PANEL: An optional grooved LUXIDIO panel which enhances the ripple effect can be purchased at your
authorized NAPOLEON dealer. This panel must be cleaned with liquidTSP (or TSPSubstitute) before being placed in the unit, to
prevent dust and debris from the manufacturing process from entering the water. Use caution when cleaning the grooves on the
panel as the machined edges can be very sharp. The stainless steel panel must be removed before installing the LUXIDIO panel.
Turn off the water before switching the panels. To remove the stainless steel panel, slide it upwards slightly, then swing the bottom
of the panel towards you, clearing the panel retaining brackets. Slide the panel downwards and out of the fountain. Install the
LUXIDIO panel in the reverse order. The LUXIDIO panel will require more water to achieve the same wave effect as the stainless
panel, as the grooves will fill and retain water. Again any dry spots can be removed by rubbing horizontally with a Scotchbrite pad.
VALVE
FULL OPEN VALVE
PARTIALOPEN
FROMBASIN
TO FOUNTAIN
FROMBASIN
TO FOUNTAIN
TO DRAIN TO DRAIN

6
WF6 WF9 WF18
70.50”
35.50”
35.50”
35.250”
23.625”
35.250”
TILES
MORTAR
BACKBOARD
TILES
MORTAR
BACKBOARD
TILES
MORTAR
BACKBOARD
CLEANING AND MAINTENANCE
The waterfall should be drained and cleaned every 3-4 months, possibly more depending on the quality of the water. The water-
fall surface can be cleaned using a warm soap and water mixture. Do not use harsh abrasive cleaners on the surface of the
stainless steel panel or it will permanently scratch the surface. Any wiping motion should be done in the direction of the grain. If
small scratches do occur, they can be blended out by gentle rubbing in the direction of the grain with a Scotchbrite pad.
The water should be completely flushed and drained from the system - switch the valve to
the purge setting, and run the pump to pump the water out. Refill the tank, run the water
through the fountain for 3 minutes and purge again. If calcium or hard water deposits are
forming on the panel or anywhere else in the system, cycle CLR solution through the system
until the deposits are removed then purge the system a few times with water.
If there are spots on the panel that dry out, check that there are no blocked ports in the
manifold tube. Remove the three nuts that secure the tube cover, and remove the cover. Re-
move the tube by flexing it out in the centre. This will allow the ends to pull out. Poke the holes out
with an opened paper clip, and then flush the tube with water. Clean the angled surface that the
manifold sprays onto with liquid TSP(orTSP substitute). It is critical that this surface is extremely
clean. Install the tube back into the unit, with the ports aiming straight down and refill with water.
Install the tube cover and test the unit.
CUSTOM SURFACE PANEL: Panels can also be made using materials such as mirror,
glass, slate, marble or ceramic tile for display in your waterfall. If tiling, use waterproof cement
board as a backer, available at any building centre. Cut the cement board to the size of your
existing stainless steel panel. Ensure that the tiles can be used in a wet environment. Porce-
lain tiles are recommended. Tile the surface, using thinset mortar, as you would a ceramic tile
floor or bathroom wall. It is not necessary to leave a gap or grout line in your tile. Ensure that the
bottom edge of the tiles are flush with the bottom edge of the cement board. You can choose any colour
or pattern that you like, to match the room or surroundings. The water will flow over the tiles, just as it does on the stainless steel
panel, but be sure to keep the edges of the tiles fairly flush to each other to prevent the water from splashing off. Surfaces less than
3/8” thick, such as glass or mirror, can be installed in front of the stainless panel. The stainless panel must be removed for all panels
thicker than 3/8” up to a maximum of 3/4”. Do not use glue to attach the tiles to the back panel, as some types of glue or epoxy will
leach out into the water, causing the filter and manifold to plug.
VALVE
PURGEPOSITION
TO DRAIN
TO FOUNTAIN
FROMBASIN
TUBE COVER
MANIFOLDTUBE
The sediment filter should be replaced every 3-4 months. To replace, unplug the pump. Lay a towel under the filter housing, as
water will drain out of the housing when opening. Unscrew the housing, and remove the filter. Replace with a new filter (part
#N252-0001) available through your authorized NAPOLEON dealer. Push the new sediment filter firmly onto the collar in the
bottom of the housing. Screw the housing back onto the unit. This must be screwed on very tightly, or it will leak.

7
Problem Possible Causes Solution
Dryspots on waterfall
surface. Insufficientflow. Increase flow by opening waterflow valve.
Surfacenot cleaned
properly. Clean with liquidTSP(orTSPSubstitute) toremove oily residue.
Lights not working. Lights not plugged in. Pluglightsinto nearestelectricalreceptacle.
UV-light not plugged in. Plug UV-light into nearestelectricalreceptacle.UV-light not working.
(optional)
Improperstart-up procedure. Ensure surface ofwaterfall is wetbefore startingby spraying with water or
washingwith wet cloth.
Bulb(s)are broken. Replace light bulb(s).
Bulb no longer good. ReplaceUV-light bulb.
Water leaking on floor.
Water level toohigh. Check that the basin drain is hooked-up properly and not blocked,
preventing water from escaping. Ensure that there is adequate drop from
the fountain to the basin. Also check that the float valve is working properly
andnot overfillingthe basin.
Leakingconnection. Checkall connections andensure they are tight. If leaking, re-tighten.
Weldleakingin waterfall
housing. Inspectwaterfall thoughlyand ascertainexactly wherethe leak is coming
from. Drain all water, and dry thoroughly. Apply a bead of clear silicone to
the inside surface of the weld. Let stand 24 hours before re-filling with
water.
Plugged portsin manifold. Turn off water and remove manifold tube. Inspect and clean. See cleaning
instructions.
Water leaking out sides of
waterfall. Wipe the sides of the waterfall frame with an oiled(WD40) rag to repel water.
TROUBLESHOOTING
Drainis gurgling. Insufficientdropfrom
fountainto basin. Ensure there is at least 1” per foot drop from the fountain outlet to the basin
inlet.
P-trapcreated indrain line. Ensure that there is a consistent slope from the fountain outlet to basin inlet
without a dip that would trap water.
Certaindrainconfigurations
mayhave a tendencyto
gurgle.
Reduce the flow through the flow control valve, or loosen the white fitting in
the left hand drain (loosen a couple of turns at a time, and then test).
Water dripping from lip
oftop retainer. Decorativepanelis not
touchingfront lip ofretainer. Remove thepaneland flex outthe paneltension springs. Ensure positive
tensionon panel. Replacethedecorative panel.
Water not flowing. Pump not plugged in. Plugpump intonearest GFI protectedreceptacle.
Insufficientwaterlevel. Add water to recommended level. Pump must be submerged by 1-2” at all
times.
Pump is“vapour-locked”. The pump may have an air bubble in it, preventing it from pushing water
through. Unplug the pump, and plug it back in several times, or momentarily
turnthe valve to the purge setting.
Water flow controlvalve
turnedoff. Turn valve to on position.
Sedimentfilter plugged. Replacefilter.
Pump burned out. Replacepump.
Waterfall appears to
berusting. High concentration of iron in
water. The waterfall andcomponentsare madeentirely ofstainless steeland
cannot rust. Use CLR remover to clean the iron deposits off the affected
areasand refillthe waterfallwith the recommended distilled water.
Burrs on edges of LUXIDIO
panel. Turn off the water. Remove the burr on the edge of the groove with a utility
knife.

8
Before contacting the customer service department, check the NAC web site for more extensive cleaning, maintenance, trouble-
shooting and part replacement instructions at www.napoleongrills.com. Contact the factory directly for replacement parts and
warranty claims. The customer service department is available between 9AM and 5 PM (Eastern standard time) at 1-866-820-8686
or fax at 1-705-727-4282. In order to process a claim, we must be provided with the following information:
1. Model and serial number of the unit.
2. Part number and description.
3.Aconcise description of the problem ('broken' is not sufficient).
4. Proof of purchase (photocopy of the invoice).
In some cases the customer service representative may request to have the parts returned to the factory for inspection, before
providing replacement parts. The parts must be shipped prepaid to the attention of the customer service department with the above
information.
Before contacting customer service, kindly note that the following items are not covered by the warranty:
-costs for transportation, brokerage or export duties
-labour costs for removal and reinstallation
-costs for service calls to diagnose problems
-discolorationof stainlesssteel parts
-part failure due to lack of cleaning and maintenance, or use of improper cleaners.
ORDERING REPLACEMENT PARTS
NOTES
Therest of thispagehas been intentionally leftblank.

9
FRAMING SPECIFICATIONS
CHECK WITH YOUR LOCAL BUILDING AUTHORITY FOR COMPLETE FRAMING GUIDELINES. THE CHART
BELOW WILL GIVE YOU THE OPENING SIZE REQUIRED FOR EACH MODEL. EACH WATERFALL IS IN-
TENDED TO BE MOUNTED ON TOP OF THE DRYWALL (NOT SHOWN). THE DRYWALL BELOW THE UNIT
SHOULD CONTINUE UP TO THE BOTTOM OF THE WATERFALL BASIN.
*Additional height may be required to ensure adequate drop to the pump module.
The minimum space required for the pump module for the waterfall is 18” x 18” x 15” high.
WIDTHHEIGHTMODEL
26.750”
38.625”
38.625”
49.00”
49.00”
84.25”
WF6
WF9 / WF9ST
WF18
WIDTH
HEIGHT
Ø1.50” 4.00” CENTERS
2x6 HEADER PANEL RECOMMENDED
CHECK WITH LOCAL CODES
24”
RECOMMENDED*
CONTINUE DRYWALL
UP TO THIS EDGE

10
PIPING DIAGRAM WITHOUT UV LIGHT
FROM WATERFALL
DRAIN TO BASIN
FROMTHREE
WAY VALVE TO
WATERFALL
TO
ELECTRICAL
OUTLET
1
2
FROM BASIN TO
WATERFALL DRAIN
OVERFLOW
PROTECTION
FROM THREE WAY
VALVE TO WATERFALL
PURGE LINE
FROM WATER
SOURCE TO
FLOAT VALVE
6X
N570-0043 (8-32 X 3/4")
B
A
B
A
TO DRAIN
CUT THE SHORT
PIECE OF BLACK
TUBING TO 14” SADDLEVALVE
(NOTINCLUDED)
SEDIMENT
FILTER
INSTALLTHE SUPPLIED
HOSE CLAMPS ON EITHER
SIDE OF THE BASIN
FLOW CONTROL
VALVE / PURGE
VALVE
Removecomponentsfrombasinand assemble asshown. Thefittings required arealreadyattachedtothe filterandbasin. Measure
andcut thelines tothe lengthnecessary,push ontothe barbedfittings and secure with the supplied hoseclamps. Leaktestthe waterfall
beforefullyenclosing.

11
PIPING DIAGRAM WITH UV-LIGHT
TO
ELECTRICAL
OUTLET
13
2
4
9X
N570-0043 (8-32 X 3/4")
B
A
FROMWATERFALL
DRAINTOBASIN
FROMTHREE WAY
VALVE TO
WATERFALL
FROMBASINTO
WATERFALLDRAIN
OVERFLOW
PROTECTION
PURGELINE
FROMWATER
SOURCETO
FLOAT VALVE
B
A
TODRAIN
FROMTHREE WAY
VALVE TO WATERFALL
SADDLE VALVE
FLOWCONTROL
VALVE / PURGE
VALVE
INSTALLTHESUPPLIED
HOSECLAMPSONEITHER
SIDEOFTHEBASIN
SEDIMENT
FILTER
UV
LIGHT
Remove components from basin and assemble as shown. The fittings required are already attached to the filter and basin.
When using the optional UV light, the barbed elbow fitting on the “IN” side of the filter will need to be removed and threaded into the
elbow at the bottom of the UV light. Then connect the UV light directly to the sediment filter. Use teflon tape to seal these connec-
tions. Ensure that the supplied ground wire is connected from the grounding terminal on the UV light to either grounded copper
plumbing, or the ground in your electrical system. Use the supplied short piece of black tubing to run from the pump to the UV light.
Measure and cut the lines to the length necessary, push onto the barbed fittings and secure with the supplied hose clamps. Leak
testthe waterfall before fully enclosing.

12
ITEM# WF6 PART# WF9 PART# WF9ST PART# WF18 PART# PARTS DESCRIPTION
1 n010-0446 n010-0447 n010-0490 n010-0448 main housing x
2 n010-0449 n010-0450 n010-0450 n010-0451 w ater supply line assembly x
3 n432-0014 n432-0015 n432-0015 n432-0015 manifold x
4 n105-0008 n105-0008 n105-0008 n105-0008 rubber grommet x
5 n080-0169 n080-0170 n080-0170 n080-0170 water pinch bracket x
6 n450-0009 n450-0009 n450-0009 n450-0009 10-24 nut x
7 n402-0006 n402-0006 n402-0006 n402-0006 lighting track WF6 - 20" long WF9/18 - 32" long x
8 n402-0004 n402-0004 n402-0004 n402-0004 lighting track end cap x
9 n402-0005 n402-0005 n402-0005 n402-0005 lighting track pow er connection x
10 n402-0007 n402-0007 n402-0007 n402-0007 light socket x
11 n402-0003 n402-0003 n402-0003 n402-0003 light bulb x
12 n200-0071 n200-0072 n200-0072 n200-0072 light cover x
n707-0002 n707-0002 n707-0002 n707-0002 12 volt transformer x
13 n255-0033 n255-0033 n255-0033 n255-0033 1/2" female pipe to 1/2" barb adapter fitting x
14 n160-0012 n160-0012 n160-0012 n160-0012 5/8" hose clamp x
15 n160-0013 n160-0013 n160-0013 n160-0013 1" hose clamp x
16 n255-0034 n255-0034 n255-0034 n255-0034 3/4" bulkhead fitting x
17 n255-0037 n255-0037 n255-0037 n255-0037 3/4" male pipe to 3/4" barb elbow fitting x
18 n475-0149 n475-0150 - n475-0151 waterfall panel - stainless steel x
n475-0152 n475-0153 - n475-0154 w aterfall panel - black grooved LUXIDIO ac
19 n335-0037 n335-0037 n335-0037 n335-0037 water basin lid x
20 n185-0002c n185-0002c n185-0002c n185-0002c w ater basin x
21 n255-0035 n255-0035 n255-0035 n255-0035 1/4" female pipe to 1/2" barb adapter fitting x
22 n517-0001 n517-0001 n517-0001 n517-0001 water pump x
23 n725-0023 n725-0023 n725-0023 n725-0023 float valve x
24 n010-0443 n010-0443 n010-0443 n010-0443 water basin housing x
25 n725-0022 n725-0022 n725-0022 n725-0022 3-way valve x
26 n255-0041 n255-0041 n255-0041 n255-0041 3/4" male pipe to 1/2" barb adapter fitting x
27 n350-0052 n350-0052 n350-0052 n350-0052 sediment filter housing x
28 n252-0001 n252-0001 n252-0001 n252-0001 replacement sediment filter (5 micron) ac
29 n080-0177 n080-0177 n080-0177 n080-0177 filter mounting bracket x
30 n570-0043 n570-0043 n570-0043 n570-0043 8-32 x 3/4" stainless steelscrew x
31 n402-0002 n402-0002 n402-0002 n402-0002 ultra violet light ac
32 n402-0008 n402-0008 n402-0008 n402-0008 ultra violet replacement bulb ac
33 n080-0171 n080-0171 n080-0171 n080-0171 ultra violet light mounting bracket ac
34 n255-0042 n255-0042 n255-0042 n255-0042 fitting, plastic 1/2" male pipe - 1/2" barb elbow x
35 n255-0039 n255-0039 n255-0039 n255-0039 fitting, plastic 1/2" female pipe - 1/2" female pipe el
b
ac
36 n255-0040 n255-0040 n255-0040 n255-0040 3/4" male pipe x 1/2" female pipe bushing x
PARTS LIST
The stainless steel panel provided with WF6, WF9, and WF18 is installed simply by sliding the top of the panel under the retaining
bracket at the top of the waterfall, and pushing it high enough to slip over the bottom support brackets. The welded brackets that
protrudeat an angle fromthe waterfall housing, merelyprovide pressure to the panel toprevent it from bowing. The optional acrylic
panel can be placed in front of the stainless steel panel in the same manner. If building your own ceramic tile or slate background, you
mustremove the stainlesssteel panel,because of the thickness of the tile andcement board backing.
The glass panel for WF9ST is installed from the manifold side by sliding the top of the glass into the gap between the retaining
bracket and the rear panel support, and pushing it high enough to slip over the lip on the bottom support brackets. The glass should
fit tight at the top and not rattle. If so it can be removed and the front retaining bracket can be pushed in, closing up the gap so the
glassfitstight.
WATERFALL SURFACE INSTALLATION
x -standard x - compris
ac - accessory ac - accessoires

13
PARTS DIAGRAM
This manual suits for next models
3
Table of contents
Popular Dehumidifier manuals by other brands

Dielectric
Dielectric 2400 Instruction and operation manual

Legend Brands
Legend Brands DRIEAZ LGR 6000Li owner's manual

Master
Master DH-720 operating manual

Desert Aire
Desert Aire ExpertAire LC Series Installation and operation manual

Brune
Brune HP25 instruction manual

Haier
Haier DE45EK Use and care guide