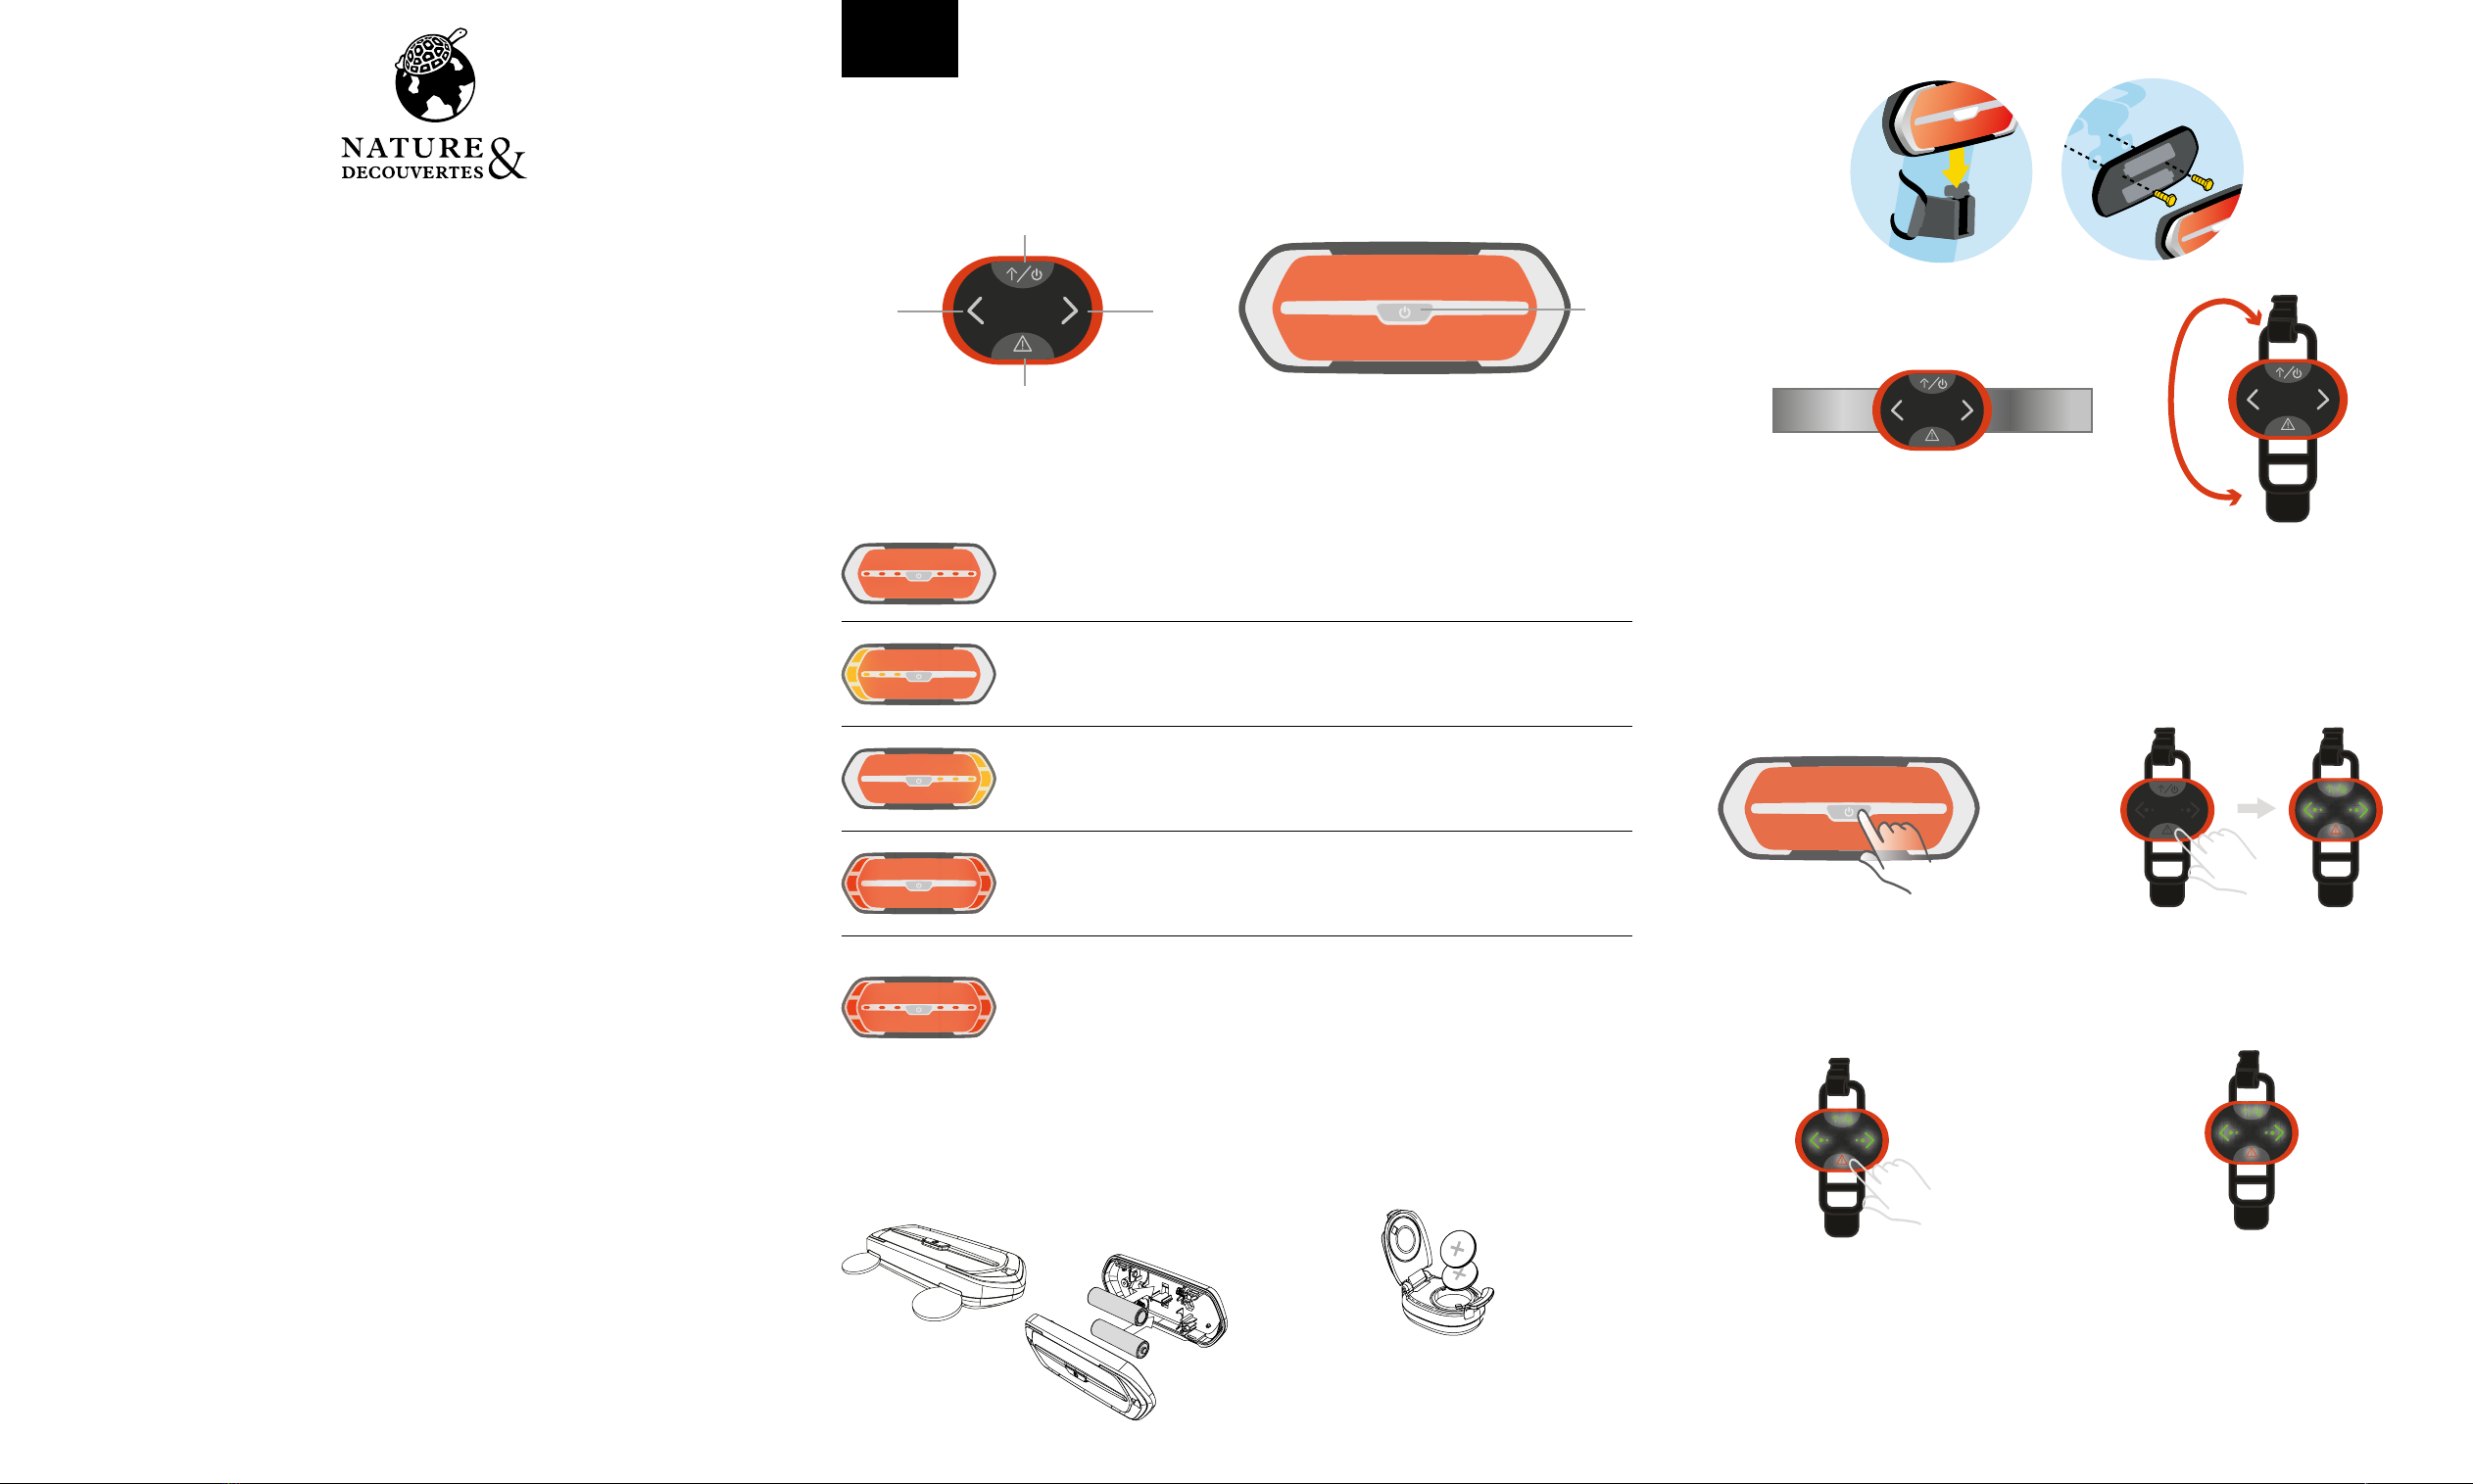
There are 4 buttons on the remote control: A, B, C and D
And 1 button at the front of the signalight : E
Hay 4 botones en el control remoto: A, B, C y D
Y 1 botón en la parte frontal del intermitente: E.
EN ES
PLEASE CAREFULLY READ THIS MANUAL
AND KEEP IT IN A SAFE PLACE INSTRUCCIONES IMPORTANTES.
MANTENGA PARA USO FUTURO: LEA CUIDADOSAMENTE
A A
D D
B BC CE E
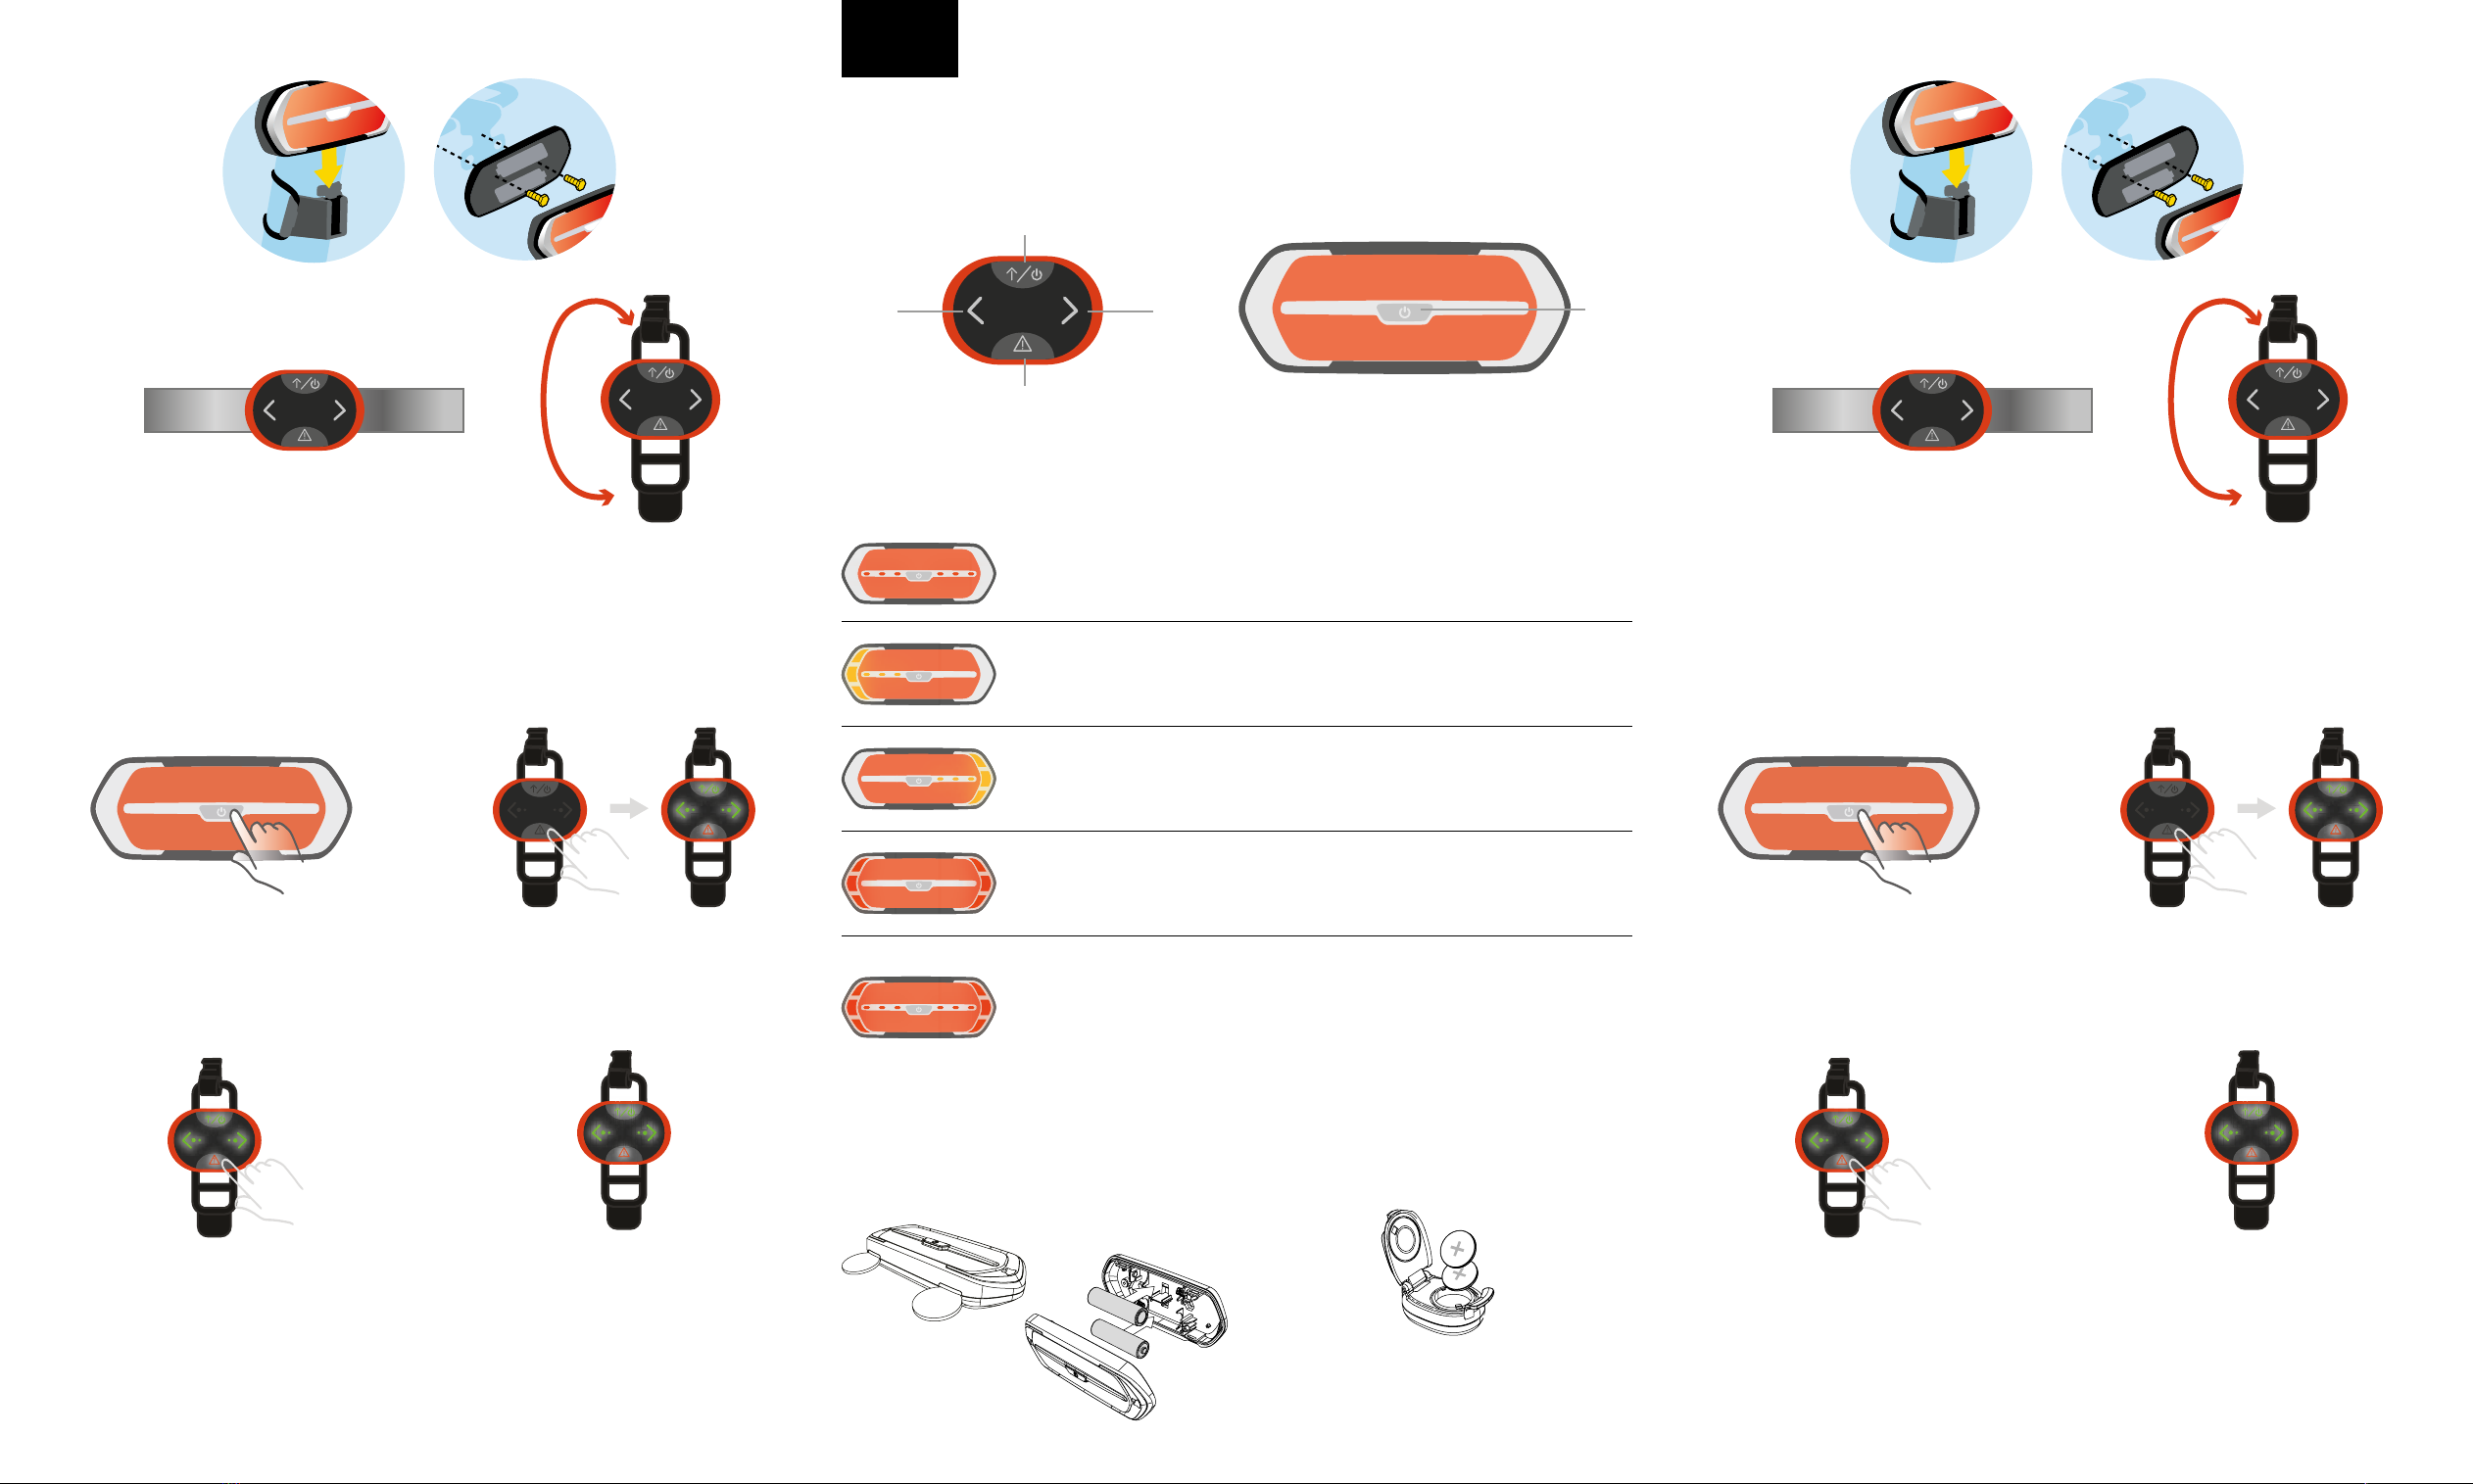
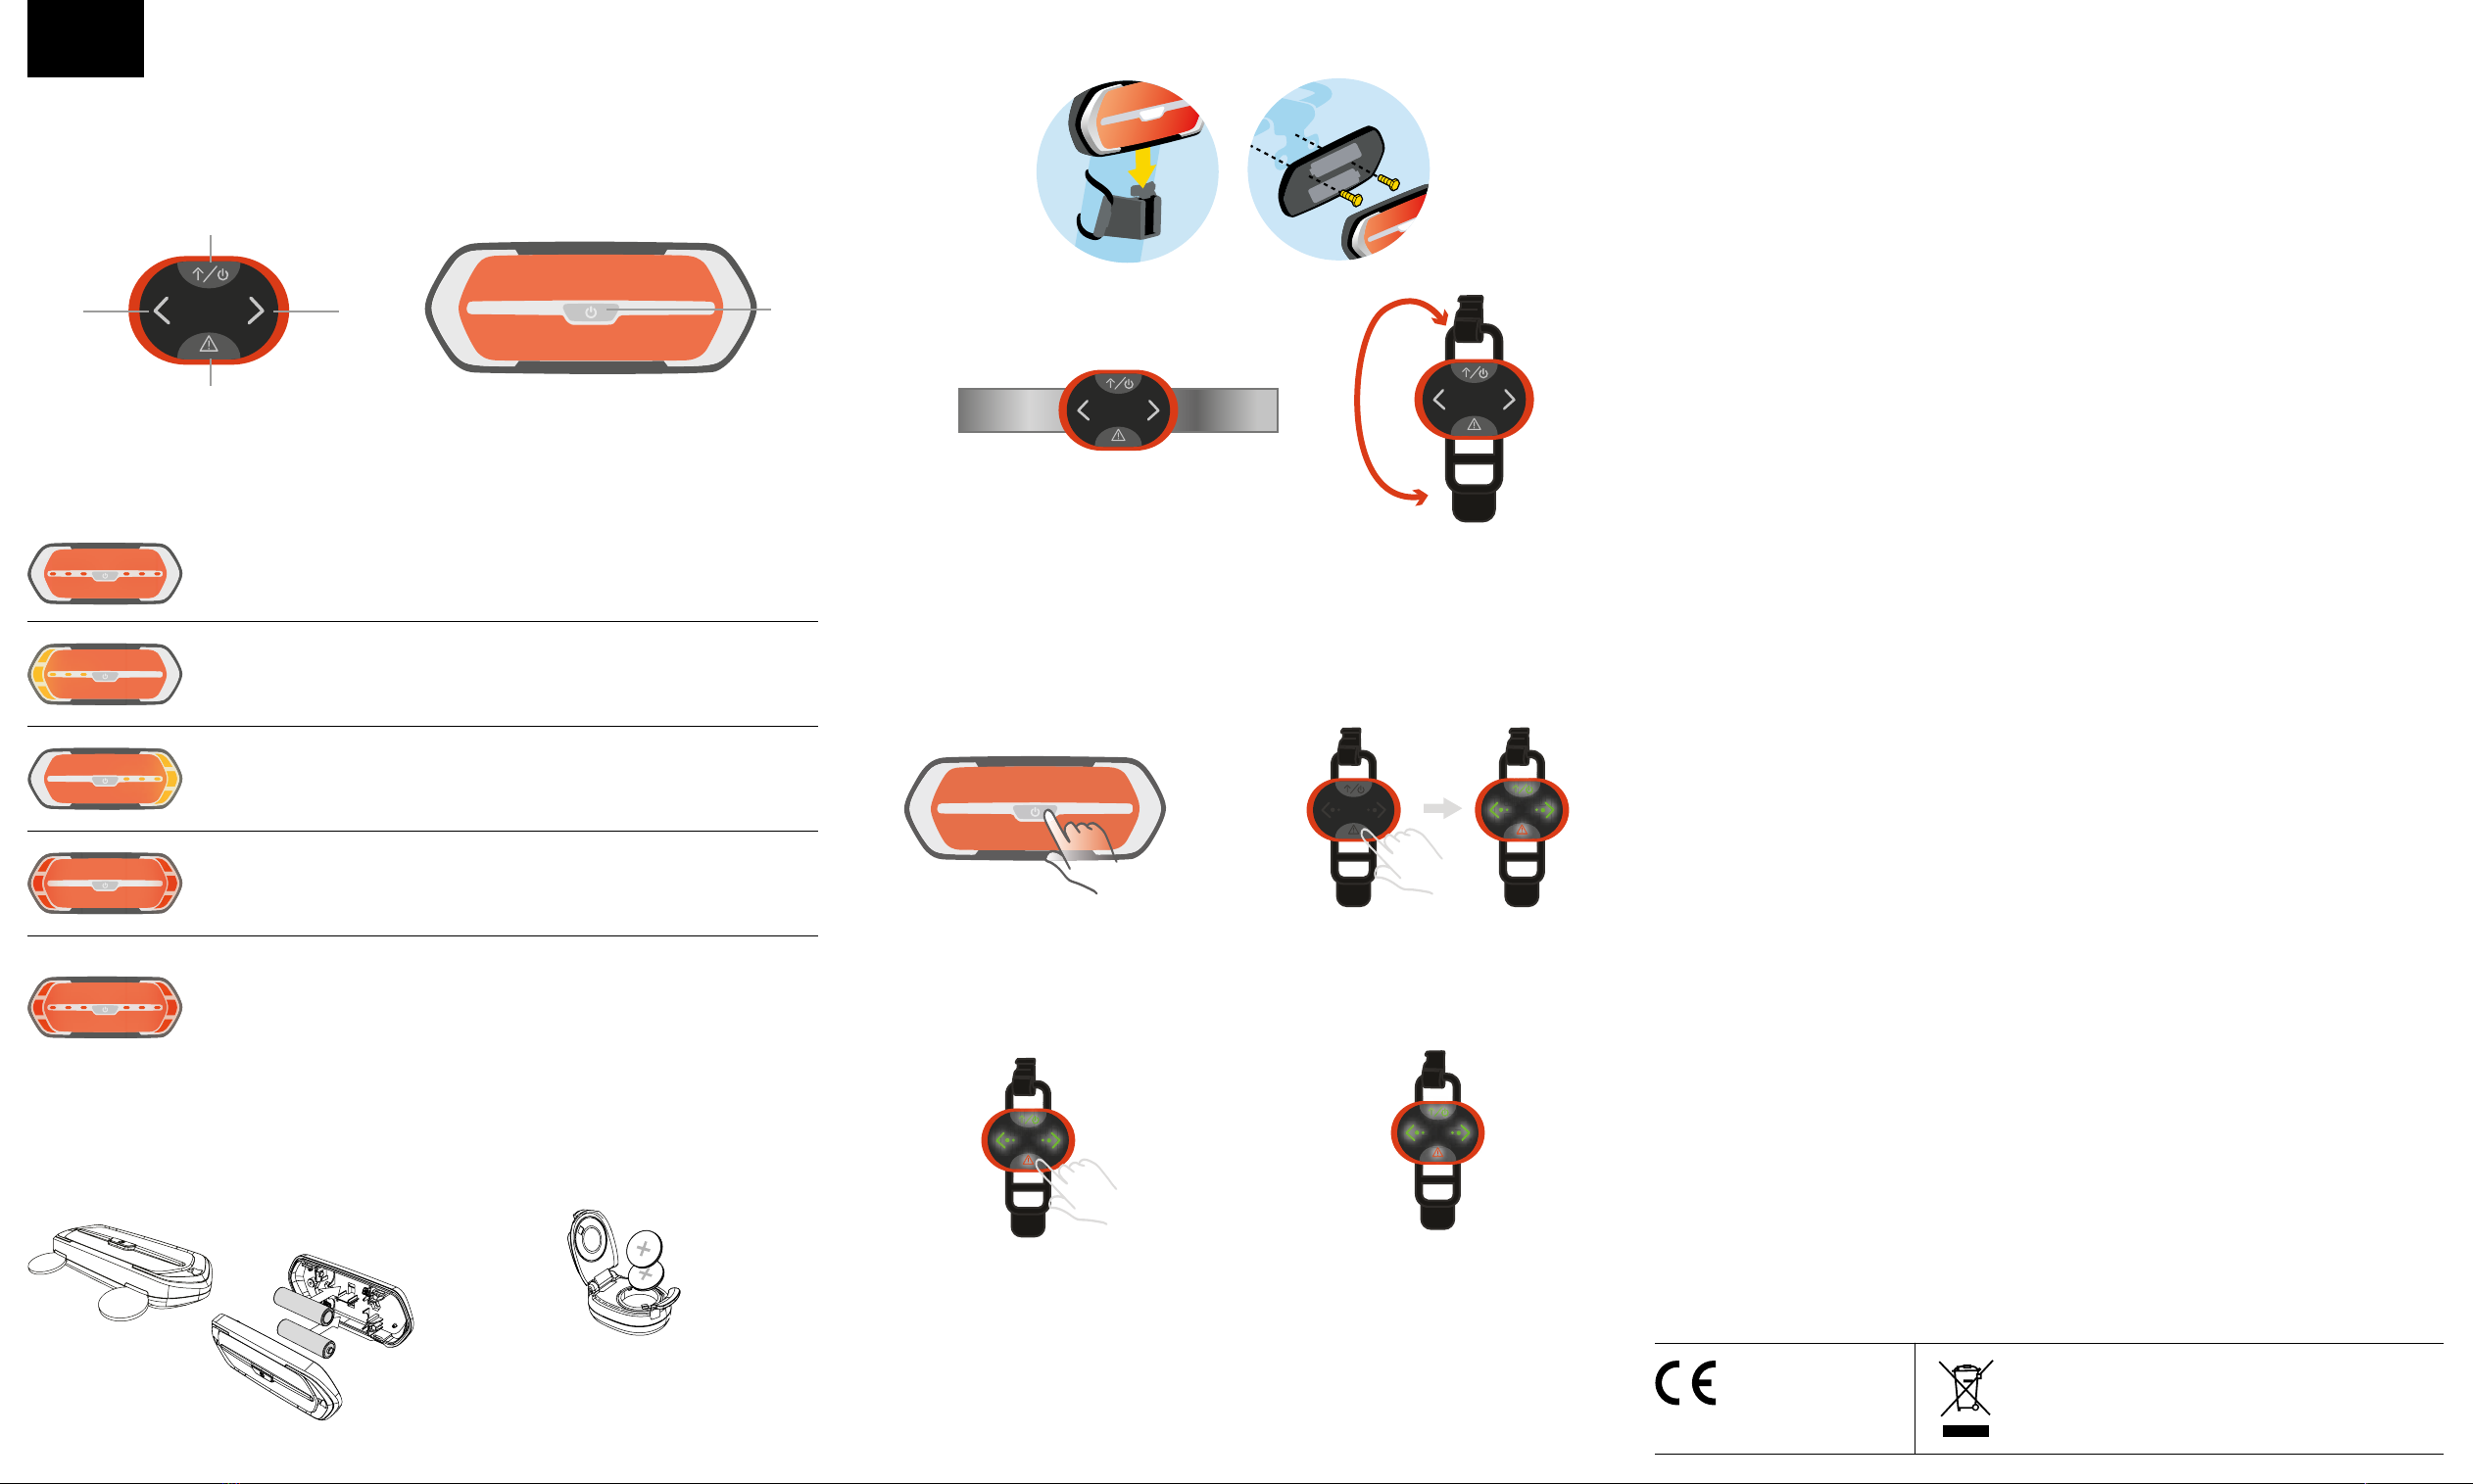
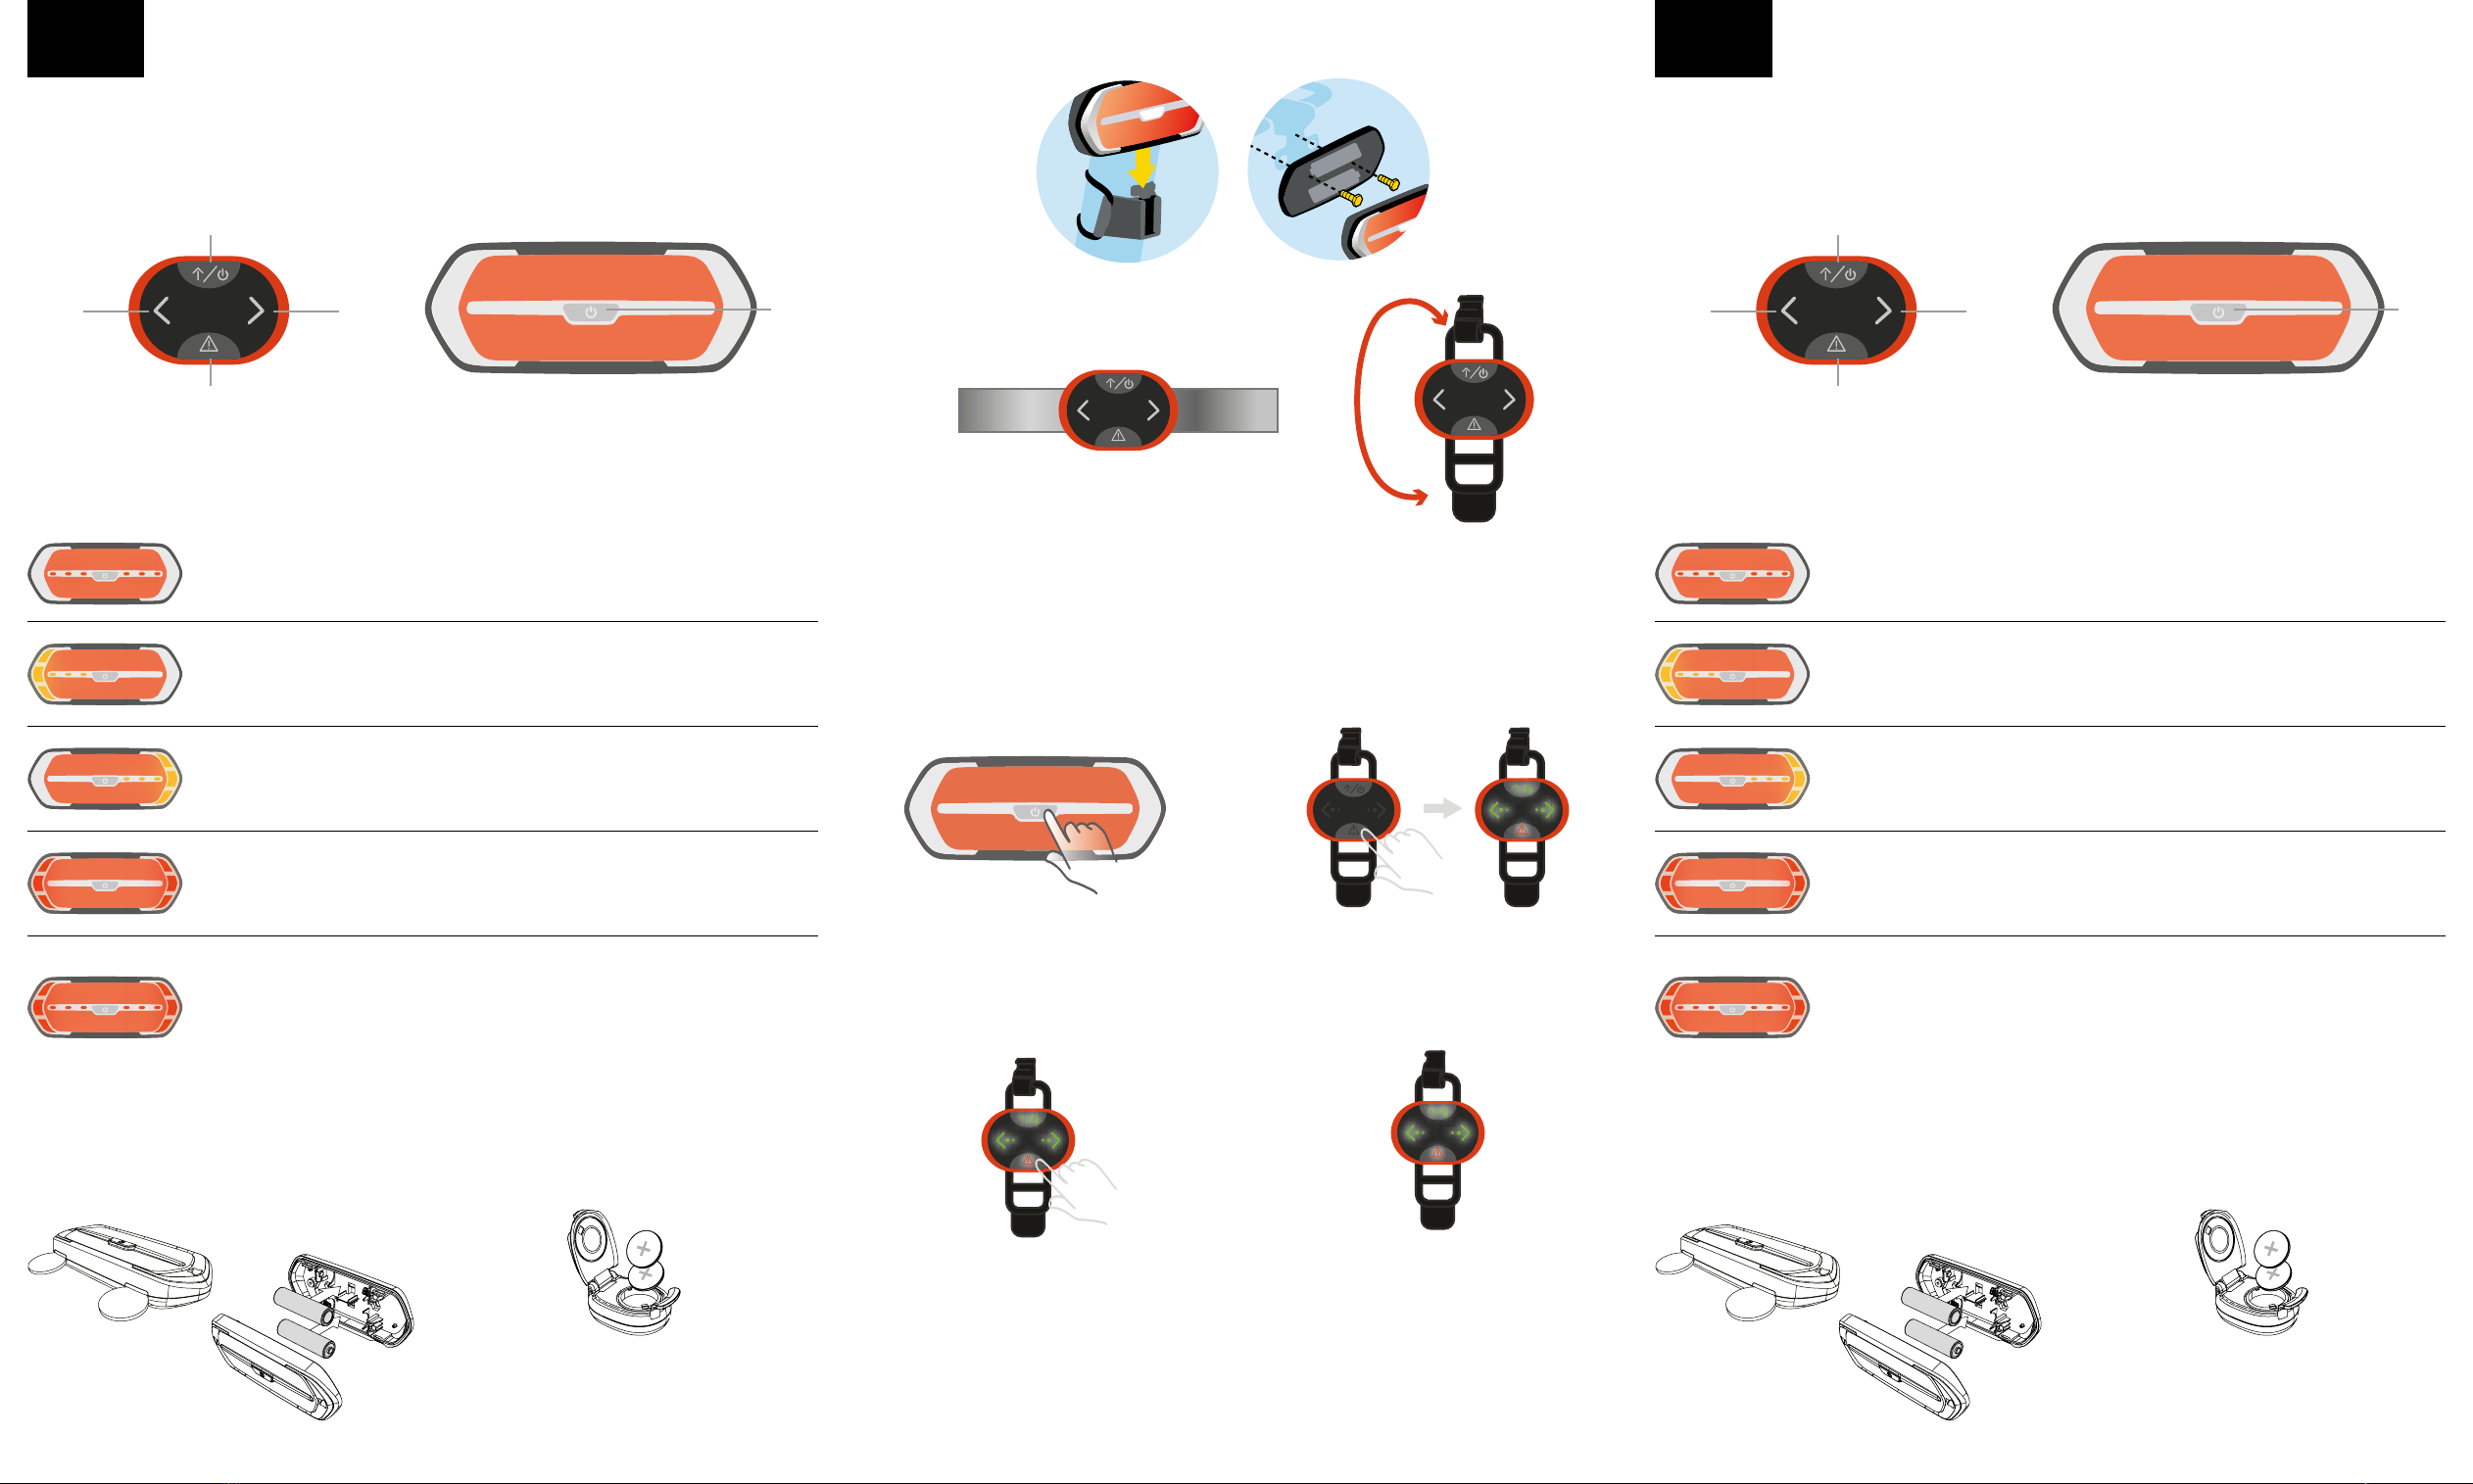
STEP ONE
Press the button (E) to switch it on : you would see a red flashing light turn on.
STEP TWO
Press the button A on the remote control to switch it on.
PASO UNO
Presione el botón (E) para encenderlo: verá que se enciende una luz roja intermitente.
PASO DOS
Presione el botón A en el control remoto para encenderlo.
BATTERY USE FOR SIGNALIGHT AND REMOTE CONTROLLER USO DE LA BATERÍA PARA EL INTERMITENTE Y EL CONTROL REMOTO
• Signalight: 2pcs AA batteries is need. Use coin to
open (as below) and insert the batteries.
• Remote Controller : 2pcs CR2025 batteries is need. • Intermitente: se necesitan 2 pilas AA. Use una
moneda para abrir (como se muestra a continua-
ción) e inserte las baterías.
• Control remoto: se necesitan 2 baterías CR2025.
Press the upper arrow ( A ), to show you are going straight forward.
You will see this signal light on. If no other arrows are pressed,it will display until
you turn the signalight o.
Presione la flecha superior (A) para indicar que sigue adelante.
Verá esta luz encendida. Si no presiona ninguna otra flecha, se mostrará esta
hasta que apague el intermitente.
HOW TO PLACE THE SIGNALIGHT ON THE BIKE?
Turn on the signalight, then mount it on back seat post/Rear bike rack:
HOW TO FIX THE REMOTE CONTROL ON YOUR BIKE ?
PROCEDURES FOR PAIRING:
Wrap the silicon strap of remote control around the handlebars of your bicycle.
Special attention : mobile phone antennas may occasionally interfere with the communication
between the remote control and the signal panel. It is highly recommended that the user removes
the Signalight and Remote Contoller when parking outside. It is easy to take out and no tools needed.
3. Press “!” button of the Remote to confirm the
pairing.
4. The LEDs of the remote and yellow LEDs of si-
gnalight will turn on if pairing successful
1. Press and hold the button E for 5 seconds to
enter the pairing mode. The red LED pattern will
be flashing to indicate it is in pairing mode.
2. Press and hold the “!” button of the Remote 5
seconds to enter the pairing mode. All LEDs will
be flashing to indicate it is in pairing mode.
Press the left arrow ( B ), to show you are turning left.
You will see left arrow will blink. To go back to Forward, press A.
Presione la flecha izquierda (B) para indicar que gira a la izquierda.
Verá que la flecha izquierda parpadea. Para volver a Adelante, presione A.
Press the right arrow ( C ), to show you are turning right on the LED panel.
You would see right arrow will blink. To go back to Forward, press A.
Presione la flecha derecha (C) en el panel led para indicar que gira a la derecha.
Verá que la flecha de la derecha parpadea. Para volver a Adelante, presione A.
Press the warning sign (D), when you would like to show a danger or a stop on
the signalight. You will see warning sign will blink until you press another button.
Presione el símbolo de advertencia (D), cuando desee indicar un peligro o una
parada en el intermitente. Verá que el símbolo de advertencia parpadea hasta
que presione otro botón.
A brake motion sensor is integrated in the signalight. In case of a strong brake,
the red danger sign will turn on to warn people that you have stopped abruptly.
You will see all red LEDs on. Danger sign will disappear as soon as you start
moving again.
El intermitente tiene integrado un sensor de movimiento del freno. En caso de
frenadas bruscas, la señal de peligro roja se encenderá para advertir a las personas
que se ha detenido abruptamente.
Verá todos los led rojos encendidos. La señal de peligro desaparecerá tan pronto
como comience a moverse de nuevo.
Please remove the battery
insulator tab before use.
Retire la lengüeta aislante de la batería
antes de usar.