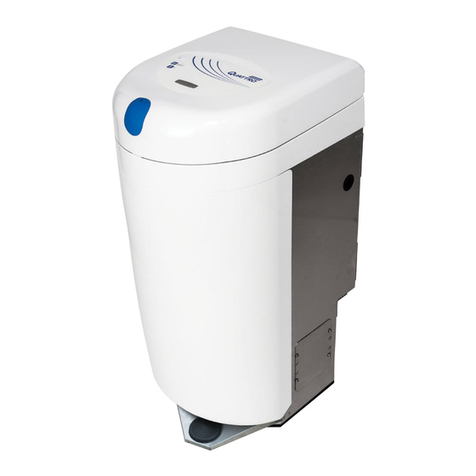
NatureMill NEO User manual


AUTOMATIC COMPOSTER
COMPOSTADOR AUTOMÁTICO
COMPOSTEUR AUTOMATIQUE
ECO SERIES:
NatureMill NEO
NatureMill METRO
NatureMill ULTRA
English ...................……….….……p. 2
Español ……….....….…….....…….p. 9
Français ……......………......…….p. 16
naturemill.com -- 2 -- PATENT PENDING
CONTENTS
Precautions ……………………………………………………2
Setup ……………………………………………………………………3
Outdoor Use ……………………………………………………3
Add Food ……………………………………………………………4
Balance Compost Every Time ………………4
Transfer Compost ………………………………………5
Remove Finished Compost ……………………5
Adjust Power Setting ……………………………6
Clearing a Jam …………………………………………6
Gardening with Compost ………………………6
TROUBLESHOOTING ………………………………………7
Pet waste ………………………………………………………8
Reset, Cleaning & Maintenance ……8
FOR HOUSEHOLD USE ONLY -- INDOOR OR OUTDOOR USE
PATENT PENDING. NATUREMILL, SAN FRANCISCO. MADE IN THE USA.
SAVE THESE INSTRUCTIONS FOR FUTURE REFERENCE
PRECAUTIONS
xREAD INSTRUCTIONS THOROUGHLY.
xDO NOT overload mixing chamber or it will jam or fail to transfer.
xThe mixing chamber may be HOT – especially the metal divider at the bottom.
Do not touch directly - use a blunt object such as a spoon if necessary.
xSpills or liquids may drip from the unit occasionally. Protect floor as needed
with a plastic tray or other barrier. Do not use on carpet or wood or other
unsealed floor materials, as damage to floor may result.
xHandle compost as you would handle soil: wash hands after handling; do not
eat; keep away from food & dishes. Always wash garden items before eating.
xDo not unplug for more than twenty-four (24) hours at a time, or compost
activity may decrease.
xFor outdoor use, protect the power supply from weather. We recommend an
“in use” electrical outlet cover. See OUTDOOR USE section.
xDo not clean the mixing chamber. Never use soap or chemicals. These destroy
compost cultures and can damage the machine.
xOdors mean inappropriate foods were added, or an imbalance destroyed the
natural cultures. See TROUBLESHOOTING section.
xSupervise children and pets near fresh compost.
xFresh compost is very powerful. Apply to soil surface only, away from
sensitive plant roots. See GARDENING WITH COMPOST.
English

COPYRIGHT © 2011 -- 3 -- naturemill.com
In-use electrical
outlet cover
1. Mixing chamber
2. Mixing bar
3. Control panel
4. Flappers (2)
5. Door
6. Air pump (hidden)
7. Motor (hidden)
8. Air filter (hidden)
9. Divider
10. Tray
11. Power supply
SETUP
xRemove power cord and pellets from the tray inside the unit.
xRe-insert the tray back the unit and close the door tightly.
xDo not use on carpet or wood or other unsealed floor materials, as damage to
floor may result. Place the unit on plastic tray or other protective barrier.
xInsert the power cord into the round hole on the back. Plug into a wall outlet.
You should notice a hum sound, and solid indicator light on the control panel.
xLeave the unit plugged in at all times. You will hear the motor mix
automatically every few hours. It will become very quiet in a few weeks.
xUse indoors or outdoors. See below for special instructions on outdoor use.
xCan be installed in most kitchen cabinets. See naturemill.com for cabinet kit.
xPosition the back of the unit at least 1 inch (2.5cm) away from a wall.
OUTDOOR USE
xFreezing outdoor winters are ok. Warm locations
up to 120°F (50°C) produce compost faster. Rain
or snow will not damage the unit.
xProtect power supply from weather. We
recommend an “in-use” electrical outlet cover,
available at most hardware stores. Otherwise,
keep the power supply covered or indoors.
English
naturemill.com -- 4 -- PATENT PENDING
1 CUP (250ml)
Sawdust Pellets
ADD FOOD
In the first week, fill the mixing chamber half way only. This gives the
cultures time to develop. Use HIGH power. Balance with pellets (see below).
After the first week, add food to at any time, on any day. The mixer and air
pump will turn on periodically. Food will start to look like compost within a few
days: granular and moist, like healthy soil. Steam and heat are good signs!
See enclosed FOOD GUIDE
for a list of foods
xSmaller items compost faster. Cut food into 4 inch (10 cm) pieces or smaller.
xYou can add meat, chicken, fish, eggs, and dairy products, due to the high
temperatures inside the mixing chamber. Add extra sawdust pellets.
xDo not overload the mixing chamber or it will jam. Add a little food each day or
several times per day, rather than a large amount of food all at once.
xBroccoli, cauliflower, cabbage, kale, Brussels sprouts, mustard greens, and
other Brassica vegetables cause strong odors. Even small amounts cause
strong odors. Avoid these or keep your composter outdoors.
xLemon, lime, orange, grapefruit, pineapple, and other acidic foods can kill the
cultures; limit them to 2-3 small pieces per load, or add extra baking soda.
xPaper, liquid, pits, bones, corn cobs, husks, tough plant stems, etc., will not
break down and can cause repeated jams.
BALANCE COMPOST EVERY TIME
Composting is a natural process to recycle food into fertilizer. It takes time,
and a little practice! To prevent odors, balance compost every time you add
food. Sawdust is a “brown” item necessary to balance the carbon-nitrogen ratio
of “green” food items. Meats and wet foods like lettuce, peaches, tomatoes,
melon, and watermelon need extra pellets. Baking soda balances food acidity.
BALANCE compost EVERY TIME you add food:
Visit naturemill.com//pellets to learn how to get free pellets. An initial supply is
included. Sawdust is a waste product, so composting it helps reduce landfill.
English
5-10 CUPS (1.3-2.5 L) food scraps
1 TBSP (15 ml)
Baking Soda
++

COPYRIGHT © 2011 -- 5 -- naturemill.com
TRANSFER COMPOST
Transfer compost down to the tray every 1-3 weeks, when compost looks like
soil. Wait until the mixing chamber is at least half full, but before it is completely
full or overloaded as it may jam. It will continue to compost in the tray.
When you push the TRANSFER button, the motor will mix the compost one
last time for a few minutes. Then it will reverse direction to open the flappers.
The compost will fall down to the tray below, where it will continue to compost
until you remove it. Finally, the motor will reverse again to close the flappers.
The entire process lasts about 20 minutes.
xTry not to add food to the mixing chamber for 8 hours before a transfer. New
food needs time to mix in. You can use the “Delayed Transfer” feature by
holding the transfer button for 5 seconds: the transfer light blinks, and a
transfer will happen automatically in 8 hours.
xA good time to transfer is after a
weekend away or just before
preparing a big meal.
xSome compost remains in the mixing
chamber to “activate” the next batch.
xSome compost may leak down to the
tray before you press TRANSFER.
This is normal, and not a problem.
REMOVE FINISHED COMPOST
Leave compost in the tray as long as possible to cure and dry. Check the tray
just before each transfer. Empty it if half full or more. Fresh compost attracts
earthworms and beneficial insects, so be sure to deposit it outdoors.
THE FIRST BATCH will be very wet and sour because the cultures are not
yet fully established. Discard the first batch.
xThe area under the tray may contain some stray compost. Clean this area.
Reinsert the tray quickly to prevent more compost from falling there.
xClose the door tightly. Resume normal use or initiate a transfer if ready.
xSee TROUBLESHOOTING section if compost is wet, dry, lumpy, or has
odors or mold. All of these can be improved with practice.
xYou can use the compost outdoors right
away, or store outdoors for later use.
See GARDENING WITH COMPOST.
xDo not cover fresh compost for prolonged
periods – it needs fresh air to breath.
xRain, snow, dry, wet, hot, or freezing
cold storage locations are ok.
English
naturemill.com -- 6 -- PATENT PENDING
ADJUST POWER SETTING
Press the button to adjust the power setting which varies the timing of mixing,
air flow, and temperature. Higher power works faster, but can dry out compost.
Lower power reduces noise, energy consumption, and wear.
xHIGH is best for initial start up, large quantities of food, tough or wet foods, or
if you experience odors, wetness, or lumpy compost. Try this mode first.
xMEDIUM is ideal for most home
composting. Use this if compost
dries out in High power .
xLOW is best for small quantities of
food, if you go on vacation, or if
your compost is dry or dusty in
Medium.
CLEARING A JAM
1. In the rare event that the jam light comes on, just wait 24 hours. The unit will
attempt to clear the jam automatically, and it is usually successful.
2. If the jam light stays on for more than 24 hours, remove the jammed material
from the mixing chamber. Usually it is a large, hard, or fibrous item, or a wad
of tough material. The unit may just be overloaded – remove some material.
Press the button to try mixing again and resume normal operation.
3. In the future, avoid whatever jammed or cut it smaller. DO NOT overload.
GARDENING WITH COMPOST
Fresh compost is ready for outdoor use, but not for indoor use. It is still “active”
and will attract earthworms and beneficial insects, and it may have a strong
earthy aroma. For indoor use, first cure and dry it outdoors for several days or
weeks. Just leave it in a pile, or in an open bucket to air out. Rain, snow, dry,
wet, hot, or freezing cold storage locations will not damage compost.
xFresh compost is very powerful. For gentle a time-release spread it around
plants on soil surface only, like mulch. Watering gradually draws nutrients into
the soil. Turning the soil seasonally also mixes in nutrients.
xOne tray is enough for 10-40 square feet (1-4 sq m) of grass or garden plants,
applied one to four times per year.
xConsult a local gardening expert or plant reference materials for specific
plants, soil, and growing conditions.
xUse a hand shovel to break apart clumps for appearance. Remove
uncomposted items and try to avoid them in the future.
English
COPYRIGHT © 2011 -- 7 -- naturemill.com
TROUBLESHOOTING
Healthy compost is spongy, moist, and granular, with a mild “earthy” aroma of
damp wool, mushrooms, parmesan cheese, or coffee. It should look like healthy
soil. Steam and heat rising are good signs. Here are some common problems:
Problem Solutions
Strong
Odors Broccoli, cauliflower, cabbage, kale, Brussels sprouts, mustard
greens, and other Brassica vegetables cause strong odors. Even
small amounts cause strong odors. Avoid these or keep your
composter outdoors. There is no way to reduce their odors
except to remove them from the unit: empty the tray, transfer, and
empty the tray a second time.
Sour,
Sharp, or
Ammonia
Odors
Balance compost with more pellets and baking soda, then wait 24
hours. Meats require extra pellets. Acid in lemon, lime, oranges,
grapefruit, or pineapple can kill the cultures, so limit them to 2-3
small pieces per load and add a few extra tablespoons of baking
soda to balance their acidity. If odors still remain for 24 hours:
empty the tray, transfer, and empty the tray a second time.
Wine
aroma Sometimes compost can smell like wine. This is normal. The
aroma should go away in a few days. Increase power to HIGH.
Wet
Compost Add more pellets; increase power setting; leave food in mixing
chamber for a few more days. Do not add liquids. Wet foods
such as lettuce, peaches, tomatoes, melon, or watermelon,
require extra pellets to soak up the moisture.
Dry
Compost Add fewer pellets; add 1 cup (250ml) regular tap water; reduce
power setting; transfer sooner before compost dries out.
Lumpy
Compost Cut foods smaller; avoid hard, stringy, and fibrous items; leave
food in the mixing chamber for a few more days; increase power
setting. In severe cases, lumpy compost will not transfer down.
Mold Mold is generally harmless. It is usually caused by excess
moisture. See “Wet Compost” above.
Lid pops
open An overloaded mixing chamber can pop the lid open, releasing
heat and odors. Transfer compost sooner. Do not overload.
Won’t
Transfer or
Jams often
Hard, large, fibrous, or stringy items can block transfers or jam
often. Remove them from mixing chamber. An overloaded mixing
chamber can also cause this problem – remove some material.
No heat,
air pump,
or mixing
The mixer, air pump, and heater turn on automatically throughout
the day. A control panel light should be on. Change power to
LOW and then HIGH. If that doesn’t work, see “No Power” below.
No Power Check that the power cord is firmly connected to the ROUND hole
on the back of the machine, and plugged into a working wall
outlet. Reset the unit by holding the button for 5 seconds until
all lights blink. If there is still no light on the control panel, contact
customer service – visit naturemill.com.
English
naturemill.com -- 8 -- PATENT PENDING
RESET, CLEANING, MAINTENANCE
xAt any time you can “reset” the unit: hold the button for 5 seconds. All lights
will turn on briefly.
xRemove any stray compost from the seals on the lid and door, and discard any
stray compost or liquid from under or behind the tray.
xWipe the exterior of the machine with a wet cloth or sponge.
xNever use soaps, sprays, or chemicals. DO NOT clean the mixing chamber.
xRinse the tray when you empty the compost.
xRemove any stringy or fibrous material that remains in the mixing chamber
after several transfers.
xThe air filter should last a lifetime. It is deep inside, and is not accessible.
PET WASTE
Manure has been used as fertilizer for many centuries. Your NatureMill can
safely compost pet droppings, kitty litter, and cage beddings. Internal
temperatures reach or exceed 140F (60C), which destroy almost all harmful
bacteria. Please follow these safety guidelines:
xFirst gain experience using your composter for several months, with food only,.
xAlways use caution when handling pet waste. Wash hands after handling.
xBe sure your pet is healthy and disease free.
xPregnant women should never handle cat droppings due to toxoplasmosis risk.
xKeep your composter outdoors to avoid carrying pet waste indoors.
xPet droppings are generally “green” waste, so balance with sawdust pellets.
xDo not use resulting compost near edible plants unless you are experienced
with manure growing methods.
xDo not attempt to compost pet hair or fur. They will jam.
xKitty litter and cage beddings: read ingredients list or contact the manufacturer
to determine if it is safe and chemical free. Organic or biodegradable products
are best. Test just a small amount first. Most kitty litter is “brown” material.
NOTES
English
Table of contents
Popular Garbage Disposal manuals by other brands

Emerson
Emerson InSinkErator WasteXpress WX-500-7-WX101 manual

Meiko
Meiko TopCut B operating instructions

KitchenAid
KitchenAid KCDS250X Dimension Guide

InSinkErator
InSinkErator Evolution Compact owner's manual

JIMTEN
JIMTEN CICLON L T-604 Maintenance and Instruction Manual

InSinkErator
InSinkErator Badger 100 installation instructions

Kohler
Kohler K-28886T-PW-NA Installation guide & user manual

Zanussi
Zanussi DU 4400 Instruction booklet

IMC
IMC 500 Series Maintenance manual

KitchenAid
KitchenAid KBDS100T - NA Batch Feed 1 HP MultiGrind Specification sheet

JIMTEN
JIMTEN Ciclon T-503 Maintenance and Instruction Manual

InSinkErator
InSinkErator Evolution Series manual